Spinach Salad with Spicy Pineapple Dressing

Steak isn’t the only way for me to add iron into my diet – another option is spinach. Spinach is also the more heart friendly way to do it too. 😉 So with more red meat recipes, there’s also a chance for more salad nights!

I found this particular recipe when I was going through my very first Secret Recipe Club assignment. And now that this is the second recipe I’ve made from Lynsey’s blog – I am willing to bet my other pinned recipes from her will also be a big hit.

This salad recipe called out to me not only because of the iron rich spinach, but because of the pineapple dressing!

Spinach Salad with Spicy Pineapple Dressing

Ingredients:

  • 2 large chicken breasts, cut in half length-wise so they’re thin
  • 1 tsp ancho chili powder
  • 2 tbsp fresh cilantro
  • 1/2 jalapeno, seeded
  • 1 clove garlic
  • 1 1/4 C cubed fresh pineapple, divided use
  • 2 tbsp orange juice
  • 4 tsp apple cider vinegar
  • 1/4 C extra virgin olive oil
  • 8 C fresh baby spinach
  • 1/2 red bell pepper, sliced
  • 1/4 red onion, thinly sliced

Steps:

  1. Season chicken with chili powder, salt, and pepper. Grill 4 minutes on each side, or until chicken is cooked through. Set aside.
  2. In a blender combine cilantro, jalapeno, garlic, half of the pineapple, orange juice, and vinegar. Pulse until smooth. With the blender running, stream in the olive oil. Adjust seasonings to taste.
  3. In a large bowl toss the spinach with the bell pepper, onion, and remaining pineapple.
  4. To serve: distribute salad, top with chicken, and dress with pineapple dressing.

*This recipe is adapted from Lynsey at http://www.lynseylous.com/2012/05/grilled-chicken-and-spinach-salad-with.html?m=1*

 Pineapple Salad

recreatedbysrc

Rosemary Steak and Potatoes

I am not a steak-and-potatoes type of gal. Potatoes? Yes. Steak? No thanks, I’ll pass. But my husband is most definitely a steak-and-potatoes type of guy. In fact, it’s the meal he always gets when we visit his parents.

I was informed that I needed to add more iron to my diet – so that means you’ll see more red meat entrees floating around Sew You Think You Can Cook. I’ve always tried to limit the red meat to once a week, typically in the form of Mexican Monday. And I am guilty of enjoying a burger quite often.

For this recipe, par-boiled potatoes share the skewer with cubes of sirloin and the result is divine. The potatoes end up resembling fries and the marinade is full of flavor. I particularly like the rosemary. Serve these skewers with your favorite vegetable and you’ve got yourself a complete meal!

If you’ve had too much red meat this week, Mom made this recipe using chicken instead of steak and it worked just as beautifully.

Rosemary Steak and Potatoes

Ingredients:

  • 1 clove garlic, minced
  • 1 tbsp fresh rosemary
  • 1 tbsp fresh thyme
  • 2 tsp steak seasoning
  • 1/2 C balsamic vinegar
  • 1/2 C olive oil
  • 2 lb steak, cut into cubes
  • 2 C golden potatoes

Steps:

  1. In a bowl combine garlic, rosemary, thyme, steak seasoning, balsamic vinegar, and olive oil.
  2. Pour 3/4 C of the marinade over the steak and set in the fridge.
  3. Boil potatoes for 15 minutes, until slightly fork tender. Drain. Pour the rest of the marinade over the potatoes.
  4. Skewer the steak and potatoes. Grill until the steak is cooked to your liking and the potatoes are done.

*This recipe is adapted from Whitney at http://littleleopardbook.com/2013/10/16/rosemary-steak-skewers/*

Rosemary Steak

Poppy Seed Chicken Casserole

Today is my beautiful sister-in-law’s birthday. Audrey is another member of the Auburn family. She is finishing up her last year in Hotel & Restaurant Management. I have to admit, I am jealous of her path. She absolutely loves her classes and her job (working at the Auburn University & Dixon Conference Center. With her experience working the both hotel & restaurant sides of the conference center, the whole world is open to her following her graduation. Literally. She’s expressed dreams of running a hotel in Vegas, of working on a cruise ship, or even moving overseas. And here’s for my big head-in-the-clouds dream: Someday she’ll open up her own hotel and I’ll be the chef in her restaurant. 😉

AudreyWedding Photography by Cher Hanna

When I asked Audrey what recipe she’d like featured on Sew You Think You Can Cook for her birthday she responded with “Poppy Seed Chicken Casserole.” There wasn’t any hesitation, there wasn’t any doubt. This dish is her favorite – and I can see why! The creamy chicken casserole uses few ingredients, is easy to assemble, is full of flavor, and definitely qualifies as comfort food. We served it with broccoli and crescent rolls to sop up the extra sauce.

This recipe comes from one of my mother-in-law’s friends and looks to be an adaptation of a Paula Deen recipe. I made a few tweaks – I halved the recipe and it fed 3 perfectly. (To serve 4 I’d add another chicken breast but keep the sauce quantities the same.) The recipe I have calls for cooked, shredded chicken. But we decided instead to cut chicken breasts into tenders, brown, and then layer into the casserole dish. If you opt to use shredded chicken I highly suggest serving this casserole over rice. We liked the adjustment of chicken tenders because it gave the illusion of a lighter meal, providing the opportunity to have as much or as little of the sauce as desired.

Poppy Seed Chicken Casserole

Ingredients:

  • 2 large chicken breasts, cut into tenders
  • 1-2 tbsp olive oil
  • 1/2 C sour cream
  • 1 can (10 oz) cream of chicken soup
  • 1/2 – 1 sleeve Ritz crackers
  • 1 tsp poppy seeds
  • 3 tbsp butter, melted

Steps:

  1. Preheat oven to 350 degrees F.
  2. Season chicken with S+P. In a large non-stick skillet over medium-high heat brown chicken in olive oil.
  3. Place chicken in a lightly greased 7×11″ casserole dish.
  4. Combine sour cream and chicken soup. Pour over chicken.
  5. Place crackers in a plastic bag to crush into crumbs. Add the poppy seeds and combine. Top casserole. Drizzle with melted butter.
  6. Bake 35 minutes, until bubbly.

Note: This recipe feeds 3. To feed four add another half or whole chicken breast but keep the remaining ingredients as indicated.

Poppy Seed Chicken Casserole

Blueberry Iced Tea

When I planned out my blog posts for June I knew that I’d be posting an iced tea recipe on June 10th. Why? Because today is National Iced Tea Day! I didn’t have a recipe picked out at the time but had a few weeks to figure that out.

And then I went to my baby shower thrown by my friends Kate and Tara. I’ve mentioned both of these wonderful ladies on my blog before. Kate is my partner-in-crime when it comes to both baking and quilting. Tara is my food blogging mentor – she blogs over at Tara’s Multicultural Table, check it out! Separately they’re both creative and way more artistic than I could ever dream to be. I guess I shouldn’t have been surprised that together they would create complete magic.

They threw a Winnie-the-Pooh inspired shower for me. And from the decorations to the food to the games they pulled out all the stops.

Winnie the Pooh Shower

The food table featured a dish for each character: The main course were Kanga and Roo Pita Pouches featuring shredded chicken and sandwich toppings, Owl’s Spinach Dip, the veggie platter was cleverly labeled Rabbit’s Garden, sweets included Tigger Tails for guests to take home (chocolate covered pretzel rods) and Pooh’s Honey Bowls (honey mouse in chocolate bowls), to drink we had Piglet’s Pink Lemonade and Eeyore’s Blueberry Iced Tea.

This blueberry iced tea was addicting and I knew that I’d have to get the recipe from Kate to feature on National Iced Tea day! This would also be a wonderful addition to your July 4th beverage collection, maybe serve it alongside my Strawberry Sparkling Lemonade? 😉

Blueberry Iced Tea

Ingredients:

  • 3 1/2 C frozen blueberries
  • zest of 3 lemons
  • juice of 4 large lemons
  • 8 C water
  • 6 bags decaf honey lemon green tea
  • 1 1/2 C sugar

Steps:

  1. Bring blueberries, lemon juice, and lemon zest to a boil. Mash. Pour through strainer, reserve liquid and let it cool. Discard the solids.
  2. Bring water to a boil. Turn off heat and steep tea bags. Discard the tea bags.
  3. Combine sugar with tea and blueberry syrup. Allow to cool and refrigerate. To serve, garnish with extra frozen blueberries.

Blueberry Iced Tea

Grandpa Ray’s Grapefruit Pie

Today marks Grandpa Ray’s 90th year (aka it’s his 89th birthday). Grandpa Ray married Busia in 1999 and fell into place with our family. He learned our card games, and introduced us to new games. He joined Busia in being a “snow bird” and absolutely loved spending time at the Lake. He would spend all day, every day, working in the garden. And he enjoyed Busia’s cooking and accepted our Polish traditions.

This recipe is one of his! It’s the dessert he would bring to any gathering, and might be the only thing he knew how to make. It’s a unique pie that’s become a family favorite – it’s usually the one my brother requests at holidays. Many people are surprised this is a grapefruit pie – they think it is a key lime or similar pie. The “secret ingredient” of grapefruit isn’t often revealed until after they’ve tried it.

Grandpa Ray’s Grapefruit Pie

Ingredients:

  • 2-3 grapefruit
  • ¼ cup lemon juice
  • 1 can condensed milk
  • 1 graham cracker crust
  • 1 tub cool whip

Steps:

  1. Slice grapefruit. Use a strainer with a bowl beneath it and pull the “meat” or pulp from the rind and membranes. You will end up with less than a cup of “meat” – mix gently and break up larger pieces of grapefruit – do not press or you will lose the juice in the pulp. Pieces should be about the size of a corn kernel or smaller. (The juice in the bowl under the strainer is your treat – fresh grapefruit juice!)
  2. In another bowl, mix together the lemon juice and condensed milk.
  3. Pour grapefruit into this mixture dispersing the grapefruit evenly throughout the mixture.
  4. Pour into the graham cracker crust and refrigerate for at least 2 hours.
  5. Top with cool whip before serving.

Grapefruit Pie

recreatedbysrc

Chicken and Potato Casserole

If you’re looking for a super simple weeknight meal look no further. This chicken and potato casserole uses only 5 ingredients and creates only 3 dirty dishes (knife, cutting board, casserole dish)!

Thankfully, Stuart isn’t afraid of helping out in the kitchen but I still didn’t want to assign him anything too complicated. I found this recipe on Pinterest and it was a perfect! Not to mention delicious – this will definitely be a go-to recipe when life gets too hectic. The flavor all comes from the Italian dressing – so be sure to buy a bottle you know you like, or make your own.

Chicken and Potato Casserole

Chicken and Potato Casserole

Ingredients:

  • 3 chicken breasts, cut in half length-wise so they’re thin
  • 1 1/2 lb baby potatoes, cut into thirds
  • 1 1/2 – 2 C Italian dressing
  • 2 lemons, sliced into rings
  • Fresh rosemary (optional)

Steps:

  1. Preheat oven to 425 degrees F. Lightly grease casserole dish.
  2. Season chicken with S+P and place in bottom of casserole dish. Top with potatoes and spread evenly.
  3. Pour dressing over chicken and potatoes.
  4. Place lemon slices on top of potatoes along with the rosemary, if using.
  5. Bake for 55 minutes, until potatoes are fork tender and chicken cooked through.

*This recipe is adapted from Kim at http://www.cravingsofalunatic.com/2014/04/chicken-and-potato-bake-with-meyer-lemons.html*


Thursday Thoughts #3

How did people do bed rest before technology!? This edition of Thursday Thoughts are the general musings and ramblings of a blogger sentenced to the couch.

I told you in my last Thursday Thoughts post that I had a wonderful Idea for May’s Grapefruit & Wasabi Crazy Ingredient Challenge. Now that May 20th has come and gone I will share with you my brainchild. I wanted to make a grapefruit sorbet and serve it with a wasabi-honey syrup. The latter would’ve been the tricky part and would probably have required a few test batches. Although I’m not a huge fan of grapefruit, in fact I plain don’t like it, the sorbet is still calling out to me. There’s a part of me that really wants to like grapefruit, but that desire hasn’t been transferred to my taste-buds yet. Once I’m off my current medication I might still give it a go – but I probably won’t be making the wasabi syrup as wasabi isn’t typically something I keep in my house – actually, it’s something I’ve never had in the house. Unless I take some the next time we eat sushi? Ha! Please go check out the recipes that my fellow CIC-ers came up with!

After a week-and-a-half away, Mom is back to keep me company and help out around the house while Stuart continues to go to work. Her first day back was get-ready-for-baby mode. As we’re moving in August I’m not setting up a nursery here so baby’s first “crib” will be either the pack n play or the rock n play, so Mom put those items together and set them up by my side of the bed. (When Stuart got home he said, “The kid isn’t even here yet and it’s already taking over the house.”) She also washed all of the baby clothes that we do have – which isn’t much. The beauty of not knowing the gender is that it prevents me from buying every cute item I see. The problem with not knowing the gender is that gender neutral clothes are very hard to find! After the laundry we did an inventory assessment and realized that only 3 newborn size onesies were not going to cut it. So we went to the internet and bought some more items!

Disney Baby
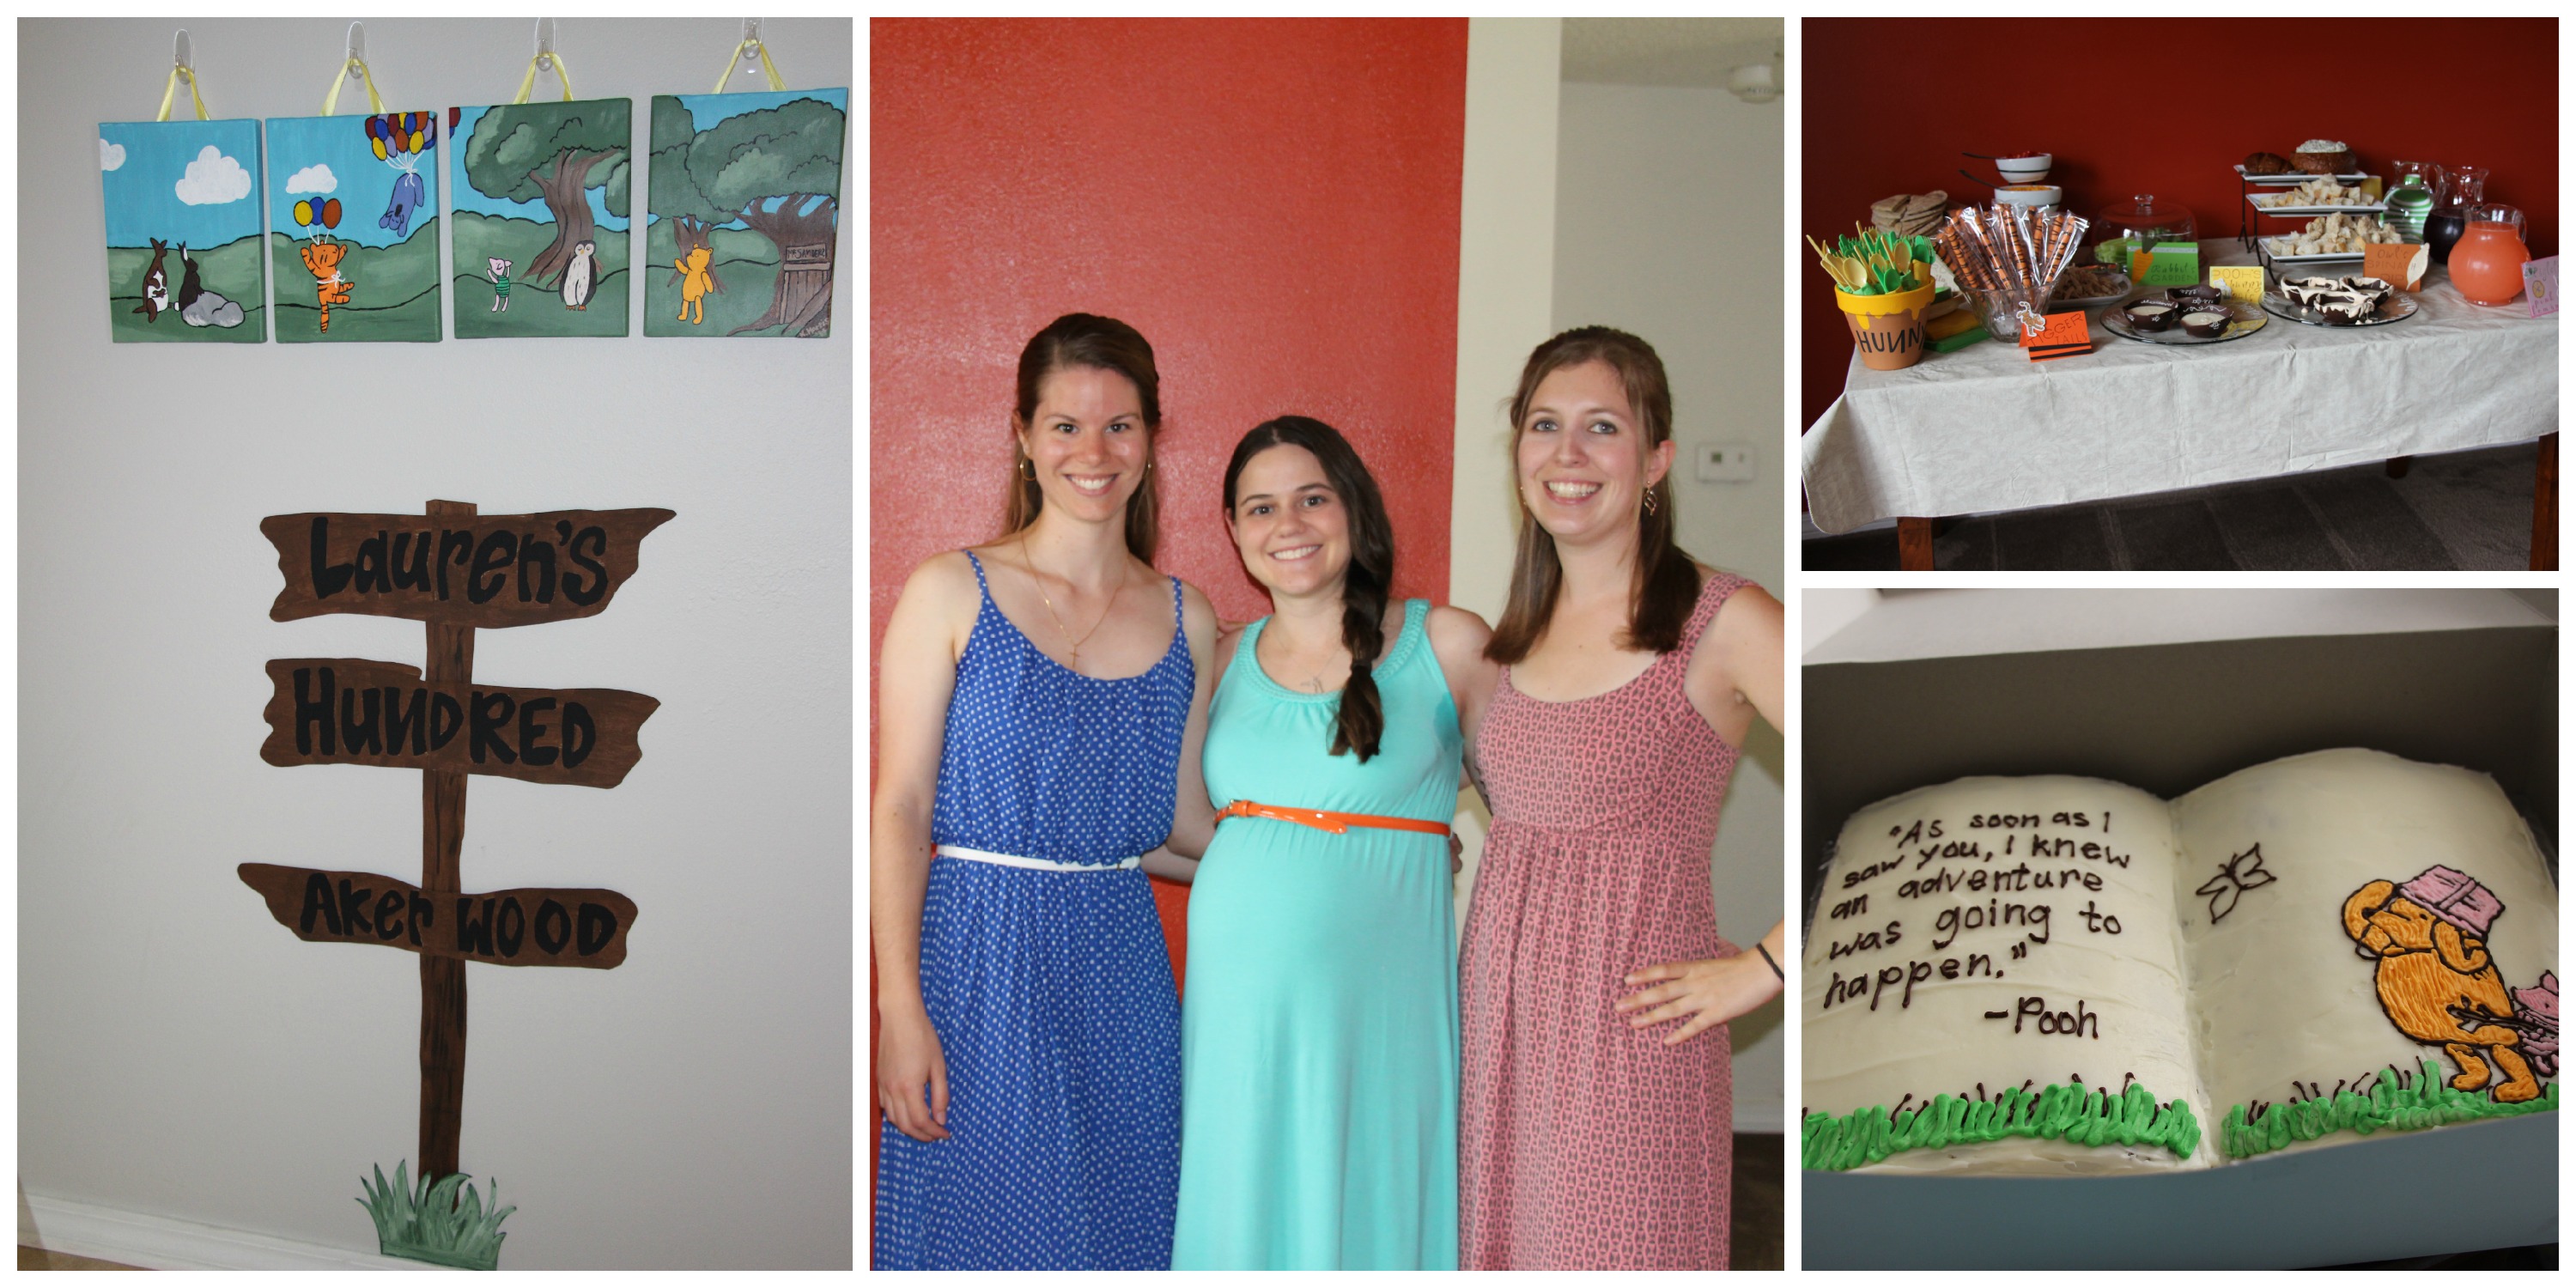
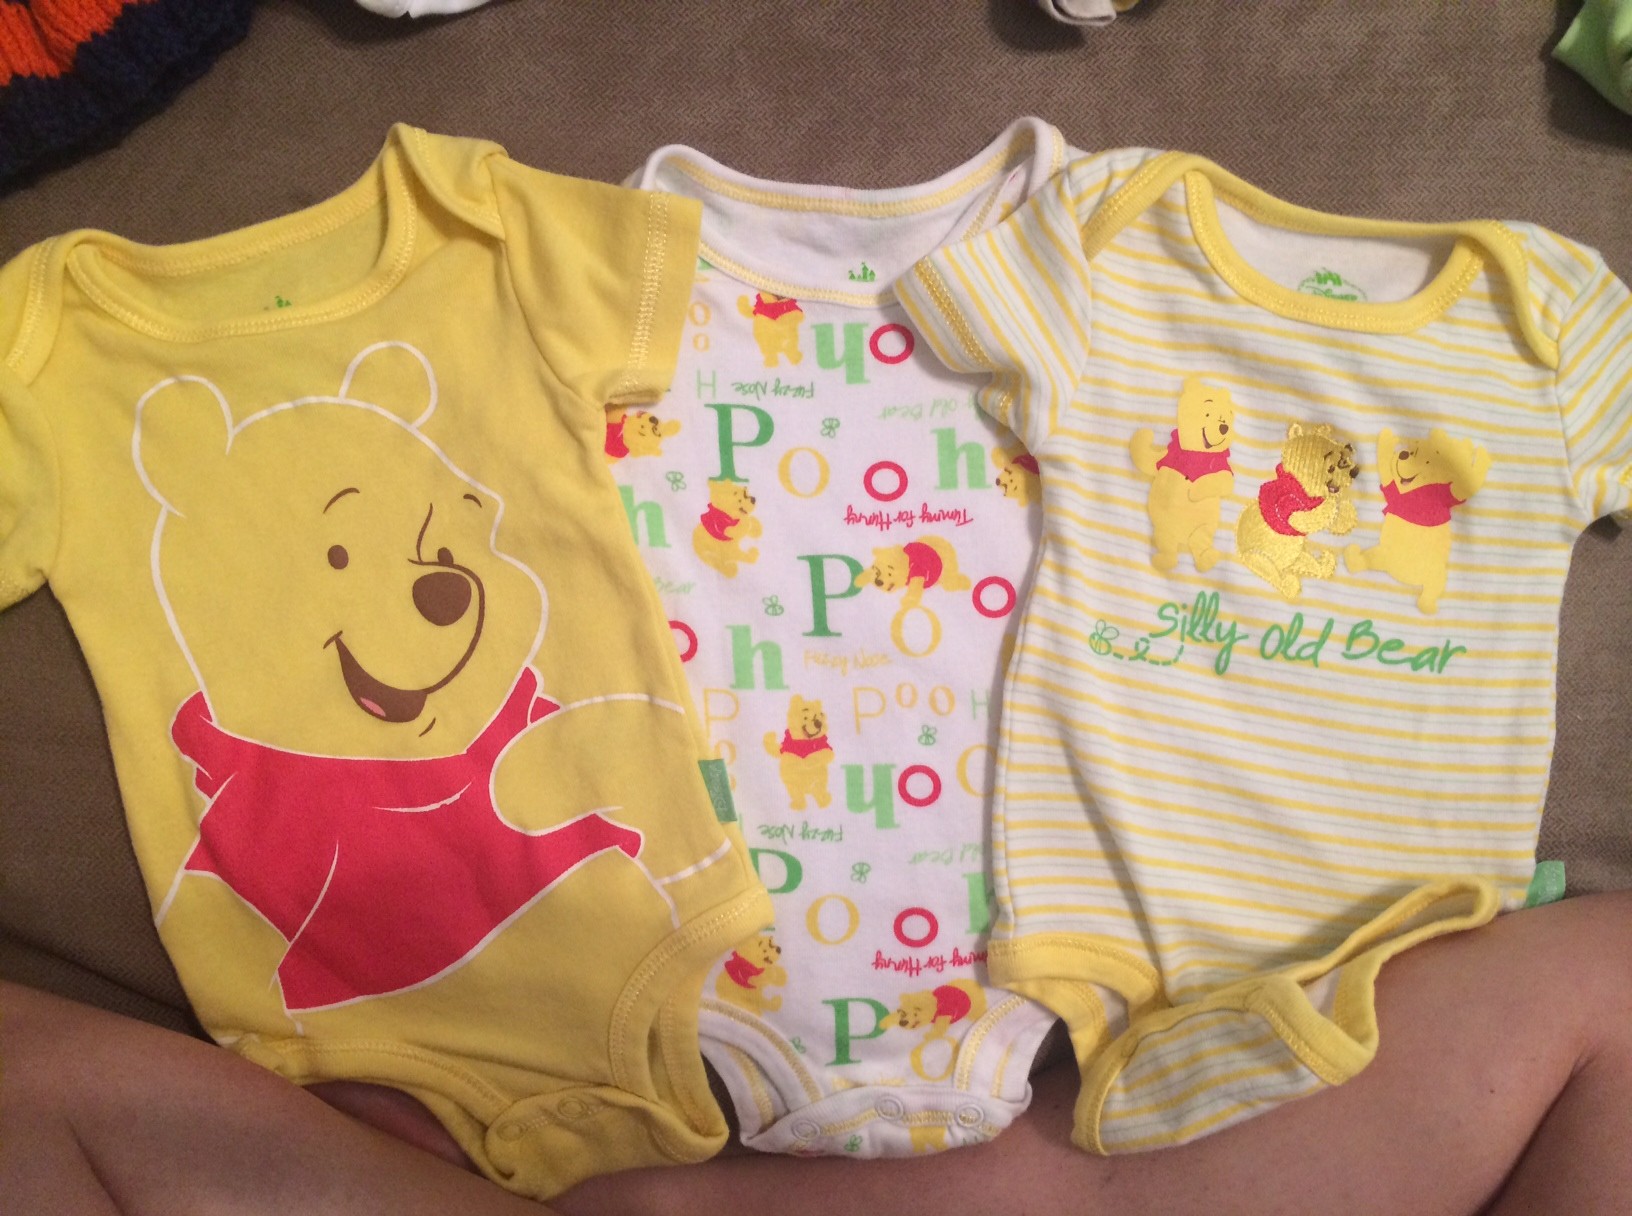
Additionally, the local Kmart is being taken down by the new Walmart so a trip to see what was left was in order – we needed baby socks and the internet didn’t have newborn in neutral colors (and I found 3 pairs). The only newborn sized baby clothes they had (that were gender neutral) were from Disney Baby, and happened to be a 3 pk of Winnie-the-Pooh onesies. Oh darn! I absolutely love Winnie-the-Pooh, and while Stuart didn’t want a Pooh themed nursery I’ve managed to “sneak” a lot of Pooh into our baby registry – through bath towels and crib sheets. The first thing I ever purchased for our little one was a 3mo T-shirt from the Disney Store Outlet, it’s green and has Pooh on it and says “Rumbly in my Tumbly”.

I (well, Mom) made this smoothie. Instead of a blog post where I share the recipe with our adjustments I’ll just provide my review here. (Why? Because I didn’t take a picture) I was nervous about putting carrot in a smoothie. Not because I was worried about the flavor, I’ve enjoyed smoothies from Tropical Smoothie that have carrot in them, but I wasn’t convinced that my Ninja blender(which is awesome by the way) would really break up the carrot enough. After the first run through the blender the smoothie was too pulpy for my preference – but it wasn’t just because of the carrot, the pineapple creates pulp on its own anyway. So we put it back in the blender and added a little bit of yogurt. That did the trick!

And now for my complaint of the day: WordPress has changed the way a blogger adds new posts and sees the scheduled posts already created. I am not enjoying this change – it is not as user friendly. Today my plan is/was to schedule as many posts this month as I could muster. (Here’s to patience so I don’t toss my computer out the window.) Even though my due date isn’t until the end of the month, I also know to be prepared for my little one to decide it’s D-Day at any point!

Update: (I know it’s weird to do an update to this post before this post has even been posted.) I have been cleared to return to life as a real person! This means I can get back to quilting. 🙂

Disclaimer: This post contains affiliate links. 

Chipotle Chicken Taco Salad

One of my favorite ways to incorporate salads into our menu is under the influence of Mexican Monday. Typically salads are just plain boring, but with big flavors in Mexican cuisine, no salad is ever boring. And creamy dressings are my favorite. This dressing gets a kick from the chipotle pepper in adobo, but is mellowed out by the sour cream and cilantro.

This salad makes for a great lunch or quick dinner – and can be assembled even more quickly if you have left over cooked chicken or stop at the store and pick up a rotisserie chicken from the deli. With black beans in the salad, you could even omit the chicken if desired for a Meatless Monday too.

For a little crunch in your salad, topped with crushed up tortilla chips or the tortilla strips salad topping from the store (they’re typically next to the packaged croutons).

Chipotle Chicken Taco Salad

Ingredients for dressing:

  • 1 chipotle pepper in adobo*
  • 1/3 C packed fresh cilantro
  • 2/3 C sour cream
  • 1 tsp cumin
  • 1 tsp chili powder
  • 1/4 tsp salt
  • juice of 1 1/2 limes
  • 2 tsp apple cider vinegar

*for a milder dressing remove seeds from pepper, for a spicier dressing include some of the adobo sauce

Ingredients for salad:

  • 1-2 chicken breasts, cut into strips
  • 1 head of lettuce, chopped
  • grape tomatoes, halved
  • red onion, thinly sliced
  • canned black beans, drained and rinsed
  • canned corn, drained and rinsed
  • avocado, diced
  • red bell pepper, thinly sliced

Steps:

  1. Season chicken with S+P. In a non-stick skillet, cook chicken over medium-high heat in a little bit of olive oil.
  2. Place dressing ingredients in a food processor or blender. Pulse until smooth. Adjust seasonings to taste.
  3. In a large bowl combine salad ingredients with cooked chicken. (Note: I didn’t specify amounts for the salad ingredients, use any or all to create your perfect salad!)
  4. Toss salad with as much dressing as desired.

*This recipe is adapted from David at http://www.myrecipes.com/recipe/chipotle-chicken-taco-salad-10000001215905/*

Chipotle Taco Salad

Gone Sailing

A couple of years ago now I embarked upon the largest quilting project to date.

Stuart wanted me to make a quilt for very good friends of ours. They have been our family here in the Panhandle and we will miss them greatly when we move to Ohio.

David has a love for sailing and owns his own sailboat so I knew I wanted to do something for the boat. As a family of 4 I thought it’d be fun to do a quilt large enough that all four of them could snuggle under the quilt out on the boat watching the sunset. The quilt I designed was massive.

Gone Sailing Design

By Christmas of last year I’d reached a point where my fabric supply was running low and needed to order some more. I’d also reached a frustrating piece of the puzzle that required paper piecing uneven hour glasses. So I took a break. When I pulled it back out in February I realized just how large of a quilt it already was. And it looked finished. So those hour glasses were trimmed into squares and turned into two smaller quilts for their children.

Gone Sailing Mini Me 2 Gone Sailing Mini Me 1

The back of the quilt is Stuart’s favorite part. I spelled out their last name in Nautical Flags!

Nautical Flags

I gave the boys their quilts in February and presented the quilt top and back to their parents before it was sent off to the quilter’s. I’ll be getting it back soon. I’ve seen it quilted and it looks fabulous! I can’t wait to give it to them. Gone Sailing

Our Anniversary Souffle Date

Today is our 4th anniversary!

We didn’t have any big plans for this year – Stuart is going off on a 30 hour adventure race tomorrow and a trip anywhere was going to be out of the question anyway being one month from my due date. We thought about taking the day off from work and going to the beach, but that idea became vetoed when I was placed on bed rest a month ago. (Turns out today’s weather forecast would’ve kept us inside regardless!) And I’m not making anything fancy from the couch.

So for this honorary blog post, I’m going to share with you a kitchen adventure we took for our 2nd anniversary. Making souffles!

DSCN2969

I picked out a savory side dish to go with our salmon and he picked out dessert. And funnily enough, we ended up making each others dish. We didn’t plan it that way, but that’s just how the kitchen tango worked itself out.

My potato souffles were made in ramekins instead of the potato skins. If I remember correctly we struggled at removing the potato from the skin.

Potato SoufflesDSCN3012

For dessert Stuart picked Orange Souffles that were made in the orange rinds! We didn’t puncture the rind on this recipe, and even had extra filling to do two ramekins in addition to the 6 oranges. We had a couple of blow outs but managed to save 3 beautifully souffleed desserts.

Orange SoufflesOrange Souffles