#IceCreamSocial: Strawberry Honey Sorbet

Hello, Summer. You’ve been here 10 days and it’s high time we’ve had an Ice Cream Social to celebrate your arrival. After all, July is National Ice Cream Month.

The Festive Foodie Events Planning Group (formerly Holiday Fun with our Blogging Friends) is having said Ice Cream Social with all treats frozen. We’re talking ice cream, frozen yogurt, gelato, sorbets, ices, affogatos, malts and shakes, ice cream cakes, ice cream pies, ice cream sandwiches, sundaes, popsicles, etc. If it’s frozen and it’s a treat, bring it on to the party! Thank you Sue of Palatable Pastime for hosting!

19399035_10104959073808201_7818881682960017989_nThe boys and I went strawberry picking with my mom the Thursday before last and brought back 8 quarts of strawberries! That’s a lot of strawberries. Particularly when they’re super tiny. These Wisconsin strawberries are half the size of those I get from the Farmer’s Market back in California.

Using about 7 cups of strawberries, Mom (with a little help from Treat) baked a beautiful pie. We filled two freezer quart bags to be used in both an ice cream and a sorbet. And there was a 48 oz container remaining for our daily Vitamin C intake.

On a beautiful (and only slightly chilly) Monday morning, Firecracker woke up asking to make ice cream. I checked my potential blogging opportunities and decided to tackle the sorbet first.

There’s a slight chance we busted my mom’s little blender, so I’m not sure if the no-churn ice cream we want to make will end up happening. I’ll need to get on that quite soon before we head back to sunny SoCal!

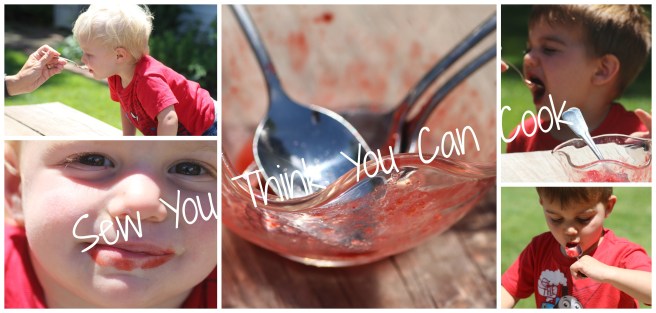
After lunch the sun came out and outside play called for some Strawberry Honey Sorbet. This treat melts quickly, especially in the sun, but it’s quite refreshing! Sweetened only with honey, I didn’t feel too guilty about letting the boys dig in!

Strawberry Honey Sorbet (kids) | Sew You Think You Can Cook

The three ingredient recipe was inspired by a Facebook Video my mom found.

I encourage you to have a taste of summer by whizzing up your own, three-ingredient sorbet.

Strawberry Honey Sorbet

Ingredients:

  • 1 qt frozen strawberries
  • 1/2 C water
  • 1/2 C honey

Steps:

  1. Place ingredients in a food processor and pulse until smooth.
  2. Transfer to a freezer friendly dish, cover, and freeze at least an hour.

*This recipe is modified from Pierce at https://www.buzzfeed.com/pierceabernathy/3-ingredient-mango-sorbet?bffbtasty&ref=bffbtasty&utm_term=.fmrJbAWaw#.kpa9N6Edq*

Strawberry Honey Sorbet for #IceCream Social from Sew You Think You Can Cook

Be sure to check out these other frozen treats for your next Ice Cream Social:

Chocolate Mousse Ice Cream by Culinary Adventures with Camilla

Cowtipper Shake by Jolene’s Recipe Journal

Easy Nutella Popsicles by All That’s Jas

Fresh Mint Chocolate Chip Ice Cream by Amy’s Cooking Adventures

No Churn Cherry Vanilla Ice Cream by Hezzi-D’s Books and Cooks

Old Fashioned Cola Float by Family Around the Table

Peanut Butter Chocolate Chip No Churn Ice Cream by Cooking with Carlee

Raspberry Ripple Ice Cream by Red Cottage Chronicles

Sour Cherry Ice Cream with Chocolate Chunks by A Day in the Life on the Farm

Strawberry Frozen Yogurt by Palatable Pastime

Strawberry Honey Sorbet by Sew You Think You Can Cook

Strawberry Peaches & Cream Popsicles with Gingersnap Crumbles by Tip Garden


#SundaySupper: Summer Corn

I have been waiting all year for fresh summer corn! I couldn’t have been more excited to see the theme for today’s #SundaySupper. I can’t wait to check out everyone’s incredible recipes to find new and exciting ways to prepare one of my favorite grains (corn isn’t a vegetable, you know)! Be sure to scroll past my recipe to check out what everyone made. Thanks to Ellen Folkman from Family Around the Table for hosting this weekend.

I do have to say, fresh corn is something that California just doesn’t have right. I have been disappointed in what pops up at the grocery stores. It’s probably the only thing (other than our friends) I miss about Ohio. Sigh. When I go visit my parents at the lake next month they better be prepared for lots of corn dishes made with Wisconsin grown corn on the cob. Now if only I could get it back to Cali.

Our farmers market near our home doesn’t have corn so I planned on driving to the larger one to see what was available. But. My excursion was halted before I got out of the driveway. I’d loaded up the boys and promised a trip to the farmers market and to a friends’ house for a playdate. Neither of those things were able to come to fruition thanks to our garage door.

The garage door broke. It’s had sticking problems since we moved in, but nothing that couldn’t be overcome by pushing the button a couple of extra times. But now, here I was with the car out of the garage and a baby screaming bloody murder. The garage door was neither up nor down and I couldn’t get it to go all the way up so I could return the van to its parking place. Luckily a neighbor was just leaving and he took the time to help me out. We discovered that the cable was completely off the pulley. I grabbed a step stool and he put it back for me. Unfortunately, it still didn’t do the trick. He was able to get the door completely open for me and I put the car back. I then had to do a mental exercise and take anything and everything I would need out of the trunk as I wouldn’t be able to get into it once I muscled the garage door closed. I took out the big double stroller, the beach blanket, and some sand toys.

I had to cancel with our friends. Instead, she kindly offered to pick up whatever I needed from the market and to come over to our house. She brought me some fresh white corn so I could still make my dish for today’s event!

The dish I’d been dreaming about was one in Rachael Ray’s Look + Cook Cookbook. How could I pass up cream, corn, and pasta!? Oh, and there’s bacon involved, too. I made this dinner when we invited over one of my husband’s coworkers and his girlfriend. The pasta was a hit and there wasn’t any leftover. Funnily enough, Firecracker fell asleep in my husband’s arms at the table and Treat fell asleep shortly thereafter, allowing us adults to enjoy the sunset with a cocktail in hand. (We’ve told them they need to come to dinner every day!)

Fresh Corn Fettuccine

Ingredients:

  • 1 lb fettuccine
  • 5 ears corn on the cob, sucked and kernels cut off the cob
  • 1 C heavy cream
  • 5 strips center-cut bacon, diced
  • 2 large shallots, diced
  • 1 bell pepper (I used 2 very small green ones we picked), diced
  • 1/2 C vegetable stock
  • 2 tsp dried thyme
  • 1 tomato, diced
  • hot sauce (to taste)
  • 1/2 – 1 C shredded parmesan cheese
  • 1/2 C fresh flat-leaf parsley, chopped
  • 1/2 C fresh basil, chopped

Steps:

  1. Bring a large pot of salted water to a boil. Cook pasta according to package instructions. Drain and set aside.
  2. Put 1/4 of the corn kernels in a food processor with the cream. Blend until smooth, season with S+P.
  3. In a large skillet, cook bacon over medium-high heat for about 5 minutes. Add the remaining corn, shallots, bell pepper, S+P, cook another 5 minutes until veggies are tender. Stir in the stock, thyme, and corn/cream mixture. Reduce the heat and simmer until slightly thickened. Gently stir in the tomato. Season to taste with hot sauce, S+P.
  4. Toss cooked pasta into the sauce with 1/2 C Parmesan cheese and the parsley. Garnish with basil and extra cheese.

*This recipe is adapted from Rachael Ray’s Look + Cook*

Fresh Corn Fettuccini for #SundaySupper from Sew You Think You Can Cook

Appetizer

Breakfast

Salad

Main Dish

Side Dish

Dessert

Sunday Supper MovementJoin the #SundaySupper conversation on twitter on Sunday! We tweet throughout the day and share recipes from all over the world. Our weekly chat starts at 7:00 pm ET. Follow the #SundaySupper hashtag and remember to include it in your tweets to join in the chat. To get more great Sunday Supper Recipes, visit our website or check out our Pinterest board.

Would you like to join the Sunday Supper Movement? It’s easy. You can sign up by clicking here: Sunday Supper Movement

Disclaimer: This post contains affiliate links.

#FoodieExtravaganza: Lemonade

foodieextravaganza-300

Happy August, everyone! August is a great month, although there aren’t any legal holidays to get you a day or two off of work. August is the final month of summer, the month when most people are taking family vacations, and the month that holds my birthday!

August also has some of the best foodie holidays. It’s National Brownies At Brunch Month (say, whaaat?!), National S’mores Day is the 10th, and the last day of the month is Eat Outdoors Day (what a fun family tradition to start!). Two years ago #FoodieExtravaganza celebrated waffles and last year potatoes.

The Foodie Extravaganza is a monthly party hosted by bloggers who love food! Each month we incorporate one main ingredient or theme into recipes to share with you. We take turns hosting and this month, it’s my turn! I decided on Lemonade Day, which falls on the 20th. Why? Because lemonade is one of my favorite summertime treats. I make a minimum of 2 homemade lemonades once summer hits. (You can read more about my citrus juicing love here.)

I decided to take a different approach with this year’s new lemonade. No sugar! Instead, this lemonade gets its sweetness from honey. You can alter how cloyingly sweet you want your beverage to be by playing around with different honey varieties. (About.com has a great resource for describing the different flavor profiles of each type of honey.)

Honey Mint Lemonade  Sew You Think You Can Cook

Honey Mint Lemonade

Ingredients:

  • 2 C freshly squeezed lemon juice (from 3 lb lemons)
  • 9 C water, divided use
  • 1/4 C honey (any variety of your choosing)
  • 3 sprigs fresh mint
  • sparkling water for serving (optional)

Steps:

  1. Microwave 1 C water for 1 minute, or until hot but not boiling. Stir honey into hot water until dissolved. Add mint and steep 5 minutes. Remove mint and discard.
  2. Combine honey mixture, lemon juice, and remaining 8 C water in a pitcher.
  3. Option to add a splash of sparkling water to serve.

*This recipe was inspired by SkinnyMs at http://skinnyms.com/homemade-honey-lemonade-with-fresh-mint-recipe/*

Honey Mint Lemonade for #FoodieExtravaganza from Sew You Think You Can Cook

Be sure to check out these other lemonades:

Dairy-Free Frosted Lemonade by Cookaholic Wife

Frosty Raw Strawberry Lemonade by Fearlessly Creative Mammas

Lemony White Sangria by Hardly A Goddess

Papaya Lemonade (or cocktail!) by Caroline’s Cooking

Passion Tea Lemonade by Making Miracles

Peachy Lemonade by A Day in the Life on the Farm

Pineapple Pink Lemonade Shaved Ice by Food Lust People Love

Shikanji (Indian Lemonade) by Tara’s Multicultural Table

Sparkling Apple and Watermelon Lemonade Spritzers by Sneha’s Recipe

Sparkling Blue Basil Lemonade by Culinary Adventures with Camilla

Sparkling Milk Lemonade by Our Good Life

If you are a blogger and would like to join our group and blog along with us, come join our Facebook page Foodie Extravaganza. We would love to have you! If you’re a spectator looking for delicious tid-bits check out our Foodie Extravaganza Pinterest Board! Looking for our previous parties? Check them out HERE.

#SundaySupper: Pool Party

It’s August! Can you believe that?! Now’s the time to polish off those summer bucket lists before school is back in session. (If that affects your household anyway.) That’s why this weekend’s Sunday Supper theme of Pool Party is a perfect fit! I connect even more with the theme because my birthday is at the end of this month and I would always have a pool party!

If you’re throwing a poolside bash this month be sure to scroll past my recipe for a wonderful list of menu possibilities. A big thank you to the Sunday Supper Movement for hosting this event.

Fellow food bloggers, do you lie awake at night thinking about your food styling and photo props? I don’t often because I know I’m not quite at that level, but with this fun summer theme I had visions dancing in my head of how I would plate my pool party offering. I used my Kroger gift card and strolled down their seasonal aisle, where school supplies pushed barbecue dishes and water toys to half off prices. I picked up a yellow plate and a beach ball. Pink Lemonade Cupcakes | Sew You Think You Can CookI knew I’d use some of my son’s water table toys for extra water fun props. But how do I put all of these fun things in the background? I’d have to put out a quilt on the grass. Luckily the sun stayed behind clouds and the threat of rain held off for the day so I didn’t have any funky shadows. I absolutely loved the way my photos turned out – from the screen on my camera, that is. Once I sat down to edit I was slightly disappointed. The bright yellow ducks and orange pail were too hard to tone down without drowning out my food. Luckily I took a close up!

Salty snacks tempted me as whenever I’m at the beach or pool I want salt! Not sure if I’m the only one there. A Chex Mix with Goldfish would be cute to serve at a pool party. But, when I think pool party I think watermelon. Unfortunately, that is a fruit that is off limits to me now. Next up, berries. I hit Pinterest looking for a fun idea and was very close to making a fruit beach ball cookie cake. But that giant sugar cookie got me thinking dessert. Cupcakes would be easy to eat by the pool. The answer: Pink Lemonade Cupcakes!

These cupcakes are everything lemonade should be and thanks to the frosting they’re tartingly sweet.

Pink Lemonade Cupcakes

Ingredients for cake:

  • 2 1/4 C flour
  • 1 tsp baking powder
  • 1/2 tsp baking soda
  • 1/2 tsp salt
  • 1/3 C room temperature butter (5 tbsp + 1 tsp)
  • 1 1/3 C sugar
  • 3 eggs
  • 1/4 C thawed frozen pink lemonade concentrate
  • 1 tsp vanilla bean paste (I used Nielsen-Massey)
  • 3/4 C sour cream
  • 1/4 C strawberry preserves/jam/spreadable fruit

Ingredients for frosting:

  • 1/3 C softened butter (5 tbsp + 1 tsp)
  • 4 C powdered sugar
  • 1/3 C thawed frozen lemonade concentrate (or more as needed)
  • 1/2 tsp vanilla extract
  • red food coloring (optional)

Steps:

  1. Preheat oven to 350 degrees F. Line 21 cupcakes with liners.
  2. In a bowl whisk together flour, baking powder, baking soda, and salt. Set aside.
  3. In the bowl of a stand mixer fitted with the paddle attachment cream butter and sugar until fluffy. Add in eggs one at a time. Add in the lemonade concentrate, vanilla, sour cream, and strawberry preserves. Mix until combined. Add in the dry ingredients in 2-3 batches until fully incorporated.
  4. Spoon batter into prepared cupcake tin. Bake 18-21 minutes, or until a toothpick inserted comes out cleanly. (Note: If one cupcake tin is on the bottom rack, I suggest rotating the cupcake tins halfway to prevent the bottoms of the bottom batch from burning.)
  5. Allow cupcakes to cool 5 minutes before removing to a cooling rack. Let cupcakes cool completely before frosting.
  6. Make the frosting: In the bowl of a stand mixer fitted with the whisk attachment cream the butter with 1 cup of the powdered sugar. Add in the lemonade concentrate and vanilla and whisk until combined. Add the remaining powdered sugar. Add additional lemonade concentrate as needed. If using, add a couple drops of food coloring to achieve a pink frosting. Frost cooled cupcakes.

*This recipe is adapted from Alice at http://hipfoodiemom.com/2014/07/11/strawberry-lemonade-cake-for-a-guest-post/*

Pink Lemonade Cupcakes for #SundaySupper from Sew You Think You Can Cook

Refreshing Beverages and Cocktails:

Appealing Appetizers and Snacks:

Super Sides and Salads:

Tempting Desserts and Sweets:

8387592742_f6164fd5a8_oJoin the #SundaySupper conversation on twitter on Sunday! We tweet throughout the day and share recipes from all over the world. Our weekly chat starts at 7:00 pm ET. Follow the#SundaySupper hashtag and remember to include it in your tweets to join in the chat. To get more great Sunday Supper Recipes, visit our website or check out our Pinterest board.

Would you like to join the Sunday Supper Movement? It’s easy. You can sign up by clicking here: Sunday Supper Movement.

#HotSummerEats: Frozen Cherry Lemonade

Every summer I make lemonade. I enjoy juicing the lemons as it always reminds me of juicing limes with my dad from the tree in the backyard. HotSummerEatsLet me tell you, I would love to have citrus trees when we finally settle in somewhere – limes are expensive!

But this post isn’t about limes. It’s about lemons! And cherries. And #HotSummerEats – the awesome blogging event going on right now headed up by Camilla of Culinary Adventures with Camilla.

While one of our sponsors, Casabella, offered a citrus reamer to participating bloggers, I opted for their cherry pitter as I already have a reamer in my cabinet. It’s not as awesome as theirs though – I love how the juice flows into a see-through canister with measurements on it! The cherry pitter is equally useful. pitting cherriesI was never sure if they were a helpful kitchen gadget or a gimmick. The answer: helpful! My least favorite part about cherries is the pits and that’s part of why I simply never eat them. Now, I can pit some cherries and have an easy to grab snack. It also makes quick work when cherries are needed for a recipe. I did learn two tricks as I worked with this product for the first time: (1) place the cherry in the pitter so it is on it’s short side and (2) don’t be gentle.

I’ve had my cherry pitter in my drawer for months semi-patiently waiting for cherries to be in season. I don’t think I’d ever been so happy to see cherries in the grocery store before! It’s definitely that time of year to start making homemade lemonade and this frozen cherry version is a beautifully, tart way to start your summer off right.

Before I get to the recipe I have a couple of notes: separation is normal and it is recommended to blend the lemonade right before serving. If you don’t use all of the lemonade immediately keep the leftovers in the fridge and re-blend before enjoying. Even after the ice has melted this lemonade is refreshing, you could always add a little more ice if you wanted.

making cherry lemonade

Frozen Cherry Lemonade

Ingredients:

  • 1/2 C sugar
  • 1 C water
  • 36 cherries, pitted
  • 7 lemons, juice (approx 1 C of juice)
  • 5 C ice

Steps:

  1. In a small saucepan over medium heat dissolve sugar in water. Remove from heat and let cool.
  2. In a blender combine cherries, lemon juice, simple syrup from step 1, and ice.

*This recipe is adapted from Tina at http://www.justputzing.com/2014/06/thirsty-thursdays-frozen-cherry-lemonade.html*

Frozen Cherry Lemonade for #HotSummerEats from Sew You Think You Can Cook

Don’t forget to enter our giveaway and be sure to check out the other bloggers who posted more summertime recipes today:

Thank you to #HotSummerEats sponsors BenBella Vegan, Caribeque, Casabella, Gourmet Garden, Intensity Academy, Not Ketchup, Out of the Weeds, Pirate Jonny’s, Quirk Books, Spicely Organics, T.Lish , and Voodoo Chef for providing the prizes free of charge. These companies also provided the bloggers with samples and product to use for#HotSummerEats without additional compensation. All opinions are my own.

S’more Brownies

Hey, there! I’m jumping on the summer s’more obsession bandwagon. And I’m not ashamed by it one bit. There’s a reason the s’more is the most popular summer food trend. Ooey-gooey melty chocolate and marshmallow. Sitting around a camp fire with family and friends. Enjoying warm weather and late nights. Getting all messy and not giving a care about it in the world.

Unfortunately not all of us have access to a backyard fire pit, but that doesn’t mean we can’t partake in the fun! Make these brownies and you’ll be transported to your favorite childhood memory.

S'more Brownies

You can follow the recipe below, or feel free to take a semi-homemade philosophy and use a boxed brownie mix! Just don’t skip out on making the graham cracker crust. I wonder if you can even fill two pie crusts with the brownie batter and turn these s’more brownies into s’more brownie pies!

S’more Brownies

Ingredients:

  • 15 graham crackers, divided use
  • 2 1/2 C sugar, divided use
  • 6 tbsp butter, melted
  • 2 sticks butter, softened
  • 4 eggs
  • 1 1/2 tsp vanilla extract
  • 1/2 C cocoa powder
  • 1 1/2 C flour
  • 1/2 tsp salt
  • 1 1/2 C mini marshmallows
  • 3 chocolate bars

Steps:

  1. Preheat oven to 375 degrees F.
  2. Crush 12 of the graham crackers into crumbs. You should have about 1 1/2 C of crumbs. Combine crumbs with 1/2 C sugar and 6 tbsp melted butter. Press into the bottom of a 9×13″ pan and bake for 7 minutes.
  3. Preheat oven to 350 degrees F.
  4. In the bowl of a stand mixer fitted with the paddle attachment cream together 2 sticks softened butter with 2 C sugar. Add eggs, one at a time. Add vanilla extract.
  5. In a bowl whisk together the cocoa powder, flour, and salt. Add to the stand mixer and mix until incorporated.
  6. Pour batter evenly over graham cracker crust. Bake for 15 minutes.
  7. Break chocolate bars and remaining 3 graham crackers into bite size pieces. Top brownies with chocolate, crackers, and marshmallows. Bake another 10 – 15 minutes.
  8. If you have leftovers, they’re best reheated in a toaster oven for a few minutes until chocolate and marshmallows are again melty and gooey.

*This recipe is modified from Nikki at http://www.chef-in-training.com/2014/07/smore-brownies/*

S'more Brownies

Grilled Pork and Pineapple

Before the summer disappears and the weather gets too cold for grilling you have to give this recipe a try! This dinner is ready in under 20 minutes and according to Better Homes and Gardens is under 320 Calories with only 7 grams of fat. So before you’re switching your menu to comfort foods, enjoy this summer meal.

Grilled Pork and Pineapple

Ingredients:

  • 4 pork chops
  • 1 pineapple, peeled, cored, and sliced into rings
  • 1/2 C yogurt
  • 3 tbsp orange marmalade
  • 1/4 C cashews

Steps:

  1. Season pork with S+P. Grill pork over medium heat for four minutes on each side, or until cooked through.
  2. Grill pineapple.
  3. In a small bowl, whisk together yogurt and marmalade.

*This recipe is adapted from http://www.bhg.com/recipe/pork/grilled-pork-and-pineapple/*

Grilled Pork and Pineapple

Guest Post: Grilled Marinated Chicken with Tomato-Fruit Salsa

I am very excited to feature my first guest post on Sew You Think You Can Cook! This post is brought to you on behalf of Hunt’s by Julia. Her recipe is perfect for summer and the grilling season. Enjoy! -Lauren

When I think of summer I think of dinners out on the back porch with food fresh off the grill.   While there will always be a soft spot in my heart for hot dogs and burgers, my favorite grill-able is chicken breast simply because of the huge range of flavor possibilities.  Thanks to the science of marinating, there is a chicken breast for every taste, so preparing a light dinner for a picky family is a snap.

This grilled chicken recipe was a hit for my entire family, including my preteen who has recently become “too cool” to enjoy his mom’s cooking.  The marinade kept the chicken from becoming dry, and the tomato-fruit salsa on top added a unique dimension of flavor that really took the edge off a hot summer night.

Grilled Chicken with Tomato-Fruit Salsa

 Grilled Marinated Chicken with Tomato-Fruit Salsa

 Ingredients for Chicken:

  • 1/4 cup Hunt’s® Tomato Ketchup
  • 1/4 cup Worcestershire sauce
  • 1/4 cup white wine vinegar
  • 1/4 cup honey
  • 2 tbsp light soy sauce
  • 2 cloves garlic, finely chopped
  • 6 boneless skinless chicken breast halves
  • PAM® Grilling Spray

Ingredients for Salsa:

  • 1 can (14.5oz each) Hunt’s® Petite Diced Tomatoes, drained
  • 1 cup finely chopped fresh pineapple
  • 1/4 cup finely chopped red onion
  • 1 tablespoon chopped fresh cilantro

Steps:

  1. Combine ketchup, Worcestershire sauce, vinegar, honey, soy sauce and garlic in large resealable plastic bag; blend well. Pound chicken with meat mallet to even out thickness for more even cooking. Add chicken to bag; seal. Turn to coat evenly with ketchup marinade. Refrigerate 2 hours or overnight.
  2. Remove chicken from bag; discard marinade.
  3. Combine drained tomatoes, pineapple, onion and cilantro in small bowl; set aside.
  4. Spray cold grill and utensils with grilling spray. Preheat grill to medium heat.
  5. Grill chicken about 10 minutes or until no longer pink in center (165°F), turning once. Serve chicken with salsa.

Pro Tips:

  • If you don’t want to us a grill, this chicken can also be cooked in a non-stick skillet over medium heat.  As always with chicken, be sure to cook all the way through until no longer pink in center (165°F).
  • Pineapple can be substituted for other favorite tropical fruits, like mango or papaya (or a combination!)

Author Bio: This is a guest post by Julia S. on behalf of Hunt’s. Visit our site at www.hunts.com to find tomato recipes, chili recipes, and easy meatloaf recipes.

Perfect Corn on the Cob Every Time

I am so excited that corn is back in season (at least in FL). I think it’s my favorite thing about summer produce.

And I have the perfect way to cook it. I honestly don’t do it any other way. It keeps the corn in all it’s natural glory.

And my favorite way to eat it is simply with salt and butter.

Perfect Corn on the Cob

Ingredients:

  • corn on the cob, husks still on

Steps:

  1. Preheat oven to 400 degrees F.
  2. Place corn, with the husks on directly on the oven rack. Alternatively, you can remove the husks and silks and wrap the corn in aluminum foil.
  3. Bake for 35 minutes.
  4. When cool enough to touch, fold back the husks and remove the silks. I prefer to leave the husks attached to the corn as it provides for an natural handle!

Image

Spiced Apple Popsicles

I found these popsicle molds at Walmart at the beginning of summer for $1. I’d been wanting to use them, but I never got around to it. Before I knew it summer was over! But hey, I live in Florida, it’s still hot out, so therefore I can still enjoy homemade popsicles!

Evan couldn't get enough!
Evan couldn’t get enough!

This recipe is actually a perfect way to end the summer and start the fall – they taste like the Motts cinnamon applesauce from when I was a kid. Stuart said they reminded him of an apple cobbler.  These fall flavors are wrapped in a summer treat! I’ve made them twice already and earned the seal of approval from a 17-month-old. Evan actually ran around the table after finishing his popsicle to try and steal the one Stuart hadn’t yet finished!

Spiced Apple Popsicles

Ingredients:

  • 2 C Simply Apple Juice
  • 1/4 C brown sugar
  • juice of 1 lime
  • 1 cinnamon stick
  • 3 whole allspice berries
  • 1/2″ piece of ginger root, peeled
  • pinch of kosher salt

Steps:

  1. Combine ingredients in a saucepan. Bring to a gentle boil. Turn off the heat and bring down to room temperature.
  2. Strain popsicle mixture into a measuring cup and pour into popsicle molds. Freeze.
  3. Run the popsicle mold under cold water to make popsicle removal easier.

*This recipe is adapted from Giada DeLaurentiis at http://www.foodnetwork.com/recipes/giada-de-laurentiis/sweet-apple-pops-recipe/index.html*

Spiced Apple Popsicles 1 Spiced Apple Popsicles 2