Mummy Dogs

It isn’t just sweets that get all of the holiday fun!

Lunch time can be a great source for Halloween entertainment with Mummy Dogs.

mummy dogs (awk)

Hotdogs are layered with American cheese and then wrapped in crescent roll dough for a fun take on a childhood favorite.

Give the mummy dogs eyes with your preferred hotdog topping – mustard or ketchup.

Firecracker wasn’t interested in actually eating one of these hotdogs, he prefers his food to be plain, as-is, and without dipping in sauces. Knowing this preference, I showed him a couple of completed mummy dogs (pre-baked) and proceeded to cook his hotdog naked.

The mummy dogs weren’t wasted, though. I enjoyed two of them for my lunch! I wasn’t fully expecting to like melted cheese with my hotdog, but let me tell you – these crescent wrapped wieners were incredibly addicting!

Any trick-or-treater would be thrilled to eat a mummy dog before heading out for candy.

Mummy Dogs

Ingredients:

  • 10 hotdogs
  • 3 slices American cheese
  • 1 tub refrigerated crescent roll dough

Steps:

  1. Preheat oven to 375 degrees F. Lightly grease a rimmed baking sheet.
  2. Make 4 rectangles from the crescent roll dough by pressing the seams of two triangles together. Then slice the rectangles into strips, lengthwise.
  3. Cut each slice of cheese into 4 strips.
  4. Place a hot dog on a strip of cheese. Wrap the hotdog in dough strips to create a mummy. Place on prepared baking sheet.
  5. Bake 14-18 minutes, until dough is golden and cooked through.
  6. Add eyes with mustard or ketchup.

*This recipe is adapted from https://www.pillsbury.com/recipes/crescent-mummy-dogs/d52a57d7-ab8a-4a1c-8dae-f9f90d03b912*

Mummy Dogs | Sew You Think You Can Cook

CIC: Pears & Red Pepper Flakes

CIC-header

I’m {finally} back with another Crazy Ingredient Challenge!

This month’s mission: to combine pears and red pepper flakes.

As I informed my husband of the task at hand I was also creating my menu and grocery list. I thought about the proteins that were in the freezer and the lightbulb went off.

Barbecue pork!

Why not make a barbecue sauce with the pears and add in the red pepper flakes for kick?

Pear Barbecue Pulled Pork Sandwich | Sew You Think You Can Cook | http://sewyouthinkyoucancook.com

I made the barbecue sauce in the morning and then added it to the slow cooker along with my bone-in pork shoulder. I shredded the pork when it was ready, put it in a container, and headed out the door to Pure Barre. When I came home, all I had to do was assemble a sandwich on my favorite pretzel bun for an easy dinner.

Well, actually, I had to first put the boys to bed. But then I got to eat my sandwich! I had more for lunch the next day, too. Having the pork for lunch was really the best thing about it!

Pear Barbecue Pulled Pork

Ingredients:

  • 1 tbsp canola oil
  • 1/2 large yellow onion, diced
  • 1 tbsp fennel seeds
  • 1 1/2 tsp cinnamon
  • 1/4 C tomato paste
  • 1 C apple cider vinegar
  • 1/2 C dark brown sugar
  • 2 red Anjou pears, diced
  • 1 tsp red pepper flakes
  • 1 2 1/2 – 3 lb bone-in pork shoulder, trimmed of extra fat
  • 6-8 pretzel buns

Steps:

  1. Heat oil in a large saucepan over medium-high heat. Add onion, season with salt, and saute until translucent. Add the fennel seeds and cook until the onion become golden. Stir in the cinnamon and tomato paste and cook 3 minutes. Add the vinegar, sugar, pears, and pepper flakes. Bring sauce to a simmer and cook over medium-low heat for 20 minutes, until pears are tender. Let cool slightly.
  2. Transfer sauce to a blender and puree until smooth. (If the sauce is still warm, be sure to cover the top of the blender with a kitchen towel.)
  3. Place a thin layer of sauce in the bottom of a slow cooker. Season pork with S+P and place in slow cooker. Cover with 1 C of the pear barbecue sauce. Cook on LOW 8 hours.
  4. Shred pork with two forks. Serve with extra barbecue sauce on a pretzel bun.

*The barbecue sauce is adapted from http://usapears.org/recipe/pear-barbecue-sauce-with-chile-and-spice/*

Pear Barbecue Pulled Pork Sandwich for Crazy Ingredient Challenge from Sew You Think You Can Cook

To see the other bloggers who participated in this month’s Crazy Ingredient Challenge click on the link below.

#CranberryWeek: Tuna Salad with Cranberries

cranberry-week-logo

It’s the final day of #CranberryWeek. #CranberryWeek was hosted by Caroline’s Cooking and A Kitchen Hoor’s Adventures. All week we shared cranberry-inspired creations all in celebration of national cranberry day. You can search #CranberryWeek to keep up to date and follow the #CranberryWeek Pinterest board for more cranberry inspiration.

My final cranberry dish of the week is the most unique. It’s a dish that can be made and enjoyed year round, and is a perfect light lunch after some heavy holiday eating.

Never in my life would I have thought to put dried cranberries in tuna salad. But, there I was, staring at the deli offerings at Whole Foods gathering items for a picnic lunch with my mother-in-law. I tried their tuna salad and immediately ordered a small carton.

Less than two weeks later, there I was ordering some more.

I knew I couldn’t let this love affair continue and found a Copy Cat recipe to make my own for much, much less a hit to my bank account.

I made a double batch when my in-laws were visiting for Treat’s 1st Birthday. There were 6 of us and not a flake of fish was left in the bowl. I think my mother-in-law ate hers on an everything bagel, my brother-in-law’s fiance on a piece of toast with avocado (the photographed serving), and I like mine best with black pepper and salt potato chips.

This recipe is the doubled version and will serve 6-8.

Copy Cat: Whole Foods Tuna Salad with Cranberries

Ingredients:

  • 2/3 C mayonaisse
  • juice of 1 lemon
  • 1 tbsp onion powder
  • 4 cans (5 oz) yellowfin tuna, drained
  • 1/3 C dried cranberries

Steps:

  1. In a bowl, whisk the mayo, lemon juice, and onion powder. Season to taste with S+P.
  2. Flake the tuna and add it to the mayo mixture. Stir in the cranberries.

*This recipe is modified from https://slowburn.org/2013/11/06/whole-foods-cranberry-tuna-salad-my-version/*

Tuna Salad with Cranberries for #CranberryWeek from Sew You Think You Can Cook

Be sure to check out all the other cranberry recipes being shared today:

Cranberry Apple Sauce from Cooking With Carlee

Cranberry Bliss Bars from Palatable Pastime

Cranberry Cheesecake Brownies by The Bitter Side of Sweet

Cranberry Cheesecake Dream Bars from Life Currents

Cranberry Grains Power Bowl from Cindy’s Recipes and Writings

Cranberry Streusel Bread from Hostess At Heart

Maple Cranberry Sauce from Cricket’s Confections

Pumpkin Dump Cake with Cranberries from A Day in the Life on the Farm

Roasted Cranberry Bourbon Crush from Take Two Tapas

Savory Cranberry and Cheese Tart from Caroline’s Cooking

#WaffleWeek2016: Buttermilk Cornmeal Waffles with Blackberry Syrup

14206095_10210049269291252_418829660051754164_o

It’s finally time for Waffle Week of 2016!

I discovered that Waffle Week was a thing last year and am excited that Kaitie of Fuchsia Freezer decided to keep the event going this year.

Not that I really need an excuse to share a waffle recipe with you… ha! In just one year I’ve more than doubled the number of waffle recipes on my blog! I mean, seriously. I don’t think there’s anything better than a waffle. The possibilities with waffle making seem endless, from savory to sweet.

My offering this year can be enjoyed either way. The waffle base lends itself perfectly to being paired with fruit and honey or with meat and gravy. It would even welcome some mix-ins of bacon, scallions, herbs, or berries.

I made these waffles for dinner during a week my husband wasn’t home and it was the perfect amount of batter for the three of us. In all actuality, my 10 month old at 3/4 of a waffle while my 2 year old barely finished a 1/4. Just when I think I know what he’ll eat he decides, “No, I don’t like waffle or pancakes anymore.” (He’s on a sandwich boycott right now too…)

I served these waffles with a blackberry syrup. To make the syrup I simply dumped a bag of frozen blackberries in a small pot with about a tablespoon of sugar and 1/4 C or so of water. I brought it up to a gentle simmer and let it reduce until syrupy then pushed it through a strainer. (You can even save the solids to stir into muffins or more waffles!)

This recipe makes approximately 6 waffles.

Buttermilk Cornmeal Wafles

Ingredients:

  • 1/2 C + 2 tbsp flour
  • 3/8 C cornmeal
  • 1 tbsp baking powder
  • 1 1/2 tsp sugar
  • 1/2 tsp baking soda
  • 1/4 tsp salt
  • 1 C buttermilk
  • 2 tbsp vegetable oil
  • 2 eggs, separated

Steps:

  1. In a large bowl, whisk together the flour, cornmeal, baking powder, sugar, baking soda, and salt.
  2. In another bowl, whisk together the buttermilk, oil, and egg yolks. Add to the dry ingredients, mixing until combined.
  3. Place the egg whites in another bowl and beat with a handmixer until stiff peaks form. Gently fold the egg whites into the waffle batter.
  4. Drop 1/3 – 1/2 C of waffle batter onto a greased waffle iron and cook until golden.

*This recipe is adapted from Nikki at http://www.chef-in-training.com/2013/10/cornmeal-buttermilk-waffles/*

Buttermilk Cornmeal Waffles with Blackberry Syrup for #WaffleWeek2016 from Sew You Think You Can Cook

And keep that waffle iron hot for these other great recipes:

Coffee and Bacon Wake Up Waffles from Baking In A Tornado

Pumpkin Spice Waffles from Fuchsia Freezer

Spiced Sweet Potato Waffles with Candied Pecans from A Nerd Cooks

Waffles Gone Wild from Our Good Life

Waffle Collage - Pinterest

Dijon Chicken Salad 

Some days are just plain harder than others. It’s those days I’m thankful for cable TV, delivery pizza, and leftovers. Or for the incredible technology that is my phone which allows me to attempt to stay on top of my blog! Yes, I am writing another post from the fabulous WordPress app.

Or I should say I’m trying to.

Firecracker is napping and instead of getting to catch up on some of my own sleep, too, I’m fighting with Treat who can’t decide if he wants to nurse or not! The poor guy has a stuffy nose and can’t seem to get comfortable! As a result I’ve already found and fixed some crazy typos from flying infant hands, but if I missed any let’s blame the 3 month old. 😉

Chicken salad is a great way to utilize miscellaneous leftovers in your fridge and makes for an easy lunch. That’s a win-win in my book! I’ve adapted this recipe from Jeff Mauro and it’s my new favorite. I’ve become a little addicted to it actually.

This recipe makes two 10″ wraps but can easily be multiplied. Eat it as a wrap, as a sandwich, on top of salad, with crackers, or as-is. I like it best enveloped in a spinach tortilla.

Dijon Chicken Salad

Ingredients:

  • 1 C cooked, cubed chicken breast
  • 1/4 C dried cherries
  • 1/4 C glazed walnut pieces
  • 1 rib celery, thinly sliced
  • 1 tbsp minced red onion
  • 1/8 C mayonnaise
  • 1/8 C plain Greek yogurt
  • 1 tbsp Dijon mustard
  • 2 10″ tortillas (serving suggestion)

Steps:

  1. In a bowl toss together the chicken, cherries, walnuts, celery, and onion.
  2. In a small bowl, whisk together the mayo, yogurt, and mustard. Season to taste with S+P.
  3. Gently fold dressing into the chicken mixture. Wrap in tortillas to serve (optional).

Dijon Chicken Salad  Sew You Think You Can Cook

#EVOOChallenge: Olive Oil Sandwich Bread

We’re halfway through the #EVOOChallenge! This challenge, in which we make foods with the only cooking fat being olive oil, was issued by Spartan Olive Oil. The goal is to highlight the benefits of using olive oil over its less healthy counterparts, I’m looking at you butter and vegetable oil. Search the hashtag on social media to see more great recipes!

While both olive oil and vegetable oil have 120 Calories and 14 grams of fat per tbsp, olive oil has 10 grams of monounsaturated fat (the good fat) whereas vegetable oil has only 3 grams of monounsaturated fat. Monounsaturated fat is actually good for your health; it reduces bad cholesterol and provides vitamin E. (Source: American Heart Association)

This unfiltered extra-virgin olive oil is made from the olives of 700 year old trees in Sparta, Greece. The flavorful oil has a rich golden color and smooth texture. I wanted to highlight the nutty, fruity flavor of the oil in my recipes this week.

I really wanted to make bread during this challenge. I had found a recipe for olive oil bread and tried that originally. It wasn’t quite a success. The recipe went against my instincts and my changes didn’t quite work out. I powered through and baked it just to check. It was dry, flakey, and crackery. So instead of trying again I decided to take a recipe I could trust and simply do a fat swap. I took the butter (or vegetable oil) and replaced it with Spartan Olive Oil.

My rise time took a longer than the recipe indicated but given the major snow day I wasn’t surprised. The dry weather also meant I had to add a little bit more water to the dough for it to come together. Another note: the loaf pan I have is 9.25″ x 5.25″ instead of 8.5″ x 4.5″ so I don’t have the classic domed sandwich bread shape.

This homemade sandwich bread is fantastic! It’s light and spongy with a beautiful golden crunchy crust. It makes for delicious toast topped with jam, simple bread and butter, and even a flavorful BLT.

Olive Oil Sandwich Bread 

Ingredients:

  • 1 pkt active dry yeast
  • 3 C flour
  • 2 tbsp sugar
  • 1 1/4 tsp salt
  • 1/2 C milk mixed with 1/2 C warm water
  • 1/4 C olive oil

Steps:

  1. Dissolve yeast in 1 tbsp warm water.
  2. Place all ingredients, including yeast, in the bowl of a stand mixer fitted with the dough hook. Knead until it forms a ball around the hook and comes away from the bowl. Add a little extra water if the dough is too dry.
  3. Oil hands and knead dough until smooth. Place in a greased bowl and cover. Allow dough to rise 1-2 hours until almost doubled in size.
  4. Punch down the dough and form into a log just slightly shorter than the loaf pan.
  5. Line loaf pan with parchment paper or lightly grease it. Place dough in prepared pan, cover, and let rise until the dough domes above the pan, another 1-2 hours.
  6. Preheat oven to 350 degrees F.
  7. Bake bread for 30-35 minutes, or until an internal temperate of 190 degrees F is reached.
  8. Remove loaf from pan and let cool on a wire rack.

*This recipe is adapted from http://www.kingarthurflour.com/recipes/classic-sandwich-bread-recipe*

Olive Oil Sandwich Bread for the #EVOOChallenge from Sew You Think You Can Cook

Disclaimer: By participating in this 5 day challenge I received a bottle and pouch of Spartan Olive Oil. 

#EVOOChallenge: Winter Salad with Shallot Balsamic Vinaigrette

It’s day 2 of the #EVOOChallenge. This challenge, in which we make foods with the only cooking fat being olive oil, was issued by Spartan Olive Oil. The goal is to highlight the benefits of using olive oil over its less healthy counterparts, I’m looking at you butter and vegetable oil. Search the hashtag on social media to see more great recipes!

While both olive oil and vegetable oil have 120 Calories and 14 grams of fat per tbsp, olive oil has 10 grams of monounsaturated fat (the good fat) whereas vegetable oil has only 3 grams of monounsaturated fat. Monounsaturated fat is actually good for your health; it reduces bad cholesterol and provides vitamin E. (Source: American Heart Association)

This unfiltered extra-virgin olive oil is made from the olives of 700 year old trees in Sparta, Greece. The flavorful oil has a rich golden color and smooth texture. I wanted to highlight the nutty, fruity flavor of the oil in my recipes this week.

Shallot Confit for the #EVOOChallenge from Sew You Think You Can CookOne of the cookbooks I got for Christmas is The Chef Next Door by Amanda Freitag. While flipping through it for the first time we came across a recipe for Shallot Confit. I knew I just had to try it for this challenge! The recipe calls for a mix of olive and canola oils, but as that would go against the rules I omitted the canola oil. I was a little nervous about omitting the canola oil and didn’t think substituting was the right way to go either. I opted with using fewer shallots than called for. And it worked.

These shallots would be incredible as a pizza topping, would add a little something extra to a sandwich, and could even work well in an onion dip. I decided to add them to salad. And as a bonus I used some of the oil in a vinaigrette!

The shallots will keep up to two weeks in the oil.

Winter Salad with Shallot Balsamic Vinaigrette 

Ingredients:

  • 4 whole shallots, peeled and trimmed
  • 1 C + 1 tbsp olive oil, divided use
  • 1 tsp thyme
  • 1 tsp peppercorns
  • 1 can (15 oz) chickpeas, drained
  • 1 tsp garlic powder
  • 2 oz balsamic vinegar
  • 1/4 tsp Dijon mustard
  • mixed baby greens (I used spinach, swiss chard, and arugula)
  • crumbled Feta cheese
  • cooked, crumbled bacon
  • pear, sliced

Steps:

  1. Make shallot confit: Place shallots in a small saucepan with 1 C oil to cover. Add the thyme, peppercorns, and S+P. Bring to a simmer over medium heat, reduce heat to low and cook 25 minutes until shallots are easily pierced. Allow shallots to cool. Store in fridge, covered.
  2. Roast chickpeas: Lay chickpeas out on a clean towel and pat dry. Remove any lose skins. Leave chickpeas out until completely dried, about 45 minutes. Preheat oven to 400 degrees F. Line a baking sheet with aluminum foil. Lay chickpeas out on the prepared baking sheet. Roast 40 minutes, or until crunchy. Toss roasted chickpeas in 1 tbsp oil. Add the garlic powder and a little salt to taste.
  3. Make dressing: Put 3 oz of the shallot confit oil in a jar with the balsamic vinegar, Dijon, and S+P. Shake until combined.
  4. Assemble salad: Top greens with Feta, bacon, pears, chopped shallot confit, and roasted chickpeas. Drizzle with vinaigrette.

*The shallot recipe is adapted from The Chef Next Door*

*The chickpea recipe is adapted from Debbie at http://www.madefrompinterest.net/roasted-chickpeas-recipe/*

Winter Salad with Shallot Balsamic Vinaigrette for the #EVOOChallenge from Sew You Think You Can Cook

Disclaimer 1: By participating in this 5 day challenge I received a bottle and pouch of Spartan Olive Oil. 

Disclaimer 2: This post contains affiliate links. 

CIC: Goat Cheese and Mushrooms

CIC-header

It’s the 20th of the month and that means it’s time for another Crazy Ingredient Challenge reveal! The winning ingredients from the polls this month are Goat Cheese and Mushrooms. I know, it’s not really that crazy of a combination, but it’s still a good one!

I didn’t think I would partake because I don’t like mushrooms. If you read this blog you already know that. If you read this blog then you also know that the two boys in my house do like mushrooms.

Last week my mother-in-law and brother-in-law’s girlfriend came to visit. I asked if they had any dinner requests and they wanted my Ravioli with Mushrooms and Brussels Sprouts. I made a huge batch so bought 2 lb of mushrooms. With help in the kitchen I forgot to mention we wouldn’t need all of the 2 pounds to be diced but before I could remember that a massive pile of diced mushrooms were awaiting my next command. (Having help is awesome!)

Now I had a baggie of chopped mushrooms hanging out in my fridge. No one used them in their eggs the next morning so I decided to get some goat cheese and answer the challenge.

Earlier this week my husband worked a half day so I decided to make lunch. You know, something other than a bagel and cream cheese. I made a quesadilla with the two mandatory ingredients and added sun-dried tomatoes and mozzarella cheese for some sweetness and cheesiness. I purchased an herb and garlic flavored goat cheese to add a little pizzazz to the quesadilla.

My son has been in a highly picky phase right now. I’m hoping it’s related to his teething and we return to his more adventurous appetite soon. Foods that we know he likes he’s not wanting. He has been living on a diet of bread, cheese, and bananas. It is with immense relief that I tell you he ate this quesadilla – I just had to call it a sandwich to get him to consider trying it! Win!

Also a win – I liked this quesadilla, too! Looks like this blogging thing might turn me into a mushroom liker (I can’t quite say lover just yet) after all!

The following recipe is for 1 quesadilla.

Goat Cheese and Mushroom Quesadilla

Ingredients:

  • 2 tsp olive oil
  • 1/2 C diced mushrooms
  • 2 8″ whole wheat flour tortillas
  • 2 oz herb and garlic goat cheese
  • 2 sun-dried tomatoes, diced
  • 1/2 C shredded mozzarella cheese

Steps:

  1. In a small skillet over medium-high heat, saute mushrooms in olive oil until tender, about three minutes. Remove from heat and set aside.
  2. Spread 1 oz of goat cheese onto each tortilla.
  3. Place one tortilla, cheese side up, in a large skillet over medium heat. Distribute the mushrooms and sun-dried tomatoes over the tortillas. Add the shredded mozzarella and top with the other tortilla, cheese side down.
  4. Cook quesadilla until golden brown on both sides and the cheese is melted.

*This recipe is adapted from Andrea at http://www.taylormademarket.com/spinach-sundried-tomato-mushroom-goat-cheese-quesadilla/*

Goat Cheese and Mushroom Quesadilla for Crazy Ingredient Challenge from Sew You Think You Can Cook

To see the other bloggers who participated in this month’s Crazy Ingredient Challenge click on the link below.

Pineapple Beef Lettuce Cups

“Quick! The little man is sleeping! Go write something!”

At least that’s what the little voice in my head is telling me right now.

But it’s not telling me anything else!

Hello, writer’s block, we meet again.

How do you jump the hurdle and share a wonderful story? Help!

At least I have this great recipe to share with you, though. It’s Stir Fry Day Friday, everyone! And today’s edition is getting all dressed up in a bright lettuce cup suit. (I’d actually suggest some added bling by very finely dicing some more fresh pineapple as garnish and an extra drizzle of Sriracha to the lettuce cup!)

This recipe only serves two. In fact, it might be better off as a lunch or even an appetizer. However, you could always serve the stir fry over rice to “beef” it up for dinner.

Pineapple Beef Lettuce Cups

Ingredients:

  • 1 C cubed fresh pineapple
  • 1/4 C soy sauce
  • 1/4 C molasses
  • 2 tbsp apple cider vinegar
  • 1-2 tbsp Sriracha
  • 1 tbsp ketchup
  • 2 tsp minced garlic (I used Gourmet Garden stir-in chunky garlic paste)
  • 1 tsp grated fresh ginger (I used 1 tsp Gourmet Garden stir-in ginger paste)
  • 1 lb stir-fry beef strips
  • 1 tbsp vegetable oil
  • 1 red bell pepper, thinly sliced
  • 1/2 sweet onion, thinly sliced
  • 1 carrot, thinly sliced
  • 8 leaves Bibb lettuce
  • sesame seeds, for garnish

Steps:

  1. Place pineapple, soy sauce, molasses, vinegar, Sriracha, ketchup, garlic, and ginger in a blender. Blend until combined. Pour into a bowl and add the beef. Place in the fridge and marinate for 1-6 hours.
  2. Remove beef from the marinade. Heat the oil in a large, non-stick skillet (or wok) over medium-high heat. Stir-fry the beef for 3-5 minutes; do this in batches if needed so as not to over crowd the pan. Remove from skillet and cover to keep warm.
  3. In the same skillet or wok saute the thinly sliced veggies until tender, season with S+P. Remove and cover to keep warm.
  4. Assemble the wraps by dividing the beef and veggies among each leaf of lettuce. Garnish with sesame seeds and more Sriracha, if desired.

*This recipe is adapted from Liz at http://www.floatingkitchen.net/spicy-pineapple-beef-lettuce-wraps/*

Pineapple Beef Lettuce Cups | Sew You Think You Can Cook

And he’s awake. Until next time!

Weagle Weagle Chicken Salad

They always say you find things when you stop looking for them. Unfortunately you can’t trick that universal law into working faster!

A couple of weekends ago we had some friends over for game night. As is customary before company arrives the house becomes cleaner in ten minutes than it does all week. Unfortunately, that rush also means things are relocated and forgotten about.

One of those things that needed to be removed from my kitchen counter was a sheet of paper with some recipes on it. (Normally I write my recipes in a notebook, but laziness kept preventing me from grabbing that notebook and bringing it back in the kitchen.) Two of the four recipes were originals! So you can imagine my frustration when I couldn’t find that piece of paper. I may or may not have had a mini meltdown.

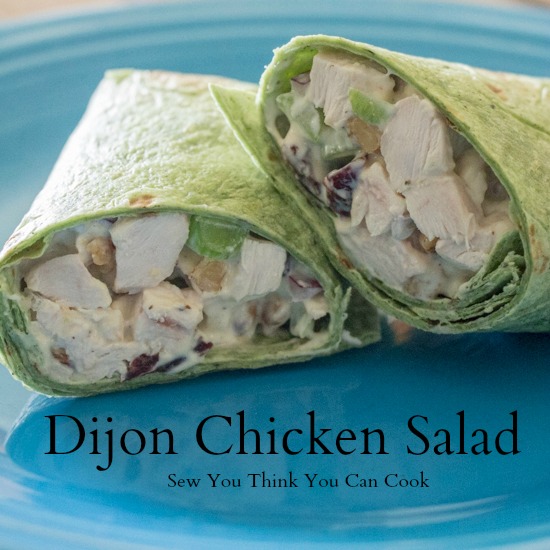
I needed one of those recipes to participate in Weekday Supper. #WeekdaySupper is a great movement by the #SundaySupper crew. Easy weeknight meals that can be done in under 30 minutes, without crazy, hard-to-find ingredients. I participated last month with my Green Eggs and Ham. The theme this month is Wraps. Conveniently my New Year’s Resolution recipe for March was a chicken salad, and one that I hadn’t yet shared with my readers.

I couldn’t find the recipe in time to submit to the Sunday Supper Movement webpage and thankfully was relieved of my stress by a good blogging friend, Wendy over at A Day in the Life at the Farm. While I don’t know Wendy personally, I feel like I do! We both participate in numerous blogging groups – Sunday Supper, Secret Recipe Club, Blogger CLUE, etc. So please go check out her page today, I know she put in great effort at the last minute to cover for me.

I was going to post a Thursday Thoughts today instead and this would’ve been the end of the post (along with the photos). But as luck would have it, I found that piece of paper a couple of days ago! Yay!

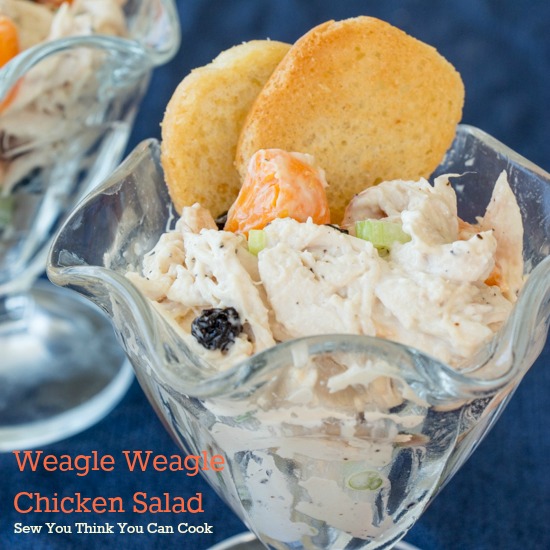
I created this chicken salad in response to a call for a new flavor at Chicken Salad Chick. While my concept didn’t make it to the voting round we were very happy with the resulting recipe. Chicken Salad Chick is an amazing chicken salad restaurant in Auburn – and have expanded to multiple locations in the south. (My favorite flavor is the Fruity Fran with apples and grapes.)

I wanted to create a chicken salad inspired by Auburn and chose fruits that were orange and blue. I chose to use clementines instead of oranges because they’re not as wet and dried blueberries instead of fresh because they’re sweet, tart, and unique. I added a little celery because I like having a crunch in my chicken salads. (I think adding pecans would be great, too!) In the dressing I used agave instead of honey in case my little man gave it a taste.

I hope you give my recipe a try and let me know what you think!

An Original Recipe

Weagle Weagle Chicken Salad

Ingredients:

  • 2 C cooked, shredded chicken
  • 1/2 C halved clementine segments
  • 1/4 C dried blueberries
  • 1/2 stalk celery, very finely diced
  • 1 scallion, thinly sliced
  • 1/4 C mayonnaise
  • 1 tsp agave
  • 1/2 tsp apple cider vinegar
  • 1/2 tsp Kosher salt
  • 1/4 tsp black pepper

Steps:

  1. In a large bowl, toss together chicken, clementines, blueberries, celery, and scallion.
  2. In a small bowl, whisk together mayo, agave, vinegar, S+P. Add as much dressing to the chicken salad as desired.
  3. Serve on a sandwich, in a wrap, with crackers, or simply eat it with a fork!

chicken salad with clementines and dried blueberries from Sew You Think You Can Cook