Creamy Chicken Noodle Soup

I have a confession to make.

I am not a fan of the everyone’s-favorite chicken noodle soup.

My soup preference is that of creamy, cheesy, thicker soups – like bisques and Panara’s Broccoli Cheese. So when Stuart requested some soup when the first cold hit in the fall I figured I’d try this new take on the classic. This creamy chicken noodle soup wasn’t a thicker version of the soup like I was anticipating, but did have a silkier quality to it.

This soup hit the spot!

Creamy Chicken Noodle Soup

Ingredients:

  • 1 1/2 tbsp olive oil
  • 1 yellow onion, chopped
  • 3 carrots, chopped
  • 3 stalks celery, chopped
  • 3 cloves garlic, minced
  • 2 cans (15 oz) chicken broth
  • 3 tbsp chopped fresh parsley
  • 2 bay leaves
  • 1 lb boneless, skinless chicken
  • 2 C uncooked egg noodles
  • 1/2 stick butter
  • 1/4 C flour
  • 2 1/2 C milk
  • 1/3 C heavy cream

Steps:

  1. Bring a large pot of salted water to a boil (for the egg noodles).
  2. Meanwhile, in a large pot heat olive oil over medium-high heat. Saute onions, carrots, and celery until tender. Add in the garlic and cook until fragrant, about 1 minute. Add the broth, parsley, and bay leaves. Season to taste with S+P.
  3. Add chicken to the soup, reduce to a simmer, cover and cook until chicken is cooked through. About 10 – 15 minutes. Remove chicken and set aside. Cut into bite size pieces.
  4. Cook egg noodles in boiling salted water according to package directions.
  5. In a medium saucepan over medium-high heat melt butter. Make a roux by stirring in the flour. Cook about 1 minute, until roux is lightly golden. Whisking constantly, slowly add in the milk. Whisk until there are no lumps. Stirring constantly, add the cream and bring to a boil. Add the cream mixture to the soup. Return the chicken to the soup along with the cooked egg noodles.

*This recipe is adapted from Jaclyn at http://www.cookingclassy.com/2014/08/creamy-chicken-noodle-soup/*

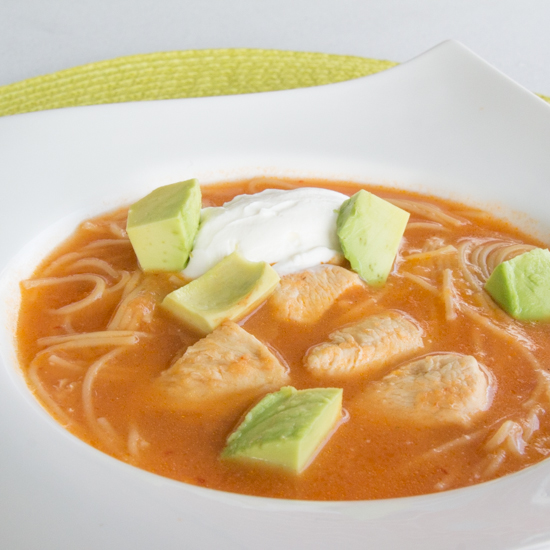
Houston, we have a problem!! I don’t have a photo of this soup! (Click on the link above for a visual of this soup.) I don’t know how this is possible. I made this soup back in October. As I search my camera for photos of this creamy noodle soup and coming up empty handed I have a vague memory of saying, “I’ll take pictures of the leftovers tomorrow when there’s light.” Evidently that didn’t happen! Maybe there wasn’t light. Maybe I simply forgot. Or maybe I was busy cooking other things. It’s also quite possible I never ate lunch the next day – that tends to happen with a newborn in the house.

I don’t pull food photos off my camera until I write the blog post so that way I don’t forget about recipes while they sit in folders on my computer. This means that there are photos on my camera that are almost a year old! But I have a gap from Father’s Day to Halloween. And somewhere in there should have been this soup! I highly appologize. I know it’s a big faux paux of food blogging to post without photography, but what can I do?! (Please don’t leave me!) It’s not like I still have some soup to snap a photo of today to post for tomorrow (yep, I’m writing this the day before it goes “live”.) It would probably be better if I wrote the blog post the day or day after I cooked and just scheduled that post for whenever I wanted, but I can’t keep up with that kind of schedule. This is real life people.

As a consolation prize, I’ll provide you with a photo of the cutest little baby boy ever! (If I do say so myself.)

IMG_1477

Mexican Noodle Soup

Are you ready for some football?? Or maybe just some good commercials?

The Super Bowl is Sunday and as such I have adopted a theme this week on Sew You Think You Can Cook. Soups!

Get it? Super Bowl….SOUP-er bowl… I just couldn’t help it.

I wanted to do this week of soups last year but lack of preparation meant I didn’t have five soups to share. So I did a week of popcorn instead. Honestly, that was probably more fun. But that’s because I’m a junk food junkie and popcorn is my kryptonite. This year, now that we live in Ohio, where it’s actually cold and grey, like all the time, soup makes sense. We’ve enjoyed this collection of soups I’m about to share over the past couple of months.

To kick off the week is a Mexican Monday applicable soup. But wait, it’s not Monday! Yesterday was my Secret Recipe Club reveal day (I will be sharing a soup from Susan’s blog on Friday too!). So let’s just pretend. But don’t pretend too hard, unless you really like Mondays.

I have a funny story to share about this Mexican Noodle Soup. I decided to make this soup during the day, so as to take advantage of some natural lighting. The beauty with soups is that they can be made in advance and instead of tasting like leftovers, they taste better! That was my thought at least. I left the soup on the stove covered over a low heat for a couple of hours, waiting for Stuart to get back from the gym. By the time he finally got home we had a pot of overcooked noodles in a chipotle sauce. These overcooked noodles were delicious! The chipotle tomato soup-turned-sauce was full of zip. A dollop of sour cream helps to mellow the spice from the chipotle. I think we will make this soup again and eat it as a soup, but if you’re wanting a Mexican pasta sauce, simply reduce it – a lot – and serve over properly cooked pasta.

Mexican Noodle Soup

Ingredients:

  • 2 large tomatoes, peeled and seeded
  • 1 onion, chopped
  • 1 – 2 chipotles in adobo, seeded (amount depends on your heat preference)
  • 3 tbsp olive oil, divided use
  • 2 boneless, skinless chicken breast, cut into cubes
  • 3 3/4 C chicken stock
  • 8 oz angel hair pasta
  • sour cream, for serving (optional)
  • avocado, for serving (optional)

Steps:

  1. Put tomatoes, onion, and chipotles in a blender. Puree until smooth. (I suggest starting with one chipotle pepper and tasting the puree before adding the second.)
  2. Heat 2 tbsp olive oil in a large pot over medium-high heat. Cook the chicken 3 minutes, or until cooked through. Remove and set aside.
  3. Add remaining tablespoon of olive oil. Reduce the heat to medium-low. Toast the noodles until lightly golden.
  4. Add in the tomato puree, chicken stock, and cooked chicken. Return heat to medium-high and cook 10 minutes or until pasta is al dente.
  5. Serve with sour cream and avocado.

*This recipe is adapted from The Illustrated Kitchen Bible*

Mexican Noodle Soup | Sew You Think You Can Cook

Disclaimer: This post contains affiliate links. 

SRC: Hummus and Pita

newsrcbanner

Today is another Secret Recipe Club Reveal Day! In the secret recipe club, each participating blogger is assigned a blog from another participating blogger and secretly searches their site for something to recreate. The accompanying blog post then goes live on reveal day! So while I was immersed in my assigned blog, someone else was picking through mine! I’m so excited to be part of this group, to see what on my blog peaks other’s interests and to stumble upon new blogs and new recipes.

This month I was assigned Susan’s blog The Wimpy Vegetarian. While Susan eats a mostly vegetarian diet, her husband does not. She has become very successful cooking for what she labels a “mixed marriage.” Her success in the kitchen of cooking for vegetarians and omnivores has lead her to a cookbook deal. In searching her website I have high aspirations for her cookbook.

I fell in love with Susan’s blog immediately. The layout of her page and her bright photography lulled me in and I stayed for her wonderful selection of recipes. Her beautiful page not only inspired me to take the plunge and update my recipe index but the entire look of my blog! If you like it, you can thank Susan. 😉

Over ten recipes made the cut for consideration for today’s reveal day. Two of them won the bid. And a third will be part of my collection of soups in anticipation for this weekend’s Super Bowl. Curry Apple Chips, Spiced Sweet Potato Fries, and Honey Cornbread are just a few of the recipes that I vow to try. (And now that reveal day is here I can finally subscribe to her blog via email!) But for now I will be sharing Hummus with Roasted Tomatoes AND Whole Wheat Pita.

I was able to check two items off my culinary bucket list thanks to Susan!  I knew that hummus was simple enough to make, especially taking advantage of canned garbanzo beans (sorry, Susan!), but I always shoved it off with a comment of “one day.” Making homemade pita wasn’t something I thought I’d tackle so soon, but how can I serve hummus during a football game without some pita bread to go with it? Conveniently, Susan had a recipe for this too. And I have to say, it wasn’t as difficult as I’d anticipated! However, I’m not sure if I went wrong in the baking time because my pita didn’t deflate – at least not the same day. I put the leftover bread in a resealable bag and stored it in the fridge. Just 10 seconds in the microwave yielded perfect pita for dipping in homemade hummus. It really is best served warm.

Hummus with Roasted Tomatoes

Ingredients:

  • 6 roma tomatoes
  • 1/4 C olive oil
  • 1/2 tsp dried thyme
  • 2 tsp balsamic vinegar
  • 2 1/2 C cooked garbanzo beans (just under 2 15.5oz cans)
  • 3 tbsp Tahini
  • 1 tsp paprika
  • 1 tsp white pepper
  • 1 tsp salt
  • 1 tsp cumin
  • 2 tsp lemon juice
  • 3/4 C water

Steps:

  1. Preheat oven to 300 degrees F. Line a rimmed baking sheet with parchment paper.
  2. Slice tomatoes in half and place cut side up on the baking sheet. Drizzle with olive oil and season with the thyme and S+P. Bake 4 hours. Pour balsamic vinegar over the roasted tomatoes and let cool. Chop to desired size. (Note: Not all of these tomatoes will be used for the hummus, they will keep in the fridge for up to 1 month.)
  3. In a food processor pulse garbanzo beans, tahini, paprika, white pepper, salt, cumin, and lemon juice. When a smooth paste is acheived slowly add the water, puree until completely smooth.
  4. Mix in 2 tbsp of the roasted tomatoes.

*These recipes are adapted from Susan at http://thewimpyvegetarian.com/2013/05/sundaysupper-roasted-balsamic-tomatoes/ and http://thewimpyvegetarian.com/2014/02/vegan-appetizer-roasted-tomato-hummus-sundaysupper-super-eats-for-game-day/*

Whole Wheat Pita

Ingredients:

  • 2 tsp instant yeast (just under 1 packet)
  • 1 tsp honey
  • 1 1/4 C warm water (110 degrees F)
  • 2 C bread flour
  • 1 C whole wheat flour
  • 1 1/2 tsp salt
  • 2 tbsp olive oil

Steps:

  1. Gently stir yeast and honey in the warm water. Set aside and allow yeast to foam for 10 minutes.
  2. In the bowl of a stand mixer, combine both flours and salt. Add the proofed yeast mixture and olive oil. Using the dough hook, knead until the dough comes together around the dough hook. Turn the dough out onto a clean surface and knead until completely smooth, add more whole wheat flour if too sticky. Form the dough into a ball.
  3. Place the dough in a lightly greased bowl. Cover and set aside in warm location for two hours, or until doubled in size. (I did this in my microwave.)
  4. Divide the dough into 8 disks. Cover and let rest 20 minutes.
  5. Place a pizza stone in the center rack of the oven. Preheat oven to 500 degrees F.
  6. Roll each disk into an 8″ pita. Be sure to run the rolling pin along the edges of the pita. Cover and let rest another 10 minutes.
  7. Cook pita on the pizza stone for 3 minutes. Do this in batches so that the entire pita is in contact with the stone – not overlapping or hanging off the edge.

*This recipe is adapted from Susan at http://thewimpyvegetarian.com/2012/12/easy-whole-wheat-pita-bread/*

Hummus & Pita | Sew You Think You Can Cook

To see the other bloggers who participated in the Secret Recipe Club this month click here:

Disclaimer: This post contains affiliate links.

Pineapple Fried Rice

The next time you make rice as a side dish to your dinner, I encourage you to make extra. 3 C worth of extra rice to be exact. Or just make this dish from scratch, just plan for extra time to cook the rice. For 3 cups of cooked rice, you’ll need approximately 1 cup of uncooked rice (and two cups of liquid).

Today’s Stir Fry Day Friday is a perfect side dish to accompany fish or chicken. I served it alongside my Brown Sugar Honey Mustard Glazed Salmon.

This fried rice isn’t your typical Chinese take out or Hibachi staple. This rice gets a kick from the ginger and a tropical sweetness from the fresh pineapple.

Pineapple Fried Rice

Ingredients:

  • 2 tbsp canola oil
  • 1 1/2 tsp grated ginger
  • 2 cloves garlic, minced
  • 1 small onion, diced
  • 3 scallions, chopped
  • 1 carrot, diced
  • 1/2 bell pepper, diced
  • 1/4 C peas
  • 1 1/4 C pineapple, cubed
  • 3 C cooked rice
  • 2 1/2 tbsp soy sauce
  • 1/2 tsp white pepper

Steps:

  1. In a wok or large skillet heat oil over medium-high heat. Stir fry the ginger and garlic until fragrant, 30 seconds. Add in the onions and white parts of the scallions. Cook until tender.
  2. Add the carrots, bell pepper, and peas. Cook for 2 minutes. Add the pineapple and cook another minute. Add the rice, soy sauce, and white pepper. Reduce heat to medium and cook two minutes. Add additional salt if desired. Garnish with green parts of the scallions.

*This recipe is adapted from Manali at http://www.cookwithmanali.com/pineapple-fried-rice/*

Pineapple Fried Rice | Sew You Think You Can Cook

recreatedbysrc

Braised Chicken Thighs with Cinnamon and Tomato

Alex Guarnaschelli is one of those Food Network stars that I would just love to meet. I stalk her instagram account and Facebook page to see everything she’s cooking up in the kitchen. My favorite posts are those in which she states her cravings – from bacon and pancakes, to ice cream and salad. I even follow the instagram account for her restaurant Butter. As if eating at her establishment wasn’t already on my bucket list, seeing photos of gourmet burgers, elegant breakfasts, and creative desserts makes me wish I could hop on a plane to NYC at the drop of a hat.

Two Christmases ago I received her first cookbook, Old-School Comfort Food: The Way I Learned to Cook. I’ve already shared her Breaded Chicken with Mustard and Sherry. Today I’m sharing another chicken dish. Alex titled this recipe Braised Chicken Legs with Ginger and Tomato. I’ve renamed it as you can see in today’s post title. I bought only thighs for this dish as a combination of thighs and drumsticks wasn’t available at my grocery store. I also found that the cinnamon flavor profile was stronger than the ginger. You might think it’s weird to cook chicken with cinnamon, but trust me on this one. No, trust Alex! She says:

“[My mom] edited an amazing Indian cookbook that made her revise the chicken tomato combo and add hauntingly flavorful spices like cinnamon, which evokes the sweetness of the tomatoes.”

I hardly ever cook with chicken thighs. My mom is a bone-less, skin-less chicken breast kind of girl and so that’s what I am also accustomed to, and what I usually buy when chicken is on my list. It’s easy. Because using dark meat isn’t something I’m exactly comfortable with, I’m never convinced I’ve cooked it completely. White meat is more obvious – zero pink and juices run clear. Dark meat doesn’t turn white. And when there’s a bone involved there’s usually some red/pink close to the bone which always makes me paranoid that I didn’t really cook it through all the way. I bought a giant pack of chicken thighs though, so there’s lot of practice in my future.

For this dish, I was really excited when my chicken skins were crispy after browning them. But then they get braised and that crispy skin is no more. Keeping the skin on the chicken though helps ensure that the meat won’t dry out.

Braised Chicken Thighs with Cinnamon and Tomato

Ingredients:

  • 2 tbsp canola oil
  • 4 bone-in, skin-on chicken thighs
  • 1/2 tsp red pepper flakes
  • 1 white onion, diced
  • 1/4 tsp cumin
  • 1″ piece of ginger, grated
  • 2 cloves garlic, minced
  • 1 cinnamon stick
  • 1 bay leaf
  • 3/4 C white wine
  • 1 can (14 oz) peeled whole tomatoes
  • 1 tbsp butter

Steps:

  1. In a large, high-sided skillet heat oil over medium-high heat.
  2. Season both sides of chicken with S+P and red pepper flakes. Add to the hot oil skin-side down. Brown for 8 minutes, flip and cook another 5 minutes. Remove and set aside.
  3. Add the onions and stir in the cumin. Cook 5 minutes. Stir in the ginger and garlic, cinnamon stick, and bay leaf. Add in the white wine and cook until reduced by half, about 8 minutes. Add the canned tomatoes and cook simmer 10 minutes.
  4. Gently break up the tomatoes. Return the chicken to the pan. Cook over low heat for 30 minutes, or until chicken is cooked through.
  5. Stir in butter and remove cinnamon and bay leaf. Serve with wild rice.

Braised Chicken Thighs with Cinnamon and Tomatoes

Disclaimer: This post contains affiliate links.

CIC: Lemongrass & Quinoa

CIC-header

I am pretty excited about this month’s Crazy Ingredient Challenge. While I didn’t vote for either of these ingredients, I’m glad they won. These two ingredients lend themselves towards healthy cooking, perfect for that post-holiday detox. I’m looking forward to seeing what everyone else made.

I actually found my inspiration during a search of ideas for my new Stir Fry Day Friday theme this year. Lemongrass shrimp. I reserved some of the flavoring mixture to mix into the quinoa. (I wanted to combine the two ingredients, not serve them together.) So if you don’t like or don’t want the shrimp, you can still have a beautiful, flavorful quinoa as a side to your protein of choice. You could even substitute chicken and keep the lemongrass flavor elements.

Lemongrass Shrimp with Quinoa

Ingredients:

  • 1 C uncooked quinoa
  • 2 1/2 tbsp lemongrass paste
  • zest 1 lime
  • 2 cloves garlic, minced
  • 3 tsp grated ginger
  • 1-2 tsp chili paste, to taste
  • 1 tbsp canola oil
  • 1 lb shrimp
  • 1 tbsp fish sauce

Steps:

  1. Cook quinoa according to package direction. (General rule of thumb is 1 C quinoa:2 C liquid)
  2. In a small bowl combine lemongrass, lime zest, garlic, ginger, and chili paste. Set aside 1/3 of the mixture for the quinoa.
  3. Heat the canola oil in a skillet over medium high heat. Cook shrimp 2 minutes on each side, or until cooked through. Stir in 2/3 of the lemongrass mixture and cook one minute. Toss in the fish sauce.
  4. Mix the remaining lemongrass mixture into the cooked quinoa.
  5. Serve shimp overtop the quinoa.

*The shrimp recipe is adapted from Adam at http://unorthodoxepicure.com/2014/10/02/food-snob-chronicles-shrimp-the-real-chicken-of-the-sea-2/*

Lemongrass Shrimp | Sew You Think You Can Cook

To see the other bloggers who participated in this month’s Crazy Ingredient Challenge click on the link below.

Slow Cooker Honey Sriracha Chicken and Cabbage

Don’t call the doctor, you’re not experiencing dejavu. Yes, I posted a Honey Sriracha Chicken dish yesterday. Yes the ingredients in this slow cooker dish are the exact same. But here’s why.

When we had our friends over for that Honey Sriracha Chicken Stir Fry she asked me if I thought it could be done as a slow cooker meal. Because we loved the stir fry enough, I happily answered her question by testing it out!

The result was yet another wonderful sweet and spicy dinner. While we did prefer it as a stir fry, this version is a perfect alternative for those busy days. I doubled the sauce to ensure there was enough liquid in the slow cooker. Doing so also created that extra heat we were missing. The heat didn’t hit you right away but built with every bite. No extra sriracha or chili flakes needed. Not that that means you can’t add more!

Slow Cooker Honey Sriracha Chicken and Cabbage

Ingredients:

  • 3/4 head green cabbage, chopped
  • 3 large chicken breasts
  • 1/2 C honey
  • 2 tbsp Sriracha
  • 2 tbsp sherry cooking wine
  • 2 tbsp white distilled vinegar
  • 2 tsp corn starch
  • 1/4 C chicken broth

Steps:

  1. Place chopped cabbage in the bottom of a slow cooker. Place chicken on top of the cabbage and season liberally with S+P.
  2. In a bowl, whisk together the honey, Sriracha, sherry, and vinegar. Pour over chicken. Cook on LOW 6 hours.
  3. Remove chicken from slow cooker, cover.
  4. Make a slurry by whisking together cornstarch and chicken stock. Add to the slow cooker and stir to combine. Cook on HIGH 15 minutes.
  5. Cut or shred chicken and return to slow cooker. Keep WARM until ready to serve. Serve over rice.

Slow Cooker Honey Sriracha Chicken and Cabbage | Sew You Think You Can Cook

Honey Sriracha Chicken Stir Fry

Friends of ours from Florida moved up here to Ohio the summer before last. (Their going away party then was actually one of my first blog posts – my blueberry bars! It’s still my most popular recipe.) Well, they’re now leaving us again.

I’m really bummed about their move this time because they have a beautiful baby boy who is only one day older than my little man. I was hoping to have more than only a few months worth of play dates with these two. I loved having someone I could easily relate to locally as well. But, that’s what phones are for!

We had them over for dinner before they left and they happily experimented a new Stir Fry Day Friday recipe with us. I suggested a couple recipes and this one won the vote. It was a huge it! She took the recipe home with her (of course, she can also catch it here!).

I promise you this stir fry has much more flavor than it looks. I was so bummed when I realized how bland this dish appeared to be. My tastebuds happily disagreed with my eyes, and we will be making it again.

The honey balanced the Sriracha very well and this dish wasn’t very spicy. If you want some more heat I suggest adding a little more Sriracha to the sauce or tossing in some red pepper flakes. But this gentle back note of heat is perfect for every palate. You can always put the Sriracha bottle on the table for those wanting more pizzazz.

Since we both have kiddos who are just now starting to experiment with solid foods, I’d like to add the disclaimer that this dish is not one that’s safe for infants. Once they really are eating off our plates forgo the honey and try using maple syrup, agave, or maybe even brown sugar instead.

Honey Sriracha Chicken Stir Fry

Ingredients:

  • 1/4 C honey
  • 1 tbsp white distilled vinegar
  • 1 tbsp sherry cooking wine
  • 1 tbsp Sriracha
  • 1 1/4 tsp salt
  • 2 tbsp canola oil
  • 1 lb boneless, skinless chicken breast, sliced
  • 1 tsp grated ginger
  • 3 cloves garlic, minced
  • 3/4 head green cabbage, chopped
  • 2 tsp cornstarch
  • 1/4 C chicken broth
  • 3 scallions, chopped

Steps:

  1. In a small bowl whisk together the honey, vinegar, sherry, Sriracha, and salt. Set aside.
  2. Heat oil in a large skillet over medium-high heat. Brown the chicken for 2 minutes on each side. Remove and set aside.
  3. In the same skillet, stir fry the ginger and garlic for 30 seconds. Add the cabbage and toss to coat. Stir in the sauce from step 1. Cover and cook 2 minutes, until cabbage is wilted.
  4. In a small bowl, whisk together the cornstarch and chicken broth. Add it to the skillet. Bring to a simmer and return the chicken to the pan. Cook another 3 minutes, or until chicken is fully cooked.
  5. Garnish with chopped scallions and serve with rice.

*This recipe is adapted from Katie at http://www.healthyseasonalrecipes.com/honey-sriracha-chicken-cashew-stir-fry/*

Honey Sriracha Chicken Stir Fry | Sew You Think You Can Cook

#BundtBakers: Coconut

4ae7b-bundtbakerspostToday is the first #BundtBakers post of the new year! #BundtBakers is a group of bundt loving bakers who get together once a month to bake bundts with a common ingredient or theme. We take turns hosting each month and choosing the theme or ingredient. This month’s theme is coconut and our lovely host is Terri of Love and Confections.

I wasn’t sure I was going to participate in today’s bundt challenge because I’m allergic to coconut. But for Christmas I got not just one but two new bundt pans and I was itching to use them. I am now the ecstatic owner of the Bundt Duet Pan and the Garland Bundt Pan.

My husband’s birthday was last Friday and he loves Almond Joys, so I decided I could make bundtlettes for him (and #BundtBakers) and reserve one to be coconut free for me. (I should have saved me two, not just one!) Last year I tried making him Almond Joy Cupcakes which turned into Chocolate and Peanut Butter Cupcakes. So it was time for redemption. Yet again, I ran into frosting problems. It wasn’t a flavor/execution problem this time though! chocolate bundtlettes When I turned my bundtlettes out of the mold I realized there was no way I wanted to cover them up with frosting. They’re just too pretty! Turns out I didn’t have almond extract like I thought either. So instead, I made a ganache and garnished these little cakes with slivered almonds and coconut flakes. If you really want to play with the coconut flavor try adding 1/4 tsp coconut extract to the ganache!

This chocolate cake batter uses buttermilk and yields an incredibly rich, moist cake. My favorite part was the crusty edge.

I got six 1 C bundtlettes and one 2.5 C bundt out of this batter amount. According to the original recipe it will also make 24 cupcakes.

Almond Joy Bundtlettes

Ingredients:

  • 2 C flour
  • 2 C sugar
  • 3/4 C cocoa powder
  • 1 1/2 tsp baking powder
  • 3/4 tsp baking soda
  • 1/2 tsp salt
  • 4 eggs
  • 1 tbsp vanilla extract
  • 1 C buttermilk
  • 1 stick butter, melted and cooled slightly
  • 4 oz semi-sweet chocolate chips
  • 1/2 C heavy cream
  • slivered almonds, for garnish
  • sweetened coconut flakes, for garnish

Steps:

  1. Preheat oven to 350 degrees F. Grease six 1 C bundtlettes and one 2.5 C bundt pan.
  2. Whisk flour, sugar, cocoa powder, baking powder, baking soda, and salt in the bowl of a stand mixer until completely combine. Until it looks like a packaged cake mix!
  3. Add in the eggs, vanilla, and buttermilk. Mix for a few seconds before adding in the butter; to prevent the eggs from scrambling if the butter is still hot. Batter will be thick.
  4. Fill prepared bundt pans. Bake the bundtlettes for 25 minutes and the bundt for 30, or until a knife inserted comes out cleanly. Allow cakes to cool slightly in the pan before turning out onto a cooling rack.
  5. Prepare ganache: In a microwave safe bowl, heat chocolate chips and heavy cream for 30 seconds. Stir. Repeat until mixture is smooth. While the ganache is still warm, pour over the cakes. Garnish with slivered almonds and coconut.

*This recipe is adapted from Kristan at http://www.confessionsofacookbookqueen.com/2013/03/almond-joy-cupcakes/*

Almond Joy Bundts | Sew You Think You Can Cook

If you are a food blogger and would like to join us, just send an email with your blog URL to foodlustpeoplelove@gmail.com. All recipes and photographs can be found on our individual blogs, on our Pinterest board, and the#bundtbakers homepage.

And don’t forget to take a peek at what other talented bakers have baked this month:

Candy Bar Chocolate Coconut Bundt Cake by Terri from Love and Confections

Chocolate Italian Cake by Renee from Magnolia Days

Chocolate Chip and Key Lime Bundt Cake by Julie from Eat, Drink and Be Mighty

Coconut and Banana Bundt Cake by Victoria from Just One Bite Baking

Coconut Banana Bundt Cake by Kathia from Basic N Delicious

Coconut Carrot Bundt Cake by Anna from Media Racion Doble, Por Favor

Coconut Cream Bundt Cake by Andrea from Adventures in All Things Food

Coconut Hummingbird Bundt Cake by Patricia from Patty’s Cake

Coconut Milk Bundt Cake by Beatriz from I Love Bundt Cakes

Coconut Milk Bundt Cake by Samantha from Un Mordisco Un Pecado

Coconut Oil Pound Cake by Laura  from The Spiced Life

Coconut Sugar Banana Cake by Jelena from A Kingdom for a Cake

Cranberries and Coconut Bundt Cake by Aisha from La Cocina de Aisha

Cranberry, Orange and Coconut Bundt Cake from Kids & Chic

German Chocolate Bundt Cake by Teri from The Freshman Cook

Glazed Chocolate Macaroon Bundt Cake by Stacy from Food Lust People Love

Gluten-free Coconut Orange Bundt Cake with Coconut Whipped Cream by Cassandra from Cassie’s Kitchen

Gizzada Mini Bundts by Kelly from Passion Kneaded

Key Lime Coconut Cream Bundt by Wendy from A Day in the Life on the Farm

Mini Samoa Bundt Cakes by Rebekah from Making Miracles

Orange and Coconut Bundt Cake by Catherine from Living the Gourmet

Oreo Coconut Bundt Cake by Shilpi from Indian Curries/Stew

Pina Colada Bundt Cake by Jane from Jane’s Adventures in Dinner

Rhubarb n Rose Coconut Frosted Bundt Cake by Laura from Baking in Pyjamas

Rum Bundt Cake with Coconut and Lime by MB from Bourbon and Brown Sugar

Toasted Coconut and Sweet Potato Bundt by Margaret from Tea and Scones

Toasted Coconut Lime Bundt Cake with Chili Lime Glaze by Tux from Brooklyn Homemaker

recreatedbysrc

Mozzarella Stuffed Turkey Meatballs

After we found out we’d be moving to Ohio I started to do some Facebook research on the spouse group connected to my husband’s organization here. I was excited to discover that there were multiple clubs and plenty of opportunities to get to know people.

One of the groups is the Recipe Club. You can imagine that I was excited for this one! It took five months before I could fit this extracurricular activity into my new mom schedule. I could have gone in December and was prepared to bring Broccoli and Grape Pasta Salad but I came down with a winter fever the night before.

Last week I was not only able to attend, but the theme of the night of “New Recipes” (something you’ve never tried before) fit in perfectly with a food blogger’s normal kitchen routine. The meatballs I was even planning to make could easily be adjusted to feed more and bring to the potluck-style event. Don’t worry, I did hold a few back for Stuart.

If you bring these to a party you can make them a but smaller than I did (or not!) and provide marinara for dipping. If you have these for dinner just whip up a quick batch of pasta! The leftovers can easily be made into an epic sandwich, too.

Mozzarella Stuffed Turkey Meatballs

Ingredients:

  • 1 1/2 lb ground turkey
  • 3 cloves garlic, minced
  • 2 eggs
  • 3/4 C freshly grated parmesan cheese
  • 1 C Italian seasoned breadcrumbs
  • 20 cubes mozzarella, from approximately 4 oz
  • 3 tbsp olive oil

Steps:

  1. In a large bowl, use your hands or a wooden spoon to combine the ground turkey with garlic, eggs, parmesan, breadcrumbs, and S+P.
  2. Form balls from 1 tbsp of the meat mixture. Place a cube of cheese into the ball, grab a little more of the meat mixture and seal it up. Repeat until all the meat is used up – I got 20 golfball sized meatballs.
  3. Preheat oven to 400 degrees F.
  4. Heat olive oil in a large skillet over medium-high heat. Brown meatballs 2 minutes on each side. (I had to do this in two batches of 10.)
  5. Bake meatballs in a lightly greased casserole dish for 10-13 minutes, or until cooked through.

*This recipe is modified from Kayle at http://www.cookingactress.com/2014/12/mozzarella-stuffed-meatballs.html*

Mozzarella Stuffed Meatballs | Sew You Think You Can Cook