Today I have a super adorable quilt tutorial to share with you. But before I get to that I have an important piece of business to attend to. This quilt was made for Luke. Luke is the 2 month old son of very good friends of ours back in Florida. At his one week well-baby check-up Luke was diagnosed with a congenital heart defect. The severity of his condition is still being evaluted, but it is likely that Luke will require surgery well before his first birthday. You can follow Luke’s story here.
This week (2/7-2/14) is Congenital Heart Defect/Disease (CHD) Awareness Week. Congenital heart defects are the #1 birth defect, occuring in 1% of newborns – in the US that’s close to 40,000 infants each year. While some heart defects can be detected during utrasounds before birth, a CHD is usually detected by an abnormal sound or murmur of the infant’s heart. Other symptoms include fast breathing, excessive sweating, poor feeding/weight gain, or a bluish tint to the baby’s skin, lips, or fingernails. Depending on the severity of the heart defect immediate surgery could be required. 25% of children born with a CHD will require heart surgery, however surgery isn’t always a cure and most will require additional procedures and medications as adults. People with CHDs have a life-long risk of health problems, including growth and developmental delays, difficulty exercising, heart failure, and sudden cardiac arrest or stroke.
The cost for inpatient CHD surgery exceeds $2.2 billion each year. Here’s how you can help: The Children’s Heart Foundation (CHF) is the only organization in America that solely funds CHD research. They have generated over $6.3 million towards CHD research since 1996. 75% of the donations CHF receives goes directly to research and research-related education.
Resources: The Children’s Heart Foundation, Mended Little Hearts, The American Heart Association

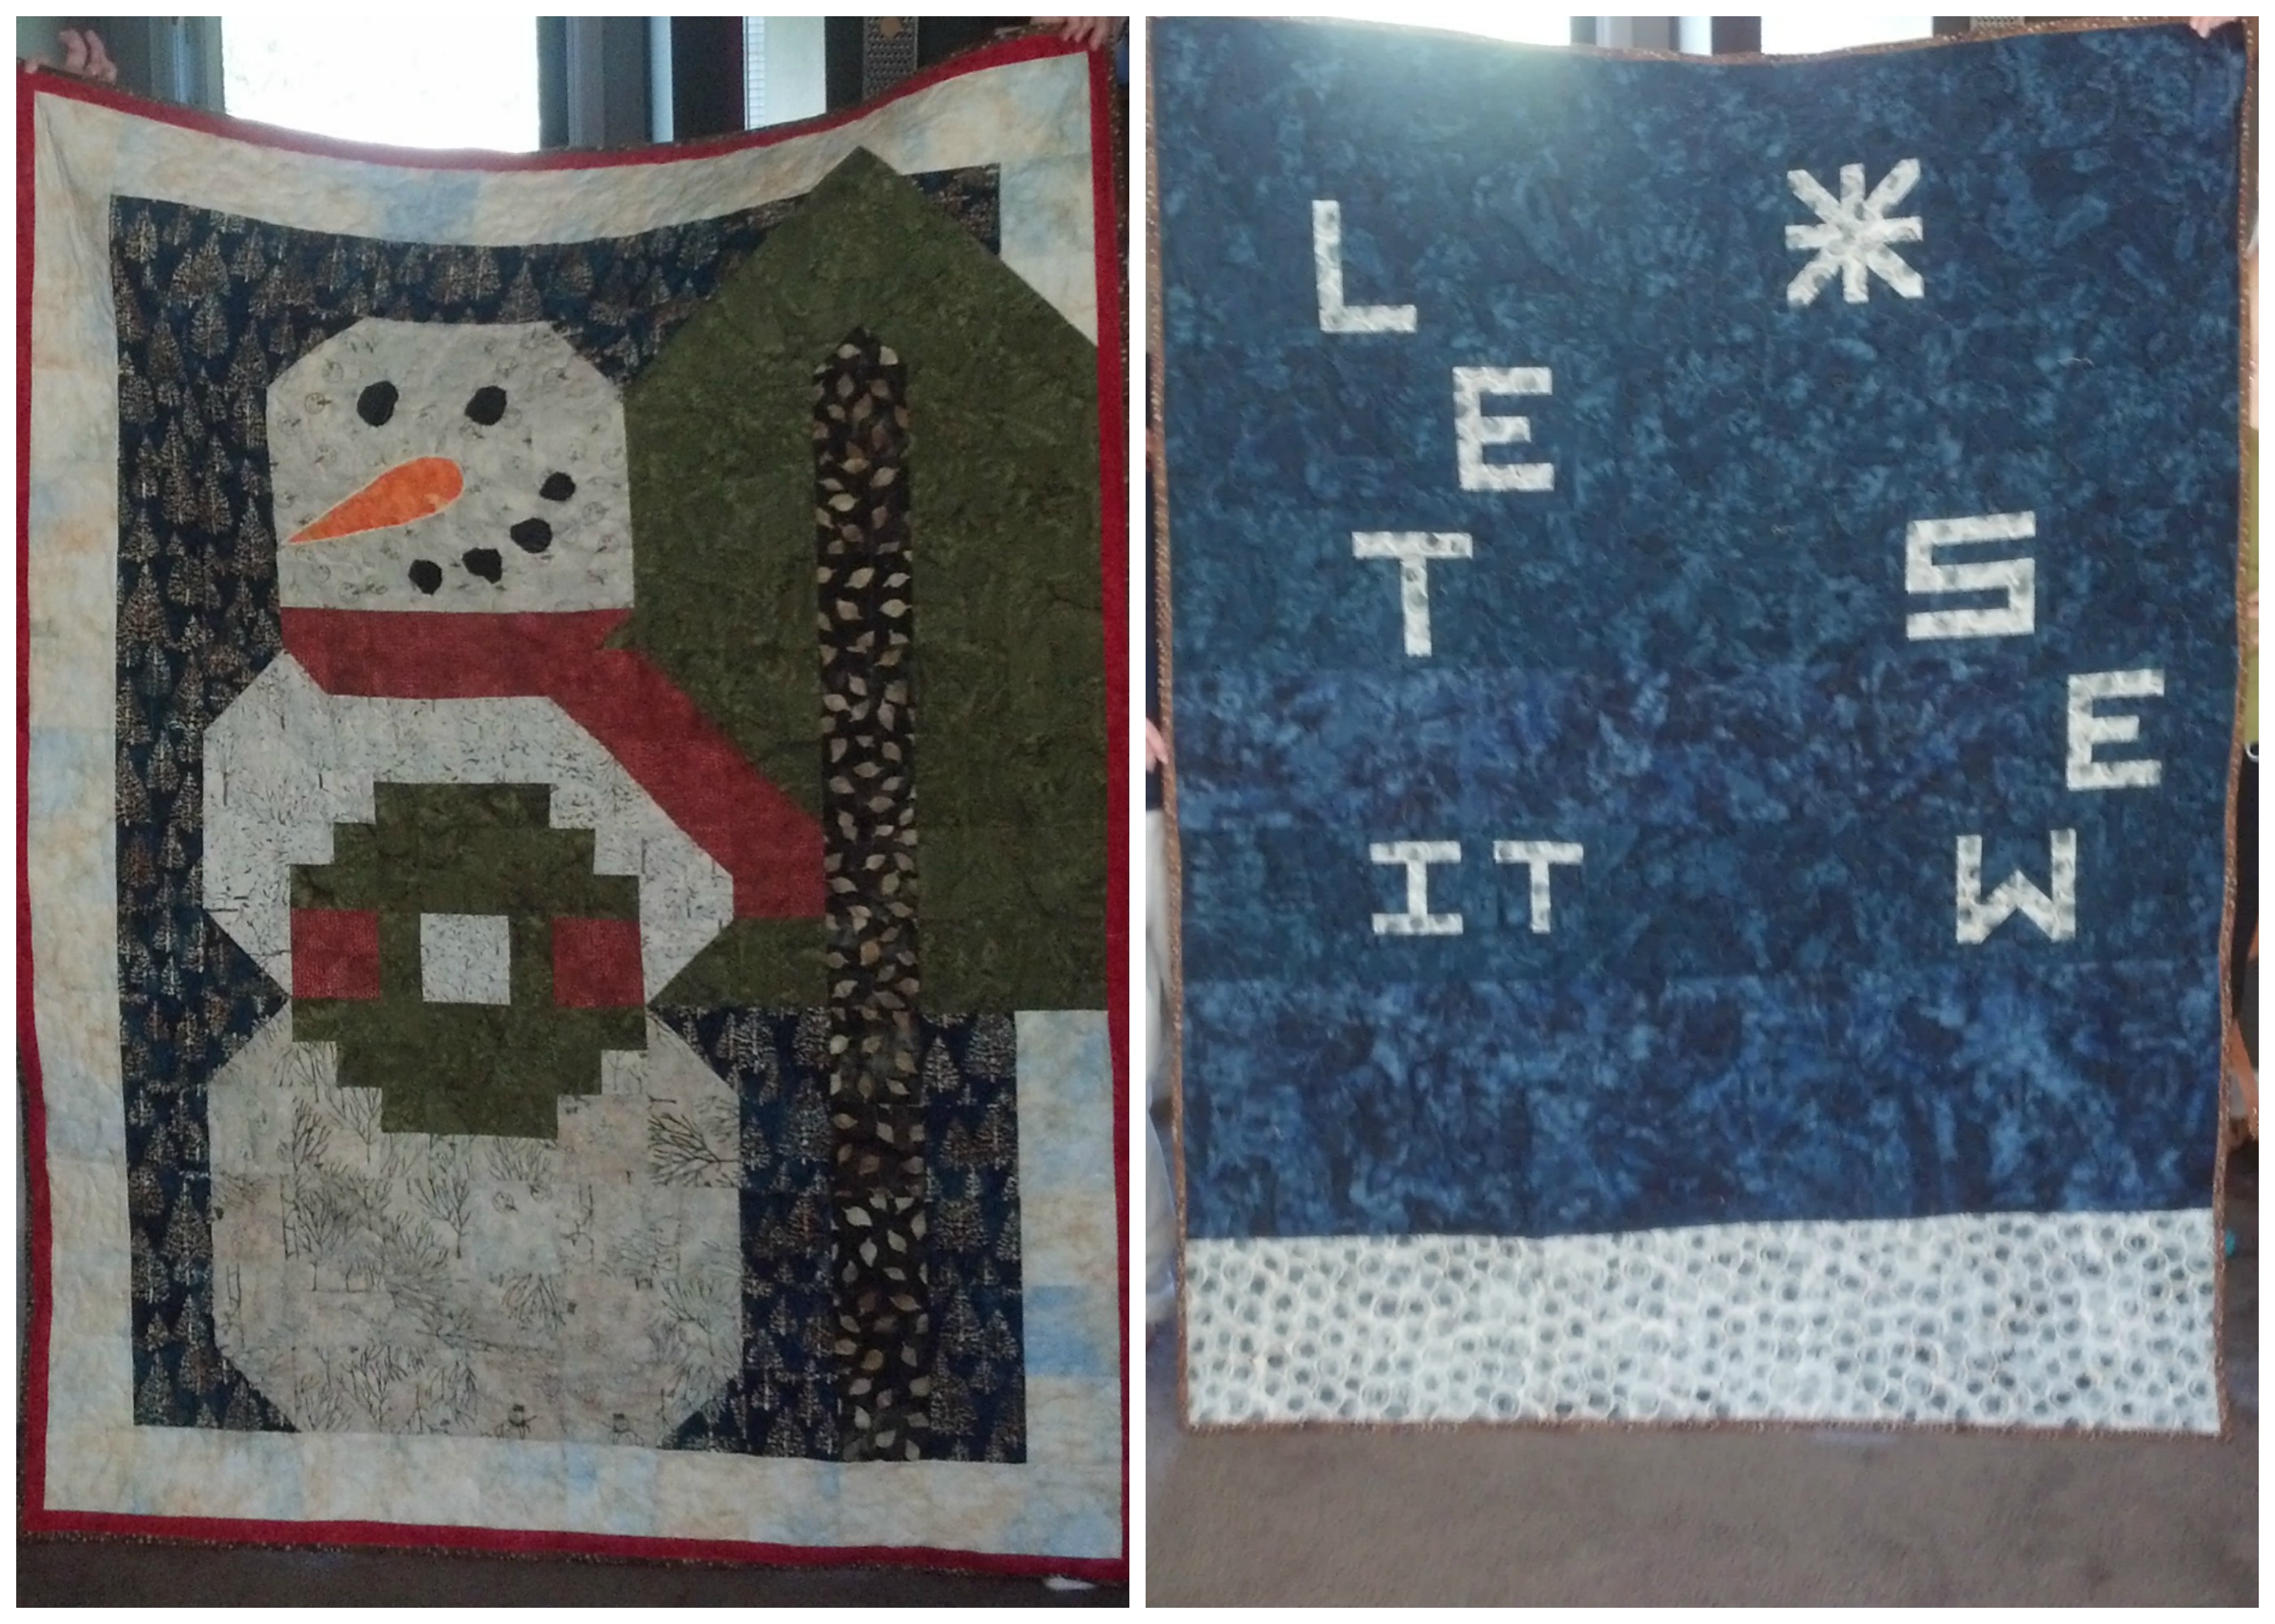
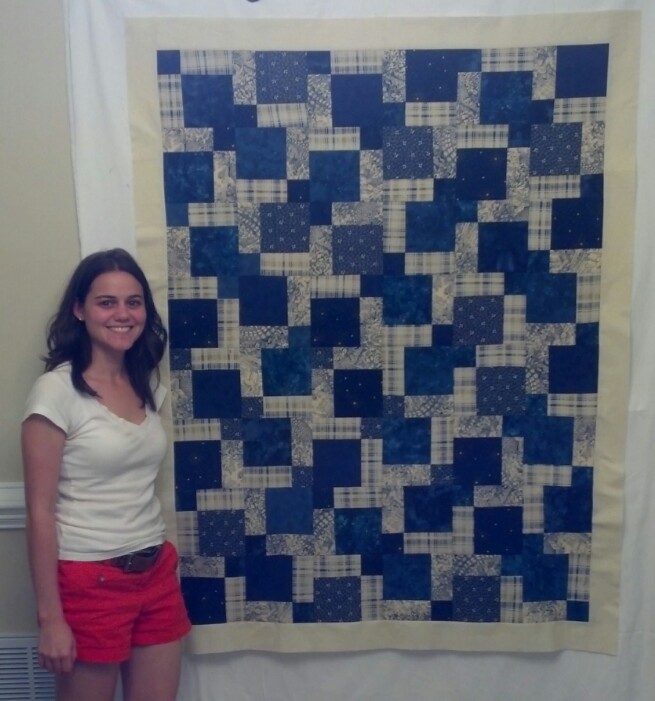
The quilt I made for Luke follows a pattern I found on Pinterest. This free pattern comes from favoritefabric.com. If you purchase new fabric for this quilt feel free to follow their instructions. I used fabrics already in my possession for this quilt and therefore have different (and in my opinion less confusing) tutorial steps. After piecing together the blocks the quilt was simply too big for a tummy time quilt – the original finished quilt was 40.5″ x 52.5″. Mine is 41″ x 45″. (You can probably chalk that extra half inch to my seam allowance “skills”.) With a total of 13 different fabrics, this quilt has a lot of character and dimension. Luke’s parents knew they were having a boy so I looked through my collection for some great blues, greys, and tans to use. It wasn’t until “Heart of a Hero” was well underway that we found out his nursery was to be yellow and grey; oh well! And now that this quilt is named, I can only imagine how it would look in reds! Looks like I’m getting an itch to make another version….
Here’s the how-to for “Heart of a Hero”
Cut fabric:
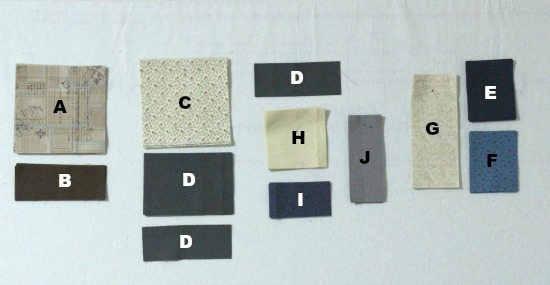
- 8 squares 6 1/2″ fabric A
- 8 rectangles 6 1/2″ x 2 1/2″ fabric B
- 7 squares 6 1/2″ fabric C
- 6 rectangles 6 1/2″ x 4 1/2″ fabric D
- 3 rectangles 6 1/2″ x 2 1/2″ fabric D
- 7 rectangles 4 1/2″ x 3 1/2″ fabric E
- 7 rectangles 4 1/2″ x 3 1/2″ fabric F
- 7 rectangles 3 1/2″ x 8 1/2″ fabric G
- 8 squares 4 1/2″ fabric H
- 8 rectangles 4 1/2″ x 2 1/2″ fabric I
- 8 rectangles 2 1/2″ x 6 1/2″ fabric J
- for the border: 1/3 yd
- for the back: 2 3/4 yd
- for the batting: 2 3/4 yd
- for the binding: 1/3 yd
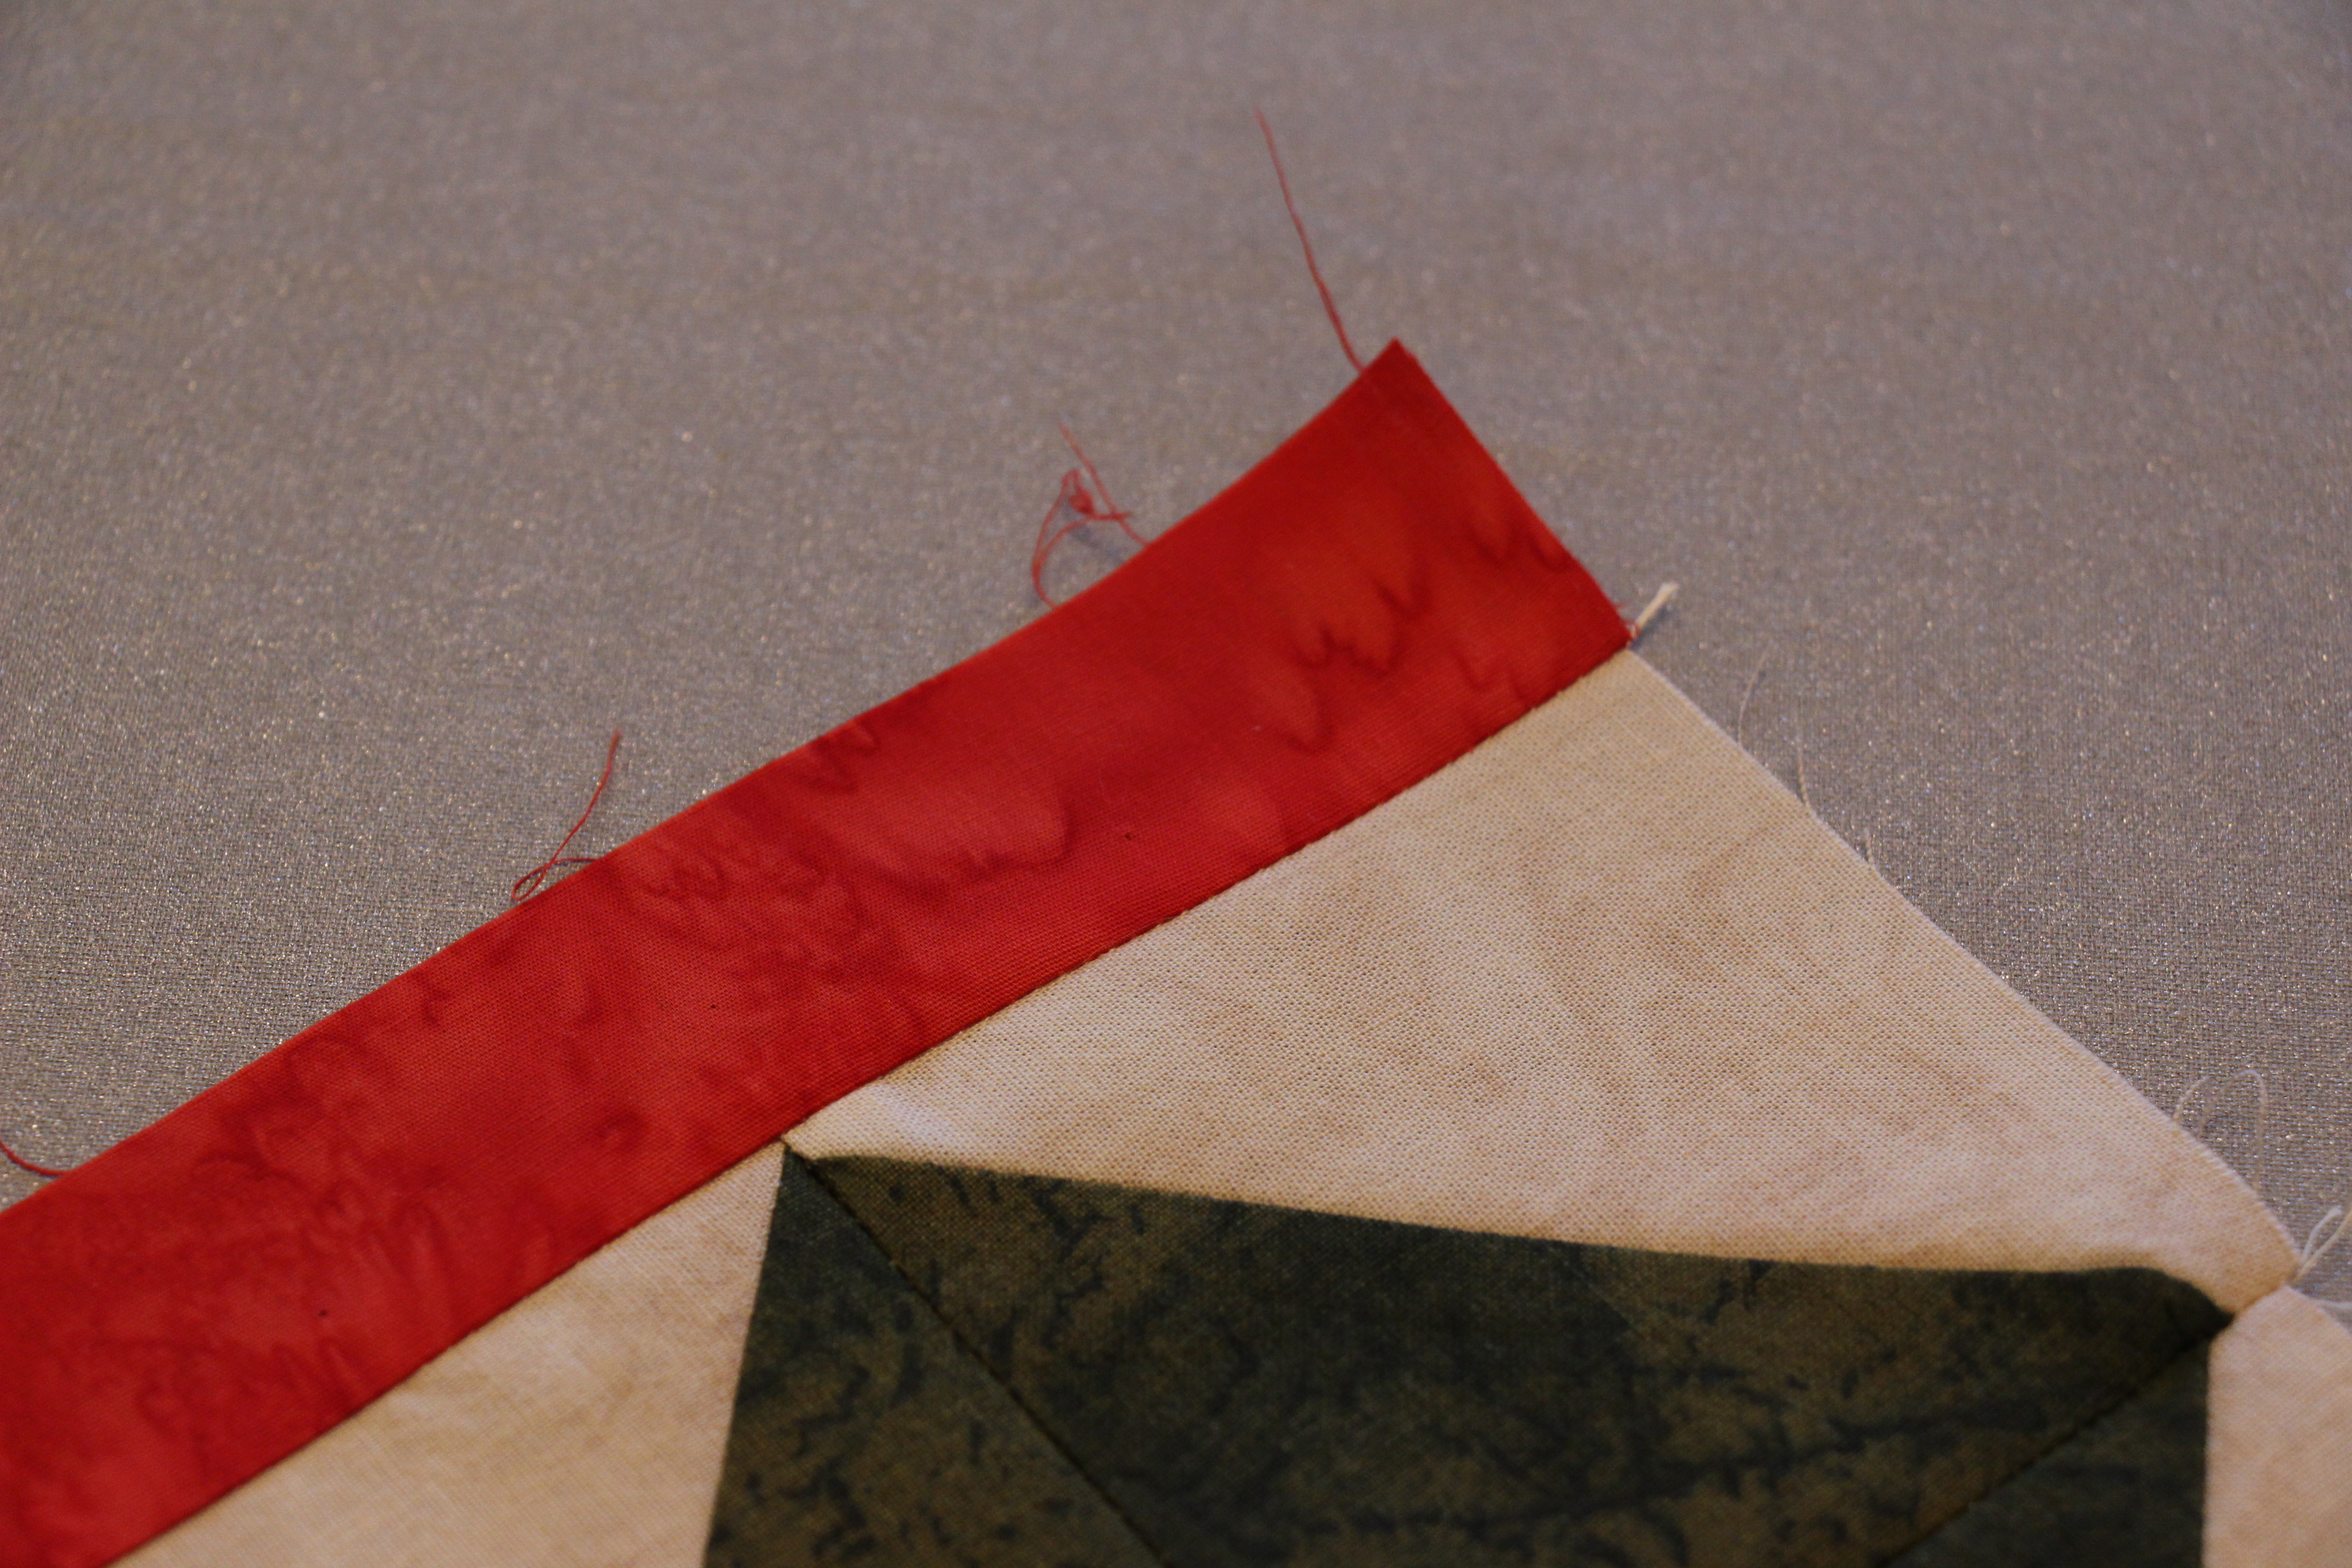
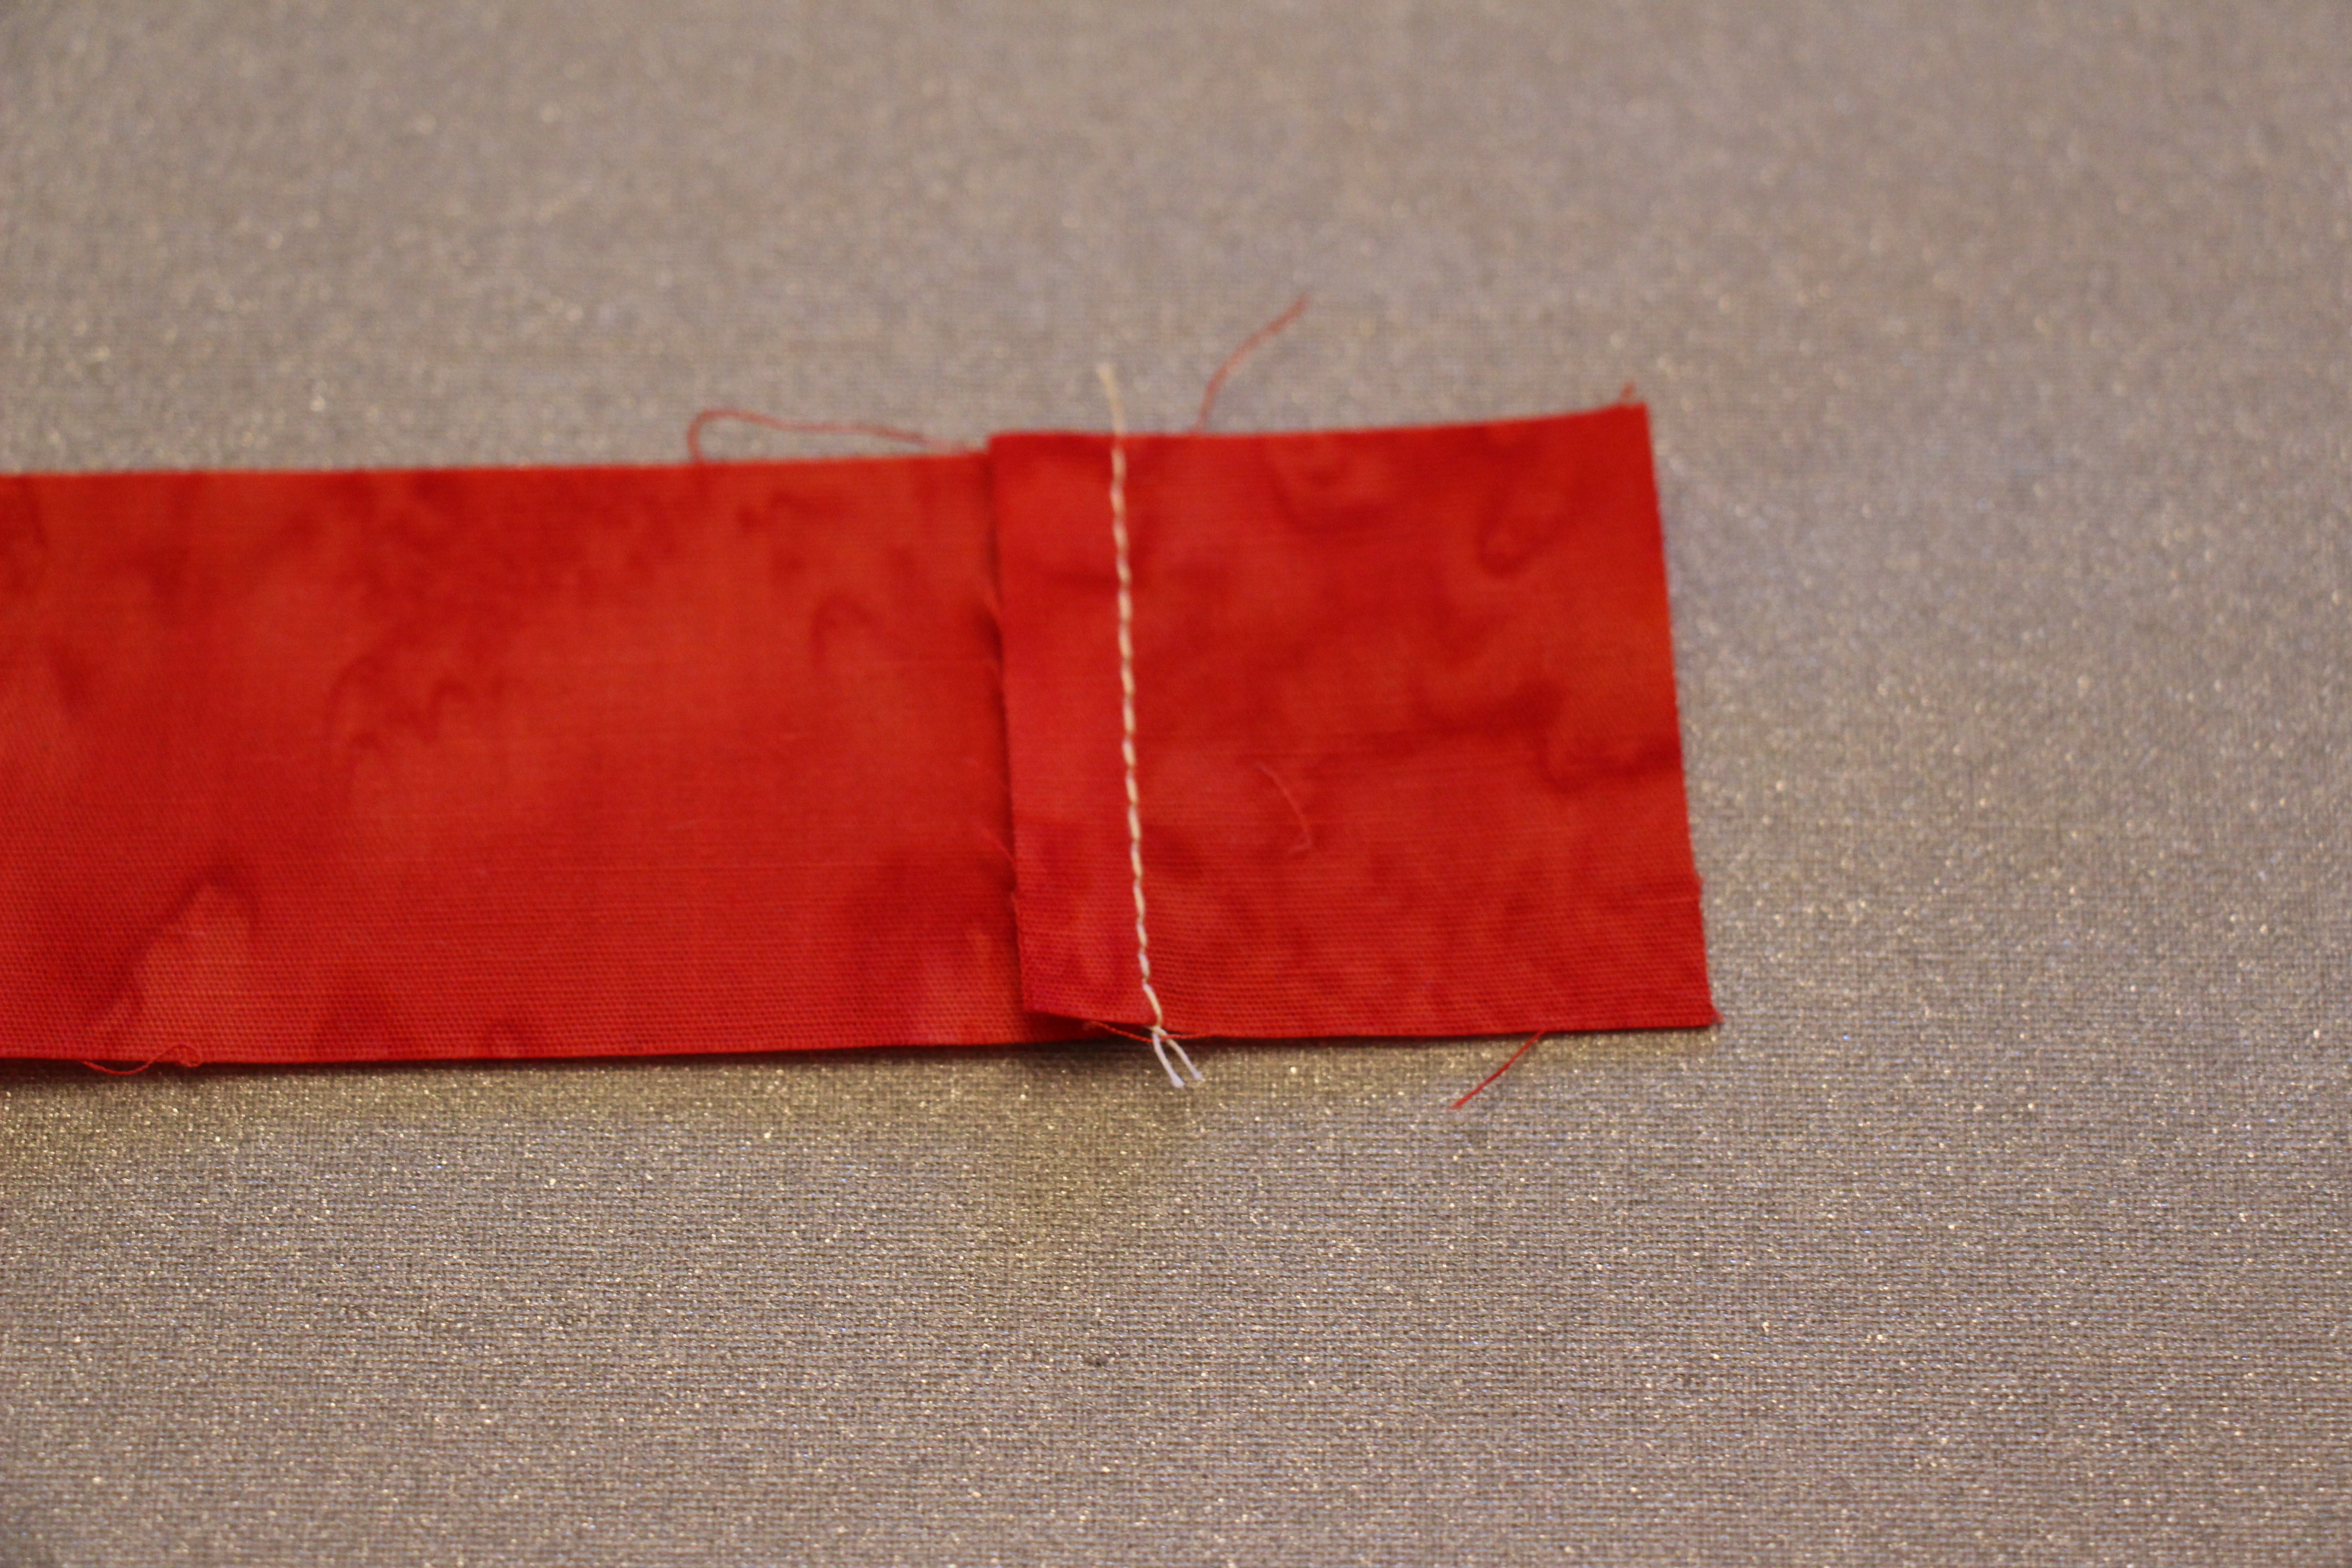
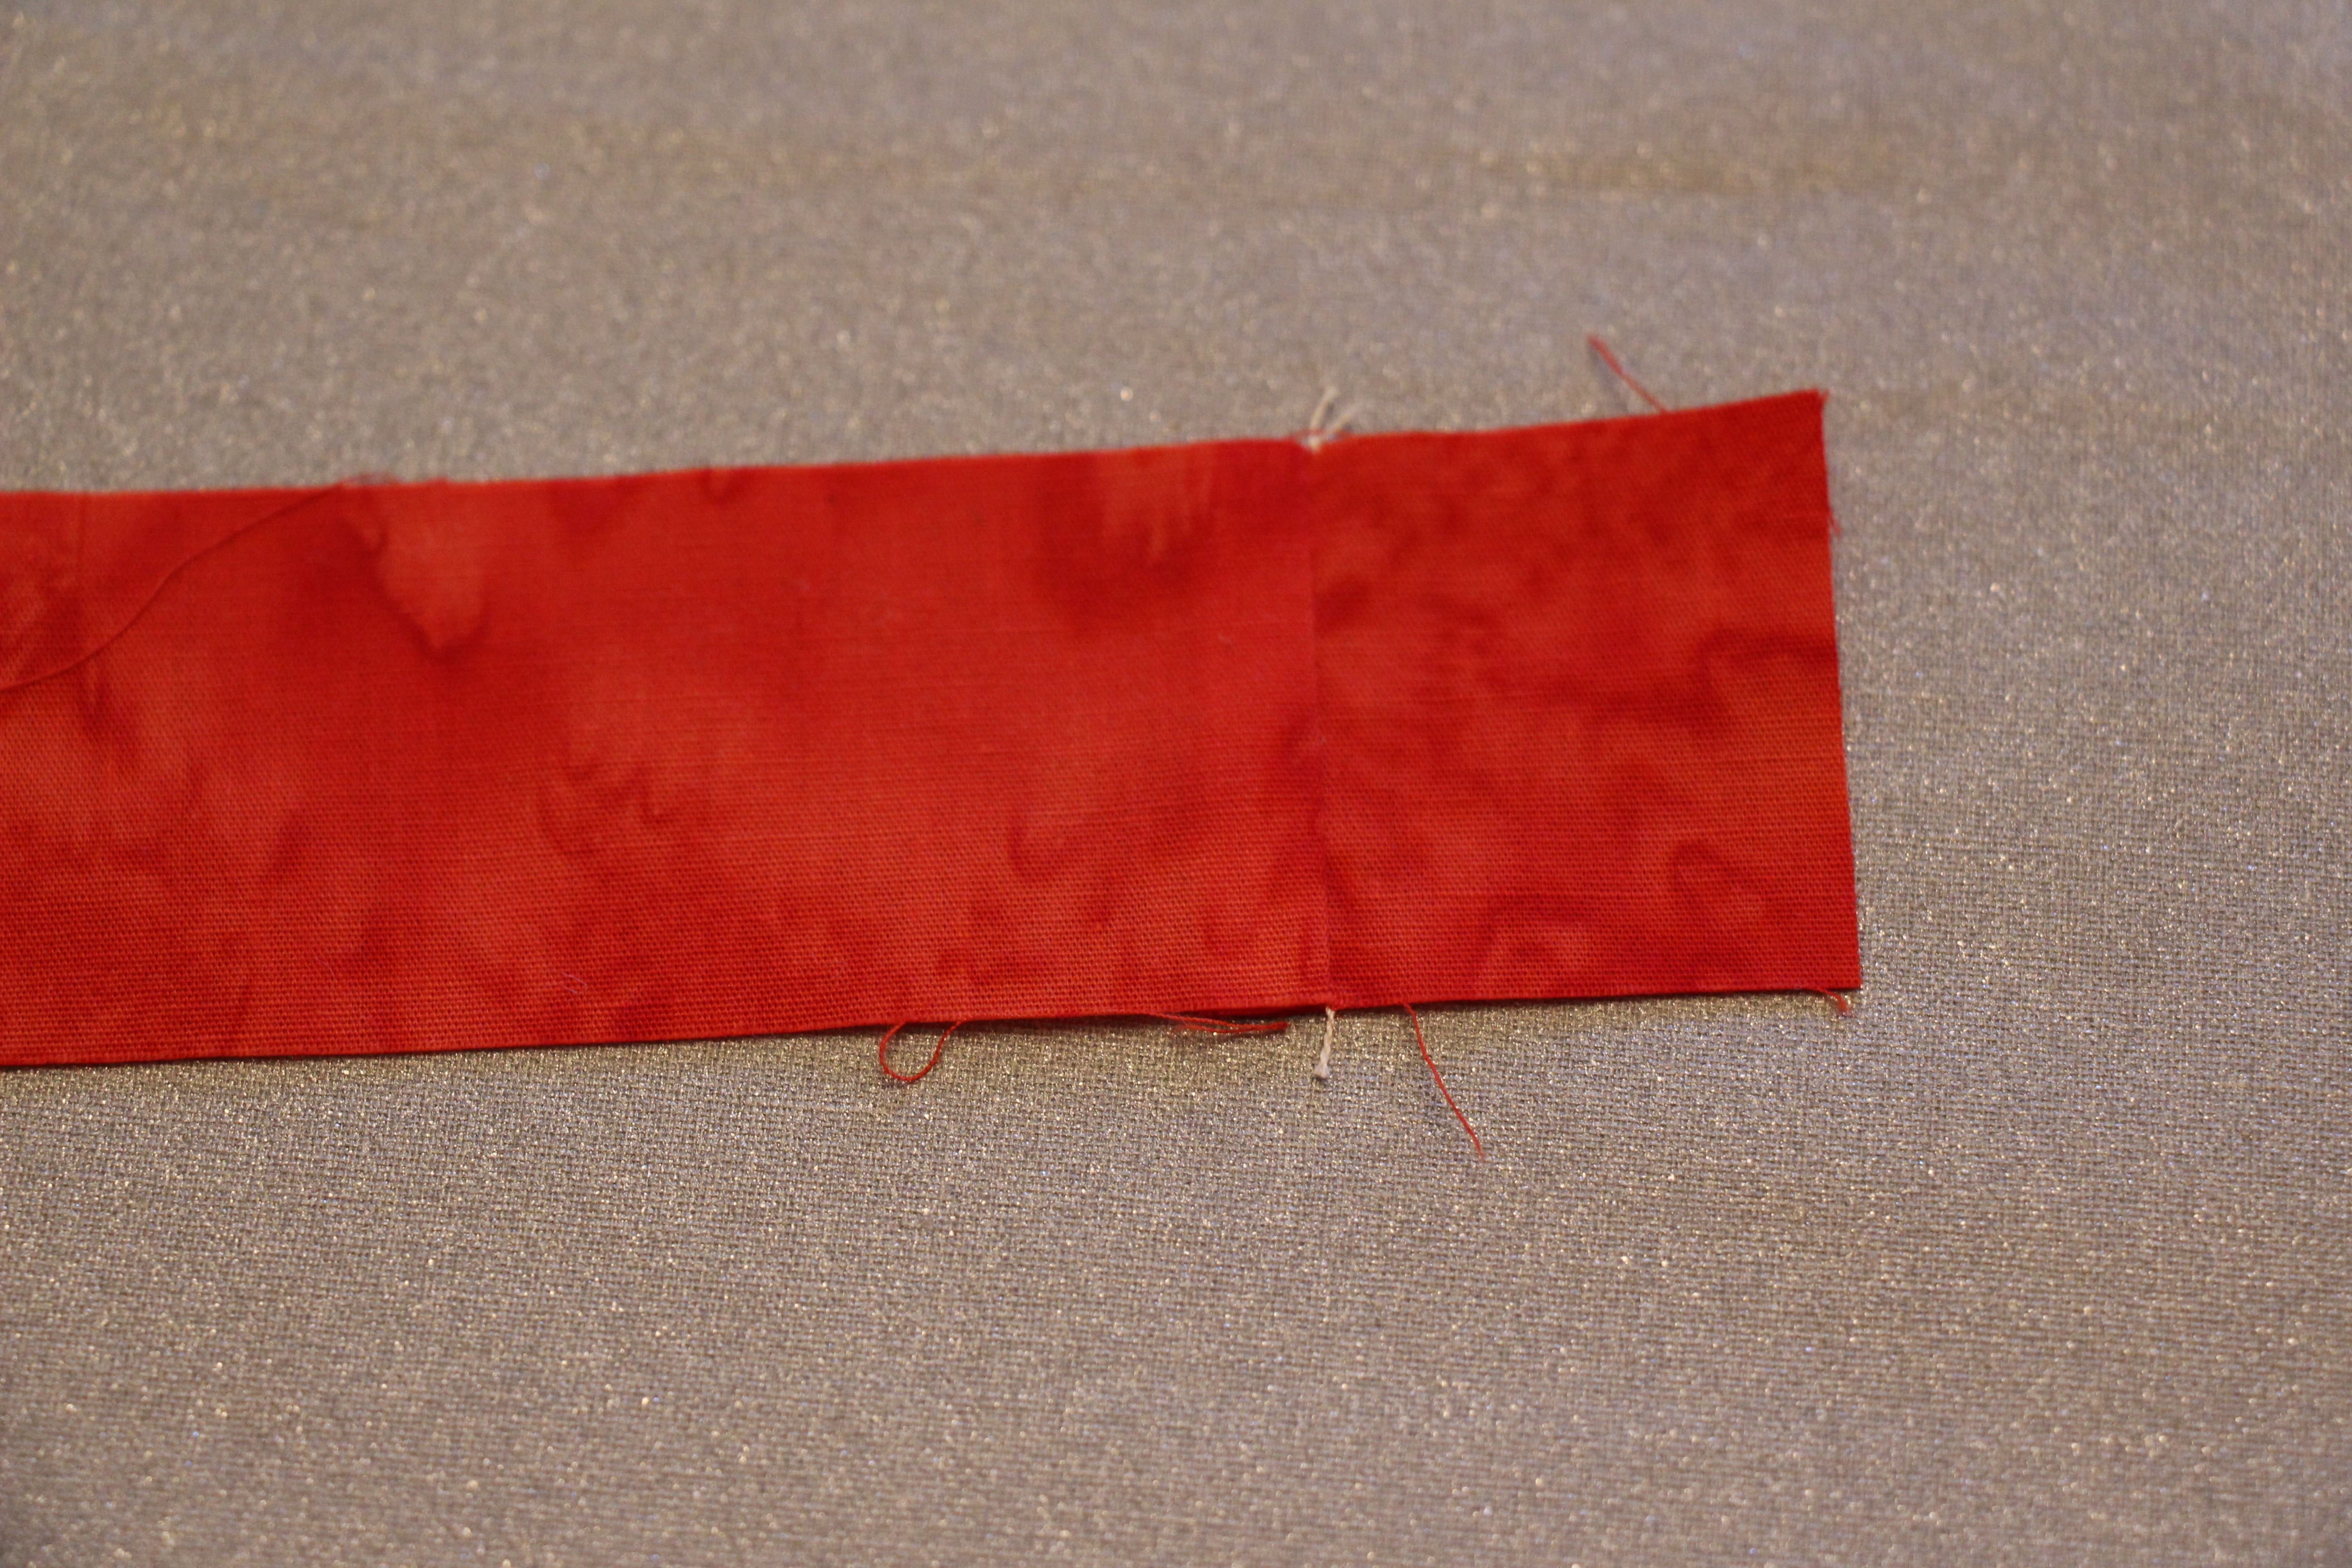
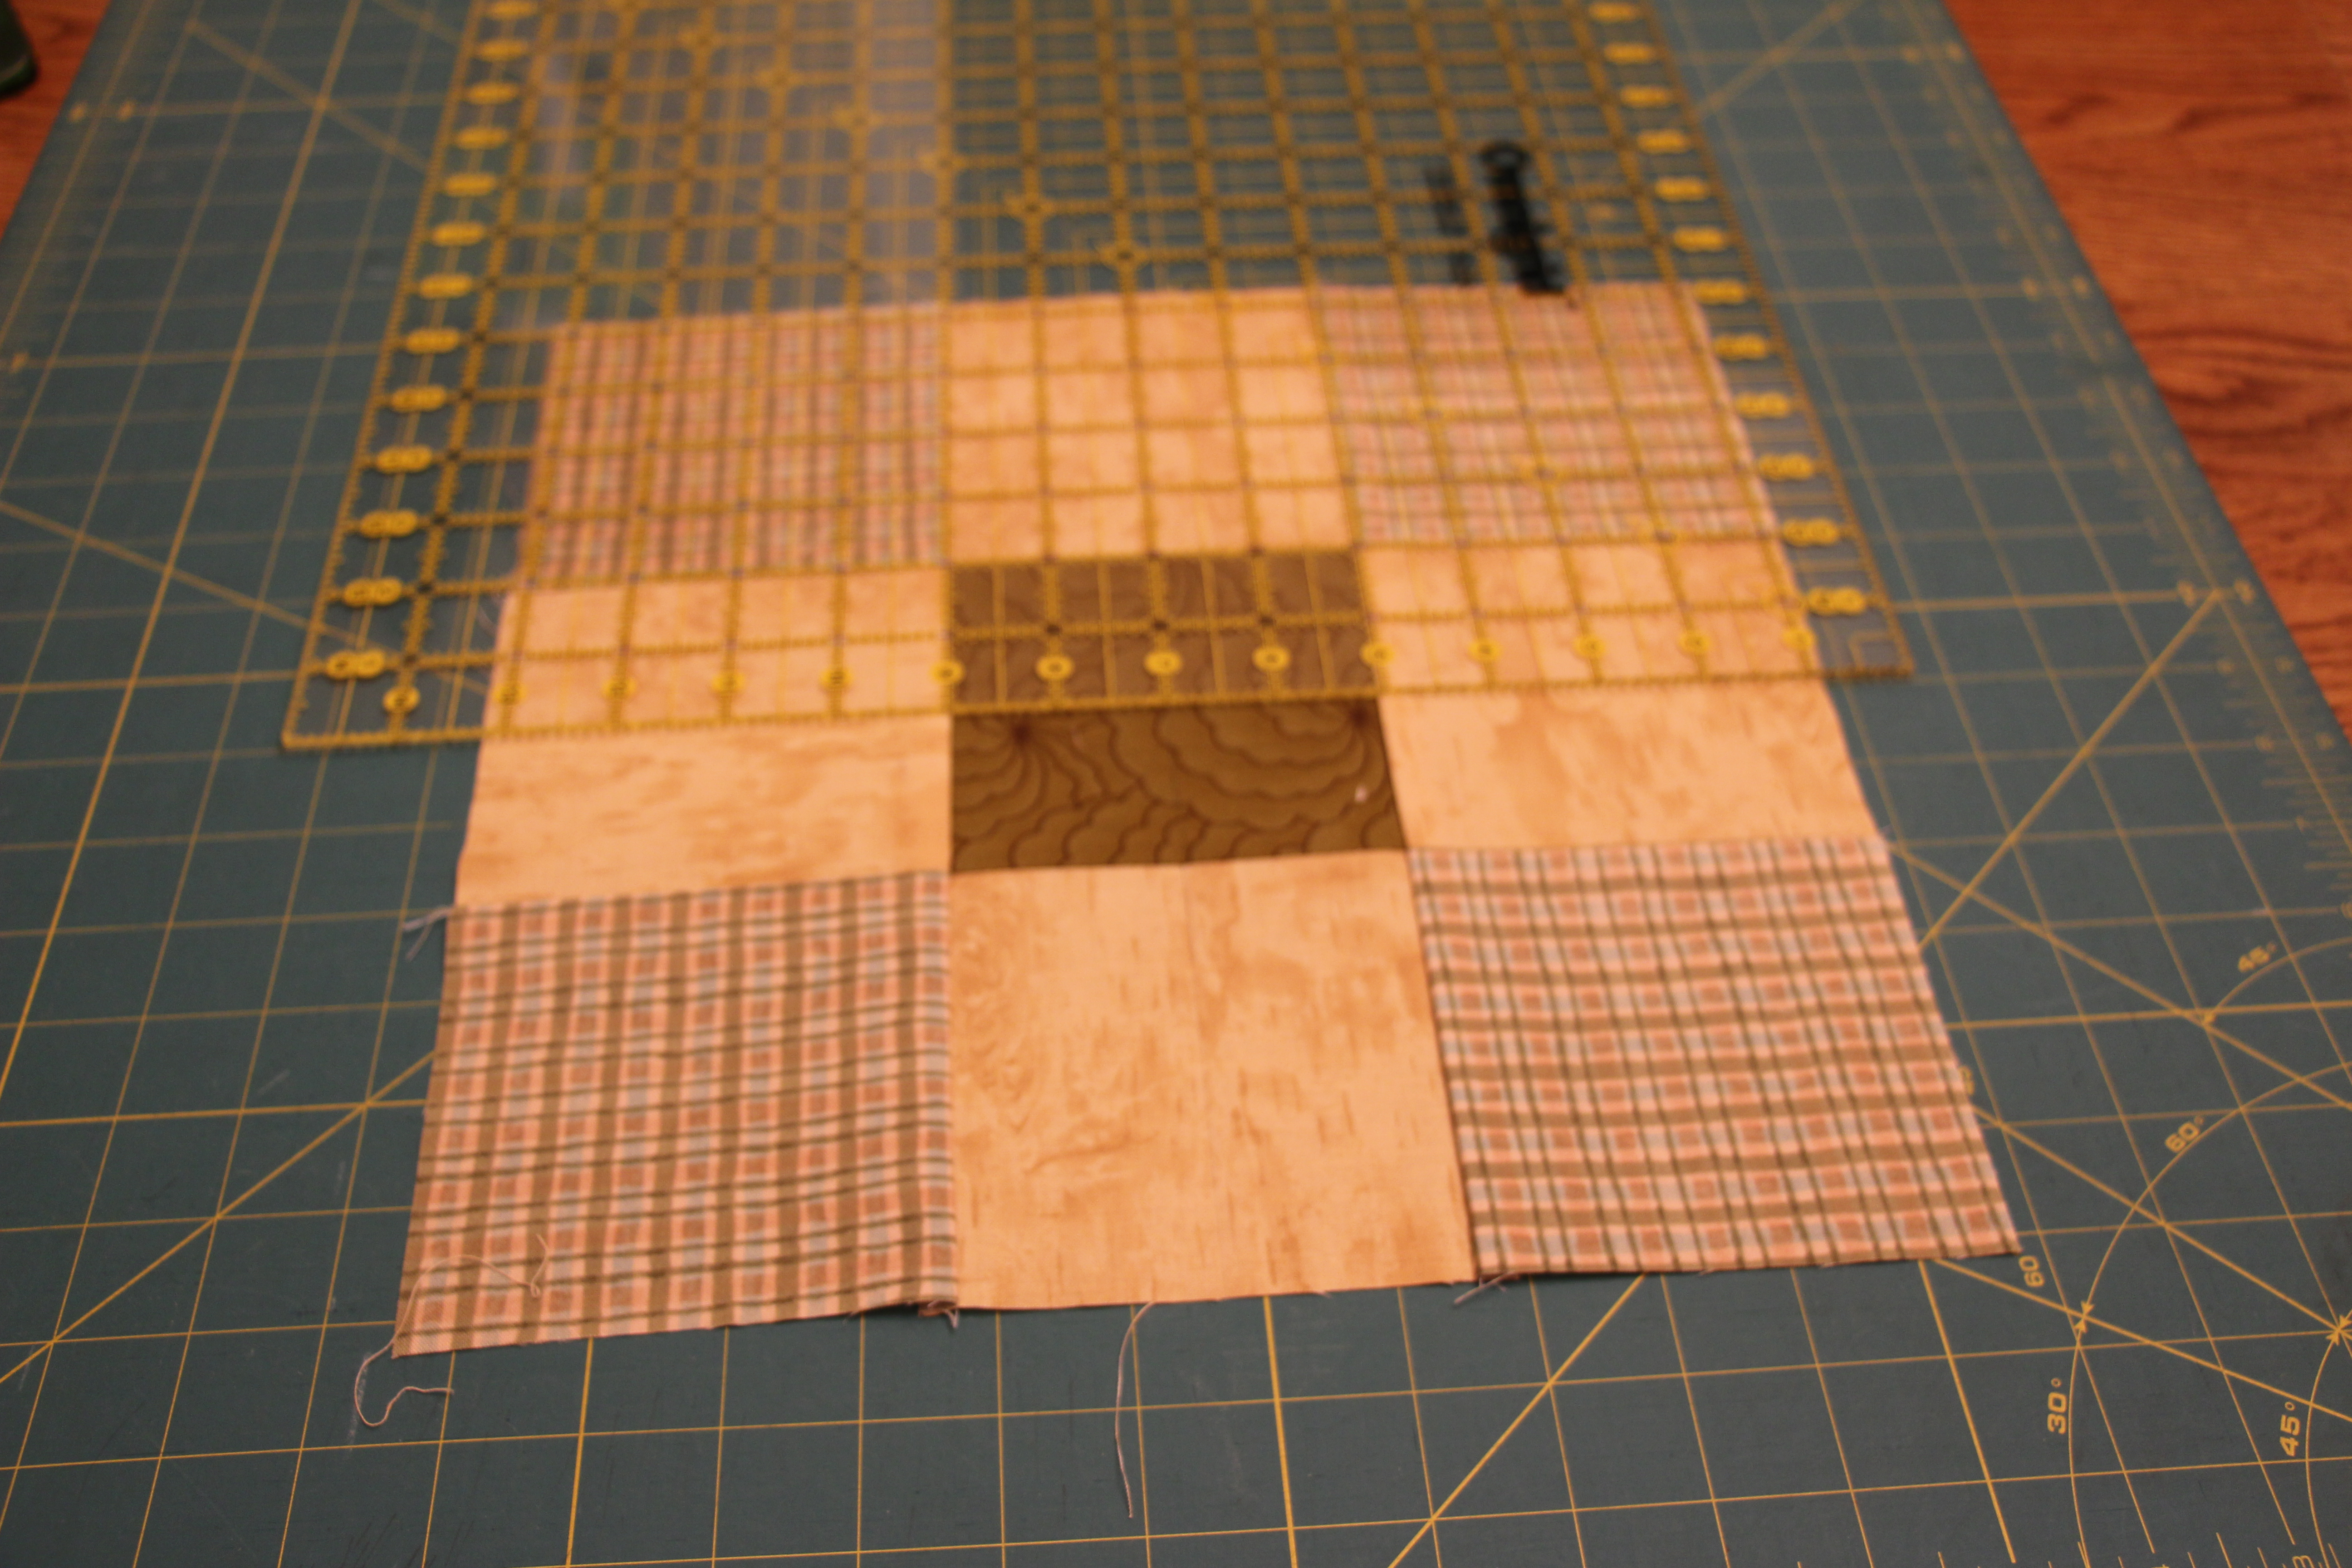
Using a 1/4″ seam allowance:
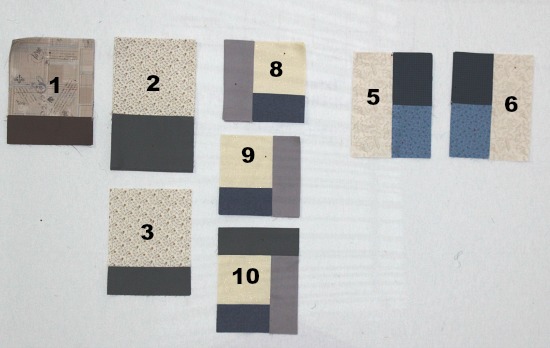
- Sew A above B (unit 1)
- Sew 6 C above 6 6 1/2″ x 4 1/2″ D (unit 2)
- Sew 1 C above 1 6 1/2″ x 2 1/2″ D (unit 3)
- Sew E above F (unit 4)
- Sew 2 G to the left side of E-F (unit 5)
- Sew 5 G to the right side of E-F (unit 6)
- Sew H above I (unit 7)
- Sew 4 J to the left side of H-I (unit 8)
- Sew 4 J to the right side of H-I (unit 9)
- Sew 2 6 1/2″ x 2 1/2″ D above 2 unit 9 (unit 10)
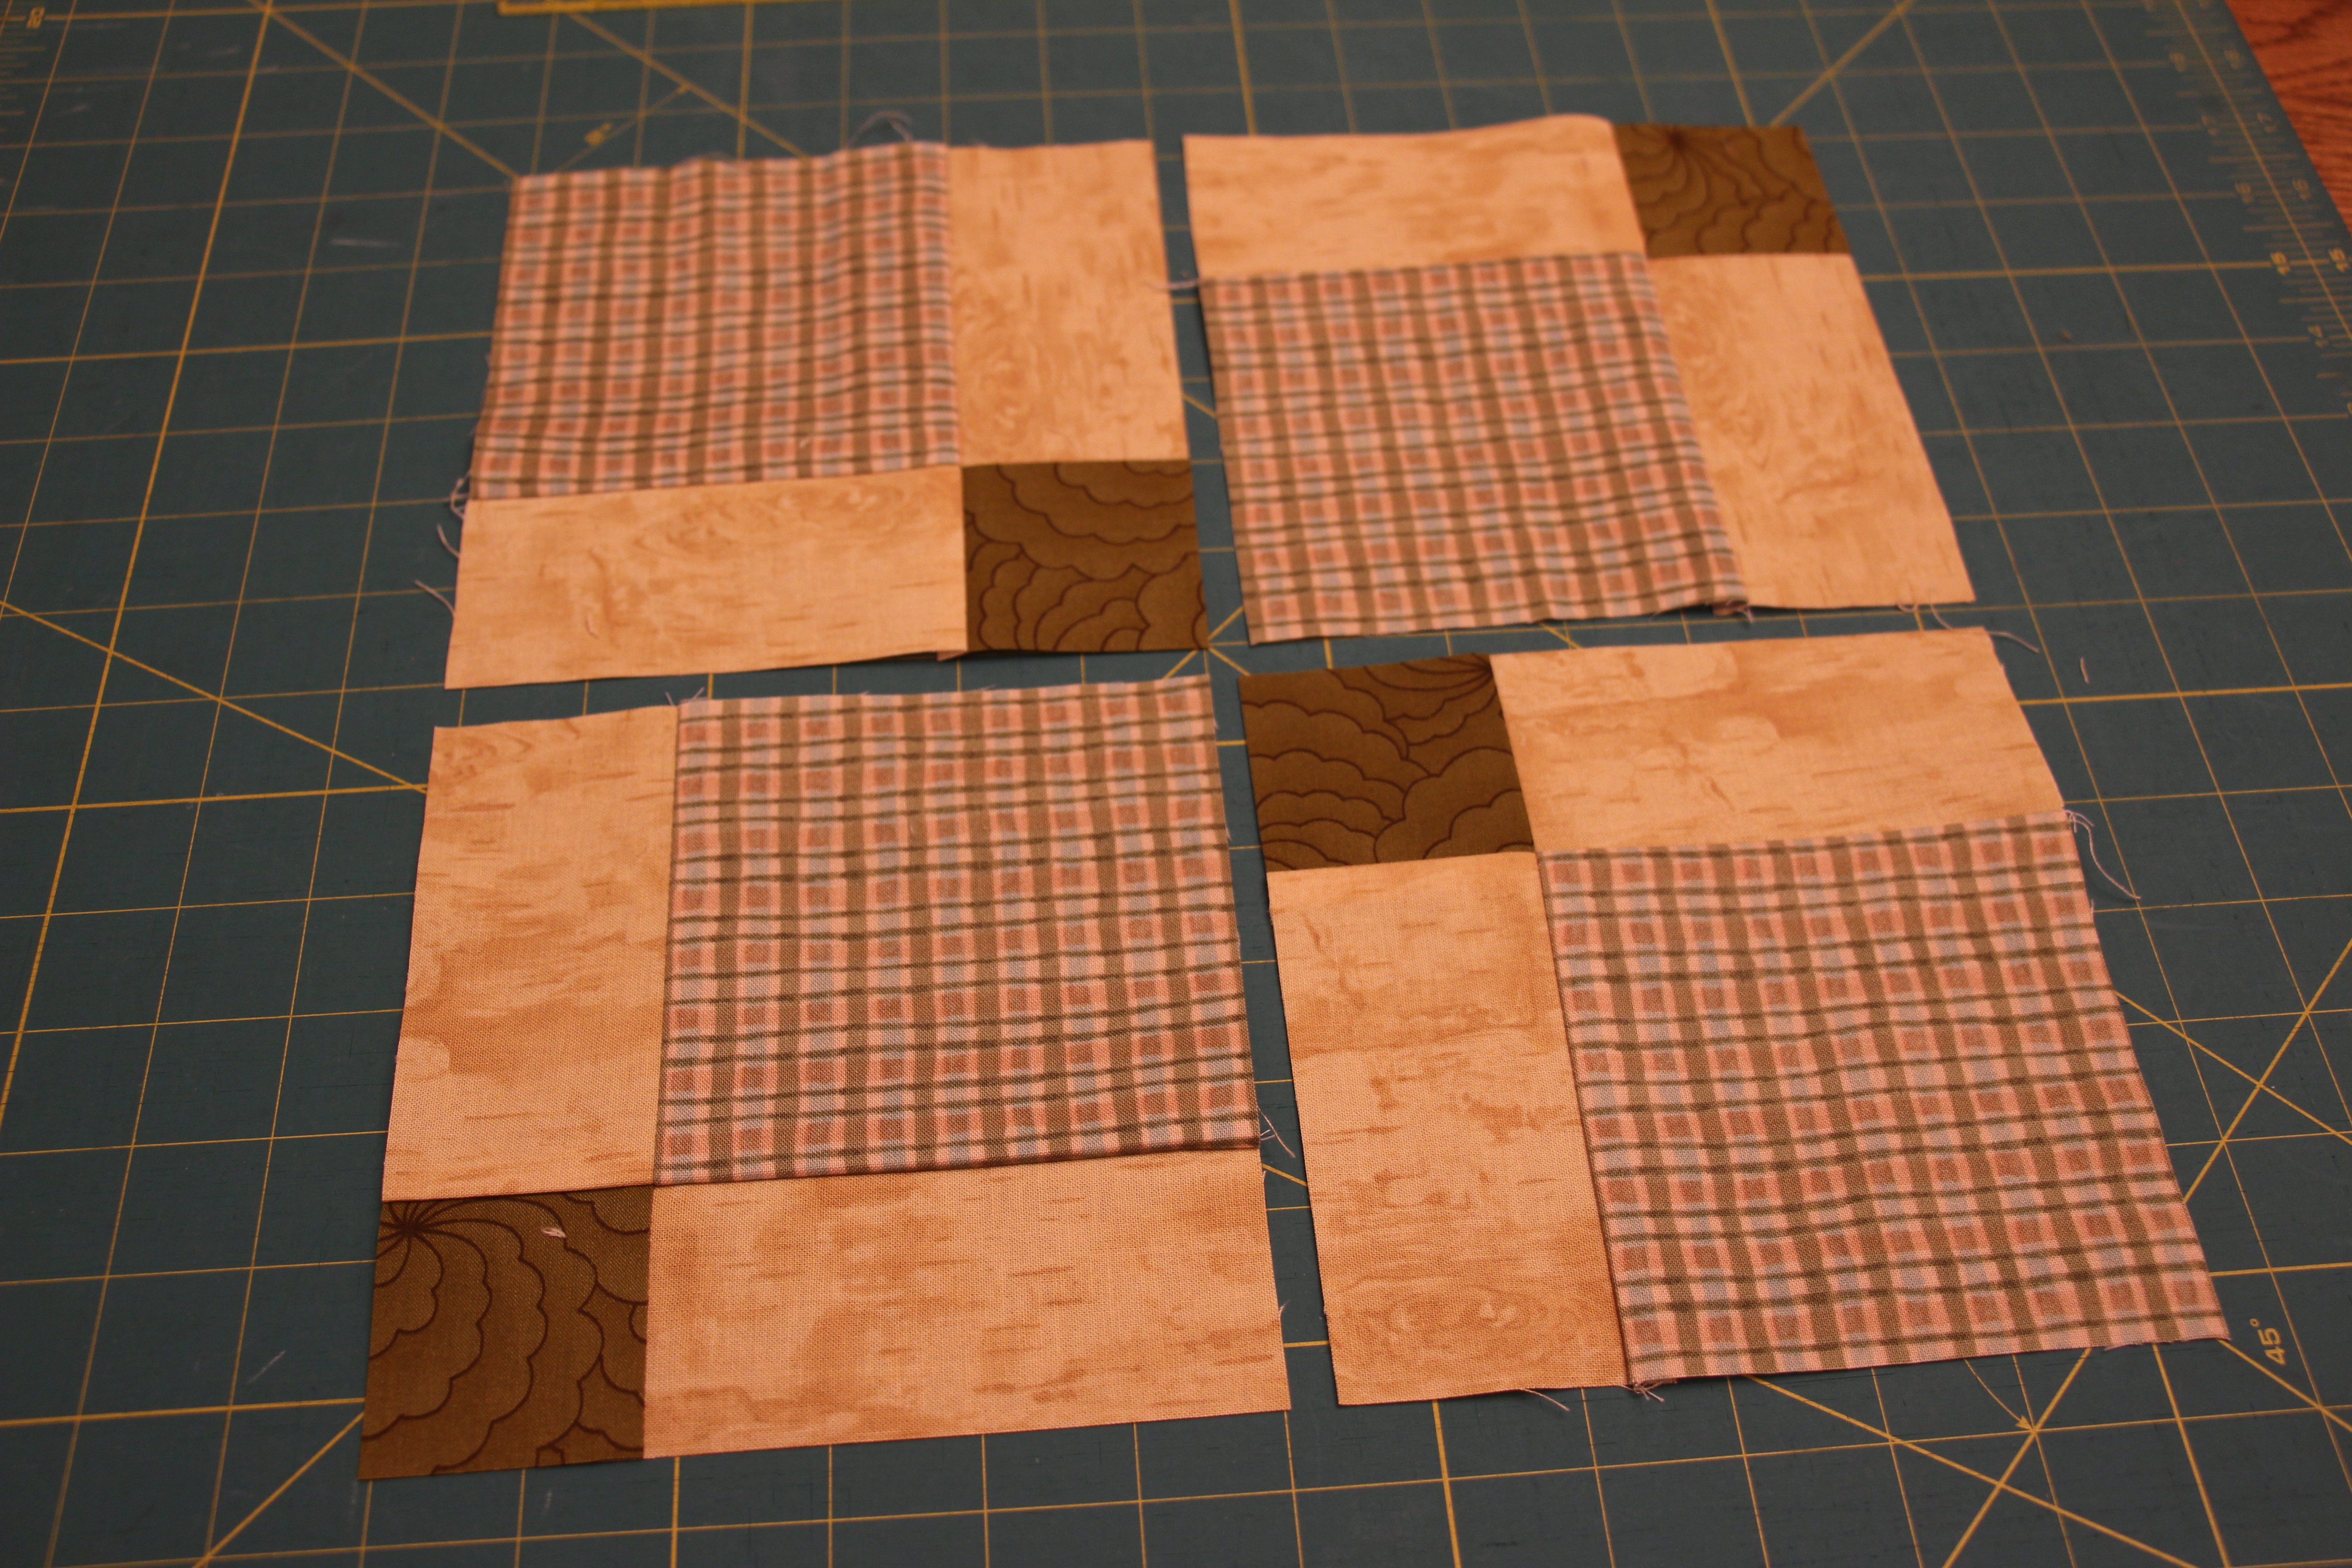
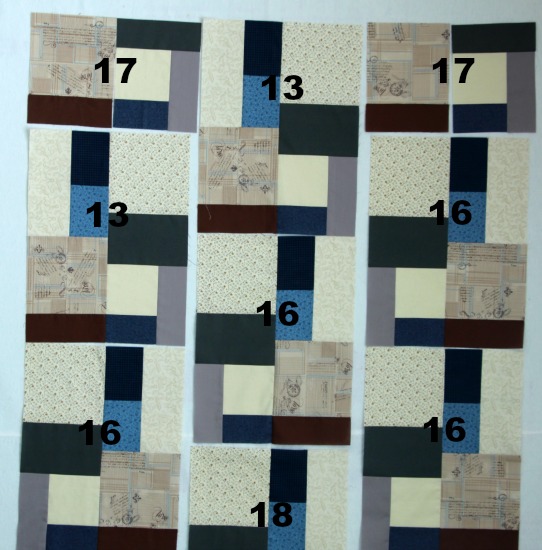
Using a 1/4″ seam allowance:
- Sew 2 unit 5 above 2 unit 1 (unit 11)
- Sew 2 unit 2 above 2 unit 9 (unit 12)
- Sew unit 11 to the left of unit 12 (unit 13)
- Sew 4 unit 2 above 4 unit 8 (unit 14)
- Sew 4 unit 6 above 4 unit 1 (unit 15)
- Sew unit 13 to the left of unit 14 (unit 16)
- Sew 2 unit 1 to the left of 2 unit 10 (unit 17)
- Sew 1 unit 3 to the left of 1 unit 6 (unit 18)
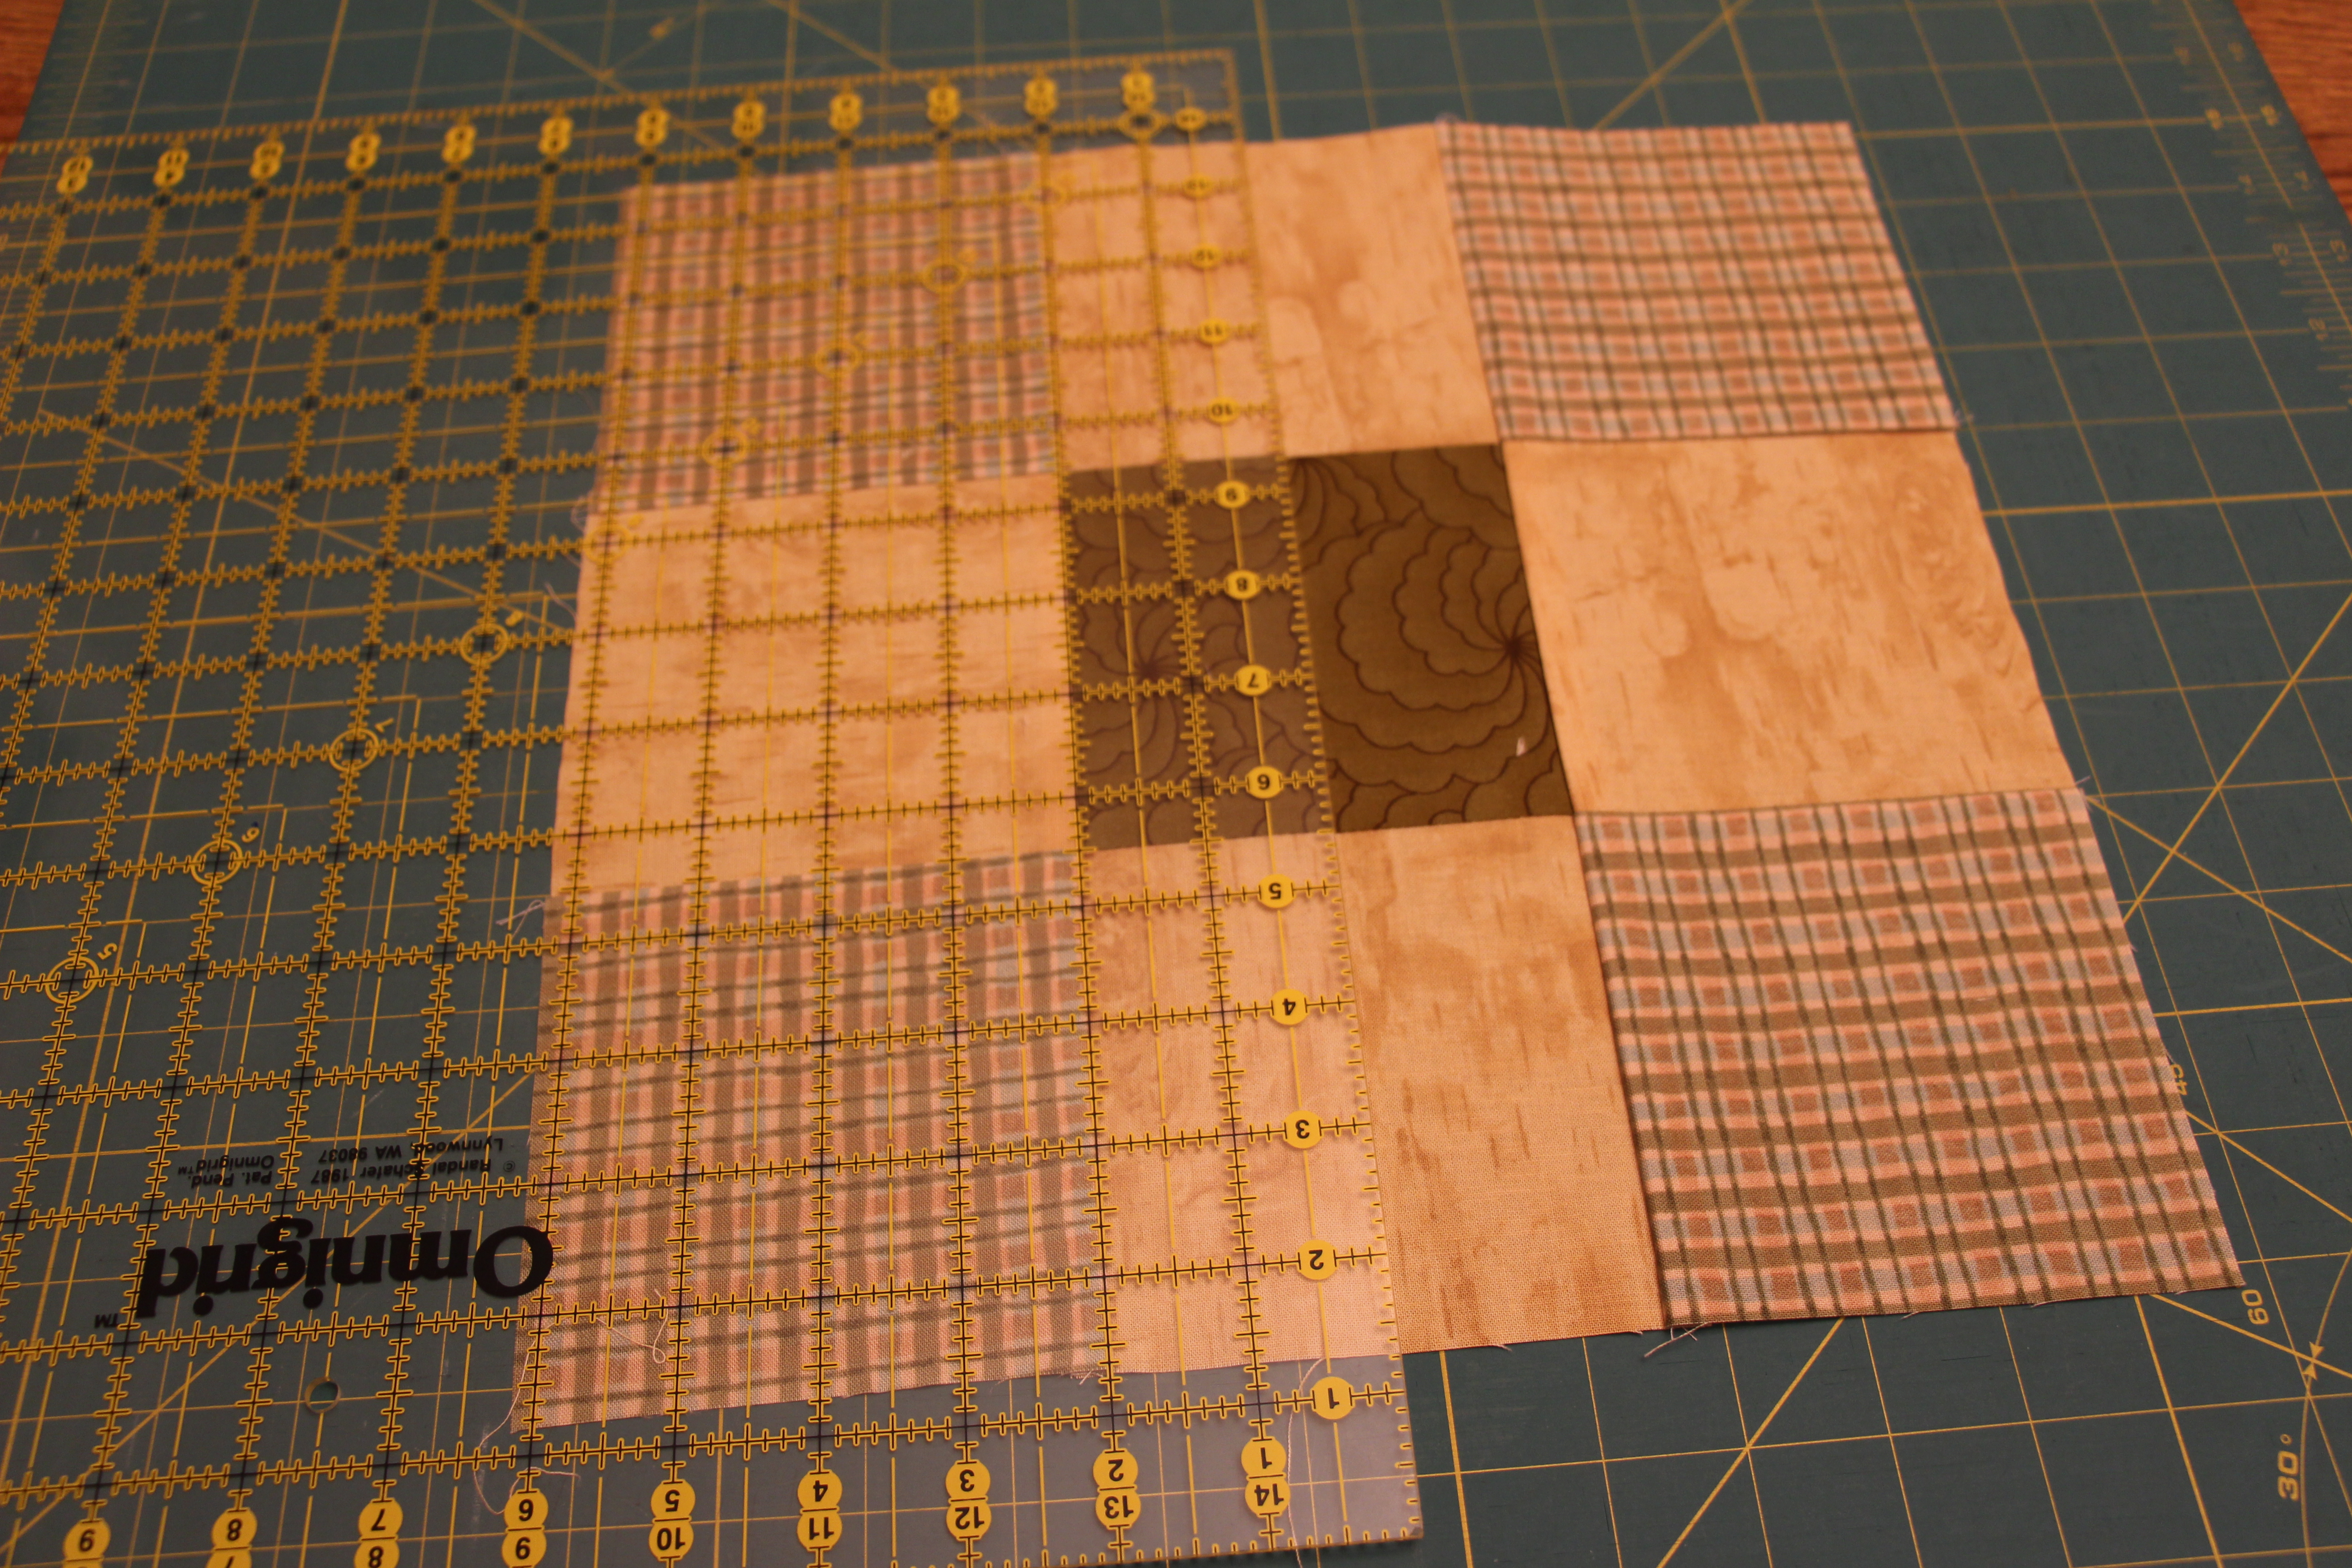
Assemble quilt in three columns:
- From top to bottom, column 1: unit 17, unit 13, unit 16
- From top to bottom, column 2: unit 13, unit 16, unit 18
- From top to bottom, column 3: unit 17, unit 16, unit 16
- Using a 1/4″ seam allowance, sew the units in the columns to each other before sewing the columns together
Once your center is sewn together, measure the sides and cut two 2 1/2″ strips of your border fabric to fit the left and right. Using a 1/4″ seam allowance attach the border strips to the left and right sides of the quilt. Measure again after the left and right sides are sewn on and cut two more 2 1/2″ strips of your border fabric to fit. Sew the top and bottom border strips to the quilt using a 1/4″ seam allowance.
Measure your final quilt top. Now piece together your backing fabric to fit your quilt top plus some overhang. The amount of overhang you need will depend on your or your quilter’s preference. Cut the same amount of batting, piecing together if needed.
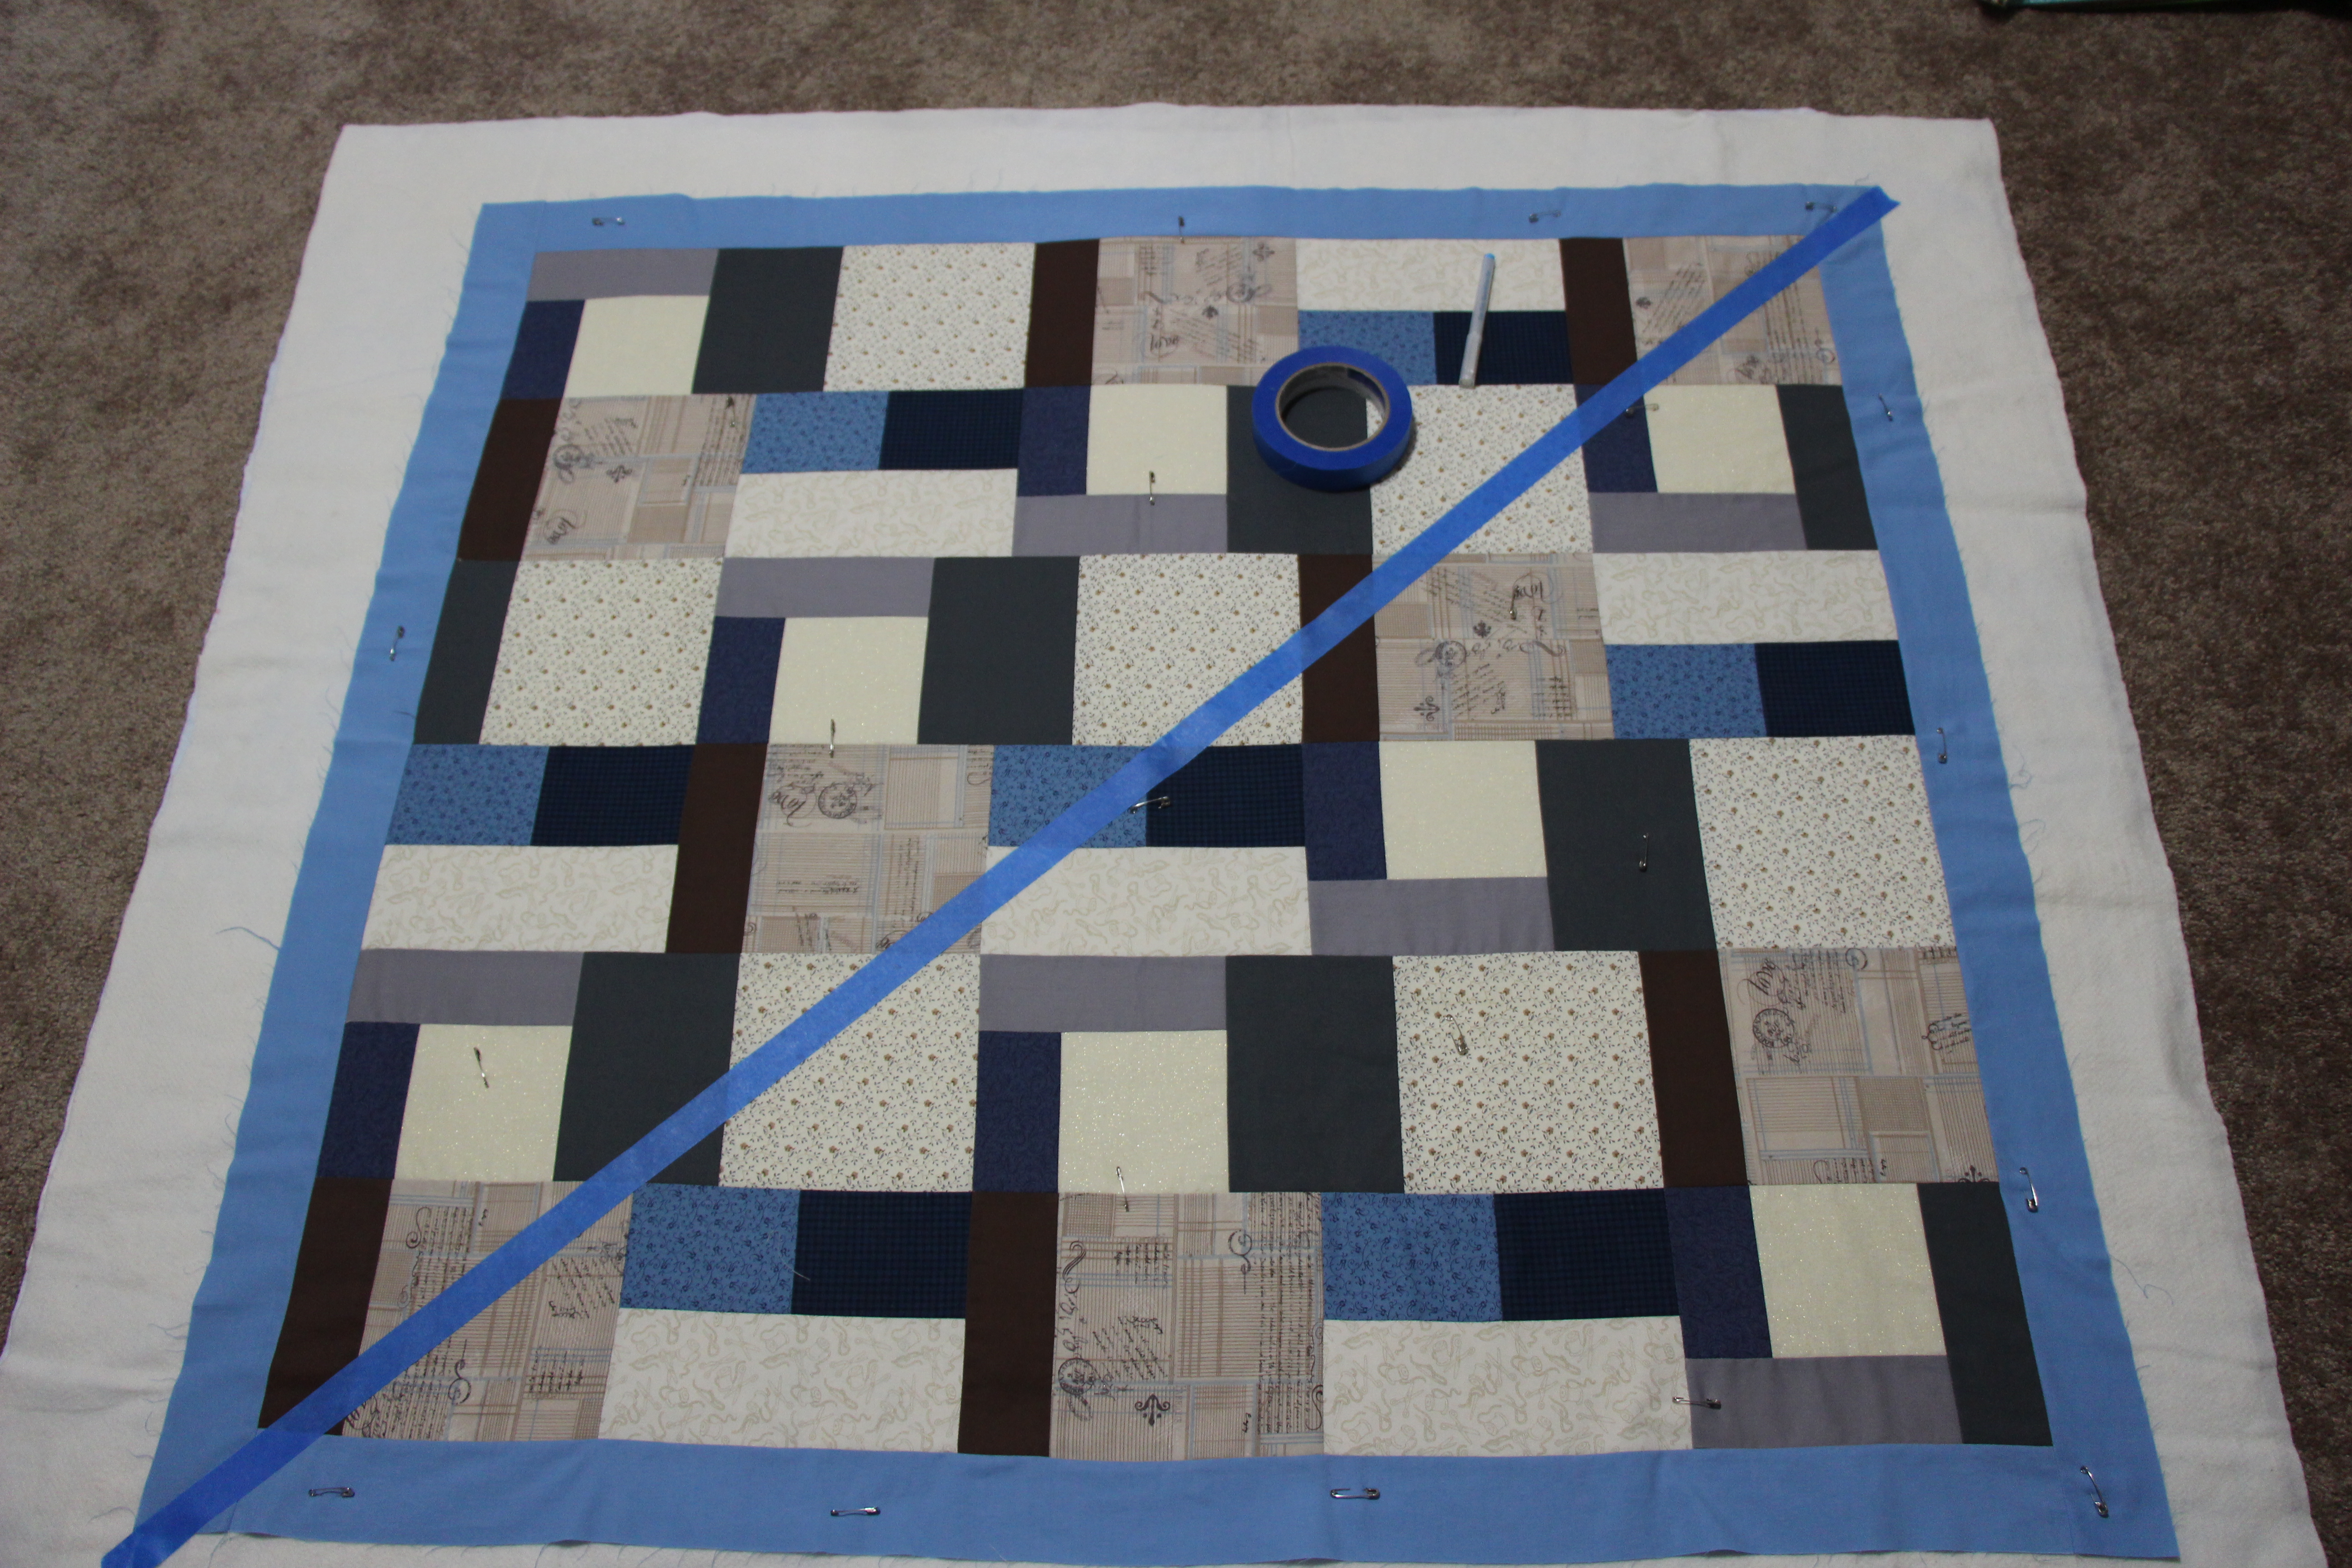
Sandwich the batting between your quilt top and your backing fabric. Quilt! If I am not sewing-in-the-ditch I like to use painter’s tape and a washable fabric marker to give some guidelines.
Assemble and attach binding fabric using your favorite method. (Maybe some day I’ll be confident enough and have an almost-perfectly bound quilt to do a tutorial.)
Don’t forget a tag!

 Today my friend’s daughter turns 1! I knew I just had to make her a quilt because this little girl happens to share my birthday! My friend, Megan, blogs over at
  Another special summer baby is a sweet boy who is only one day older than my son. I was very excited when I found out that our friends were expecting their first baby only 10 days after our first. I was particularly excited because they happen to live in Ohio – where we were going to be relocating! I was looking forward to having another first time mommy friend and for Wesley to have a play date friend. We actually had our first “play date” last week – as much as 7-wk-olds can play. My friend knew she was having a boy so I had a lot of fun making a boy quilt with car fabric and reds, greens, and blues. (Photo to the right from February when “Little Racer” was under construction.)