Pistachio Mint Pesto

Traditionally speaking, I’m not the biggest pesto fan. I’m of course talking about the no frills basil and pine nut version. Maybe if I made my own I’d feel differently, but whenever I order something with pesto on it at a restaurant I don’t get that bright herby punch I’m expecting. I’ve made a couple unique pestoes on the blog before, Jalapeno and Beet, and we’ve loved both of them. The jalapeno one has been made multiple times already. And come to think of it, I have beets in the fridge right now without a planned future…

But today we’re talking about a new variety of pesto. One that exceeded my expectations! I had an abundance of mint and the internet at my fingertips. I decided to give this pesto twist a try and I am oh so glad I did! I don’t often work with pistachios, in fact, I tend to forget that they even exist. I don’t know why, they’re quite delicious!

I served the pesto over pasta originally. The leftovers brightened up my sandwiches during the week for lunch – I put cooked chicken, cheddar cheese, pesto, and spinach in a pita and gave it a quick toast in the toaster oven. Perfect.

Pistachio Mint Pesto (pasta)  Sew You Think You Can Cook

Pistachio Mint Pesto

Ingredients:

  • 1 C shelled pistachios
  • 1 C shredded Parmesan cheese
  • 1 C fresh mint
  • 1 C fresh parsley
  • 2 cloves garlic
  • 1/2 C olive oil
  • juice 1 large lemon

Steps:

  1. Put all ingredients in a food processor and pulse until smooth, scraping the sides of the bowl as needed.

*This recipe is adapted from Denise at http://sweetpeasandsaffron.com/2015/09/pistachio-mint-pesto.htmlhttp://sweetpeasandsaffron.com/2015/09/pistachio-mint-pesto.html*

Pistachio Mint Pesto  Sew You Think You Can Cook

Oat Waffles

As we were reaching the end of our time in Ohio my pantry ingredients kept dwindling without being replenished as was only logical. The only problem was trying to make dinner! Our go-to “no food in the house” meal is some sort of breakfast. But when you’ve depleted your supply of both whole wheat and all purpose flour you have to get creative.

My husband started getting into Alton Brown’s old show Good Eats which re-airs on Cooking Channel around that time and remembered seeing him grind up oats for waffles. We figured we’d give it a try, but upon inspection of the recipe, there was still flour involved. I still had a little bit of cake flour and decided to just go for it. We didn’t have the right amount of oats either, but our result was still a delicious waffle. Naturally, I added some cinnamon to the batter for good measure.

Out in California Good Eats airs right after the bedtime routine for the boys. The bedtime process starts with watching the “Nighttime in the Neighborhood” episode of Daniel Tiger and eating a banana. We then go brush teeth, read books, and sing songs. I hold Firecracker’s hand until he drifts off to sleep. (Now that he’s in a “big boy” bed, it’s a lot easier!) Stuart stays upstairs with Treat watching Good Eats as he (I could be talking about either of them really) drifts off to sleep.

Oat Waffles

Ingredients:

  • 1 3/4 C old fashioned oats (I used Bob’s Red Mill)
  • 1 C cake flour
  • 3 tbsp sugar
  • 1 tsp cinnamon
  • 1 tsp baking powder
  • 1 tsp salt
  • 1/2 tsp baking soda
  • 3 eggs
  • 2 C buttermilk
  • 1/2 stick butter, melted

Steps:

  1. Toast oats in dry skillet over medium heat until golden brown. Transfer oats to a food processor and pulse until they reach the consistency of whole wheat flour.
  2. In a large bowl, whisk together the oat flour, cake flour, sugar, cinnamon, baking powder, salt, and baking soda.
  3. In another bowl, whisk together the eggs, buttermilk, and melted butter. Pour the wet ingredients into the try, mixing until just combined.
  4. Pour batter into a hot, greased waffle iron until golden.

*This recipe is modified from Alton Brown at http://www.foodnetwork.com/recipes/alton-brown/oat-waffle-recipe.html*

Oat Waffles  Sew You Think You Can Cook

Biscuit Taco Pizza

Do you ever have those nights where you simply don’t want to make dinner? But you have all this food in the fridge from earlier in the week that you know you should eat but just don’t want to? I feel like those nights happen here quite a bit.

I’m not typically a simple reheat-the-leftovers type of person (with a few exceptions here and there). Often times leftovers get put into quesadillas, grilled cheese sandwiches, or omelets.

And sometimes they get turned into pizzas!

But what if you don’t have a pizza crust in the fridge or any yeast (or time to let the yeast do its thing)? Well, there’s Pinterest for that! I saved this No Yeast Pizza Crust that took only 15 minutes. I figured, “Why not? What have I got to lose?”

The crust that we got reminded us more of a biscuit than a pizza, hence my post title. You could also infer that leftover taco meat and toppings were used to top the biscuity crust.I used salsa as the sauce, topped it with cooked Mexican chorizo, and Mexican blend cheese. After coming out of the oven I added some fresh chopped lettuce, tomato, and scallions.

And the best part? Firecracker was willingly eating veggies! I guess if you put it on a pizza, kids will eat it.

Biscuit Pizza Dough

Ingredients:

  • 2 1/4 C flour
  • 1 C milk
  • 1/2 stick room temperature butter
  • 1 tbsp baking powder
  • 1/4 tsp salt
  • cornmeal, for pizza peel

Steps:

  1. Place pizza stone in oven. Preheat oven to 450 degrees F.
  2. Put all ingredients in the bowl of a stand mixer fitted with the dough hook attachment. Mix until the dough forms a ball around the hook.
  3. Turn dough out onto a floured surface. Roll out to desired thickness. Transfer dough to a pizza peel dusted with corn meal. Top dough with desired toppings.
  4. Shimmy pizza onto pizza stone. Bake 10-12 minutes.

*This recipe is adapted from Serene at http://houseofyumm.com/no-yeast-pizza-dough/*

Biscuit Taco Pizza in 30 minutes with this yeast free dough  Sew You Think You Can Cook

Blog-iversary 3

3 yrsSew You Think You Can Cook is 3 years old!

This past year has been a whirlwind in my personal life between welcoming a second baby boy to our family and moving across the country.

Blogging-wise I have continued to grow. I have 43 more followers by e-mail and 270 more Facebook fans. I’ve become more active on Twitter and Instagram with a total following of 423 and 530, respectively.

In this fourth year I hope to find the time to delve into monetizing the blog and gaining some sponsored posts. That’s if my two busy boys allow me to do so! I did however, finally pay to own my domain name! As my “birthday gift,” take a look up at the top of your browser and you’ll notice something a little different. The “dot wordpress” is no longer there! I hope your finger memory (and mine!) adjusts quickly when you type in sewyouthinkyoucancook.com.

For Mother’s Day 2016 my husband got me a macro lens for my camera and I have enjoyed taking photos even more! I’m even breaking out the tripod these days. Now when I recreate a recipe from my blog for dinner, I try and reshoot the photos. Updated photographs can be found on Balsamic Glazed Beef Roast, Baby Baked Beef Burritos, and Sweet Potato Waffles.

I hope you’ll continue to follow along with my journey here on the internet.

It has become my tradition to share something new to me on this milestone. For my 1st year, I baked with olive oil. For my second, I made marshmallow for a cheesecake. Keeping with the sweet side of experimentation, this year I’m sharing a vegan cupcake!

Why vegan?

We have friends here in California that we knew in Ohio as well who follow a vegan lifestyle. They have a daughter who is 4, a son who is only 2 weeks younger than Firecracker, and are expecting a third child in a month-ish. We did a play date with them and Firecracker was insistent about wanting to bake cupcakes with “Emmer.” I found a recipe that didn’t require any strange ingredients (borrowing almond milk from them) or coconut. The kids did a fabulous job making these cupcakes and the dozen didn’t last long. Icing didn’t come to fruition though and instead I ended up with a glaze. But it’s a glaze that was fantastic! No one felt bummed or cheated by not having a beautiful frosting peaked top.

We will be having a joint birthday celebration for the 2 year olds next week and I’ll be remaking the cupcake base. Now to find an actual frosting – if you have a recipe for coconut free vegan frosting please share it with me in the comments!

This recipe makes 1 dozen cupcakes.

Vegan Vanilla Cupcakes

Ingredients:

  • 1 3/4 C flour
  • 1 C sugar
  • 1 tsp baking soda
  • 1/2 tsp salt
  • 1 C almond milk
  • 1/3 C olive oil
  • 1 tbsp white vinegar
  • 2 tsp vanilla extract

Steps:

  1. Preheat oven to 350 degrees F. Line cupcake tin with liners.
  2. In a large bowl, whisk together flour, sugar, baking soda, and salt. Add the almond milk, olive oil, vinegar, and vanilla. Mix until just combined.
  3. Divide batter in cupcake tin. Bake 18-20 minutes. Allow cupcakes too cool in the pan for 1 minute before removing to a cooling rack.

*This recipe is adapted from Alison at http://lovingitvegan.com/vegan-vanilla-cake/*

Vegan Maple Glaze

Ingredients:

  • 1 1/2 C powdered sugar
  • 1/2 C almond milk
  • 1/2 C canola oil
  • 1 tbsp maple syrup
  • 1/2 tsp vanilla extract

Steps:

  1. Using a hand mixer, whisk together all ingredients until smooth. Poor over cooled cupcakes.

Vegan Vanilla Cupcakes with Vegan Maple Glaze  Sew You Think You Can Cook

#FoodieExtravaganza: Doughnuts

foodieextravaganza-300

July has arrived and that means it’s time for another #FoodieExtravaganza! Each month we take turns hosting and selecting a foodie holiday associated with that month. Somehow in all the planning July was overlooked so in a mad dash in the second half of June Lauren of From Gate to Plate told us to celebrate the doughnut. If anyone is keeping score, National Doughnut Day is actually the first Friday in June, but none of us are complaining to be celebrating one of America’s favorite breakfast treats today. July is national culinary arts month so let’s just go with that. Also in July: Fried Chicken Day (today, the 6th), Blueberry Muffin Day (the 11th), and Junk Food Day (the 21st).

I have a soft spot for doughnuts or is it donuts? However you spell it, I’ll eat it. While I prefer a yeast and fried doughnut, I made a cake doughnut. It’s simply easier and less messy. Besides, I need to use my doughnut pan!

I swear, over the past few months my sweet tooth has re-awoken after 6 years of being dormant. I am now searching for that something sweet after dinner, something I get from my dad! That something sweet can be as small as a handful of M&Ms or as decadent as some ice cream. And speaking of that sweet tooth, chocolate is starting to reign supreme, too. Even when my sweet tooth was pretty vocal, I always gravitated towards those sugary, tart sweets over chocolate. I don’t quite know how to handle this new taste preference, I now seem to always have a bag of chocolate covered raisins in the pantry.

Thanks to the chocolate love, I gravitated heavily towards a fancier doughnut than I’d typically do. Chocolate Snickerdoodle Doughnuts. Because. Cinnamon. And chocolate. What could possibly be bad about that?! I did think chocolate chips inside the doughnut and the chocolate ganache on top of the doughnut was just a touch too rich, so I omitted the chips. They weren’t missed. However, not having them in the batter resulted in a lower yield of doughnuts. But for 2.5 of us, one dozen was plenty!

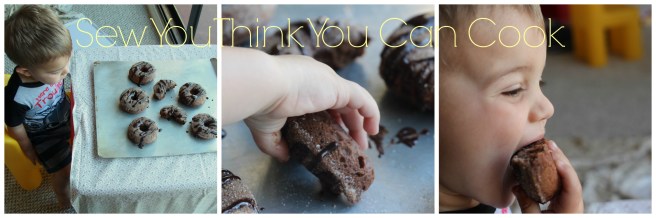
We enjoyed these doughnuts for Father’s Day breakfast. And the father of my children was definitely getting impatient while I finished glazing and photographing the doughnuts. Firecracker’s insistence on regaining possession of his toddler table for his trains didn’t help speed things along. But everyone waited calmly. And the wait was well worth it.

Chocolate Snickerdoodle Doughnuts  Sew You Think You Can Cook

Chocolate Snickerdoodle Doughnuts

Ingredients for doughnuts:

  • 2 C flour
  • 1 C sugar
  • 1/4 C cocoa powder
  • 2 tsp baking powder
  • 1 tsp cream of tarter
  • 1 tsp salt
  • 1 tsp cinnamon
  • 1/4 tsp nutmeg
  • 2 eggs
  • 1 C buttermilk
  • 3 tbsp melted butter
  • 1 tbsp vanilla extract

Ingredients for toppings:

  • 3 tbsp melted butter
  • 1/2 C sugar
  • 1 tsp cinnamon
  • 1 C semi-sweet chocolate chips
  • 3/4 C heavy cream

Steps:

  1. Preheat oven to 350 degrees F. Grease a doughnut pan.
  2. In a large bowl, whisk together the flour, sugar, cocoa powder, baking powder, cream of tarter, salt, cinnamon, and nutmeg.
  3. In another bowl, whisk together the eggs, buttermilk, butter, and vanilla.
  4. Add the dry ingredients into the wet and mix until combined.
  5. Pour batter into prepared doughnut pan. Bake 10-12 minutes, until a toothpick inserted comes out cleanly. Let doughnuts cool in the pan for 1 minute before transferring to a wire rack to cool.
  6. Make the cinnamon sugar: In a shallow bowl, combine the cinnamon and sugar. Set aside.
  7. Make the ganache: Put chocolate chips and heavy cream in a microwave safe bowl. Microwave in 20 second increments, stirring, until the chocolate is melted. Allow ganache to cool slightly. Set aside.
  8. Brush cooled doughnuts with melted butter. Dip in cinnamon sugar. Top with ganache.

*This recipe is adapted from Melanie at http://melaniemakes.com/blog/2014/03/triple-chocolate-snickerdoodle-donuts.html*

Chocolate Snickerdoodle Doughnuts for #FoodieExtravaganza from Sew You Think You Can Cook

Be sure to check out these other doughnuts:

Gluten-Free Matcha Doughnuts – Three Ways! by Culinary Adventures with Camilla
Raspberry Cookies n Cream Baked Doughnuts by Baking in Pyjamas
Lemon Poppy Seed Donuts by Making Miracles
Baked S’mores Doughnuts by Tara’s Multicultural Table
Strawberry Shortcake Donut Tarts by Fearlessly Creative Mammas
15 Minute Funnel Cake Bites by From Gate to Plate
Cake Mix Donuts by I’m Hungry
Doughnut Trifle by A Day in the Life on the Farm
Watermelon Doughnuts by The Freshman Cook
Baked Cherry Lemon Donuts by Caroline’s Cooking
Orange Glace Donuts by Basic N Delicious
Medhu Vada – Savory Lentil Doughnut by Sneha’s Recipe

If you are a blogger and would like to join our group and blog along with us, come join our Facebook page Foodie Extravaganza. We would love to have you! If you’re a spectator looking for delicious tid-bits check out our Foodie Extravaganza Pinterest Board! Looking for our previous parties? Check them out HERE.

Fried Chicken

I have to say, I am really enjoying Food Network’s The Kitchen. I was skeptical at first. I wasn’t sure how the format and casting was really going to work out. But they’re 10 seasons in and it seems there’s no stopping! I enjoy watching the interactions between the different chef personalities and The Kitchen joined my DVR queue. Earlier this year they did a Southern Comforts show.

On that show, we watched Katie Lee make fried chicken. Fried chicken is one of those dishes I thought I’d never end up being brave enough to do at home. But after listening to Katie’s tips and watching her do it I couldn’t stop dreaming about it. It’s her use of hot sauce that had me.

katie lee interactionI decided to give it a shot. So of course I had to share it on Instagram and Twitter. And could you believe my amazement when Katie Lee herself (or maybe one of her people, I don’t know) replied to me!? If I didn’t love The Kitchen cast already, I just loved them even more. We’ve had Twitter interactions with Jeff Mauro, too! Cue the star-struck squeals of excitement. My husband and I are huge fans of Jeff because he’s a Cross-Fitter, from Chicago, and we love his sense of humor. To be friends with The Kitchen family could probably go on my bucket list, but it’s an item that would never get a check mark, so I’ll leave it there in dream land.

Back to the chicken.

This chicken was perfect! Incredibly crispy and still juicy. Part of the draw was the dual cook method of fryer and oven. Doing so prevents the crust from burning before the chicken is fully cooked. If you’re a newbie to frying chicken like I am, don’t be scared. Give this recipe a try.

Fried Chicken

Ingredients:

  • 2-3 lb bone-in, skin-on chicken pieces (I used just drumsticks)
  • 1 tbsp kosher salt
  • 2 tsp pepper
  • 1 tsp garlic powder
  • 3 eggs
  • 1/2 C hot sauce
  • 1/2 C buttermilk
  • oil for frying (I used canola oil)
  • 2 1/2 C flour

Steps:

  1. In a small bowl, combine salt, pepper, and garlic powder. Season chicken on both sides.
  2. In a large bowl, whisk together the eggs, hot sauce, and buttermilk. Add the chicken and toss to coat. Cover and refrigerate 2-4 hours.
  3. Heat oil in a Dutch oven to 350 degrees F.
  4. Preheat oven to 450 degrees F. Line a rimmed baking sheet with a wire rack.
  5. Remove chicken from the marinade. Dredge in flour.
  6. Working in batches, fry the chicken in the hot oil, covered, for 5 minutes. Flip the chicken and cook, uncovered, another 5 minutes. Place chicken on the prepared baking sheet. Repeat until all chicken is fried.
  7. Bake fried chicken 10 minutes, until fully cooked.

*This recipe is adapted from Katie Lee at http://www.foodnetwork.com/recipes/katie-lee/fried-chicken.html*

fried chicken  sew you think you can cook.jpg

#SundaySupper: Easy to Make Patriotic 4th of July Recipes

It’s July 3rd, the day my Firecracker turns two! (TWO!) It also happens to be the day before Independence Day – the 4th of July. Which is why #SundaySupper is celebrating with Easy to Make Patriotic Recipes.

To kick start a festive morning, might I suggest these stars? They’re a baked pancake, which I’m dubbing “breakfast cake.” It makes me think of that Jim Gaffigan skit:

You’re not having cake for breakfast; you’re having fried cake, with syrup on top!

I made this breakfast after returning from my brother’s wedding in FL last month from a bare pantry. I think that qualifies my recipe as being “easy to make.” I didn’t have any butter, so I used oil, and I didn’t have enough sugar for both the baked pancake and the syrup, so I decided to add vanilla to the batter and keep the sugar for the syrup.

I used a star cookie cutter to make the shapes and topped them with strawberry syrup and fresh blueberries. The leftover pieces of “cake” were handed to Treat, with no sugar I didn’t feel too guilty about it.

IMG_9217

The 4th of July is in my top three of favorite holidays. I love creating menus in my country’s colors. Three years ago I went all out with a Red, White, and Blue Spread: complete with colored star shaped ice cubes and dyed pasta! Two years ago was my first year (probably ever) missing the fireworks display, but I had a good reason. Last year I was on cloud 9 celebrating the holiday (and Firecracker’s 1st birthday) with my entire family where I spent my childhood Fourths.

IMG_1037
My 1 day old Firecracker – 2014

This year we will be experiencing our first California 4th of July. I am hoping for a fog-less, smog-less night so we can watch up to 3 Fireworks shows from our balcony. We’ll be grilling burgers, drinking sangria, and chowing down on rice krispie treats. (I can’t not have rice krispie treats!)

Breakfast Cake Stars with Strawberry Syrup

Ingredients for Breakfast Cake:

  • 1 1/2 C flour
  • 2 tsp baking powder
  • 1/2 tsp salt
  • 2 eggs
  • 1 1/4 C buttermilk
  • 1/4 C vegetable oil
  • 2 tsp vanilla extract

Ingredients for Strawberry Syrup:

  • 2 C diced strawberries
  • 1 C + 1 tsp water, divided use
  • 1/2 C sugar
  • 1 tsp corn starch

Steps:

  1. Preheat the oven to 350 degrees F. Lightly grease a 9″ x 13″ cake pan.
  2. In a large bowl, whisk together the flour, baking powder, and salt. In another bowl, whisk together the eggs, buttermilk, oil, and vanilla. Combine the wet ingredients into the dry. Pour into the cake pan and bake for 20 minutes, or until lightly golden and a toothpick inserted comes out cleanly.
  3. Make the syrup: Put strawberries in a saucepan with 1 C water and the sugar. Bring to a boil over medium heat. Cook 15 minutes, or until the syrup has started to thicken and the strawberries have broken down.
  4. In a small bowl, whisk together the remaining teaspoon of water and the cornstarch. Add to the syrup. Allow syrup to thicken another 5 minutes. Remove from heat. Strain.
  5. Option: Using a cookie cutter, cut shapes out of the breakfast cake. Serve with strawberry syrup and fresh blueberries.

*This recipe is adapted from April at http://www.girlgonegourmet.com/2016/06/pancake-squares.html*

Breakfast Cake Stars with Strawberry Syrup for #SundaySupper from Sew You Think You Can Cook

All-American Appetizers

America the Beautiful Beverages

Raise the Flag Breakfasts

For the Red, White and Blue Salads and Main Dishes

Oh Say Can You See Desserts

Sunday Supper MovementJoin the #SundaySupper conversation on twitter on Sunday! We tweet throughout the day and share recipes from all over the world. Our weekly chat starts at 7:00 pm ET. Follow the #SundaySupper hashtag and remember to include it in your tweets to join in the chat. To get more great Sunday Supper Recipes, visit our website or check out our Pinterest board.

Would you like to join the Sunday Supper Movement? It’s easy. You can sign up by clicking here: Sunday Supper Movement

#TourDeManger: Walnut Cake

Eat the Tour De France image

When my blogging buddy Sarah of Curious Cuisiniere informed me she wanted to gather a group of bloggers to celebrate the Tour de France I thought it’d be fun to join in. While I don’t watch or follow the race (sorry, bikers, tennis and soccer trump you in our house), I can appreciate some good food!

The idea behind today’s blogging event is to eat through the race route. The race starts in Mont-Sait-Michel, dips into Spain and Switzerland, and ends in Paris.

My recipe today comes from Southwest France, more specifically, Aquitaine. Aquitaine has a little bit of everything – from seaside to mountains to woodland and farmland. The area is known for its wine, truffles, and walnuts. Northeast Aquitaine, the Dordogne area, is considered to be one of the oldest populaces  in Europe. Pau in Southern Aquitaine is Stage 8 of Le Tour De France.

I decided to make a walnut cake. Those cyclists need some sugar to keep going, right?! I adore this cake, and it couldn’t be any simpler to make. I’ll admit, I was skeptical because it doesn’t have a leavening agent in it. And I was converting metric units to American measurements. Technically… I used 13 extra grams of butter and somewhere between a third and a half cup extra flour, but hey, it worked! The cake didn’t rise (or if it did I couldn’t tell) but that didn’t mean it was dense. This walnut cake was somehow fluffy, sweet, and had texture from the ground nuts. A perfect base for some chocolate.

And it wasn’t at all my mid morning snack this week….

Walnut Cake

Ingredients:

  • 1 stick butter, softened
  • 1 1/2 C powdered sugar, divided use
  • 1 1/2 C halved walnuts
  • 3 eggs
  • pinch of salt
  • 1/2 C flour
  • 1 C semisweet chocolate chips
  • 3/4 C heavy cream

Steps:

  1. Preheat oven to 350 degrees F. Grease an 8″ circle cake pan.
  2. In the bowl of a stand mixer fitted with the paddle attachment, cream together the butter and 3/4 C powdered sugar.
  3. Place the walnuts in a food process and pulse until finely ground, but having some texture. Transfer to a bowl and mix with the remaining 3/4 C powdered sugar.
  4. Add the walnut mixture to the butter and mix until combined. Add the eggs one at a time until fully incorporated. Add a pinch of salt and the flour, mix until combined.
  5. Transfer cake batter to the prepared cake pan. Bake 35-40 minutes, until golden and a toothpick inserted comes out cleanly. Allow cake to cool in the pan.
  6. Put chocolate chips and heavy cream in a microwave safe bowl. Microwave in 20 second increments, stirring, until the chocolate is melted. Allow ganache to cool slightly before pouring over the cake. Garnish with extra walnuts if desired.

*This recipe is adapted from http://southweststory.com/french-south-west-gastronomy*

Walnut Cake for #TourDeManger from Sew You Think You Can Cook

See what the other bloggers have made from the other regions on the race route. Be sure to visit each one to learn more about the regions on the route and to enjoy a taste of the cuisine! Show us how you plan to eat your way though Le Tour de France all month long with the hashtag #TourDeManger !

#MuffinMonday: Chocolate Chip Blood Orange Muffins

Muffin Monday

#MuffinMonday is a group of muffin loving bakers who get together once a month to bake muffins to brighten their Mondays. There isn’t a theme to #MuffinMonday posts so anything goes, as long as it’s a muffin!

You can see all our of lovely muffins by following our Pinterest board. Updated links for all of our past events and more information about Muffin Monday can be found on our home page.

About a month and a half ago I finally had the opportunity to discover first hand the beauty that is the blood orange. I’ve known of them but had never found them anywhere. And then one of the farmers markets had them and I grabbed a fair few. Most of them I simply indulged in my new favorite thing to do: cut open a blood orange and snap a photo of it (see Instagram) then squeeze the juice out of it and have a fresh glass. As blood oranges can vary in color from orange to dark red I had a blast being surprised by each slice of the knife. I came to the conclusion that the darker the fruit, the sweeter its juice.


When I made these muffins I “wasted” the darker oranges on the juice that went into the batter. The ones I’d saved for the photographs looked like your boring, everyday run-of-the-mill orange. Go figure. The pigment of your orange will actually affect the final color of your muffin.

This recipe makes 1 dozen muffins.

Chocolate Chip Blood Orange Muffins

Ingredients:

  • 1 3/4 C flour
  • 1/2 C sugar
  • 1 1/2 tsp baking powder
  • 1 1/2 tsp baking soda
  • 1/4 tsp salt
  • zest of 3 blood oranges
  • 3/4 C chocolate chips
  • 2 eggs
  • 2/3 C fresh blood orange juice (3-4 oranges)
  • 1 stick  butter, melted
  • 1 tsp vanilla extract

Steps:

  1. Preheat oven to 400 degrees F. Line a muffin tin with liners.
  2. In a large bowl whisk together the flour, sugar, baking powder, baking soda, salt, and orange zest. Mix in the chocolate chips.
  3. In another bowl whisk together the eggs, juice, butter, and vanilla.
  4. Mix the wet ingredients into the dry ingredients. Divide batter among prepared muffin tin.
  5. Bake 20-25 minutes, or until a toothpick inserted comes out cleanly. Allow muffins to cool in the pan 5 minutes before removing to a cooling rack.

*This recipe is adapted from Tara at http://tarasmulticulturaltable.com/blood-orange-chocolate-chip-muffins/*

Chocolate Chip Blood Orange Muffins for #MuffinMonday from Sew You Think You Can Cook

And don’t forget to check out these other muffin recipes:

Banana Bread and Chocolate Muffins from Making Miracles

Grilled Cherry Muffins from Farm Fresh Feasts

Jamaican Me Hungry Muffins from A Day in the Life on the Farm

Margarita Sour Cream Muffins from Karen’s Kitchen Stories

Pancake Muffins from Passion Kneaded

Sweet Corn Muffins from Food Lust People Love

#SundaySupper: Waffles!

I am so excited to be back blogging with the Sunday Supper Movement. My last post was the Regional Specialties themed day – OVER TWO MONTHS AGO! I have definitely missed being able to share the table with this great group of foodies.

As soon as the theme was revealed for today’s event, you know I couldn’t miss out on this one. Waffles! If you know me but at all you’d probably have reported a missing person had I not chimed in today. Thanks, Sue from A Palatable Pastime, for hosting today’s event at a time in my life when I could finally participate in #SundaySupper. I know you did it just for me and not because National Waffle Iron Day is Wednesday. 😉 Be sure to scroll past my recipe for a collection of over 35 waffles recipes.

Having made just a few waffles in my day, I decided to throw caution to the wind and make my own waffle. I did it “by feel” and needed to adjust my flour amount before I was comfortable with the batter. I’m happy to report that my waffles worked out, and my creative flavor combination wasn’t a failure.

I love pairing cherries with chocolate, so those hand picked cherries of ours found their way into my waffles. As sometimes the only way to get Firecracker to eat is by way of waffle or pancake, I knew I had to throw something nutritious in there. That’s where the beets come in. I was going to roast them and toss them in a smoothie, but this way was easier.

An Original Recipe

Chocolate Cherry Beet Waffles

Ingredients:

  • 1 1/4 C flour
  • 3/4 C whole wheat flour
  • 1/4 C cocoa powder
  • 1/4 C sugar
  • 1 tbsp baking powder
  • 1/2 tsp salt
  • 1/4 tsp baking soda
  • 2 eggs
  • 2 C milk
  • 1/3 C vegetable oil
  • 1 tsp vanilla extract
  • 3/4 C shredded beets, patted dry
  • 2 C fresh cherries, pitted and chopped
  • whipped cream for serving (optional)

Steps:

  1. In a large bowl, whisk together the flours, cocoa powder, sugar, baking powder, salt, and baking soda.
  2. In another bowl, whisk together the eggs, milk, oil, and vanilla.
  3. Mix the wet ingredients into the dry ingredients. Fold in the beets and cherries.
  4. Into a hot greased waffle iron, drop 1/3 C of batter and cook until browned. Serve with whipped cream.

Chocolate Cherry Beet Waffles for #SundaySupper from Sew You Think You Can Cook

Sweet and Sinful:

Savory Brinner Winners:

Sunday Supper MovementJoin the #SundaySupper conversation on twitter on Sunday! We tweet throughout the day and share recipes from all over the world. Our weekly chat starts at 7:00 pm ET. Follow the #SundaySupper hashtag and remember to include it in your tweets to join in the chat. To get more great Sunday Supper Recipes, visit our website or check out our Pinterest board.

Would you like to join the Sunday Supper Movement? It’s easy. You can sign up by clicking here: Sunday Supper Movement