#MuffinMonday: Strawberry and Chocolate Muffin Hearts

Muffin Monday It’s time for another Monday filled with muffins!

#MuffinMonday is a group of muffin loving bakers who get together once a month to bake muffins to brighten their Mondays. There isn’t a theme to #MuffinMonday posts so anything goes, as long as it’s a muffin!

You can see all our of lovely muffins by following our Pinterest board. Updated links for all of our past events and more information about Muffin Monday can be found on our home page.

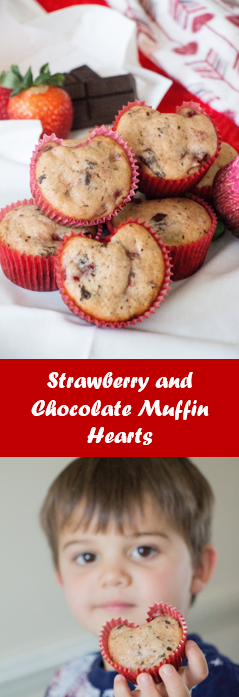
I’m keeping the Valentine’s Day spirit alive with my February #MuffinMonday submission. Muffins shaped as hearts! And involving both chocolate and strawberries together. Who doesn’t want to start their morning with a little love in a muffin cup?

IMG_6145As part of our Valentine’s themed school unit, I thought it’d be fun to bake muffins with the boys. It was the perfect way to end the lessons

Bonus points – the boys now have added marbles to their toy collection. I taped an octagon (because who can tape a circle?!?) on the carpet with painters tape and we played a game of rolling the single larger marble into the “circle” to get marbles out of the circle. Firecracker is really into this game. Treat prefers to just kick and stomp through the circle, dispersing every single marble across the floor. If you have other good marble games to play, please share them in the comments!

Treat even took a nap the day we baked these muffins so I was able to put in a little extra photography effort with the help of Firecracker, who really wanted to be in the pictures.

This recipe makes 24 muffin hearts.

Strawberry and Chocolate Muffin Hearts

Ingredients:

  • 2 C flour
  • 1 C sugar
  • 2 tsp baking powder
  • 1 tsp cinnamon
  • pinch of salt
  • 10 oz frozen strawberries, thawed, chopped, and drained
  • 1 egg
  • 2/3 C buttermilk
  • 1/2 C canola oil
  • 2 tbsp sour cream
  • 1 tsp vanilla extract
  • 2 1/2 oz unsweetened chocolate, chopped

Steps:

  1. Preheat oven to 400 degrees F. Line muffin tins with paper liners.
  2. In a large bowl, whisk together the flour, sugar, baking powder, cinnamon, and salt. Add the strawberries, tossing to coat and distribute evenly.
  3. In another bowl, whisk the egg, buttermilk, oil, sour cream, and vanilla until combined.
  4. Add the wet ingredients to the dry ingredients, stirring to incorporate. Fold in the chopped chocolate.
  5. Fill muffin cups halfway with the batter. Gently tuck back the liner and put a marble between the liner and the tin (not in the batter). Bake 20min, until a toothpick inserted comes out cleanly.

*This recipe is adapted from Averie at https://www.averiecooks.com/2014/01/strawberry-chocolate-chip-muffins.html, the method from Getty at http://www.gettystewart.com/does-using-marbles-to-make-heart-shaped-muffins-really-work/*

Strawberry and Chocolate Muffin Hearts for #MuffinMonday from Sew You Think You Can Cook

And don’t forget to check out these other muffin recipes:

Bouchon Bakery Style Carrot Muffins from Karen’s Kitchen Stories

Cocoa Beet Chocolate Chip Muffins from Farm Fresh Feasts

Lucky Charms Muffins from Palatable Pastime

Morning Glory Muffins from Food Lust People Love

Rice Cereal Apple Muffins from A Day in the Life on the Farm

Strawberry and Chocolate Muffin Hearts from Sew You Think You Can Cook

#CranberryWeek: White Cheddar and Cranberry Dip

It’s day three of #CranberryWeek hosted by Caroline of Caroline’s Cooking. We’re sharing cranberry-inspired creations all week long in celebration of national cranberry day. Search #CranberryWeek to keep up to date and follow the #CranberryWeek Pinterest board for more cranberry inspiration.

I made this dip last year at Christmas and it was enjoyed by all. Who doesn’t love a dip in a bread bowl!? I held on to it hoping that #CranberryWeek would indeed return in 2017.

White Cheddar and Cranberry Dip for #CranberryDip from Sew You Think You Can Cook

The photos taken at my parents’ house last year were not worth editing and I knew I’d have to make this dip again. It’s still delicious – the cheddar cheese has a bite that challenges that of the fresh cranberry while the cranberry sauce lends just a back-note of sweetness.

White Cheddar and Cranberry Dip

Ingredients:

  • 1 1/2 C shredded extra-sharp white cheddar cheese
  • 1/2 C shredded Gruyere cheese
  • 1 block (8 oz) cream cheese, at room temperature
  • 1/2 C fresh cranberries
  • 1/4 C cranberry sauce
  • 1 sourdough boule loaf

Steps:

  1. Preheat oven to 375 degrees F.
  2. In a large bowl, mix together shredded cheese and cream cheese until combined. (Option to reserve some of the cheddar cheese for topping.) Fold in the cranberries and cranberry sauce.
  3. Create a bowl from the sourdough by cutting the top and scooping out the insides, leaving enough thickness for a wall. Cube up the removed bread for serving.
  4. Pour cheese mixture into the bread bowl. Place on a baking sheet and bake 30 minutes. Top with reserved cheese, if desired, and broil until golden.
  5. Serve with cubed sourdough bread, vegetables, and crackers.

*This recipe is adapted from https://californiagoldminer.com/recipe/white-cheddar-cranberry-dip*

White Cheddar and Cranberry Dip for #CranberryWeek from Sew You Think You Can Cook

Be sure to check out these other great cranberry recipes:

Butternut Squash Wild Rice Salad with Cranberries and Fennel from Caroline’s Cooking

Cranberry Almond Chicken Salad Wraps from Family Around The Table

Cranberry Cheeseball by The Freshman Cook

Cranberry Cobbler from Cookaholic Wife

Cranberry Gremolata from Culinary Adventures with Camilla

Cranberry Orange Relish from Books n’ Cooks

Jellied Cranberry Sauce from Palatable Pastime

Orange Cranberry Sweet Rolls from A Kitchen Hoor’s Adventures

Pear Holly Cocktail from Bear & Bug Eats

Roasted Green Beans with Cranberries from Making Miracles

Slow Cooker Cranberry BBQ Chicken from Jonesin’ For Taste

Slow Cooker Cranberry Pot Roast from Everyday Eileen

White Cheddar and Cranberry Dip from Sew You Think You Can Cook

White Chocolate Cranberry Blondies from House of Nash Eats

Mummy Granola Bars

Granola bars have been on my “to make” list for quite some time. In fact, I’ve tried making them before with disastrous results.

So I did some searching for another type of recipe – this one a no bake!

These chewy granola bars are made kind of like rice krispie treats! They’re packed full of healthy ingredients (and sugar) and given the mummy treatment with a drizzling of melted white chocolate. To give the mummies eye, I simply cut raisins, though melted dark chocolate would work quiet well, too.

These granola bars have an airy crispiness from the rice cereal and a smokey sweetness from the local honey I used in the recipe. Because I was mummifying these granola bars with a drizzling of white chocolate I opted to omit the mini chocolate chips.

If you have a granola bar recipe you swear by, by all means use that – and share it in the comments, I’d love to expand my granola bar repertoire!

Mummy Granola Bars

Ingredients:

  • 6 tbsp butter
  • 1/3 C brown sugar
  • 1/4 C + 2 tbsp honey
  • 1 1/2 tsp vanilla extract
  • 2 C quick oats
  • 1 3/4 C crispy rice cereal
  • 1/2 C sliced almonds
  • 1/4 C flax meal
  • white chocolate
  • raisins or dark chocolate

Steps:

  1. Line a 9×11″ baking pan with aluminum foil and lightly grease with cooking spray.
  2. In a large pot over medium heat, melt the butter, brown sugar, and honey together. Bring to a boil, reduce the heat, and cook 2 more minutes, until thickened slightly. Remove from the heat and add the vanilla, stir to incorporate.
  3. Fold in the oats, cereal, almonds, and flax meal. Mix until combined.
  4. Pour into the prepared baking dish and press firmly. Cover and refrigerate until set, at least 2 hours.
  5. Remove from the fridge and cut into rectangles.
  6. Melt the white chocolate and pour over the granola bars to make them look like mummies. Cut a raisin in half for each granola bar to make eyes.
  7. Store in the refrigerator.

*This recipe is adapted from Jenn at https://www.onceuponachef.com/recipes/chewy-chocolate-chip-granola-bars.html*

Mummy Granola Bars | Sew You Think You Can Cook

#ChoctoberFest: Cocoa Butter Granola

Dislcaimer: I received products as part of #Choctoberfest for review. All opinions and statements are my own.

#Choctoberfest

I’m happy to be back for the final day of #ChoctoberFest to remind you it’s your last chance to enter the amazing giveaway thanks to our fabulous sponsors. One of those sponsors, Caveman Coffee, provided product that is the star of my recipe today.

caveman-coffee-logoCaveman Coffee was founded by three athletes (I can’t wait to share this information with my husband when we reunite this weekend!) who joined forces with a master coffee roaster from Albuquerque to create sustainable and naturally grown coffee. Their coffee beans are hand-picked and wet-processed before roasting.

In addition to coffee they have other paleo-friendly products, including Coconut Oil, Cocoa Butter, and Green Tea.

cc-packageI received a bag of White Gold coffee beans and a bag of cocoa butter as part of #Choctoberfest. I’d never worked with cocoa butter before and was quite excited to explore its possibilities. I honestly didn’t even know what to expect! In my mind I was picturing something along the lines of a nut or seed butter (after all, cocoa is a seed). Contrary to my perception, cocoa butter is better used as an oil or dairy butter substitute, with a slightly chocolaty aura. The best part is that it’s a healthy vegan option that doesn’t involve coconut which I’m allergic to!

I decided to make a granola using the cocoa butter, but my head is already reeling with more ways to use the product. I’m dreaming about some rice krispie treat action… Caveman Coffee suggest stirring it into their hot coffee for a mocha inspired beverage.

This granola is addicting and perfect for topping your morning yogurt with some fresh strawberries. It can be used in any way you’d use a sweet granola – in cookies or pancakes and atop ice cream. I tested it out as my morning cereal and while it does work, the min chocolate chips make it a little “odd,” but the oats were fantastic with the addition of cool milk.

Cocoa Butter Granola featuring Caveman Coffee Cocoa Butter for #Choctoberfest from Sew You Think You Can Cook

My boys quite enjoyed the granola as well. Even my Treat who doesn’t like oatmeal quite enjoyed the sweetened oats when paired with strawberries and vanilla yogurt. However, when given a cup to himself, Firecracker simply picked out the chocolate chips.

Cocoa Butter Granola

Ingredients:

  • 3/4 C cocoa butter
  • 1/2 C brown sugar
  • 2 1/2 C old fashioned oats
  • 1/2 C mini chocolate chips

Steps:

  1. Preheat oven to 300 degrees F.
  2. Place cocoa butter and sugar in a small saucepan over medium heat until melted. Remove from heat and stir in the oats, tossing to coat.
  3. Spread oats onto a rimmed baking sheet and bake 20 minutes, tossing halfway through. Allow oats to cool before tossing with the chocolate chips.

cocoa-butter-granola-for-choctboerfest-from-sew-you-think-you-can-cook

Don’t forget to enter our giveaway and be sure to check out the other bloggers who posted more chocolate recipes today:

#MuffinMonday: Apple Carrot Muffins

Muffin Monday

#MuffinMonday is a group of muffin loving bakers who get together once a month to bake muffins to brighten their Mondays. There isn’t a theme to #MuffinMonday posts so anything goes, as long as it’s a muffin!

You can see all our of lovely muffins by following our Pinterest board. Updated links for all of our past events and more information about Muffin Monday can be found on our home page.

My cookbook library received a well deserved expansion this past Christmas and we excitedly started cooking out of them immediately. One of the books I received was a signed copy of Giada’s Happy Cooking. This cookbook is quite different from her previous cookbooks in both feel and format. Looking through the book makes me feel like I’m going through a beautiful magazine instead of a book book. There’s even a very honest introduction written by Giada.

The first thing we made were the black bean brownies. All I can say is these were… different. To be fair, we changed it up and used a can of refried black beans instead of regular black beans. Stuart took the interesting result to work for others to try our experiment. Successful wouldn’t be the term to describe that baking adventure! Maybe we’ll give them another go and follow her recipe exactly.

Apple Carrot Muffins for #MuffinMonday from Sew You Think You Can Cook (2)

Today’s muffins came from Happy Cooking. I did have to use all AP flour because I was out of wheat flour and omitted the flax meal. As always, I used cinnamon applesauce in place of the unsweeted regular applesauce called for. I also substituted golden raisins in place of dried goji berries. (I wouldn’t recommend shredding baby carrots, but you do what you gotta do!) Even with my changes, these muffins were definitely successful!

This recipe makes one dozen muffins.

Carrot and Apple Muffins

Ingredients:

  • 6 tbsp butter, at room temperature
  • 1 C dark brown sugar
  • 2 eggs
  • 1 1/4 C flour
  • 1 1/2 tsp baking powder
  • 1/2 tsp cinnamon
  • 1/2 tsp salt
  • 1/8 tsp allspice
  • 1/4 C cinnamon applesauce
  • 1/4 C apple juice
  • 1/2 – 2/3 C shredded carrot
  • 1/4 C golden raisins

Steps:

  1. Preheat oven to 350 degrees F. Line a muffin tin with liners.
  2. In the bowl of a stand mixer fitted with the paddle attachment, beat the butter and brown sugar until fluffy. Add in the eggs, one at a time.
  3. In a large bowl, whisk together the flour, baking powder, cinnamon, salt, and allspice. Add half of the flour mixture to the stand mixer and mix until combined.
  4. Add the applesauce and apple juice. Mix until incorporated.
  5. Add the remaining flour mixture and mix until combined. Fold in the carrot and raisins.
  6. Divide batter among the prepared muffin tin.
  7. Bake 18 – 20 minutes, or until a toothpick inserted comes out cleanly. Allow muffins to cool in the pan 5 minutes before removing to a cooling rack.

*This recipe is modified from Giada’s Happy Cooking*

Apple Carrot Muffins for #MuffinMonday from Sew You Think You Can Cook (1)

And don’t forget to check out these other muffin recipes:

Blueberry Cornmeal Sourdough Muffins from Karen’s Kitchen Stories

Cherry Chocolate Chip Muffins from Palatable Pastime

Cinnamon Molasses Muffins from Passion Kneaded

Cranberry White Chocolate Muffins from Making Miracles

Peanut Butter Cup Stuffed Chocolate Muffins from Food Lust People Love

Sour Cream and Green Onion Corn Muffins from A Day in the Life on the Farm

Spicy and Sweet Hummus Muffins from Kelli’s Kitchen

Strawberry Vanilla Yogurt Muffins from Farm Fresh Feasts

Disclaimer: This post contains affiliate links. 

CIC: Chickpeas & Honey

CIC-header

This month’s Crazy Ingredient Challenge was to combine chickpeas aka garbanzo beans and honey. Two ingredients that were already in my pantry. How was I to turn down the challenge!?

I kept it really simple this month and added only a few more ingredients, cinnamon sugar and olive oil. The result was a snack that we devoured within the hour! Roasted chickpeas will become a new snack staple and I can’t wait to play around with some other flavor combinations.

These chickpeas would be beautiful atop a salad, too. Much like the one I shared yesterday!

Cinnamon and Honey Roasted Chickpeas

Ingredients:

  • 1 can (15 oz) chickpeas, drained
  • 1 tbsp olive oil
  • 1 tbsp honey
  • 2 tsp cinnamon sugar

Steps:

  1. Lay chickpeas out on a clean towel and pat dry. Remove any lose skins. Leave chickpeas out until completely dried, about 45 minutes.
  2. Preheat oven to 400 degrees F. Line a baking sheet with aluminum foil.
  3. Lay chickpeas out on the prepared baking sheet. Roast 40 minutes, or until crunchy.
  4. Toss roasted chickpeas in oil. Add the honey and cinnamon sugar. Place chickpeas back on the baking sheet and roast another 5 minutes.

*This recipe is adapted from Debbie at http://www.madefrompinterest.net/roasted-chickpeas-recipe/*

Cinnamon and Honey Roasted Chickepeas for Crazy Ingredient Challenge from Sew You Think You Can Cook

To see the other bloggers who participated in this month’s Crazy Ingredient Challenge click on the link below.

#SundaySupper: Back to School

Most schools are starting this coming week and some have even already been in class for a week or more! If you’re part of the lucky ones who wait until Labor Day to start the school year, enjoy the rest of your summer.

Today’s Sunday Sunday Supper menu will help you get ready for the school year, with plenty of ideas to get breakfast or dinner on the table quickly, lunches to make your kids happy, and snacks to keep you going. A big thank you to DB of Crazy Foodie Stunts and Caroline of Caroline’s Cooking for hosting this event and helping us stay organized this school year!

When I think “Back to School” I think of Peanut Butter and Jelly sandwiches. I don’t exactly need to give you a recipe for PB&J – unless it’s my grilled one! Instead I decided to make muffins! These PB&J muffins are a perfect busy weekday breakfast or after school snack.

PB&J Muffins

Ingredients:

  • 2 C flour
  • 1/2 C sugar
  • 1 tsp baking powder
  • 1 tsp baking soda
  • 1/2 tsp salt
  • 1/2 C creamy peanut butter
  • 1 C buttermilk
  • 1 tsp vanilla extract
  • 3 tbsp canola oil
  • 2 eggs
  • 1 C jam (I use all fruit grape spread)

Steps:

  1. Preheat oven to 400 degrees F. Line muffin tins with liners (makes 18-20).
  2.  In a large bowl whisk together flour, sugar, baking powder, baking soda, and salt.
  3. In another bowl stir peanut butter and buttermilk together until smooth. Add in the vanilla, oil, and eggs.
  4. Add peanut butter mixture to dry ingredients and stir until combined – it’s thick! Fold in the jam.
  5. Fill prepared muffin tins. Bake 15 – 17 minutes, until a toothpick inserted comes out cleanly.

*This recipe is adapted from Renee at http://www.reneeskitchenadventures.com/2014/05/peanut-butter-and-jelly-muffins.html*

PB&J Muffins for #SundaySupper from Sew You Think You Can Cook

Getting Started On School Days

Ideas for the Lunchbox

After School Snacks and Beverages

School Night Suppers

Sweets to End the Day

8387592742_f6164fd5a8_o
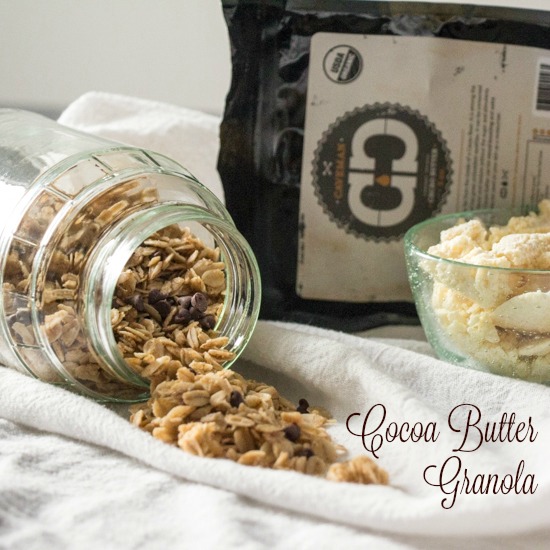
Join the #SundaySupper conversation on twitter on Sunday! We tweet throughout the day and share recipes from all over the world. Our weekly chat starts at 7:00 pm ET. Follow the#SundaySupper hashtag and remember to include it in your tweets to join in the chat. To get more great Sunday Supper Recipes, visit our website or check out our Pinterest board.

Would you like to join the Sunday Supper Movement? It’s easy. You can sign up by clicking here: Sunday Supper Movement.

Cinnamon Peanut Butter and Honey Popcorn

When we went to the Farmer’s Market in Virginia we picked up a carton of cinnamon peanut butter. If you’re a frequent reader then you know of my cinnamon obsession. How was I to pass up cinnamon peanut butter?! This peanut butter created by Sprelly is thick in texture so I thought the best way to use it would be to heat it up to make it more spreadable. I thought about making an ice cream with it (and still might!) but when my friend was hosting a “Going to the Movies” game night I knew immediately that I’d make popcorn! Funnily enough, she was also providing four different popcorn flavors to munch on – one of which was a peanut butter and honey. I’m pretty sure we followed the same recipe! Her peanut butter coating did coat the popcorn better, and I’m going to guess that’s because she used a creamy peanut butter. This popcorn can be stored in an air tight container and will stay fresh 2-3 days.

Cinnamon Peanut Butter and Honey Popcorn

Ingredients:

  • canola oil, enough to coat bottom of pot
  • 1/2 C unpopped popcorn kernels
  • 1/4 C honey
  • 1/4 C cinnamon peanut butter
  • 1 tsp vanilla bean paste (I used Nielsen-Massey)
  • salt, to taste

Steps:

  1. Put canola oil in pot over medium high heat along with 2-3 kernels of popcorn. Cover and stand by. Once you hear the kernels pop, add the 1/2 C of popcorn. Cover and cook over medium heat until popping slows. Gently shake the pot during the popping process so as not to burn the popcorn at the bottom. Remove from heat and remain covered until popping has ceased, unless you want to be pelted with popcorn. (If you have another method of popping popcorn, feel free to use it.) Place popcorn in a large bowl. Note: It is highly suggested you remove any unpopped kernels as they’ll be hard to pick out once mixed with the peanut butter coating. 
  2. In a small saucepan over medium heat, combine honey and sugar. Allow to simmer two minutes. Immediately add the peanut butter and vanilla. Whisk until smooth, if the mixture hardens simply reheat. You can also add some more honey if needed.
  3. Pour peanut butter mixture over popcorn and toss to coat.
  4. Spread popcorn onto baking sheets to allow it to set. Store in an air tight container for up to three days.

*This recipe is adapted from Rachel at http://www.rachelcooks.com/2013/07/08/peanut-butter-popcorn/*

Cinnamon Peanut Butter and Honey Popcorn  Sew You Think You Can Cook

*This recipe is adapted from Rachel at http://www.rachelcooks.com/2013/07/08/peanut-butter-popcorn/*

Blogger CLUE: Apple Chips

blogger CLUE

This month my Blogger CLUE friends and I are going on a picnic! We were tasked with searching our assigned blogs for picnic food. With the beautiful weather, the season is just begging us to bring a blanket and sit outside for hours.

I was assigned the blog A Mama, Baby, & Shar-pei in the Kitchen written by Alice. Alice is a mother to two active girls and one funnily named puppy. She gives a story about her dog’s name (Patella Starscream) and it made me think very much of my husband, too, who would also have loved to name our child after a Transformer.

In searching through Alice’s blog I discovered that we share a love for Harry Potter. She created her own Felix Felicis! (For those of you non-HP nerds, Felix Felicis is a potion that provides the drinker luck for a day. Alice’s version is a cold remedy and I’ll definitely have to try it when cold season comes back around.) I also stumbled up a post about creating Ciabatta in which she likened herself to Hermione Granger. Seriously, Alice and I need to meet but as she lives in England I don’t see that happening.

On my hunt of picnic foods I narrowed it down to Buttermilk Fried Chicken, Pasta Salad, and Apple Chips. As you can tell, I settled on Apple Chips. Apple chips are incredibly easy to make and yet I’ve kept crossing them off my to-do list. For Christmas TWO years ago I’d asked for a mandolin with the intention of making apple chips. Finally the moment has come, thank you Alice and Blogger CLUE for the push! Alice used Granny Smith apples for her chips and while I do prefer that variety I wanted to try and recreate those bagged apple chips I enjoyed as a kid so I grabbed Red Delicious. (I NEVER buy Red Delicious apples, the texture of them is not my favorite and I don’t feel they have that apple crunch and quality that apples should have. But, for apple chips – perfect.)

When I started typing up this post I realized I forgot a step in making the apple chips. How sad is that?! There are only three steps! (Four if you count preheating the oven.) I forgot to spray the chips with cooking spray before seasoning and putting them in the oven so they didn’t hold their crisp. I have another apple though and I’m going to give this snack another try.

Apple Chips

Ingredients:

  • 1 apple (I used Red Delicious)
  • pumpkin pie spice (or other spice/spice blend)
  • cooking spray

Steps:

  1. Preheat oven to 200 degrees F and arrange racks in top third and bottom third of the oven. Line two cookie sheets with parchment paper.
  2. Using a mandolin (or very sharp knife) carefully cut apples to 1/8″ thickness. Remove any seeds.
  3. Place apples in a single layer on the prepared cookie sheets. Spray gently with cooking spray. Sprinkle with pumpkin pie spice.
  4. Bake 2 hours, or until crisp. Gently peel the apples up from the parchment paper and allow to cool on the cookie sheets. Store in an air tight container.

*This recipe is adapted from Alice at http://www.acookingmizer.com/2011/10/20/make-your-own-apple-chips/*

apple chips | sew you think you can cook

Here’s a list of the other players of Blogger CLUE this month:

Black Bean Dip

Let me tell you about my new favorite snack. Well, healthy snack. I’m still a sucker for Sour Cream and Onion potato chips. Which is why I tend to not buy them. Unless I have a good excuse. Like people coming over for a grill out and game night. Such as happened over the weekend. And why I’m now sitting here munching on processed food deliciousness.

Salty and crunchy foods are always my mid-afternoon craving, so I try to keep a smarter option on hand. A bean dip is a great snack – full of protein and fiber – and I can enjoy it with a slightly guilty pita or tortilla chip along with carrots and celery. I think the biggest challenge with eating healthy is satisfying those unhealthy cravings, so it’s important to “cheat” in a smart way. By combating salty chips with a filling and healthy dip you end up feeling satisfied.

This black bean dip is a huge hit! I’ve made it three times now. If it’s still on the table when my husband gets home I find I don’t have any left the next day. My son even enjoys it – he’ll eat it with his hands, off a spoon, or even gnaw it from a piece of celery.

Black Bean Dip

Ingredients:

  • 2 cans (15 oz) black beans, rinsed and drained
  • 1/2 C salsa
  • 1 tsp minced garlic
  • 1 tsp cumin
  • 1/2 tsp chili powder
  • 2 tbsp extra virgin olive oil
  • 1 tbsp lime juice
  • 2 tbsp fresh cilantro

Steps:

  1. Place beans in food process and pulse until they’re broken up. Add salsa, garlic, cumin, chili powder, olive oil, and lime juice. Puree until smooth.
  2. Season to taste with S+P and add in the cilantro. Pulse until combined.
  3. Serve with multi-grain tortilla chips, pita chips, pita bread, or veggies.

*This recipe is adapted from Bobbi at http://www.bobbiskozykitchen.com/2015/02/chipotle-black-bean-dip-sundaysupper.html#.VSrAH_nF_0e*

Black Bean Dip | Sew You Think You Can Cook