It’s finally time to share my Firecracker’s second birthday party, with you!
When we moved to California and became regulars at the playground I quickly realized it’d be a great place to have the kids’ birthday parties. I scoped out the venue for months to determine when would be the best time of day to throw a party at a public park, to figure out if it’d be allowed, and to decide which picnic table to claim. I then had to start asking around about how big the 4th of July got around here. The answer was a resounding “crazy!” So I knew that we simply wouldn’t be able to celebrate on THE day. (Good thing it wasn’t his 1st birthday!)
We celebrated on a Sunday at 10:30 am. Firecracker is only two weeks older than our friends’ son and so we did a dual birthday bash for the 2 year olds. Our guest lists would have been identical anyway. The party was attended by other families who moved out to California from Ohio the same time we did. And by happy coincidence, my dad had meetings in Los Angeles the following week so my parents came out for the party and my mom stayed out here to play and help with the kids while my dad was in his meetings!
 I had originally planned (aka – when he was born I picked out his first four birthday themes) on having an Auburn themed birthday party. It was hard for me to change my mind, but I knew that my train obsessed toddler would much prefer a train themed party. So, I let go of my planning and switched gears.
This party was much smaller than his 1st birthday, so instead of ordering a cake, I decided to simply make cupcakes. I made 4 dozen cupcakes – way more than I needed. About half of them ended up in my freezer unfrosted. I displayed the cupcakes on Twizzler train tracks on our dining table. I made Busy Day Chocolate Cake with Chocolate Cream Cheese Frosting and Vegan Vanilla Cupcakes, my friend made the frosting for the vanilla cupcakes.

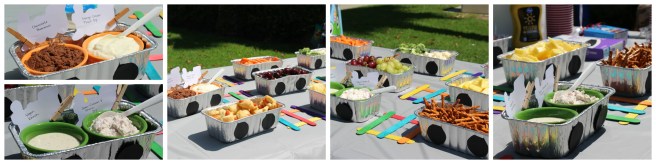
Down at the playground we set up a table with snacks. I cut out black circles and taped them to disposable aluminum loaf pans to create train cars. My friend had popsicle sticks which we used to create a track for the food.
A fruit train of pineapple, cherries, and red and green grapes was led by Orange Cream Dip and Chocolate Hummus. A veggie train of cherry tomatoes, broccoli and cauliflower, and carrots was led by Sour Cream and Onion Dip and Ranch. We also had a container of hummus. Salty snacks of pretzel sticks, potato chips, and “pigs” in a blanket joined the party, too. I traced a train cookie cutter to cut out the labels for the respective dips.
After a couple of hours at the playground we moved the party to our place for grilling and cupcakes.
Decorations were fairly minimal too. I used the major Thomas and Friends character colors as my inspiration, blue, red, and green for Thomas, James, and Percy, respectively. I wrapped streamers around the banister for the stairs and tied some balloons on each end of the staircase. Balloons were attached to chairs at either end of the table were the cupcakes were displayed. Two sets (1 balloon of each color) of balloons were placed on Thomas the Tank Engine balloon weights and taken down to the playground to bookend our picnic table.
The biggest decorating endeavor was the Happy Birthday Banner. The banner was placed above our awesome 80’s style mirrored fireplace. I didn’t have a single hole puncher (I do now!) and couldn’t fit the train shapes in our stand 3 hole puncher, so my mom strung the banners together with a needle and thin yarn.
I found templates for a train engine, train car, and caboose through Google searching. I printed those out on colored card stock. I had two blue trains for the birthday boys’ names, a red train, and a green train. 4 red cabooses, and 19 grey train cars! For the letters, I used the font Ariel. Three letters at a time were typed in WordArt at font size 96, then I sized the WordArt graphic to be 3.48″ x 8.81″, making sure the letters would fit inside the train cars, and then selected Rotate Flip Horizontal so that the text would be backwards. The words “2nd” and “and” followed the same method except that the WordArt graphic was sized at 1.52″ x 3″. The letters were arranged to look like railroad crossing signs and put on two 5″ yellow circles. Everything was cut out using a craft knife and adhered to the train cars using small glue dots .
.

My attempt at getting a photo of the birthday boys with their cupcakes was a slight fail.
Disclaimer: This post contains affiliate links.


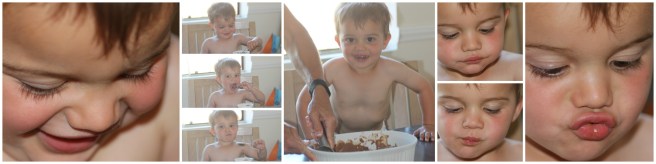
 Seriously, is my child that smart or was it simply coincidental? After some time playing in the water the boys had their first shared bath. Firecracker asked for dinner, which he didn’t eat. Treat was fussy, so I assumed he was also hungry (he did eat). At 6:20pm both boys were asleep at the table. Thankfully my husband was on his way home and I didn’t have to figure out how I was going to wriggle us out of our position. (See photo. –>)


 #MuffinMonday is a group of muffin loving bakers who get together once a month to bake muffins to brighten their Mondays. There isn’t a theme to #MuffinMonday posts so anything goes, as long as it’s a muffin!


 When we found out how big the Fourth of July is here we knew that we’d be hard pressed to leave our home via vehicle that weekend. We also knew that we’d be able to see multiple firework shows from our balcony. With that in mind we were on the hunt for patio furniture. And we cut it close. Father’s Day weekend we drove all over town stopping at different furniture stores doing price checks. We did not purchase anything. We then re-measured the patio because I was quite skeptical that what we were thinking would actually fit. I’m glad I did because we would have definitely over purchased seating! The following weekend we went to Home Depot in the hopes that what we wanted would be in stock or delivered in time for the following weekend. Luck was on our side and we managed to fit all items in the back of the van. We then spent a couple of nights that week assembling chairs after the boys went to bed. Mission accomplished, we watched fireworks under
  The following week, we finally broke out the grill! And just in time, too, for today’s themed Sunday Supper of Hamburgers and Hotdogs. July is National Hotdog month, but the tastemakers at Sunday Supper Movement broadened the recipes to include the hotdog’s best friend, hamburger. Be sure to scroll past my recipe to see more great ideas for your next summer grilling bash. This event is hosted by Christie of

