Taco Popcorn

This week I will be bringing you 4 different popcorn flavors. Perfect for your Super Bowl party!

I want to start with one that can kinda-sorta fall into my Mexican Monday theme.

This popcorn comes from Food Network Magazine’s January/February 2014 booklet of 50 Flavored Popcorns. Popcorn is tossed with corn chips, butter, and chili powder. Then quickly baked with cheese and scallions.

Taco Popcorn

Ingredients:

  • canola oil, enough to coat bottom of pot
  • 3/4 C popcorn kernels
  • 3 C corn chips
  • 6 tbsp salted butter, melted
  • 2 tbsp chili powder
  • 1 C shredded cheddar cheese
  • 2 scallions, chopped

Steps:

  1. Put canola oil in pot along with 2-3 kernels of popcorn. Cover and stand by. Once you hear the kernels pop, add the 3/4 C of popcorn. Cover and cook over medium heat until popping slows. Gently shake the pop during the popping process so as not to burn the popcorn at the bottom. Remove from heat and remain covered until popping has ceased, unless you want to be pelted with popcorn. (If you have another method of popping popcorn, feel free to use it.)
  2. Preheat oven to 350 deg.
  3. In an extra large bowl toss together popped popcorn and corn chips. Toss with chili powder. Toss with melted butter.
  4. Place popcorn mix on a baking sheet in an even layer. Top with shredded cheese and scallions. Bake for 3 minutes, or until cheese is melted. Season with salt to taste.

Taco Popcorn 1 Taco Popcorn 2 Taco Popcorn 3 Taco Popcorn 4

Creamed Spinach

Creamed Spinach is a pretty classic side dish for a meaty main course. And it’s easy to make at home!

In the past I’ve always bought the frozen stuff, and it is delicious. But when you make it yourself you can add any additional flavors you might like – such as garlic and cheese!

Be sure to have a great slice of bread, a biscuit, or a crescent roll to sop it all up!

Creamed Spinach

Ingredients:

  • 3 tbsp butter
  • 3 tbsp flour
  • 1 1/4 C milk
  • 1/2 tsp garlic powder
  • 1/4 tsp white pepper
  • 1/2 tsp salt
  • pinch nutmeg
  • 10 oz fresh spinach
  • 1 C shredded cheddar cheese

Steps:

  1. Melt butter over medium heat in a large pot. Whisk in flour until it forms a paste.
  2. Add in milk, constantly whisking. Season with garlic powder, salt, pepper, and nutmeg. Bring to a simmer, still whisking.
  3. Add spinach to the pot of milk. Stir with a wooden spoon until it wilts down. Stir in cheese until it melts.

*This recipe is modified from Katie at http://www.healthyseasonalrecipes.com/cheddar-creamed-spinach/*

Creamed Spinach

Roasted Shrimp and Avocado Pesto

If you’re still keeping up with your New Year’s resolution, good for you! If you’re not – don’t consider it failure, pick it back up and try again.

On January first I promised you a healthy dish. I’m only 3 weeks late in delivering, but here it is! Brown rice pasta (pad thai noodles) and roasted shrimp tossed in avocado pesto.

I followed Amateur Gourmet‘s method for roasting the shrimp and was inspired by The Gracious Pantry‘s avocado pesto. Because I kept tasting throughout the cooking process, I ended up creating my own version of avocado pesto!

Roasted Shrimp and Avocado Pesto

Ingredients:

  • 1 lb peeled and deveined shrimp
  • 8 oz brown rice noodles
  • 2 avocados
  • 1/2 C fresh basil
  • juice of 2 lemons
  • 2 cloves garlic
  • 1/4 C shredded asiago cheese
  • salt and white pepper, to taste

Steps:

  1. Preheat oven to 425 deg.
  2. Cook brown rice noodles according to package directions.
  3. Place shrimp on a greased baking sheet. Season with salt, pepper, and a little squeeze of lemon. Roast for 10 minutes.
  4. In a food processor combine the remaining ingredients.
  5. Toss noodles and shrimp with as much avocado pesto you want.

Avocado Pesto

recreatedbysrc

Golden Slow Cooker Pork Tenderloin

Pork tenderloin is my favorite cut of meat. And cooking it in the slow cooker ensures a tender, juicy outcome every time.

The liquid you cook the pork in also becomes a great almost-gravy to pour over top the pork. If you want it to be thicker simply reduce it over the stove.

I tried slicing the pork so that I could pour the sauce over top and take a mouthwatering photograph. But Stuart decided that I was slicing the pork incorrectly and grabbed the knife out of my hand. He said I shouldn’t cut straight down, I should be cutting at an angle. Well, his attempt to cut at an angle failed completely. The pork was so tender that is simply shredded!

Time-saving Tip: Combine your liquid ingredients the night before and store in the fridge. That way all you have to do while you’re still half-asleep is whisk and pour atop the pork in the slow cooker!

Golden Slow Cooker Pork Tenderloin

Ingredients:

  • 1 can golden mushroom soup
  • 3/4 C apple juice
  • 2 tbsp sugar
  • 1 tbsp corn starch
  • 1 tsp dried mustard
  • 1/4 tsp pepper
  • 2 tbsp soy sauce
  • 2 lb pork tenderloin

Steps:

  1. Place tenderloin in slow cooker and season with S+P. Whisk together soup, apple juice, sugar, corn starch, mustard, and pepper. Pour liquid over top the pork. Cook on LOW 7-8 hours.

*This recipe is adapted from Jenn @ http://www.thespicekitrecipes.com/crock-pot-pork-roast/*

Golden Pork Tenderloin

Honey Balsamic Glazed Carrots

While I don’t really make official New Year’s resolutions, I am trying my best to make more balanced meals – protein, starch, and vegetable. (It’s the “and vegetbale” that I always forget to plan!)

This side dish goes with just about any protein you choose, and as proven on Budget Bytes, it’s cheap!

For just the two of us I halved the recipe. I wasn’t planning on having leftovers for lunch the next day so didn’t bother making more than we needed. The recipe I present to you today is the halved version, to serve two.

Honey Balsamic Carrots

Ingredients:

  • 3 carrots, peeled and cut into 1″ pieces
  • 1 tbsp olive oil
  • 1 tbsp honey
  • 1/8 C balsamic vinegar
  • 1/2 tbsp butter

Steps:

  1. Place carrots on a rimmed baking sheet and toss in olive oil, salt, and pepper. Roast carrots in a 400 degree oven for 40 minutes. Be sure to flip them halfway through the cooking time.
  2. When there are ten minutes left on the timer, combine the honey and vinegar. Allow tot thicken. Remove from heat and stir in the butter until melted.
  3. Toss carrots in the glaze and serve alongside the protein of your choice.

Glazed Carrots

Breaded Chicken with Mustard and Sherry

For Christmas I received Alex Guarnaschelli’s cookbook Old-School Comfort Food: The Way I Learned to CookWhen it was announced that Alex (yes, we’re on a first name basis) was releasing a cookbook I knew I had to have it. If you’ve ever watched The Best Thing I Ever Ate or Chopped on Food Network you know that Alex has a way of speaking about food in such a poetic way. She genuinely loves food and can describe a dish in a way that will bring you to your knees. And as the newest Iron Chef, there’s no doubt (not that there was any to begin with) that her skills in the kitchen are even more impressive. One of my bucket list restaurants is her’s, Butter, in NYC.

With Alex’s cookbook I was expecting there to be a story behind every recipe, and I haven’t been let down yet. This particular recipe is one of her mother’s. And although she says not to tell anyone I got the recipe from her, I am obligated by food blogging rules to do so. According to Alex, no self-respecting chef would ever cook skinless chicken. Well, sorry Alex, I do it all the time. But I guess that’s why you’re the Iron Chef and I’m not.

I may have one more apology to make. The recipe calls for dry sherry. I used sherry cooking wine, because that’s what I have in my pantry. And because I have no idea if that qualifies or not. Probably not. So my finished product may not be perfect, but it was still delicious. And the suggestion to serve with sliced lemon is spot on, squeeze your lemon over the chicken just before eating.

Breaded Chicken with Mustard and Sherry

Ingredients:

  • 1 lb boneless, skinless chicken breast
  • 1/2 C sherry
  • 1/2 C dry soy sauce
  • 1 tbsp Worcestershire sauce
  • 1 tbsp hot sauce
  • 2 tbsp Dijon mustard
  • 1/4 C canola oil
  • 1 1/2 C plain breadcrumbs
  • 5 tbsp butter, melted

Steps:

  1. If chicken breasts are large, cut in half horizontally or pound until thin. (This step is optional)
  2. Whisk together sherry, soy sauce, Worcestershire, hot sauce, mustard, and oil.
  3. Place chicken in a large plastic bag, dump in the marinade and marinate, refrigerated, 3 hours to over night.
  4. Preheat oven to 400 deg.
  5. In a shallow bowl, combine breadcrumbs and melted butter. Season with salt. Mix until the texture looks and feels like wet sand, or brown sugar.
  6. Remove marinated chicken, shaking off any excess liquid. Dredge chicken in breadcrumbs. Place on a baking sheet fitted with a wire rack. Doing so will prevent a soggy bottom to the breaded chicken. Bake 30 minutes, or until cooked through.
  7. Serve with lemon wedges.

Alex's Chicken

Disclaimer: This post contains affiliate links. 

Mexican Stuffed Shells

Mexican Monday is back! And it’s back with a trusty favorite recipe. Stuffed shells. I know, stuffed shells are typically an Italian dish, but I much prefer this Mexican spin to the traditional spinach and ricotta.

I’ve been making these stuffed shells for a couple years now, and was not disapointed to find that previous photographs weren’t exactly blog worthy. I’ve done these with both ground beef and ground turkey. Honestly, the turkey just doesn’t yield that same mouth-watering, need-to-grab-another stuffed shell result. But if you’re trying to cut back on red meat this year you can absolutely substitute turkey or chicken for the beef.

Shells

Meat Filling

Stuffed Shells

Mexican Stuffed Shells

The following recipe is for two casserole dishes worth of stuffed shells, which will feed 6-8 people.

Mexican Stuffed Shells

Ingredients:

  • 2 lb ground beef
  • 4 tbsp taco seasoning
  • 8 oz cream cheese
  • 1 box jumbo shells
  • 1 jar (16 oz) salsa
  • 1 jar (8 oz) taco sauce
  • 2 1/2 C shredded Mexican cheese
  • 3 scallions

Steps:

  1. Bring a large pot of salted water to a boil. Cook pasta until al dente. You don’t want them to be too soft so you can stuff them. Using a slotted spoon remove shells from water and place on wax paper. (You run the risk of breaking shells by straining like you would normal pasta.)
  2. Brown ground beef. Drain fat. Mix with taco seasoning and 2 C water. Cook until water is reduced. Mix in cream cheese until melted. Remove from heat and set aside.
  3. Divide salsa between two casserole dishes.
  4. Spoon about 1 tbsp of meat mixture into each shell. Place in casserole dishes.
  5. Top shells with taco sauce.
  6. Bake at 350 degrees for 25 minutes. Top with cheese and bake another 10 minutes.
  7. Garnish with scallions. Serve with sour cream, salsa, or any other toppings you’d like.

*This recipe is adapted from Maeghan at http://www.thewaytohisheartblog.com/mexican-stuffed-shells/*

Mexican Stuffed Shells 1 Mexican Stuffed Shells 2 Mexican Stuffed Shells 3

Creamed Corn

Although not exactly a healthy side dish, I have to admit that I love creamed corn.

It’s a perfect side for any spicy main dish. And it works great as a dip for tortilla chips too!

Creamed Corn

Ingredients:

  • 20 oz corn, canned or frozen
  • 1 1/4 C heavy cream
  • 1 1/4 C milk
  • 1 tbsp flour
  • salt and pepper

Steps:

  • In a small pot over medium heat combine corn and cream. Cook, stirring, for 5 minutes.
  • In a small bowl whisk together flour and milk. Add to corn and whisk until creamed corn reaches desired texture. Season to taste with salt and pepper. (I like lots of pepper with my creamed corn!)

Creamed Corn

Chocolate Cupcakes with Peanut Butter Frosting

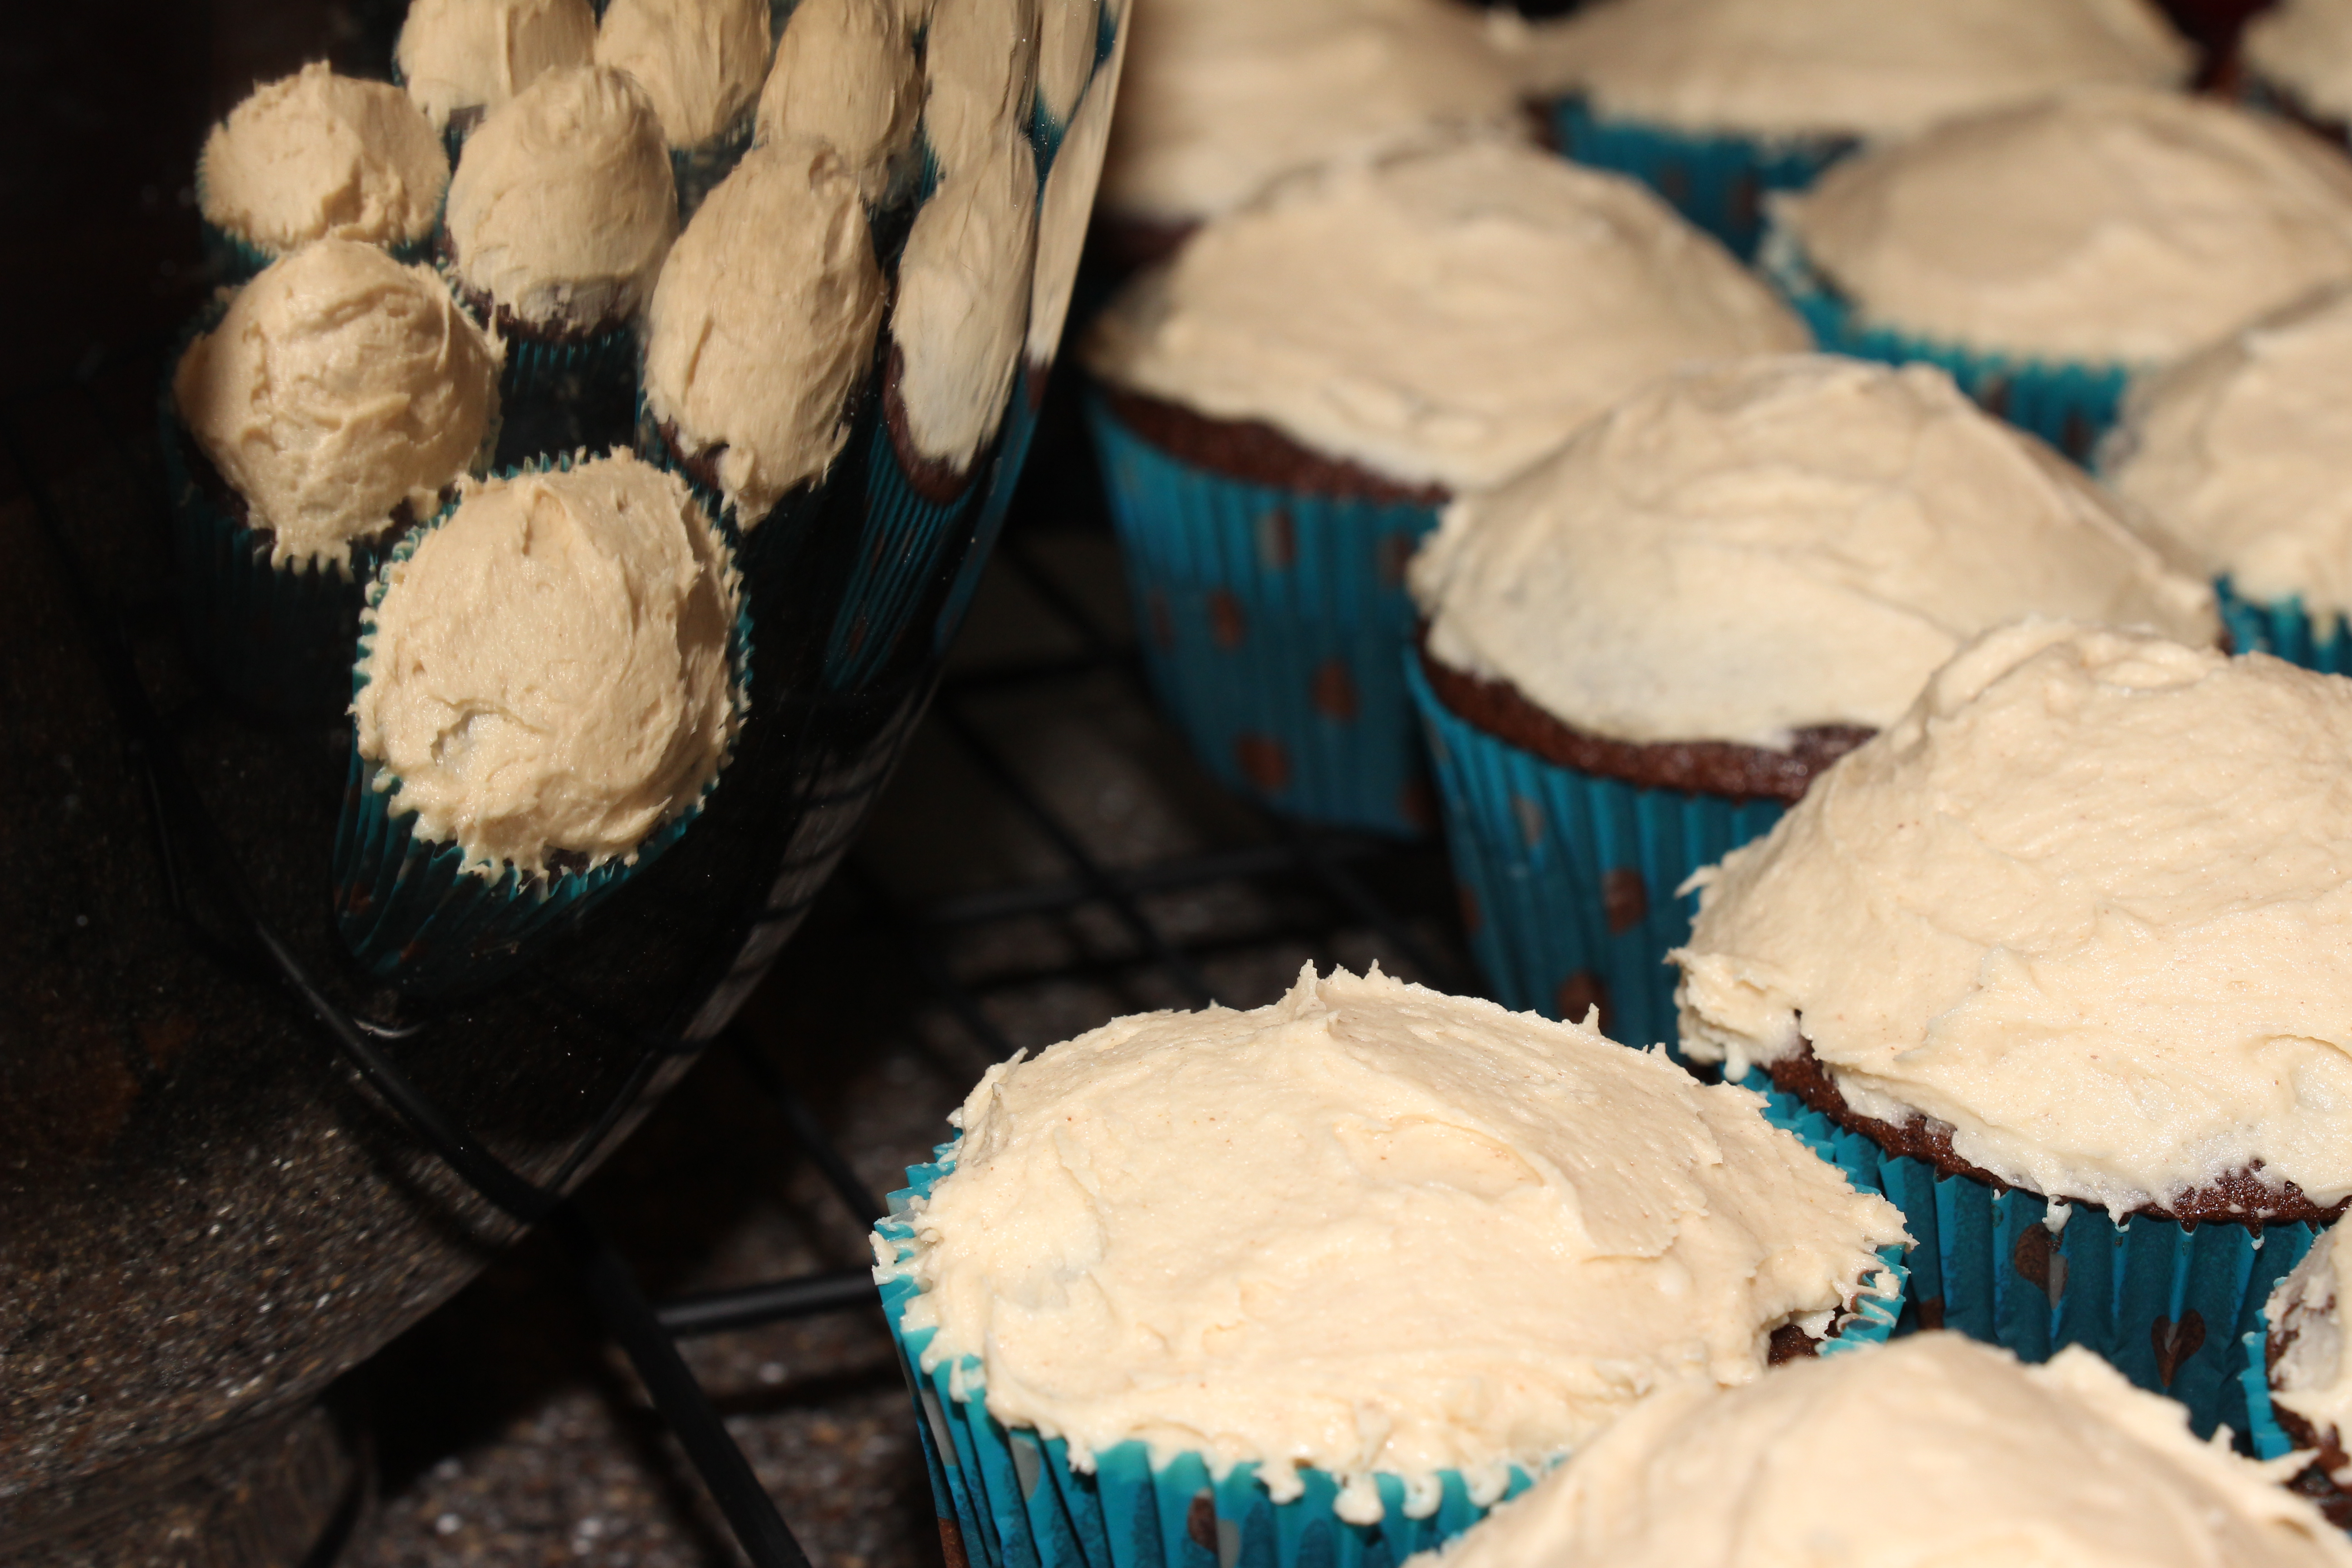
Today is my husband’s birthday! Some of his coworker’s know I’m a food (mostly) blogger and are always complaining that Stuart doesn’t bring in enough leftovers at lunch for everyone. So today I’m sending him to work with cupcakes!

I wanted to make them from scratch instead of using a box. I was trying to decide what flavor profile to do and decided to go with a play on his favorite candy bar: the Almond Joy. The frosting recipe called for coconut extract, but because I have a coconut allergy I didn’t want to buy a bottle to use 1/4 tsp. I looked up how to make my own, but doing so requires a fresh coconut. I decided to substitute vanilla extract, and trust that the coconut milk used to make the frosting will keep the coconut flavor alive. They’re additionally topped with shredded coconut (and an almond).

If you notice, the title of this blog post is Chocolate Cupcakes with Peanut Butter Frosting, not Coconut. That’s because I typed up the post before I made the frosting. The frosting did not turn out well. The texture was all off – it wasn’t smooth and almost looked like glitter.

So I switched it up and decided to go with peanut butter frosting. (It’s a good thing I got the new glass KitchenAid bowl for Christmas so I didn’t have to do dishes in between frostings, thanks parents!) I asked, “Can I just pretend Reese’s are your favorite candy?” “Yes, I like Reese’s!” Also, instead of pretending to be perfect, you get to know my Plan B secret! I followed the frosting recipe I used on my Caramel Filled Chocolate Avocado Cupcakes with Peanut Butter Caramel Frosting, omitting the caramel.

Chocolate Cupcakes Peanut Butter Frosting

Chocolate Cupcakes with Coconut Peanut Butter Frosting

Ingredients for cupcake:

  • 2/3 C cocoa powder
  • 1 tsp baking soda
  • 1/2 C butter, melted
  • 1/3 C vegetable oil
  • 1 1/2 tsp vanilla extract
  • 1 1/3 C sugar
  • 3/4 tsp salt
  • 2 eggs
  • 2 egg yolks
  • 1/2 C heavy cream
  • 1 3/4 C flour

Ingredients for frosting:

  • 1 C salted butter, at room temperature
  • 1/4 C canned coconut milk
  • 1 tsp vanilla extract
  • 4 C powdered sugar
  • 1/2 stick unsalted butter, at room temperature
  • 2 C powdered sugar
  • 1/8 C + 1 tsp milk
  • 1/4 C peanut butter

Steps:

  1. Boil 1 C of water in the microwave. Mix together cocoa powder and baking soda. Whisk in the boiling water and whisk until the mixture no longer bubbles and is smooth. Set aside.
  2. In a large mixing bowl, beat melted butter, oil, vanilla, sugar, and salt with a hand mixer. Add in the two eggs and beat until combined. Repeat with the egg yolks. Add the cocoa mixture and heavy cream. Once combined add in the flour in batches, mixing after each addition.
  3. Pour cupcake batter into 2 dozen cupcake tins. Bake at 350 degrees for 18 minutes, or until a toothpick comes clean when inserted. Let cool.
  4. Make the frosting: Using a stand mixer, beat the butter and coconut milk until fluffy. Mix in the extract. Slowly add in the powdered sugar until a frosting is made! In a stand mixer beat together sugar, butter, and milk. When combined fully add in the peanut butter.
  5. Top cooled cupcakes with frosting. Top with shredded coconut and an almond, if desired.

*The cupcake recipe is adapted from Jaclyn at http://www.cookingclassy.com/2013/02/chocolate-cupcakes-with-coconut-frosting-almonds-almond-joy-cupcakes/*

Chocolate Cupcakes Peanut Butter Frosting