Fresh Strawberry Pie

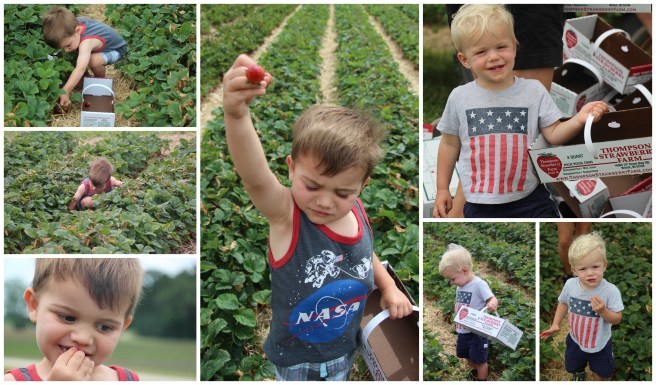
Here it is, the third and final recipe made with the 8 quarts of strawberries we picked while staying with my parents in Wisconsin in June.

kids berry picking

1 quart was turned into Strawberry Honey Sorbet. 1 quart was turned into No-Churn Strawberry Ice Cream. Almost 2 quarts became this incredible deep dish strawberry pie. The remaining half of the strawberries were gobbled up by mostly my kids.

My mom really wanted to make pie with the strawberries. I’m not the biggest pie fan. I have a thing against warm fruit. But I’m getting better, I’ll at least give it a go on occasion. But, of course, I had to try the stunning pie I watched her make with her grandsons!

pie filling

These strawberries were quite different than those I get from the Farmers Market here in California. They’re different from the Florida Strawberries you can find in the winter months (depending on where you live). These berries were small, dark, and slightly tart. They also let off a lot of juice. My mom likes her pies to be a little on the “runny” side compared to the average pie eater and we ended up having to take the boy’s {clean} Tylenol syringe to syphon off some juice.

berry picking

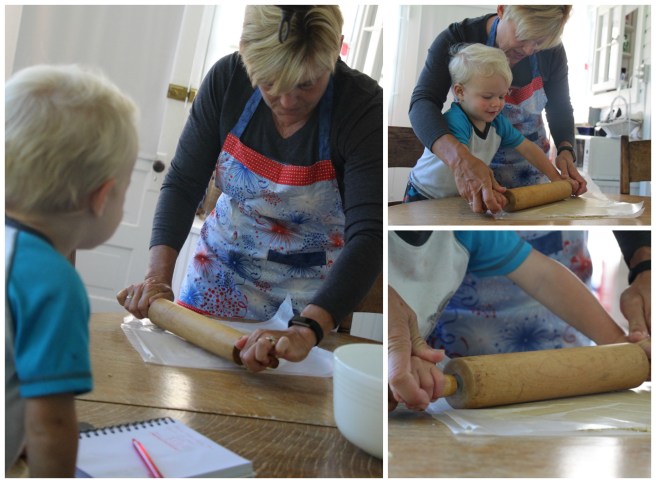
The recipe for the pie dough was handed down from my grandmother and it’s my mom’s all time favorite crust. Unlike myself, my mom opts to make her dough over buying one from the freezer section. After watching her make the crust in a matter of minutes, I really don’t see why I couldn’t do that from now on, too.

pie dough

Fresh Strawberry Pie

Ingredients for the crust:

  • 2 C flour
  • pinch of salt
  • 1/2 C vegetable oil
  • 1/4 C milk

Ingredients for the filling:

  • 7 C sliced strawberries
  • 2 tbsp cornstarch
  • 1/2 – 3/4 C brown sugar
  • 1 tbsp butter, cubed

Steps:

  1. Preheat oven to 400 degrees F.
  2. Make dough: Whisk flour and salt in a large bowl. Create a well in the center. In a measuring cup, combine the milk and oil. Pour into the flour and mix until combined. Form into two balls. Roll one of the pieces of dough between two sheets of wax paper into a large circle. Place in the bottom of a pie pan, patch up any tears.
  3. Make the filling: Combine ingredients in a large bowl. Adjust sugar to taste depending on the sweetness level of your strawberries. Spoon the filling into the pie pan, leaving excess juice behind. Dot with butter.
  4. Roll the remaining pie dough between two sheets of wax paper. Option to cut out stars for topping the pie, or simply lay the top crust on top with a couple of slits in the center.
  5. Bake 40 minutes, covered with foil. Bake another 30-33 minutes, uncovered, until golden and bubbly.

Fresh Strawberry Pie | Sew You Think You Can Cook | http://sewyouthinkyoucancook.com

We had a lot of fun with photography while the boys were playing in the backyard, going “old school” and putting the pie in the literal window to cool. Trust me, had the kids been inside, that pie would’ve been placed on top of the counter out of reach.

cell phone photos

And seriously, my all-time favorite photo of this pie is the one taken on my iPhone through the Instagram app. Check it out here! And if you don’t already, give me a little follow to keep up with our crazy life in between blog posts.

#BundtBakers: Untraditional Bundts

4ae7b-bundtbakerspost#BundtBakers is a group of bundt loving bakers who get together once a month to bake bundt cakes with a common ingredient or theme.

Except that this month, Colleen of Faith, Hope, Love & Luck Survive Despite a Whiskered Accomplice is breaking that mold and challenging us to think outside of the bundt pan. To bake something in our favorite cake pan that isn’t cake!

I didn’t know if I was going to sign up for this one given my summer blogging break but one of my best friends from college shared a Facebook video with me. Her timing couldn’t have been more perfect! The video was for a fajita bundt cake. Yes. Fajitas. In a bundt. It looked so fun, we just had to try it!

Picture your bundt cake. But instead of a rich cake center, imagine fajita seasoned chicken and veggies. Instead of a cake crust to cut through, imagine tortillas. And instead of frosting and sprinkles, imagine sour cream and cilantro.

The dinner was so fun and would definitely be a show stopper for company.

Chicken Fajita Bundt Cake (cut) for #BundtBakers from Sew You Think You Can Cook

Chicken Fajita Bundt Cake

Ingredients:

  • 3 chicken breasts, sliced
  • 2 bell peppers, sliced
  • 1 onion, sliced
  • 2 tbsp fajita seasoning
  • 2 tbsp olive oil, plus more for greasing the pan
  • 1 tbsp salt
  • 9 flour tortillas
  • 1 1/2 C shredded Mexican blend cheese
  • 2 tbsp fresh cilantro, chopped
  • 1 tomato, diced
  • 1 C sour cream
  • 1 lime

Steps:

  1. Preheat oven to 400 degrees F.
  2. On a large rimmed baking sheet, toss together the chicken, bell peppers, onion, fajita seasoning, olive oil, and salt. Bake 30 minutes.
  3. Reduce oven temperature to 360 degrees F.
  4. Brush a bundt pan with olive oil. Tuck 5 tortillas into the pan, add the remaining 4 tortillas behind the first layer. Put half of the cheese into the tortilla-lined bundt pan. Top with the cooked chicken mixture, tomato, cilantro, and remaining cheese.
  5. Press tortillas over the cheese. Bake 25 minutes.
  6. Flip out the fajita cake.
  7. Mix sour cream with a little lime juice, to taste. “Frost” the “cake.” Garnish with chopped cilantro and lime zest.

*This recipe is adapted from Tom at http://twistedfood.co.uk/giant-chicken-fajita-donut/*

Chicken Fajita Bundt Cake for #BundtBakers from Sew You Think You Can Cook

You can see all our of lovely Bundts by following our Pinterest board. Updated links for all of our past events and more information about #BundtBakers, can be found on our home page.

And don’t forget to take a peek at what other talented bakers have created this month:

Bacon, Zucchini, Raisins and Cheddar Bundt Cake from I Love Bundt Cakes

Cheesesteak Bundt from Cookaholic Wife

Cherry Bundt Breakfast Danish from Faith, Hope, Love & Luck Survive Despite a Whiskered Accomplice

Chive Potato Filled Cheeseburger Meatloaf Bundt from Food Lust People Love

Classic Vanilla Flan Bundt from All That’s Left Are The Crumbs

Pasta Chicken Bundt from Sneha’s Recipe

Soap Bundt Cake from La Mejor Manera

Spinach Pasta Surprise from A Day in the Life on the Farm

#FantasticalFoodFight: Ice Cream

unnamed

Fantastical Food Fight has done it again, a food fight worthy of returning to my blog.

I’m laughing a little bit because my uncle teased me for blogging so much after declaring I was taking a break. (Thanks for being a true fan, Uncle Lar!)

The kids and I spent the end of June at Lake Geneva with my parents while my husband was doing a two week stint at the Pentagon. While on our trip, we went strawberry picking in Bristol. A lot of strawberries! We used those strawberries to make pie, sorbet, and no-churn ice cream.

Because I was at my mom’s house, sans ice cream maker, I had to go with a no-churn method for ice cream making. Luckily this food fight allows no-churn varieties of ice cream!

No-Churn Strawberry Ice Cream

Ingredients:

  • 1 qt frozen strawberries
  • 1 can (14 oz) sweetened condensed milk
  • 1 tsp vanilla extract
  • 1 pt heavy cream

Steps:

  1. Place a metal pan in the freezer to chill (we used a bundt pan!).
  2. Thaw strawberries 10-20 minutes.
  3. Place strawberries in a food processor and pulse until pea-sized. Add the condensed milk, vanilla, and a pinch of salt. Pulse until combined.
  4. Using a hand mixer, beat the heavy cream until stiff peaks are formed.
  5. Fold 1 C of the whipped cream into the ice cream base then pour that into the remaining whipped cream until blended.
  6. Pour into the chilled pan and freeze 2-5 hours.

*This recipe is adapted from Food Network at http://www.foodnetwork.com/recipes/food-network-kitchen/no-churn-strawberry-ice-cream-3364490*

No-Churn Strawberry Ice Cream for #FantasticalFoodFight from Sew You Think You Can Cook

To check out these other Fantastical Ice Creams click here:

 If you would like to join our Fantastical Food Fight, you can learn more on our informational page.

#SundaySupper: Simple Mixed Drinks for a Refreshing Summer

Before my husband discovered the Moscow Mule last year, a Pimm’s Cup was his drink of choice for about two years.

While he’s currently in a “dry season” due to training for World’s Toughest Mudder, I think he’d like to celebrate his race, not with the customary beer, but with something a bit more refreshing.  (Not immediately, mind you, it’ll be a miracle just making it back home after the 24 hours of conquering the WTM course!)  Given that our house is currently void of vodka, I think I’ll remind him of this beauty.

The Pimm’s Cup is perfect for sharing with today’s #SundaySupper Simple Mixed Drinks for a Refreshing Summer! Thank you to Christie of A Kitchen Hoor’s Adventure for hosting this event.

The Pimm’s Cup has been a popular English summer drink for the past 46 years. It is the official drink of the Wimbledon Tennis Tournament. Fun fact, the finals are next weekend, so you might as well gather all the ingredients and pretend you’re in London watching the match, but from the comfort of your much-less-expensive couch.

This recipe is intended for individuals ages 21 & up. Please drink responsibly.

Pimm’s Cup

Ingredients:

  • 1 part Pimm’s No. 1
  • 2 parts lemonade
  • 1 part gingerale
  • cucumber slices

Steps:

  1. Combine all ingredients and serve over ice.

Pimms Cup

Classics with a Twist

Make Mine a Mocktail

Simply Different

Tasty and Tropical

Very Vino

For even more inspiration check out these Simple Mixed Drinks for a Refreshing Summer by Sunday Supper Movement

Sunday Supper MovementJoin the #SundaySupper conversation on twitter on Sunday! We tweet throughout the day and share recipes from all over the world. Our weekly chat starts at 7:00 pm ET. Follow the #SundaySupper hashtag and remember to include it in your tweets to join in the chat. To get more great Sunday Supper Recipes, visit our website or check out our Pinterest board.

Would you like to join the Sunday Supper Movement? It’s easy. You can sign up by clicking here: Sunday Supper Movement

#IceCreamSocial: Strawberry Honey Sorbet

Hello, Summer. You’ve been here 10 days and it’s high time we’ve had an Ice Cream Social to celebrate your arrival. After all, July is National Ice Cream Month.

The Festive Foodie Events Planning Group (formerly Holiday Fun with our Blogging Friends) is having said Ice Cream Social with all treats frozen. We’re talking ice cream, frozen yogurt, gelato, sorbets, ices, affogatos, malts and shakes, ice cream cakes, ice cream pies, ice cream sandwiches, sundaes, popsicles, etc. If it’s frozen and it’s a treat, bring it on to the party! Thank you Sue of Palatable Pastime for hosting!

19399035_10104959073808201_7818881682960017989_n
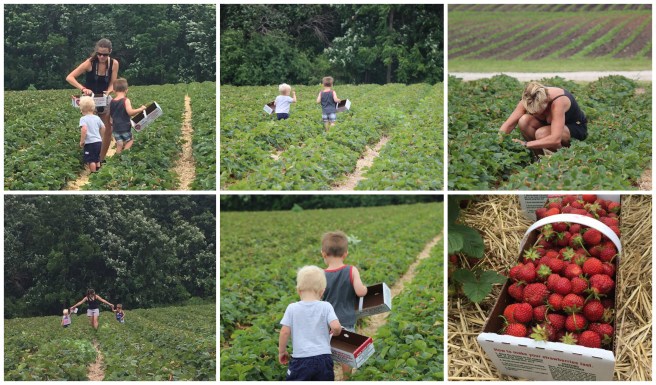
The boys and I went strawberry picking with my mom the Thursday before last and brought back 8 quarts of strawberries! That’s a lot of strawberries. Particularly when they’re super tiny. These Wisconsin strawberries are half the size of those I get from the Farmer’s Market back in California.

Using about 7 cups of strawberries, Mom (with a little help from Treat) baked a beautiful pie. We filled two freezer quart bags to be used in both an ice cream and a sorbet. And there was a 48 oz container remaining for our daily Vitamin C intake.

On a beautiful (and only slightly chilly) Monday morning, Firecracker woke up asking to make ice cream. I checked my potential blogging opportunities and decided to tackle the sorbet first.

There’s a slight chance we busted my mom’s little blender, so I’m not sure if the no-churn ice cream we want to make will end up happening. I’ll need to get on that quite soon before we head back to sunny SoCal!

After lunch the sun came out and outside play called for some Strawberry Honey Sorbet. This treat melts quickly, especially in the sun, but it’s quite refreshing! Sweetened only with honey, I didn’t feel too guilty about letting the boys dig in!

Strawberry Honey Sorbet (kids) | Sew You Think You Can Cook

The three ingredient recipe was inspired by a Facebook Video my mom found.

I encourage you to have a taste of summer by whizzing up your own, three-ingredient sorbet.

Strawberry Honey Sorbet

Ingredients:

  • 1 qt frozen strawberries
  • 1/2 C water
  • 1/2 C honey

Steps:

  1. Place ingredients in a food processor and pulse until smooth.
  2. Transfer to a freezer friendly dish, cover, and freeze at least an hour.

*This recipe is modified from Pierce at https://www.buzzfeed.com/pierceabernathy/3-ingredient-mango-sorbet?bffbtasty&ref=bffbtasty&utm_term=.fmrJbAWaw#.kpa9N6Edq*

Strawberry Honey Sorbet for #IceCream Social from Sew You Think You Can Cook

Be sure to check out these other frozen treats for your next Ice Cream Social:

Chocolate Mousse Ice Cream by Culinary Adventures with Camilla

Cowtipper Shake by Jolene’s Recipe Journal

Easy Nutella Popsicles by All That’s Jas

Fresh Mint Chocolate Chip Ice Cream by Amy’s Cooking Adventures

No Churn Cherry Vanilla Ice Cream by Hezzi-D’s Books and Cooks

Old Fashioned Cola Float by Family Around the Table

Peanut Butter Chocolate Chip No Churn Ice Cream by Cooking with Carlee

Raspberry Ripple Ice Cream by Red Cottage Chronicles

Sour Cherry Ice Cream with Chocolate Chunks by A Day in the Life on the Farm

Strawberry Frozen Yogurt by Palatable Pastime

Strawberry Honey Sorbet by Sew You Think You Can Cook

Strawberry Peaches & Cream Popsicles with Gingersnap Crumbles by Tip Garden


#FantasticalFoodFight: Peaches & Cream

unnamed

I’ve declared that I will be taking a break from blogging for a bit. So what am I doing just a couple weeks later with a brand new blog post?!

Well, I also stated that Sew You Think You Can Cook wouldn’t disappear either. I have a couple of fun blog link-up events in the near future, yet. It’s looking like one, maybe two, per month throughout the summer months.

Hopefully I’ll be back a little less sporadically come the start of the school year in September. Sew You Think You Can Cook just might have a slightly new vibe come then.

My fun post for June is the one you’re reading right now – today’s Fantastical Food Fight! The task? Peaches & Cream. The requirement? A dish that involves both peaches and cream.

Originally I was thinking an ice cream.

I’m sorry to burst that bubble, but as fate had it, my husband requested some sort of French toast with our Farmer’s Market peaches for breakfast over Memorial Day weekend.

Perfect!

This French toast is quite simply. Eggs + milk (or cream!) + bread. What makes this dish pop are the caramelized peaches you put on top of that French toast. A dollop of whipped cream doesn’t hurt anything, either.

Peaches & Cream French Toast

Ingredients:

  • 6-8 slices bread
  • 5 eggs
  • 1/2 C milk or cream
  • 3/4 C sugar
  • 1/2 C water
  • 5 tbsp butter
  • 2-3 peaches, sliced or chopped
  • cinnamon sugar, for serving
  • whipped cream, for serving

Steps:

  1. Whisk together the eggs and milk/cream in a shallow bowl.
  2. Preheat griddle or a large pan over medium heat.
  3. Dip bread in the egg mixture, coating both sides. Cook on greased griddle until golden on both sides.
  4. In a small pan over medium-high heat, combine sugar and water. Once the sugar is dissolved do not mix. Allow mixture to caramelize 8-10 minutes. Melt in the butter. Add the chopped peaches and cook 3-4 minutes. Pour over French toast.
  5. Sprinkle with cinnamon sugar and serve with whipped cream.

*This recipe is adapted from Dina at http://simplyhomecooked.com/caramelized-peach-french-toast/*

Peaches & Cream French Toast for #FantasticalFoodFight from Sew You Think You Can Cook

To check out the other Fantastical Peaches & Cream recipes click here:

If you would like to join our Fantastical Food Fight, you can learn more on our informational page.

Iced Herbal Ginger Lime Tea

Disclaimer: I received products from KitchenIQ in exchange for my honest review. All opinions are my own.

Every once in a while there’s a kitchen product that comes around and changes your life.

Okay, maybe not your life.

But your culinary world.

A citrus zester is a great example. Can you imagine if we still had to carefully and thinly slice the peel from a lemon and then chop it up into teensy pieces?! I know I certainly wouldn’t make that effort. There are a lot of citrus zesters out there that make the task of zesting a lime much simpler.

But KitchenIQ took that precious tool and made it even better! Their V-etched Better Zester! provides the smoothest zesting experience I’ve ever had thanks to the nonstick coating on those v-shaped blades. But the feature I love the most is the container attached to the back of the tool. Not only does it catch the zest, it has lines indicating tablespoons and mL. You’ll never again be guessing if the zest of one lime gives you a teaspoon or not. (I know I never actually measure the zest in a recipe and always “wing it.”) A quick {gentle} bang on the countertop and the zest falls to the bottom for easy measuring.

KitchenIQ didn’t stop their with their mind-blowing gadgets. I’m so excited to have The Grate Ginger Tool in my life. I must admit, I’ve ever enjoyed working with ginger simply because it wasn’t an easy ingredient to prep. First there’s peeling the skin. I’ve heard the back of a spoon works quite nicely but it’s never been as easy as it looks on TV, I always end up cutting off the skin and as a result losing a lot of the usable ginger. Ginger is also quite fibrous. Using a microplane grater on it always left me with a stringy piece of ginger in my hand, and chopping it finely just isn’t that fun.

The Grate Ginger Tool answers each of these problems. There is a removable spoon-like device peels the ginger quite nicely and the non-stick v-shaped blades makes grating the ginger as easy as cutting through softened butter. The ginger shavings end up in a little compartment inside the gadget which pulls out easily. There’s even a slicer on the back!

If their new V-etched Spice Grater works just as well as the previous two products, I can’t wait to get my hands on some whole spices!

An Original Recipe

Iced Herbal Ginger Lime Tea

Ingredients:

  • 1 tsp freshly grated ginger root
  • 1/4 tsp freshly zested lime
  • 12 oz hot water
  • simple syurp, to taste
  • ice

Steps:

  1. Place ginger and lime in a loose leaf tea ball infuser.
  2. Pour hot water over the tea infuser in a large heat proof cup. Allow tea to steep 3-5 minutes.
  3. Divide ice into 2-3 serving glasses, fill with tea, and sweeten to taste with simple syrup. Garnish with a lime wheel.

Iced Herbal Ginger Lime Tea | Sew You Think You Can Cook


#SundaySupper: Small Bites Recipes for Entertaining

Ah, entertaining.

When I think about entertaining, I imagine high top tables surrounded by chatty friends holding some sort of cocktail.

Truth be told, I don’t know why that’s what pops into my mind. I think the only event I’ve been to like that is the cocktail hour portion of a wedding or my brother’s post rehearsal dinner party.

Realistically, entertaining for me involves some sort of sporting event, Thanksgiving, or a kid’s birthday party.

Elegant entertaining is not exactly in my foreseeable future as elegant and toddler boy don’t quite belong in the same sentence. Unless it’s to say, “Don’t plan an elegant party if the toddler boys are going to be around.” As much as I want to have/host an elegant gold Golden Birthday in August, I don’t think it’ll be happening.

If entertaining is in your schedule this summer be sure to check out the 20+ recipes perfect for your next party from the #SundaySupper crew! Thanks to Christie of A Kitchen Hoors Adventures for hosting this event.

Wild Mushroom and Grape Crostini

Ingredients:

  • 1 baguette, sliced on the bias
  • olive oil, for brushing
  • 1/2 lb mixed wild mushrooms, chopped
  • 1 C red grapes, halved
  • 1 shallot, chopped
  • 2-3 tbsp rosemary olive oil
  • 6-8 oz whole milk ricotta cheese
  • lemon
  • Parmesan cheese, shaved

Steps:

  1. Preheat oven to 400 degrees F.
  2. Brush baguette slices with olive oil. Season with S+P. Arrange on a baking sheet in a single layer and bake 8 minutes, until golden. Transfer to a cooling rack.
  3. Preheat oven to 500 degrees F.
  4. Arrange mushroom, grapes, and shallot on a rimmed baking sheet. Toss evenly to coat in the rosemary olive oil. Bake 8-10 minutes. Set aside to cool.
  5. Season ricotta with S+P and a squeeze of fresh lemon.
  6. Spread ricotta onto the baguette slices, top with the cooked mushrooms and a shaving of Parmesan cheese.

*This recipe is modified from Giada at http://www.foodnetwork.com/recipes/giada-de-laurentiis/mushroom-and-grape-crostini-3636546*

Wild Mushroom and Grape Crostini for #SundaySupper from Sew You Think You Can Cook

Small Starters

Pint-sized Protein

Demi-Desserts

Sunday Supper MovementJoin the #SundaySupper conversation on twitter on Sunday! We tweet throughout the day and share recipes from all over the world. Our weekly chat starts at 7:00 pm ET. Follow the #SundaySupper hashtag and remember to include it in your tweets to join in the chat. To get more great Sunday Supper Recipes, visit our website or check out our Pinterest board.

Would you like to join the Sunday Supper Movement? It’s easy. You can sign up by clicking here: Sunday Supper Movement

#BrunchWeek: Biscuit Bar with Flavored Sugars

This post is sponsored in conjunction with #BrunchWeek. I received product samples from sponsor companies to aid in the creation of the #Brunchweek recipes. All opinions are mine alone.

Happy Friday, everyone!

While there’s one more day left of #BrunchWeek, today’s my last posting of the event. I hope you’ve enjoyed all of our brunch recipes and are ready for celebrating Mother’s Day this weekend.

I don’t think #BrunchWeek could be complete without biscuits. At least not a good southern brunch anyway.

In 2015 I made Cheddar Biscuits for breakfast sandwiches during #BrunchWeek, so it was time to go in a sweeter direction.

A biscuit bar with flavored sugars.

If you’re having a brunch party, a biscuit bar is the perfect way to go. You can use any biscuit recipe you like! Offer some classic biscuits, sweet biscuits, and savory biscuits. Offer honey, softened butter, and jams. And offer flavored sugars. (Those sugars can also be turned into party favors!)

Flavored Sugars for a Biscuit Bar for #BrunchWeek from Sew You Think You Can Cook

For my first foray into flavored sugar making I went with Lavender, Blood Orange, and for a little something different, Chile Lime.

These sugars are great on more than just buttered biscuits. They’re lovely on English muffins and French toast.

I actually used the chili lime sugar the last time I made my favorite black bean and corn salsa for tacos in place of agave.

Biscuits

Ingredients:

Steps:

  1. Preheat oven to 400 degrees F.
  2. In a food processor fitted with the dough blade, combine the flour, baking powder, sugar, and salt. Pulse. Add in the cold butter and pulse until the mixture looks like crumbs. Add in the milk and mix until just combined.
  3. Turn dough out onto a floured surface. Roll to 1″ thickness. Cut out biscuits using a biscuit cutter and place on a silicone mat lined cookie sheet.
  4. Bake 18-20 minutes, until lightly golden.

*This recipe is adapted from Damaris at http://www.foodnetwork.com/recipes/damaris-phillips/spiced-biscuits*

Lavender Sugar

Ingredients:

Steps:

  1. Place sugar and lavender in a small food processor and pulse.
  2. Store in an air tight container.

*This recipe is adapted from Rita at http://www.food.com/recipe/lavender-sugar-with-vanilla-101039*

Blood Orange Sugar

Ingredients:

Steps:

  1. Place sugar and orange zest in a small food processor and pulse.
  2. Spread sugar onto a rimmed baking sheet and let dry.
  3. Store in an air tight container.

*This recipe is adapted from Gabrielle at https://www.designmom.com/diy-flavored-sugar-valentines/*

Chile Lime Sugar

Ingredients:

Steps:

  1. Place ingredients in a small food processor and pulse.
  2. Spread sugar onto a rimmed baking sheet and let dry.
  3. Store in an air tight container.

*This recipe is adapted from Sommer at http://www.aspicyperspective.com/flavored-sugar-recipes/2/*

Don’t forget to enter our giveaway and be sure to check out these other great brunch recipes:

BW 2017 logo FINAL

BrunchWeek Beverages:

Blackberry Mint Bellinis from Sweet Beginnings
Cardamom Rose Cocktail from Culinary Adventures with Camilla
Lemon & Blueberry Mocktail from Girl Abroad
Mango Pina Colada from The Spiffy Cookie
Sparkling Mojito Lime Rickies from A Kitchen Hoor’s Adventures

BrunchWeek Egg Dishes:

Cheesy Asparagus Bacon Quiche from The Nifty Foodie
Creamed Asparagus Omelet from Wholistic Woman
Eggs in Hell from kimchi MOM
Asparagus and Cheddar Frittata from My Catholic Kitchen
Spring Veggie Quiche from A Day in the Life on the Farm

BrunchWeek Breads, Grains and Pastries:

Apple Cheddar Cream Cheese Danish from Amy’s Cooking Adventures
Apple Cinnamon Bread from It Bakes Me Happy
Gluten Free Apple Waffles from Gluten Free Crumbley
Banana Bread Buttermilk Pancakes from Love and Confections
Blackberry Cream Cheese Sweet Rolls from Pink Cake Plate
Brown Sugar Poptarts from Big Bear’s Wife
Creme Brulee French Toast from The Barbee Housewife
Cherry Almond Coffee Cake from The Chef Next Door
Cheddar Dinner Rolls from Family Around the Table
Cinnamon Apple Danish from Nik Snacks
Garlic and Herb Pull Apart Bread from Jane’s Adventures in Dinner
Lemon Poppy Seed Loaf Cake from Books n’ Cooks
Mocha Eclairs from The Redhead Baker
Sweet Apple Hand Pies with Cheddar Shortcrust from An Edible Mosaic

BrunchWeek Main Dishes:

Country Ham Biscuits with Peach Mustard from Palatable Pastime
Ham, Apple and Cheddar Melts from Cookaholic Wife
Ham, Egg, and Asparagus Breakfast Pizza Rants From My Crazy Kitchen
Shaved Asparagus, Herb Cream Cheese, and Smoked Salmon Pizza from Sarcastic Cooking
Yumbo Sliders from Cindy’s Recipes and Writings

BrunchWeek Fruits, Vegetables and Sides:

Rhubarb Crunch from Cooking with Carlee
Biscuit Bar with Flavored Sugars from Sew You Think You Can Cook
Low-Fat Apple Coffee Cake from Hardly A Goddess

Disclaimer: Thank you to #BrunchWeek Sponsors: Red Star Yeast, Dixie Crystals, Cabot Cheese, Nielsen-Massey, Rainier Fruit, and Michigan Asparagus for providing the prizes free of charge. These companies also provided the bloggers with samples and product to use for #BrunchWeek recipes. All opinions are my own. The #BrunchWeek giveaway is open to U.S. residents, age 18 & up. All entries for the winner will be checked and verified. By entering you give the right to use your name and likeness. The number of entries received determines the odds of winning. Six winners will be selected. The prize packages will be sent directly from the giveaway sponsors. The #BrunchWeek Bloggers are not responsible for the fulfillment or delivery of the prize packages. Bloggers hosting this giveaway and their immediate family members in their household cannot enter or win the giveaway. No purchase necessary. Void where prohibited by law. This promotion is in no way sponsored, endorsed or administered by, or associated with Facebook, Instagram, Pinterest, or any other social channel mentioned in the #Brunchweek posts or entry.

#BrunchWeek: German Apple Pancake

This post is sponsored in conjunction with #BrunchWeek. I received product samples from sponsor companies to aid in the creation of the #Brunchweek recipes. All opinions are mine alone.

I love discovering new apple varieties. Especially when apple picking with my family. But it’s not apple picking season near me yet.

After receiving the beautiful Lady Alice apples from Rainier Fruit, I really couldn’t wait to get picking! These apples, even though shipped to me from Washington, tasted like they’d just been plucked from the tree. They might just be the perfect apple, ever!

Unfortunately, I won’t find Lady Alice apples ripe for the picking here in Southern California. Lady Alice apples were created naturally from two different types of apples in the orchard (the parent species still hasn’t been defined)! Nature truly is incredible.

If I could present an apple on a plate as a #BrunchWeek recipe, I would!

Instead, I decided (well, my husband had the idea) to try my hand at German apple pancakes. So, Mom and I took to it! And then we ate it! All.

pancake bite

German Apple Pancake

Ingredients:

Steps:

  1. Place flour, milk, salt, baking powder, and eggs in a blender. Blend. Let rest 30 minutes.
  2. Preheat oven to 400 degrees F. Grease 2 8″ or 9″ round cake pans.
  3. Place 2 tbsp butter in each pan. Put in the oven a few minutes, just until the butter has melted. Remove from the oven.
  4. Divide apples between the two pans.
  5. Give the pancake batter a quick pulse and divide evenly over the apples.
  6. Mix together the sugar and cinnamon. Sprinkle over the pancakes. Bake 25 minutes, until puffed and set.

*This recipe is adapted from http://www.food.com/recipe/kittencals-german-apple-puff-pancake-105212*

German Apple Pancake for #BrunchWeek from Sew You Think You Can Cook

Don’t forget to enter our giveaway and be sure to check out these other great brunch recipes:

BW 2017 logo FINAL

BrunchWeek Beverages:

Almond Joy Iced Coffee from Hardly A Goddess
Rose Water & St. Germain Champagne Cocktail from The Barbee Housewife

BrunchWeek Egg Dishes:

Asparagus Topped Eggs with Hats from That Skinny Chick Can Bake
Huevos Gratinados from Palatable Pastime

BrunchWeek Breads, Grains and Pastries:

Apple Banana Streusel Bread from Family Around the Table
Cinnamon Apple Sourdough Waffles from My Catholic Kitchen
Crispy Apple Cheesecake Danish from A Kitchen Hoor’s Adventures
Gooey Lemon Blueberry Pull-Apart Bread from Girl Abroad
German Apple Pancake from Sew You Think You Can Cook
Overnight Raspberry French Toast from Hezzi-D’s Books and Cooks
Peach Custard Tart from The Redhead Baker
Pecan Gingerbread Buns from Jane’s Adventures in Dinner
Pineapple Sweet Rolls from Cooking with Carlee
Raspberry and Chocolate Grilled Cheese from Brunch-n-Bites
Southwestern Style Farro Breakfast Bowl from Cooking in Stilettos

BrunchWeek Main Dishes:

Apple, Grape, and Walnut Chicken Salad from Love and Confections

BrunchWeek Fruits, Vegetables and Sides:

Apple & Grape Breakfast Salad from The Chef Next Door
Cheddar Broccoli Soup from Cindy’s Recipes and Writings
Fully Loaded Stuffed Potatoes from A Day in the Life on the Farm

BrunchWeek Desserts:

Champagne Pound Cake with Rose Water Frosting from Sweet Beginnings
Lemon Cheesecake Parfaits from Cookaholic Wife
Lemon No Bake Cheesecake from Feeding Big

Disclaimer: Thank you to #BrunchWeek Sponsors: Red Star Yeast, Dixie Crystals, Cabot Cheese, Nielsen-Massey, Rainier Fruit, and Michigan Asparagus for providing the prizes free of charge. These companies also provided the bloggers with samples and product to use for #BrunchWeek recipes. All opinions are my own. The #BrunchWeek giveaway is open to U.S. residents, age 18 & up. All entries for the winner will be checked and verified. By entering you give the right to use your name and likeness. The number of entries received determines the odds of winning. Six winners will be selected. The prize packages will be sent directly from the giveaway sponsors. The #BrunchWeek Bloggers are not responsible for the fulfillment or delivery of the prize packages. Bloggers hosting this giveaway and their immediate family members in their household cannot enter or win the giveaway. No purchase necessary. Void where prohibited by law. This promotion is in no way sponsored, endorsed or administered by, or associated with Facebook, Instagram, Pinterest, or any other social channel mentioned in the #Brunchweek posts or entry.