#BundtBakers: Pears

4ae7b-bundtbakerspost

This month’s edition of #BundtBakers is a little different. No, you won’t notice anything unique about this month compared to any of the previous #BundtBakers events but behind the scenes I’m the one hosting! #BundtBakers is a group of bundt loving bakers who get together once a month to bake bundts with a common ingredient or theme. We take turns hosting each month and choosing the theme or ingredient.

I’ve selected a theme of Pears for November 2016. When I told my mom she said, “but you made a pear cake last month.” Yes, yes, I did. I’m that much obsessed with pears this fall.

How did this pear obsession begin?

Friends of ours brought over a fruit salad one evening and there were pears in it. These pears were perfectly ripe and reminded me how delicious a pear can be! I’ve since been buying them when I can get decent ones at the grocery store. Treat loves them, too. They’re such a perfect late night snack.

My favorite pear variety of choice is the boring ole Bartlet. I went rogue and bought a Bosq for a salad (but my husband ate it). We didn’t care for it as much.

The pear cake I’m sharing today varies from the my previous one because the pear is shredded! The shredded pear almost disolves into the cake batter as it’s baking, but you still get that bit of pear texture. I decided to pulse some walnuts instead of using almondmeal and I love the flavor it gives to the cake. Another change I made from the recipe of inspiration was to use honey instead of maple syrup. Pear, honey, and walnuts, are a perfect flavor combination and I couldn’t pass up the opportunity. It had me thinking of a cheese platter and I decided to use mascarpone cheese in the frosting again, too.

My husband perfers just about every cake to be warmed up in the microwave. I’m the opposite and like my cake at room temperature, even cold for some recipes! For this bundt cake, though, I am 100% on board with warming it up. Yum.

Honey and Walnut Pear Bundt Cake

Ingredients for cake:

  • 1 1/2 sticks butter, softened
  • 3/4 C sugar
  • 2 eggs
  • 1 tsp vanilla paste
  • 1/4 C honey
  • 1/2-1/2 C walnuts
  • 1 1/3 C flour
  • 1 1/2 tsp baking powder
  • 1/2 tsp cinnamon
  • 1/2 tsp salt
  • 1/4 tsp nutmeg
  • 1/4 C milk
  • 1 pear, shredded

Ingredients for frosting:

  • 4 tbsp mascarpone, softened
  • 2 tbsp butter, softened
  • 2 tbsp honey
  • 3/4 tsp vanilla paste
  • 1/2 C powdered sugar
  • milk, as needed
  • pinch of salt, if desired

Steps:

  1. Preheat oven to 350 degrees F. Heavily grease a bundt pan.
  2. In the bowl of a stand mixer, beat together the butter and sugar until fluffy. Add the eggs one at at time, mixing until incorporated. Mix in the vanilla and honey.
  3. Put walnuts in a food processor and pulse until fine – should yield 1/4 C.
  4. In a large bowl, whisk together the flour, 1/4 C of the walnut crumbs, baking powder, cinnamon, salt, and nutmeg.
  5. Add half of the dry ingredients to the stand mixer and mix until combined. Add the milk, mix until incorporated. Repeat with the remaining dry ingredients. Add the shredded pear and mix.
  6. Pour batter into prepared bundt pan. Bake 50-55 minutes, or until a knife inserted comes out cleanly. Allow cake to cool before unmolding.
  7. Make the frosting: Place mascarpone, butter, honey, and vanilla in a bowl and whisk with a hand mixer until combined. Add in the powdered sugar and beat until incorporated. Add milk as needed a teaspoon at a time. If desired, stir in a pinch of salt. Pipe frosting over cooled cake.

*The cake recipe is modified from Tessa at http://thecakeblog.com/2015/12/maple-pear-cake.html*

Honey and Walnut Pear Bundt Cake for #BundtBakers from Sew You Think You Can Cook

You can see all our of lovely Bundts by following our Pinterest board. Updated links for all of our past events and more information about #BundtBakers, can be found on our home page.

And don’t forget to take a peek at what other talented bakers have baked this month:

Almond Pear Bread Pudding from Food Lust People Love

Fresh Pear Bundt Cake with Vanilla Glaze from The Queen of Scones

London Fog & Pear Bundt Cake from All That’s Left Are The Crumbs

Orange Pear Bundt Cake from Basic N Delicious

Pear and Date Bundt Cake with Caramel Mascarpone Sauce from kidsandchic

Pear and Hazelnut Bundt from Jane’s Adventures in Dinner

Pear and Port Bundt Cake from Palatable Pasttime

“Pear”fect Rum Raisin Cake from Faith, Hope, Love, & Luck Survive Despite a Whiskered Accomplice

Pear Pecan Coffee Bundt Cake from Patty’s Cake

Pear Spiced Bundt Cake from I Love Bundt Cakes

Pear Streusel Crunch Cake from Noshing with the Nolands

Pumpkin Pear Bundt Cake from Making Miracles

Roasted Pear & Walnut Spice Cake Bundt from Brooklyn Homemaker

Salted Caramel Pear Bundt Cake from Tartacadabra

Spiced Pear Bundt from A Day in the Life on the Farm

This recipe was my personal favorite of November 2016. I’ve added it to An InLinkz Link-up celebrating monthly favorite recipes on Sid’s Sea Palm Cooking. 

https://static.inlinkz.com/cs2.js

Scrappy Princess Quilt

Nothing makes me happier than a quilt being loved on.

My husband’s cousin recently shared a photo of her beyond-adorable-for-words daughter snuggling up underneath the quilt I made for her 2 1/2 years ago.

Seeing that photo reminded me that I haven’t done a blog post on this one yet. Stuart’s cousin has recently picked up quilting, being taught by her aunt (my mother-in-law). Her first project was a rag quilt that turned out beautifully and now that she has the itch she wants to make a quilt like the one I made for her daughter.

Because it’s a scrappy quilt, this project is another simple one that has a big impact. I think that scrappy quilts are some of the best one’s out there. There’s so much interest in them and they look traditional and loved. The engineer in my struggles with the process of creating scrappy quilts because I go out of my way to prevent inadvertent patterns, but once they’re completed I couldn’t be happier.

This quilt was made with a baby girl in mind so it’s all pink, white, and sparkly. Use any color profile you like, it’s bound to be a stunning quilt.

This quilt finishes to 39″ x 47″.

Scrappy Princess Quilt Design | Sew You Think You Can Cook

Here’s the How-To for my Scrappy Princess Tutorial:

From a variety of complimentary fabrics cut:

  • 160 squares 2.5″ (from a total of 3/4 yd)
  • 40 rectangles 2.5″ x 8.5″(from a total of 3/4 yd)

The amount of fabric needed for the borders is 1/2 yd. Cut 4″ strips.

The amount of fabric needed for the back is 1 1/2 yd. The same amount of fabric will be needed for the batting.

The amount of fabric needed for the binding is 5/8 yd.

Using a 1/4″ seam allowance:

  • Assemble the 2.5″ squares into 10 different 16-patch blocks.
  • From the 40 rectangles, assemble blocks of 4 strips each, making 10 blocks.
  • Assemble the quilt by alternating the 16-patch and the block made from the rectangles. The quilt will have 5 rows of 4 blocks. (I opted to keep the blocks made from the rectangles horizontal, but you could easily make them vertical or even randomize their orientation throughout the quilt.)

The inside of the quilt will measure 32″ x 40″.

Trim the border strips to fit the quilt and attach to the quilt center.

Sandwich your quilt top and quilt back with the batting. Quilt and bind it to complete the project.

Scrappy Princess Quilt Tutorial | Sew You Think You Can Cook

Four Hour Quilt Variation

When my good friend Tara (of Tara’s Multicultural Table) told me she was pregnant with her second child the wheels were already turning as to what quilt to sew for the new addition.

Her son, Evan, received my first ever baby quilt (his is the safari one) for his first Christmas. I’ve made quite a few Four Hour Quilts since then. I wanted to do something different this time. But I wanted something that would compliment big brother’s quilt. I found this photo via Pinterest and knew I had a winner. All I had to do was wait to see if Evan would be having a baby brother or baby sister.

It’s a girl! And that beautiful baby girl is my Goddaughter. I helped Tara decide on the theme for her nursery and hit the fabric shops. The theme: woodland, with pinks.

Four Hour Quilt Variation Tutorial (girl) | Sew You Think You Can Cook

Because this quilt is quick, easy, and fun to assemble, I decided to use the same quilt pattern for my baby boy, too. To have his quilt complement my little man’s I kept with a Winnie-the-Pooh theme with a Winnie-the-Pooh pattern for the back and quilt top fabric choices of the characters’ colors. (Orange for Tigger, Red for Pooh, Pink for Piglet, Grey for Eeyore, Blue for Roo, and Yellow for Rabbit)

Four Hour Quilt Variation Tutorial (neutral) | Sew You Think You Can Cook

Here’s the How-To for a Four Hour Quilt Variation:

For a baby quilt that finishes to 47×47″, you will need 48 5 1/2″ squares (this is a total of approximately 1 1/4 yd of fabric). You can use as many different fabric choices or as few as you like. I choose 5-7 different fabrics for these squares. The strips for the borders are cut to 3″. I typically use the same fabric for all 3 borders, but feel free to be as colorful as you want! (this is a total of approximately 1 1/2 yd of fabric)

The center of the quilt is assembled from 4 of the 5 1/2″ squares into a square.

Once your center is sewn together, measure the sides and cut two strips to fit the top and bottom. Measure again after the top and bottom are sewn on and cut two more strips to fit. You now have a framed center.

Sew two rows of 3 from the 5 1/2″ squares. Attach the rows to opposite sides of the framed center. Sew two columns of 4 from the 5 1/2″ squares. Attach the rows to the remaining sides of the center.

Once this new center is sewn together, measure the sides and cut two strips to fit the top and bottom. Measure again after the top and bottom are sewn on and cut two more strips to fit.

Sew two rows of 6 from the 5 1/2″ squares. Attach the rows to opposite sides of the framed center. Sew two columns of 8 from the 5 1/2″ squares. Attach the rows to the remaining sides of the center.

Once this new center is sewn together, measure the sides and cut two strips to fit the top and bottom. Measure again after the top and bottom are sewn on and cut two more strips to fit. You now have a finished quilt top.

Create a sandwich with the quilt top, batting and backing (2 3/4 yd of fabric). With baby quilts I use my sewing machine to do simple quilting – the stitch in the ditch method is perfect for this project.

Once you have your quilt, trim it, and bind it (1/2 yd of fabric).

Bow Tie

Bow ties have been all the rage the past few years, even withstanding the mustache obsession (which I’ve never understood), especially when it comes to babies! This quilt block would be very adorable done in many colors if you know of a little boy on the way.

I put four bow ties together in one block as a part of Old Glory. (Finished project here.)

bow tie quilt block tutorial

Here’s the how-to for the Bow Tie Quilt Block:

Note: These measurements are for a 4″ block. Sew using a scant 1/4″ seam allowance.

Cut fabric:

  • 1 rectangle 4 1/2″ x 1 7/8″ red
  • 2 squares 2 1/2″ red
  • 2 squares 2 1/2″ white
  • 2 squares 1 7/8″ white

Use the 2 squares of 2 1/2″ red and white to create 4 Half Square Triangles (HSTs) trimmed down to 1 7/8″. Click here for my tutorial on how to make Half Square Triangles.

Lay out the Bow Tie Quilt Block:

bow tie quilt block tutorial | sew you think you can cook

Sew the HSTs to the white squares:

bow tie quilt block tutorial | sew you think you can cook

Sew the bow tie “flaps” on to the red rectangle:

Bow Tie Quilt Block Tutorial | Sew You Think You Can Cook

School Girl’s Puzzle

Just because I revealed the final version of Old Glory that doesn’t mean I’m done with quilt block tutorials! Today’s block is called the School Girl’s Puzzle. This block isn’t in my quilt, but it is (or will be) in my mother-in-law’s version, which she’s named “Older Glory”. Her version of this American Flag sampler quilt is a scrappy sampler – meaning each of her blocks uses a different fabric. I can’t wait to see how hers turns out. I wasn’t brave enough to mix hundreds of fabrics so I used only 3 different reds and 2 different blues.

School Girl's Puzzle quilt block tutorial

Here is the how-to for the School Girl’s Puzzle Quilt Block:

Note: These measurements are for an 8″ block. Sew using a scant 1/4″ seam allowance.

Cut fabric:

  • 4 squares 2 1/2″ white
  • 3 squares 3 1/8″ red
  • 3 squares 3 1/8″ white
  • 2 squares 2 7/8″ white, then cut on the diagonal
  • 1 square 4 7/8″ red, then cut on the diagonal

Use the 3 squares of 3 1/8″ red and white to create 6 Half Square Triangles (HSTs) trimmed down to 2 1/2″. Click here for my tutorial on how to make Half Square Triangles.

Lay out the School Girl’s Puzzle quilt block:

School Girl's Puzzle quilt block tutorial

Looking at the top left quadrant, sew a white triangle to the HST:

School Girl's Puzzle quilt block tutorial

Then sew the other white triangle to the HST:

School Girl's Puzzle quilt block tutorial

Sew the new triangle to the red triangle. Repeat with the bottom right quadrant.

The remaining two quadrants are four patches, sew accordingly.

You now have a four patch ready to assemble:

School Girl's Puzzle quilt block tutorial | Sew You Think You Can Cook

Old Glory – completed!

Last year I shared the plans for the Fourth of July quilt that was already underway.

Over two years later, my goal of completing this quilt by the Fourth did indeed happen.

American Flag Sampler Quilt | Sew You Think You Can Cook

In February of this year (2015) Old Glory was finally completed and ready to be taken to the quilters! On June 16th I got a call that Old Glory was ready for pick up (three days before I was expecting it) and on the 20th I had finally gotten the binding sewn on.

Getting the binding on the quilt ended up being a challenge as I was one strip short of having enough fabric to go all the way around the quilt. I had to do some finagling but I got it to work. Instead of sewing the binding strips on a bias to reduce bulk I simply sewed straight lines at a 1/4″ seam allowance. The last strip of “just too skiny” fabric was cut in half, sewn together lengthwise, and trimmed to 2 1/4″ before being attached to the long strip of binding. I am relieved to say that even knowing where the “awkward” location on the binding is, I struggle to find it. Phew!

All that’s left to do is create the tag for Old Glory and sew it on. But for this year, it’s as good as ready for our first family of three firework watching. (Here’s to hoping my now one-year-old enjoys the bright flashes of light and loud bangs…)

American Flag Sampler Quilt (details) | Sew You Think You Can Cook

I wish you all a safe and happy Fourth of July.

And God Bless America.

American Flag Sampler Quilt (front + back) | Sew You Think You Can Cook

Box-in-a-Box Variation

It’s July again and now that I’ve completed Old Glory, my patriotic sampler quilt, I am going to blog a few more quilt block tutorials this month.

This quilt block is a box-in-a-box variation, colored out so that it looks like a mini spool or hourglass.

My mother-in-law and I spent quite a bit of time trying to figure out if it were possible to paper piece this block. At least the way I’ve colored it, the answer was no. Instead we broke it down into squares, rectangles, and half square triangles (HSTs).

(I apologize for the photo below, evidently I didn’t take a photo of the finished block. This photo will be updated with a better photo as soon as I can!)

box-in-a-box

Here is the how-to for a Box-in-a-Box Variation quilt block:

Note: These measurements are for an 8″ block. Sew using a scant 1/4″ seam allowance. 

Cut fabric:

  • 1 square 3 1/8″ red
  • 2 rectangles 3 1/8″ x 1 7/8″ red
  • 2 rectangles 3 1/8″ x 1 7/8″ white
  • 2 squares 3″ red
  • 2 squares 3″ white
  • 2 rectangles 5 7/8″ x 1 7/8″ red
  • 2 rectangles 5 7/8″ x 1 7/8″ white

Use the 4 squares of 3″ red and white to create 4 HSTs trimmed down to 1 7/8″. Click here for my tutorial on how to make Half Square Triangles.

Lay out the HSTs and other pieces of fabric into the box-in-a-box variation quilt block:

box-in-a-box quilt block tutorial

The center spool (or hourglass) is a 9-patch. Sew that 9-patch together:

box-in-a-box quilt block tutorial 2

The remaining patches form another 9-patch. Sew the 9-patch together. You now have a box-in-a-box variation.

Heart of a Hero

Today I have a super adorable quilt tutorial to share with you. But before I get to that I have an important piece of business to attend to. This quilt was made for Luke. Luke is the 2 month old son of very good friends of ours back in Florida. At his one week well-baby check-up Luke was diagnosed with a congenital heart defect. The severity of his condition is still being evaluted, but it is likely that Luke will require surgery well before his first birthday. You can follow Luke’s story here.

This week (2/7-2/14) is Congenital Heart Defect/Disease (CHD) Awareness Week. Congenital heart defects are the #1 birth defect, occuring in 1% of newborns – in the US that’s close to 40,000 infants each year. While some heart defects can be detected during utrasounds before birth, a CHD is usually detected by an abnormal sound or murmur of the infant’s heart. Other symptoms include fast breathing, excessive sweating, poor feeding/weight gain, or a bluish tint to the baby’s skin, lips, or fingernails. Depending on the severity of the heart defect immediate surgery could be required. 25% of children born with a CHD will require heart surgery, however surgery isn’t always a cure and most will require additional procedures and medications as adults. People with CHDs have a life-long risk of health problems, including growth and developmental delays, difficulty exercising, heart failure, and sudden cardiac arrest or stroke.

The cost for inpatient CHD surgery exceeds $2.2 billion each year. Here’s how you can help: The Children’s Heart Foundation (CHF) is the only organization in America that solely funds CHD research. They have generated over $6.3 million towards CHD research since 1996. 75% of the donations CHF receives goes directly to research and research-related education.

Resources: The Children’s Heart Foundation, Mended Little Hearts, The American Heart Association

CHD Awareness

The quilt I made for Luke follows a pattern I found on Pinterest. This free pattern comes from favoritefabric.com. If you purchase new fabric for this quilt feel free to follow their instructions. I used fabrics already in my possession for this quilt and therefore have different (and in my opinion less confusing) tutorial steps. After piecing together the blocks the quilt was simply too big for a tummy time quilt – the original finished quilt was 40.5″ x 52.5″. Mine is 41″ x 45″. (You can probably chalk that extra half inch to my seam allowance “skills”.) With a total of 13 different fabrics, this quilt has a lot of character and dimension. Luke’s parents knew they were having a boy so I looked through my collection for some great blues, greys, and tans to use. It wasn’t until “Heart of a Hero” was well underway that we found out his nursery was to be yellow and grey; oh well! And now that this quilt is named, I can only imagine how it would look in reds! Looks like I’m getting an itch to make another version….

Here’s the how-to for “Heart of a Hero”

Cut fabric:

Heart of a Hero 1

  • 8 squares 6 1/2″ fabric A
  • 8 rectangles 6 1/2″ x 2 1/2″ fabric B
  • 7 squares 6 1/2″ fabric C
  • 6 rectangles 6 1/2″ x 4 1/2″ fabric D
  • 3 rectangles 6 1/2″ x 2 1/2″ fabric D
  • 7 rectangles 4 1/2″ x 3 1/2″ fabric E
  • 7 rectangles 4 1/2″ x 3 1/2″ fabric F
  • 7 rectangles 3 1/2″ x 8 1/2″ fabric G
  • 8 squares 4 1/2″ fabric H
  • 8 rectangles 4 1/2″ x 2 1/2″ fabric I
  • 8 rectangles 2 1/2″ x 6 1/2″ fabric J
    • for the border: 1/3 yd
    • for the back: 2 3/4 yd
    • for the batting: 2 3/4 yd
    • for the binding: 1/3 yd

Using a 1/4″ seam allowance:

Heart of a Hero 2

  • Sew A above B (unit 1)
  • Sew 6 C above 6 6 1/2″ x 4 1/2″ D (unit 2)
  • Sew 1 C above 1 6 1/2″ x 2 1/2″ D (unit 3)
  • Sew E above F (unit 4)
  • Sew 2 G to the left side of E-F (unit 5)
  • Sew 5 G to the right side of E-F (unit 6)
  • Sew H above I (unit 7)
  • Sew 4 J to the left side of H-I (unit 8)
  • Sew 4 J to the right side of H-I (unit 9)
  • Sew 2 6 1/2″ x 2 1/2″ D above 2 unit 9 (unit 10)

Using a 1/4″ seam allowance:

  • Sew 2 unit 5 above 2 unit 1 (unit 11)
  • Sew 2 unit 2 above 2 unit 9 (unit 12)
  • Sew unit 11 to the left of unit 12 (unit 13)
  • Sew 4 unit 2 above 4 unit 8 (unit 14)
  • Sew 4 unit 6 above 4 unit 1 (unit 15)
  • Sew unit 13 to the left of unit 14 (unit 16)
  • Sew 2 unit 1 to the left of 2 unit 10 (unit 17)
  • Sew 1 unit 3 to the left of 1 unit 6 (unit 18)

Assemble quilt in three columns:

Heart of a Hero 3

  • From top to bottom, column 1: unit 17, unit 13, unit 16
  • From top to bottom, column 2: unit 13, unit 16, unit 18
  • From top to bottom, column 3: unit 17, unit 16, unit 16
    • Using a 1/4″ seam allowance, sew the units in the columns to each other before sewing the columns together

Once your center is sewn together, measure the sides and cut two 2 1/2″ strips of your border fabric to fit the left and right. Using a 1/4″ seam allowance attach the border strips to the left and right sides of the quilt. Measure again after the left and right sides are sewn on and cut two more 2 1/2″ strips of your border fabric to fit. Sew the top and bottom border strips to the quilt using a 1/4″ seam allowance.

Measure your final quilt top. Now piece together your backing fabric to fit your quilt top plus some overhang. The amount of overhang you need will depend on your or your quilter’s preference. Cut the same amount of batting, piecing together if needed.

Heart of a Hero 4

Sandwich the batting between your quilt top and your backing fabric. Quilt! If I am not sewing-in-the-ditch I like to use painter’s tape and a washable fabric marker to give some guidelines.

Assemble and attach binding fabric using your favorite method. (Maybe some day I’ll be confident enough and have an almost-perfectly bound quilt to do a tutorial.)

Don’t forget a tag!

Quilt Tutorial | Sew You Think You Can Cook

Summer Babies

I was busy this past year making 3 four hour quilts (FHQs) for 3 very special summer babies. 

Peach's Circus
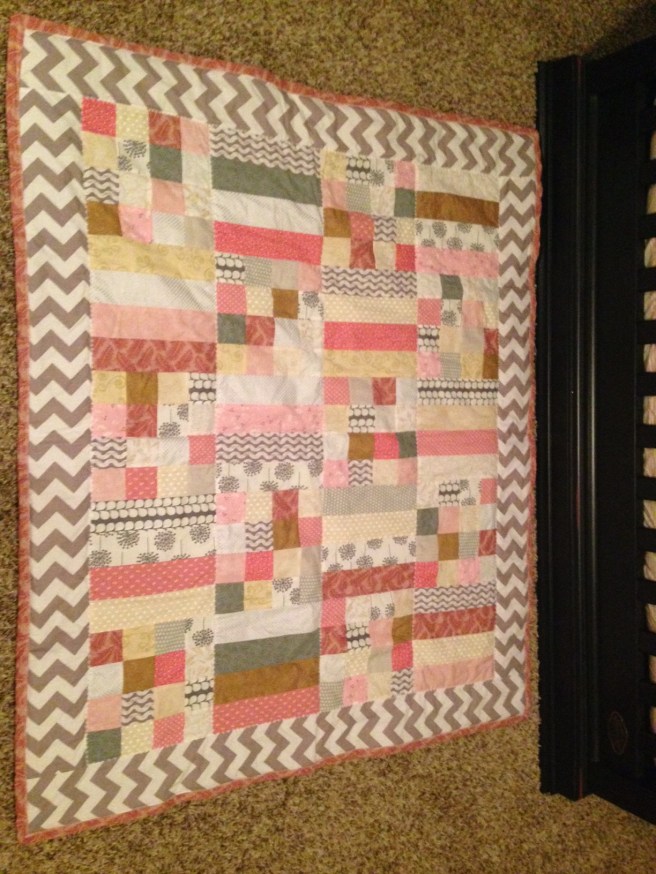
Today my friend’s daughter turns 1! I knew I just had to make her a quilt because this little girl happens to share my birthday! My friend, Megan, blogs over at Project Mama and shares her adventures in sewing. She is very talented and creative at the sewing machine so I felt the pressure to put my best work forward. I have to say, “Peach’s Circus” is one of my favorite FHQs to date! I found the fabric at Sew Studio last Christmas. (Photo to the left courtesy of Megan!)

Little Racer
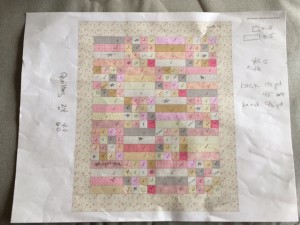
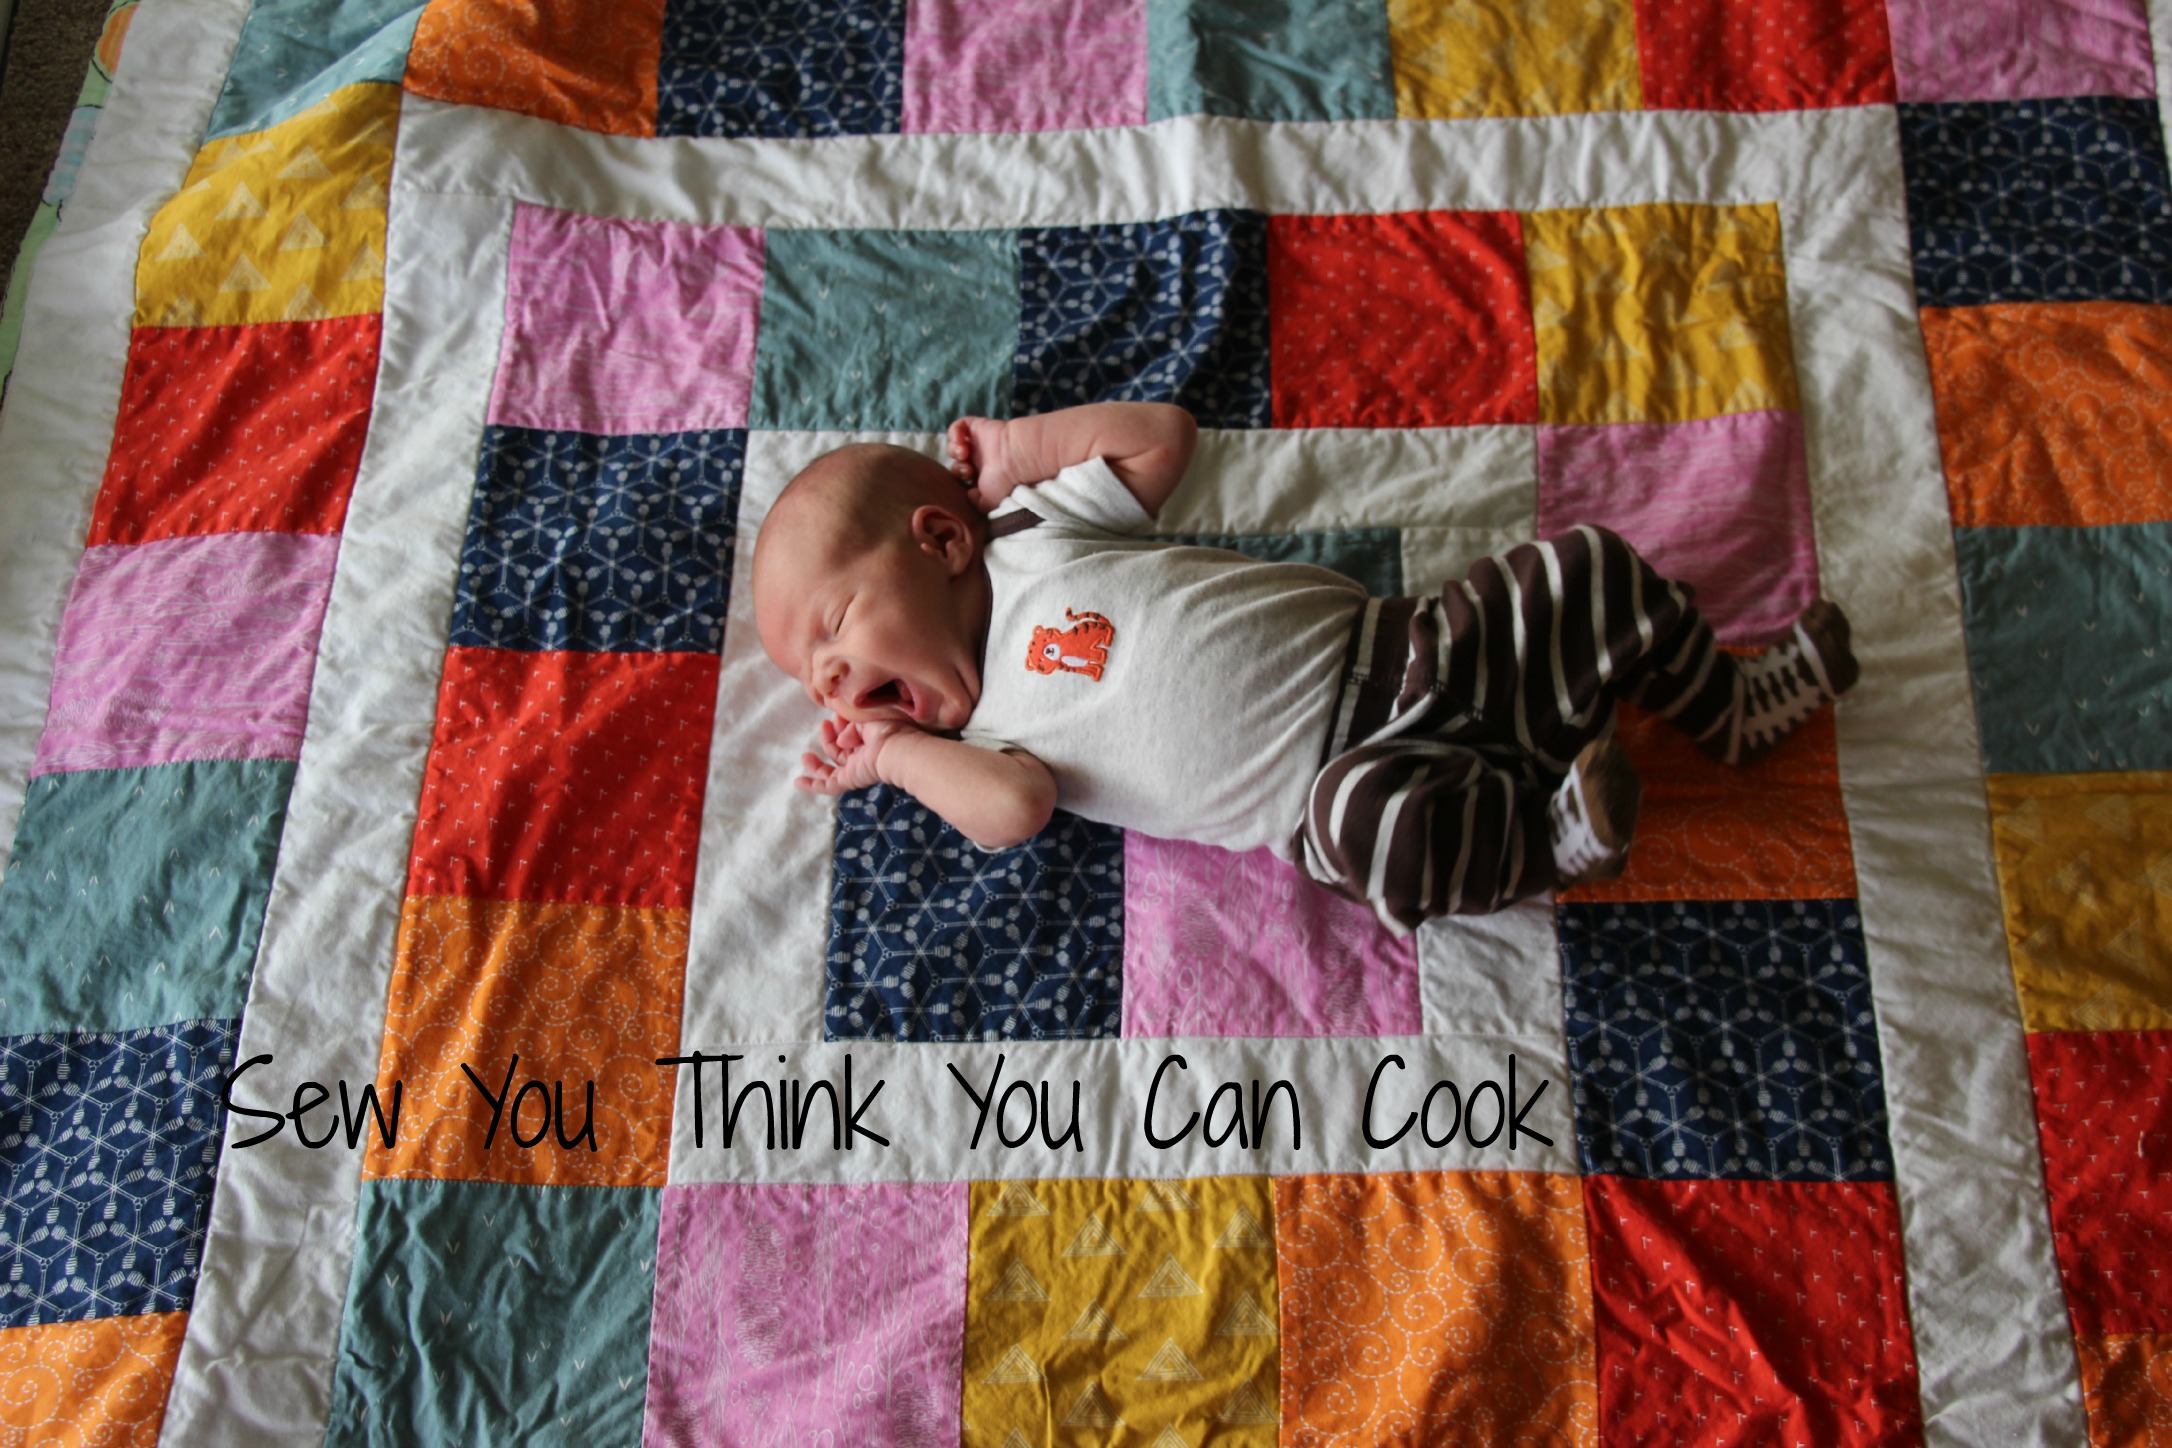
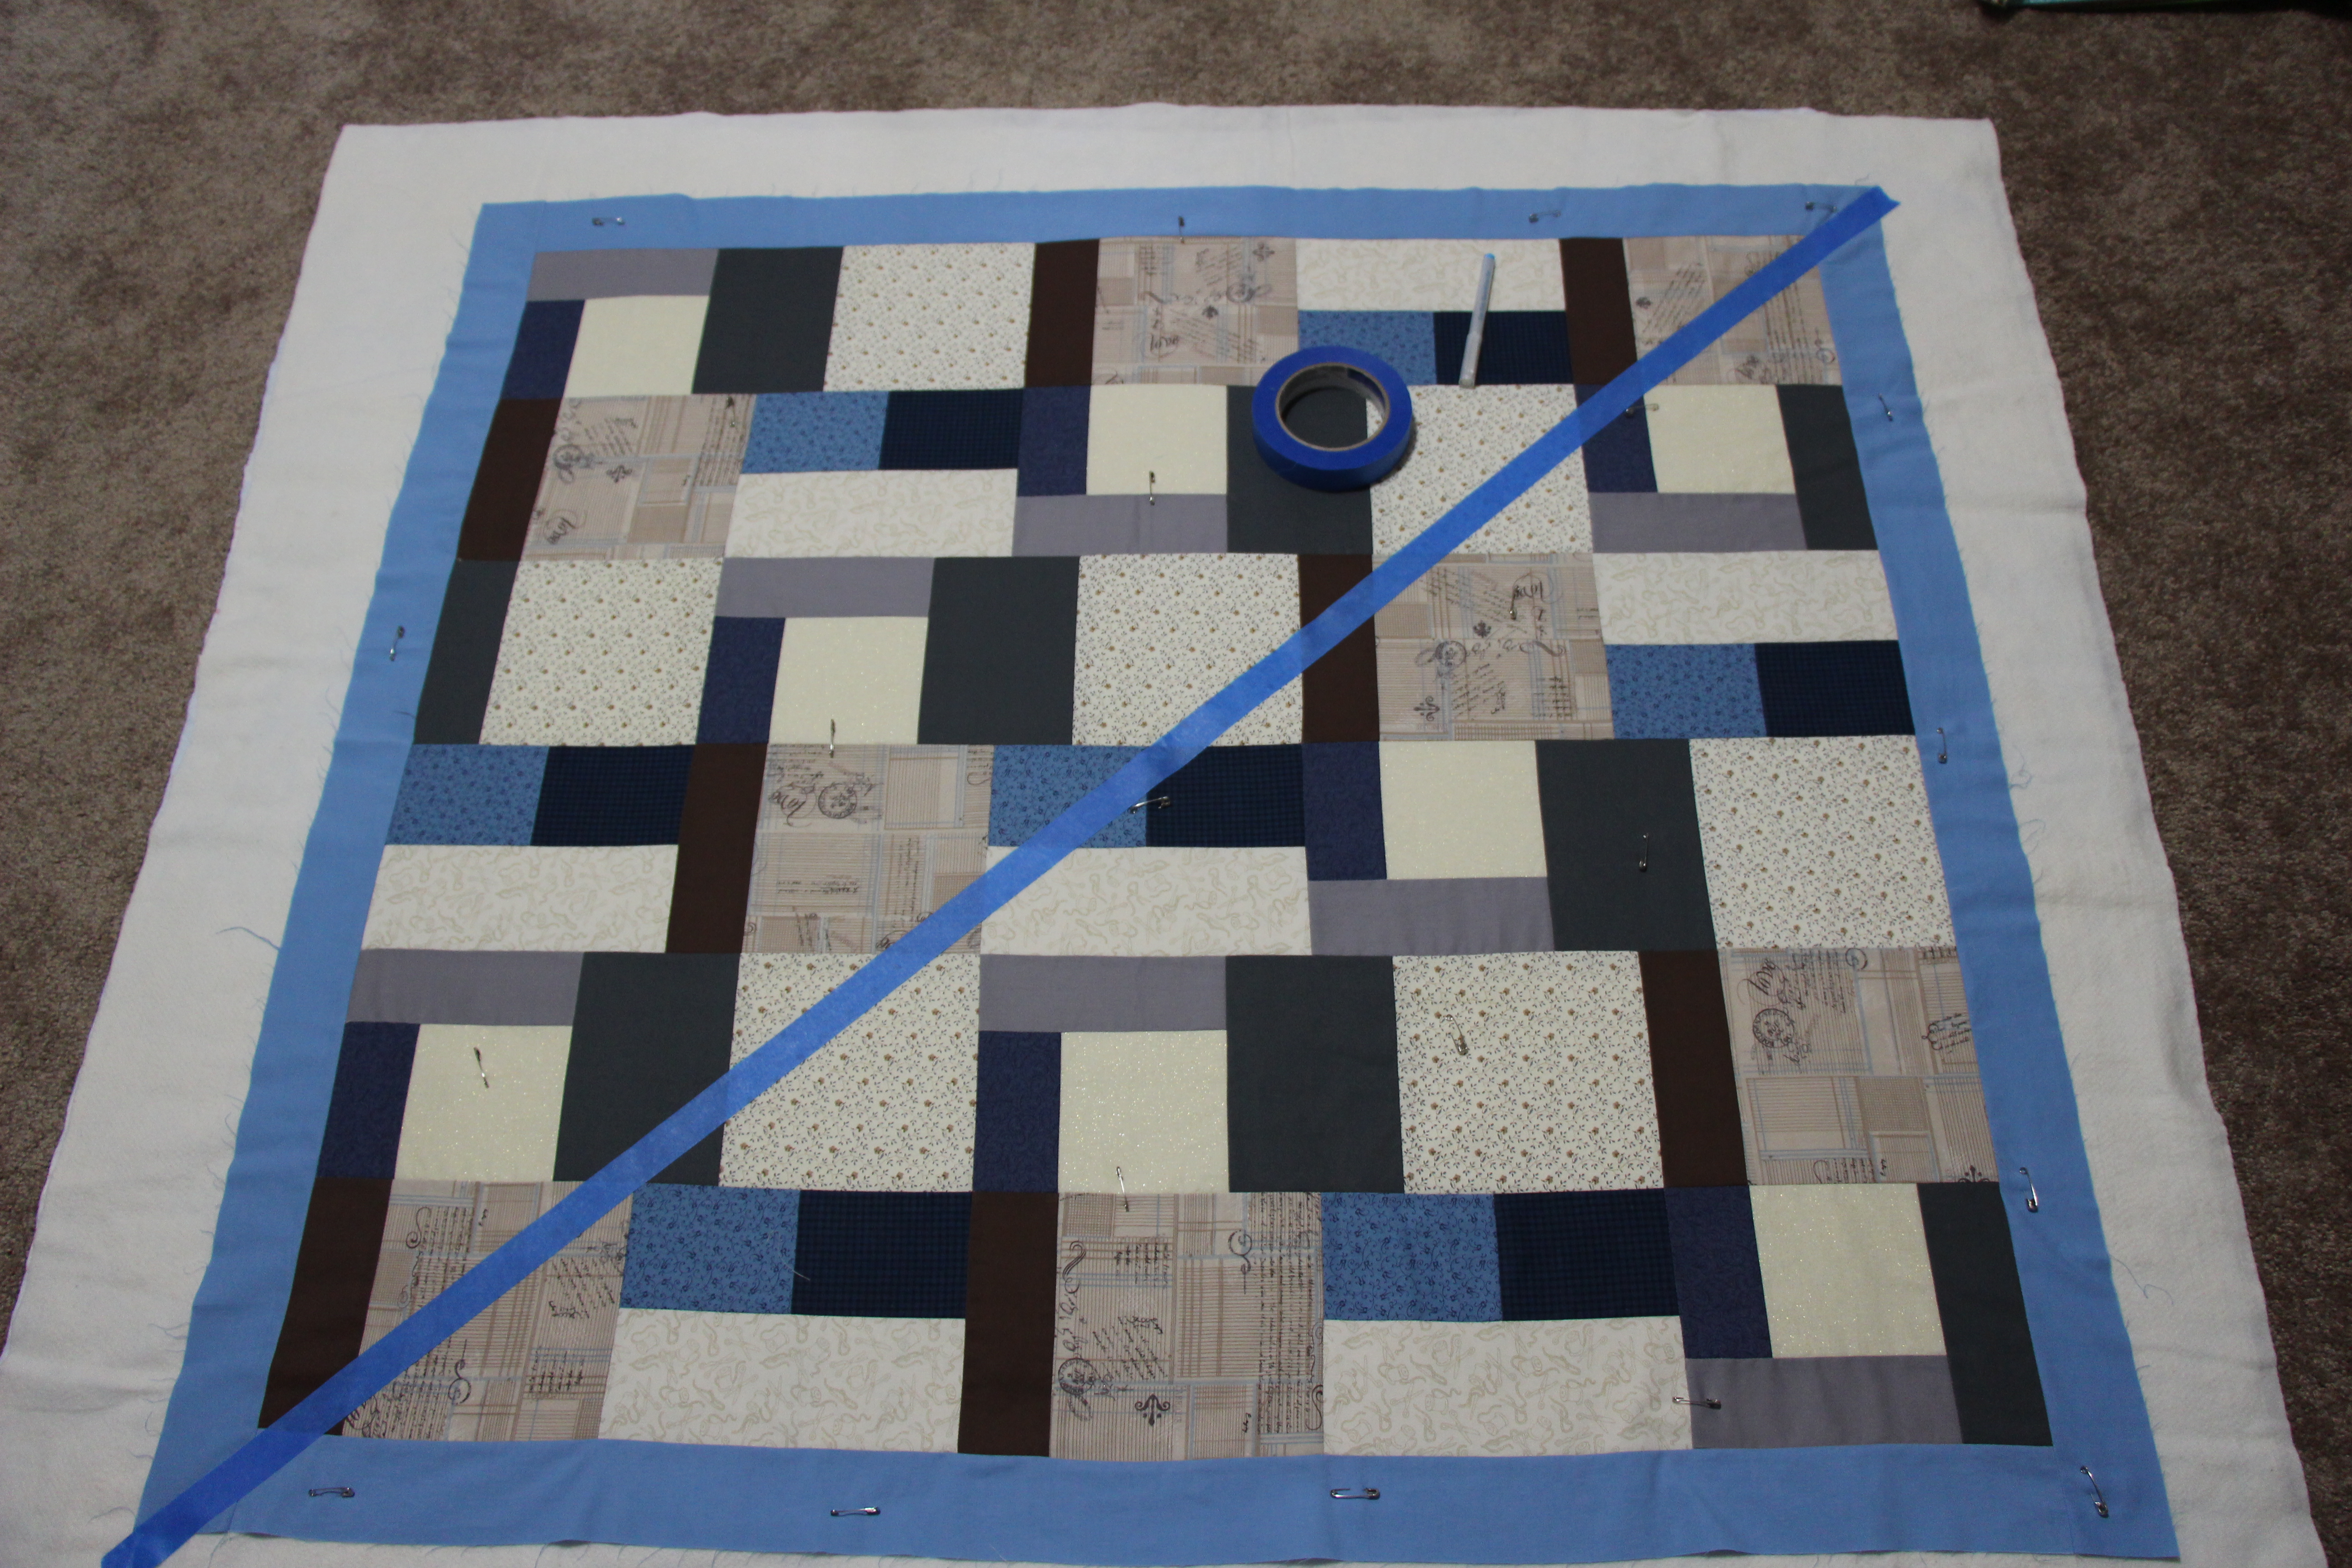
Another special summer baby is a sweet boy who is only one day older than my son. I was very excited when I found out that our friends were expecting their first baby only 10 days after our first. I was particularly excited because they happen to live in Ohio – where we were going to be relocating! I was looking forward to having another first time mommy friend and for Wesley to have a play date friend. We actually had our first “play date” last week – as much as 7-wk-olds can play. My friend knew she was having a boy so I had a lot of fun making a boy quilt with car fabric and reds, greens, and blues. (Photo to the right from February when “Little Racer” was under construction.)

And last but not least, I finally got the opportunity to make a quilt for my own baby! As we opted for the gender surprise package I made a gender neutral quilt. The back fabric, of course, is Winnie-the-Pooh and on the front I opted for tone-on-tone chevrons in colors white, blue, pink, purple, and yellow; colors of Winnie-the-Pooh characters! To keep it from being too feminine I used grey as my border fabric. (Photo below is my absolute favorite of Wesley sleeping in “Kerplunk’s Hundred Acre Wood”)

Kerplunk's Hundred Acre Wood

8-Grid Chain Variation

There are many variations of the 8-Grid Chain Quilt Block. Simply google it! There are endless possibilities with using different fabrics too. This is the variation I used in my Fourth of July quilt  Old Glory.

8-Grid Chain Variation Quilt Block Tutorial

Here’s the how-to for this 8-Grid Chain Variation Quilt Block

Cut fabric:

  • 12 squares 1 1/2″ red
  • 8 squares 1 1/2″ white
  • 4 rectangles 2 1/2″ x 4 1/2″ white
  • 4 rectangles 1 1/2″ x 2 1/2″ white
  • 1 square 2 1/2″ red

Lay out fabric squares into the 8-Grid Chain Variation:

8-Grid Chain Variation Quilt Block Tutorial


Sew together the four 4-patch blocks in the corner. Also, sew together the 9-patch block in the center:

8-Grid Chain Variation Quilt Block Tutorial

The 8-Grid Chain Variation is now a simple 9-patch. Complete the three rows before sewing the rows together:

8-Grid Chain Variation Quilt Block Tutorial