Four Hour Quilt Variation

When my good friend Tara (of Tara’s Multicultural Table) told me she was pregnant with her second child the wheels were already turning as to what quilt to sew for the new addition.

Her son, Evan, received my first ever baby quilt (his is the safari one) for his first Christmas. I’ve made quite a few Four Hour Quilts since then. I wanted to do something different this time. But I wanted something that would compliment big brother’s quilt. I found this photo via Pinterest and knew I had a winner. All I had to do was wait to see if Evan would be having a baby brother or baby sister.

It’s a girl! And that beautiful baby girl is my Goddaughter. I helped Tara decide on the theme for her nursery and hit the fabric shops. The theme: woodland, with pinks.

Four Hour Quilt Variation Tutorial (girl) | Sew You Think You Can Cook

Because this quilt is quick, easy, and fun to assemble, I decided to use the same quilt pattern for my baby boy, too. To have his quilt complement my little man’s I kept with a Winnie-the-Pooh theme with a Winnie-the-Pooh pattern for the back and quilt top fabric choices of the characters’ colors. (Orange for Tigger, Red for Pooh, Pink for Piglet, Grey for Eeyore, Blue for Roo, and Yellow for Rabbit)

Four Hour Quilt Variation Tutorial (neutral) | Sew You Think You Can Cook

Here’s the How-To for a Four Hour Quilt Variation:

For a baby quilt that finishes to 47×47″, you will need 48 5 1/2″ squares (this is a total of approximately 1 1/4 yd of fabric). You can use as many different fabric choices or as few as you like. I choose 5-7 different fabrics for these squares. The strips for the borders are cut to 3″. I typically use the same fabric for all 3 borders, but feel free to be as colorful as you want! (this is a total of approximately 1 1/2 yd of fabric)

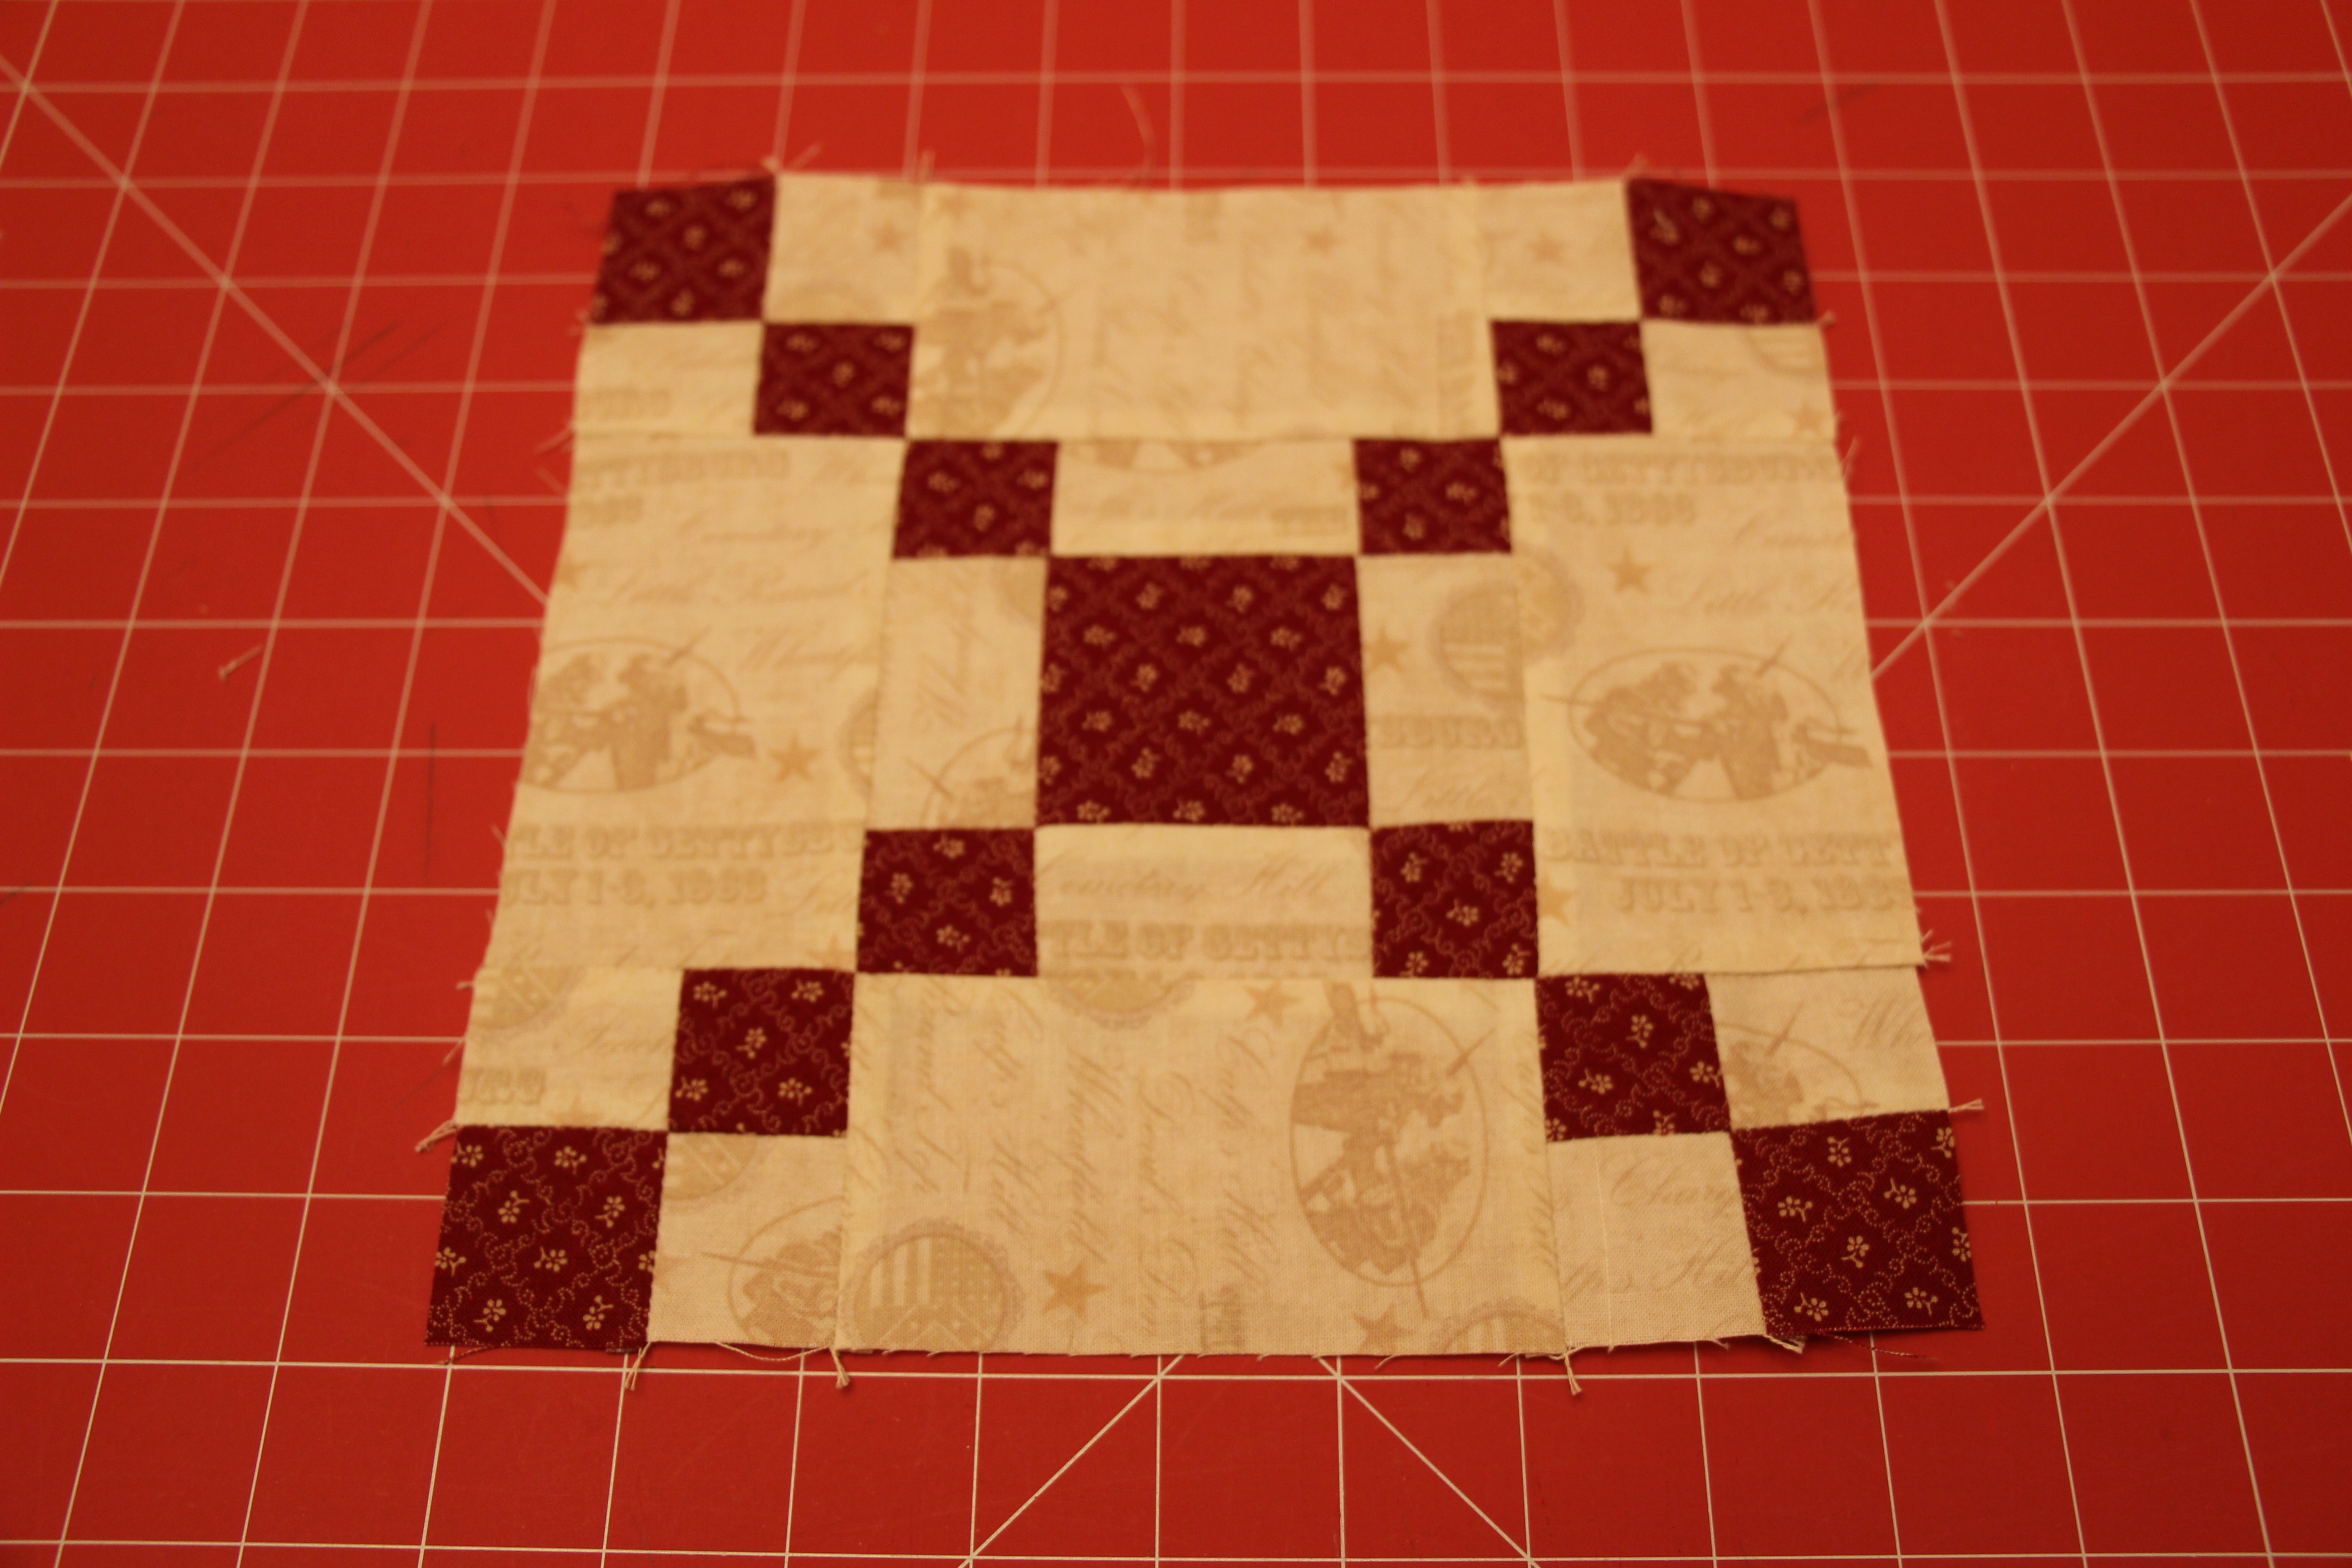
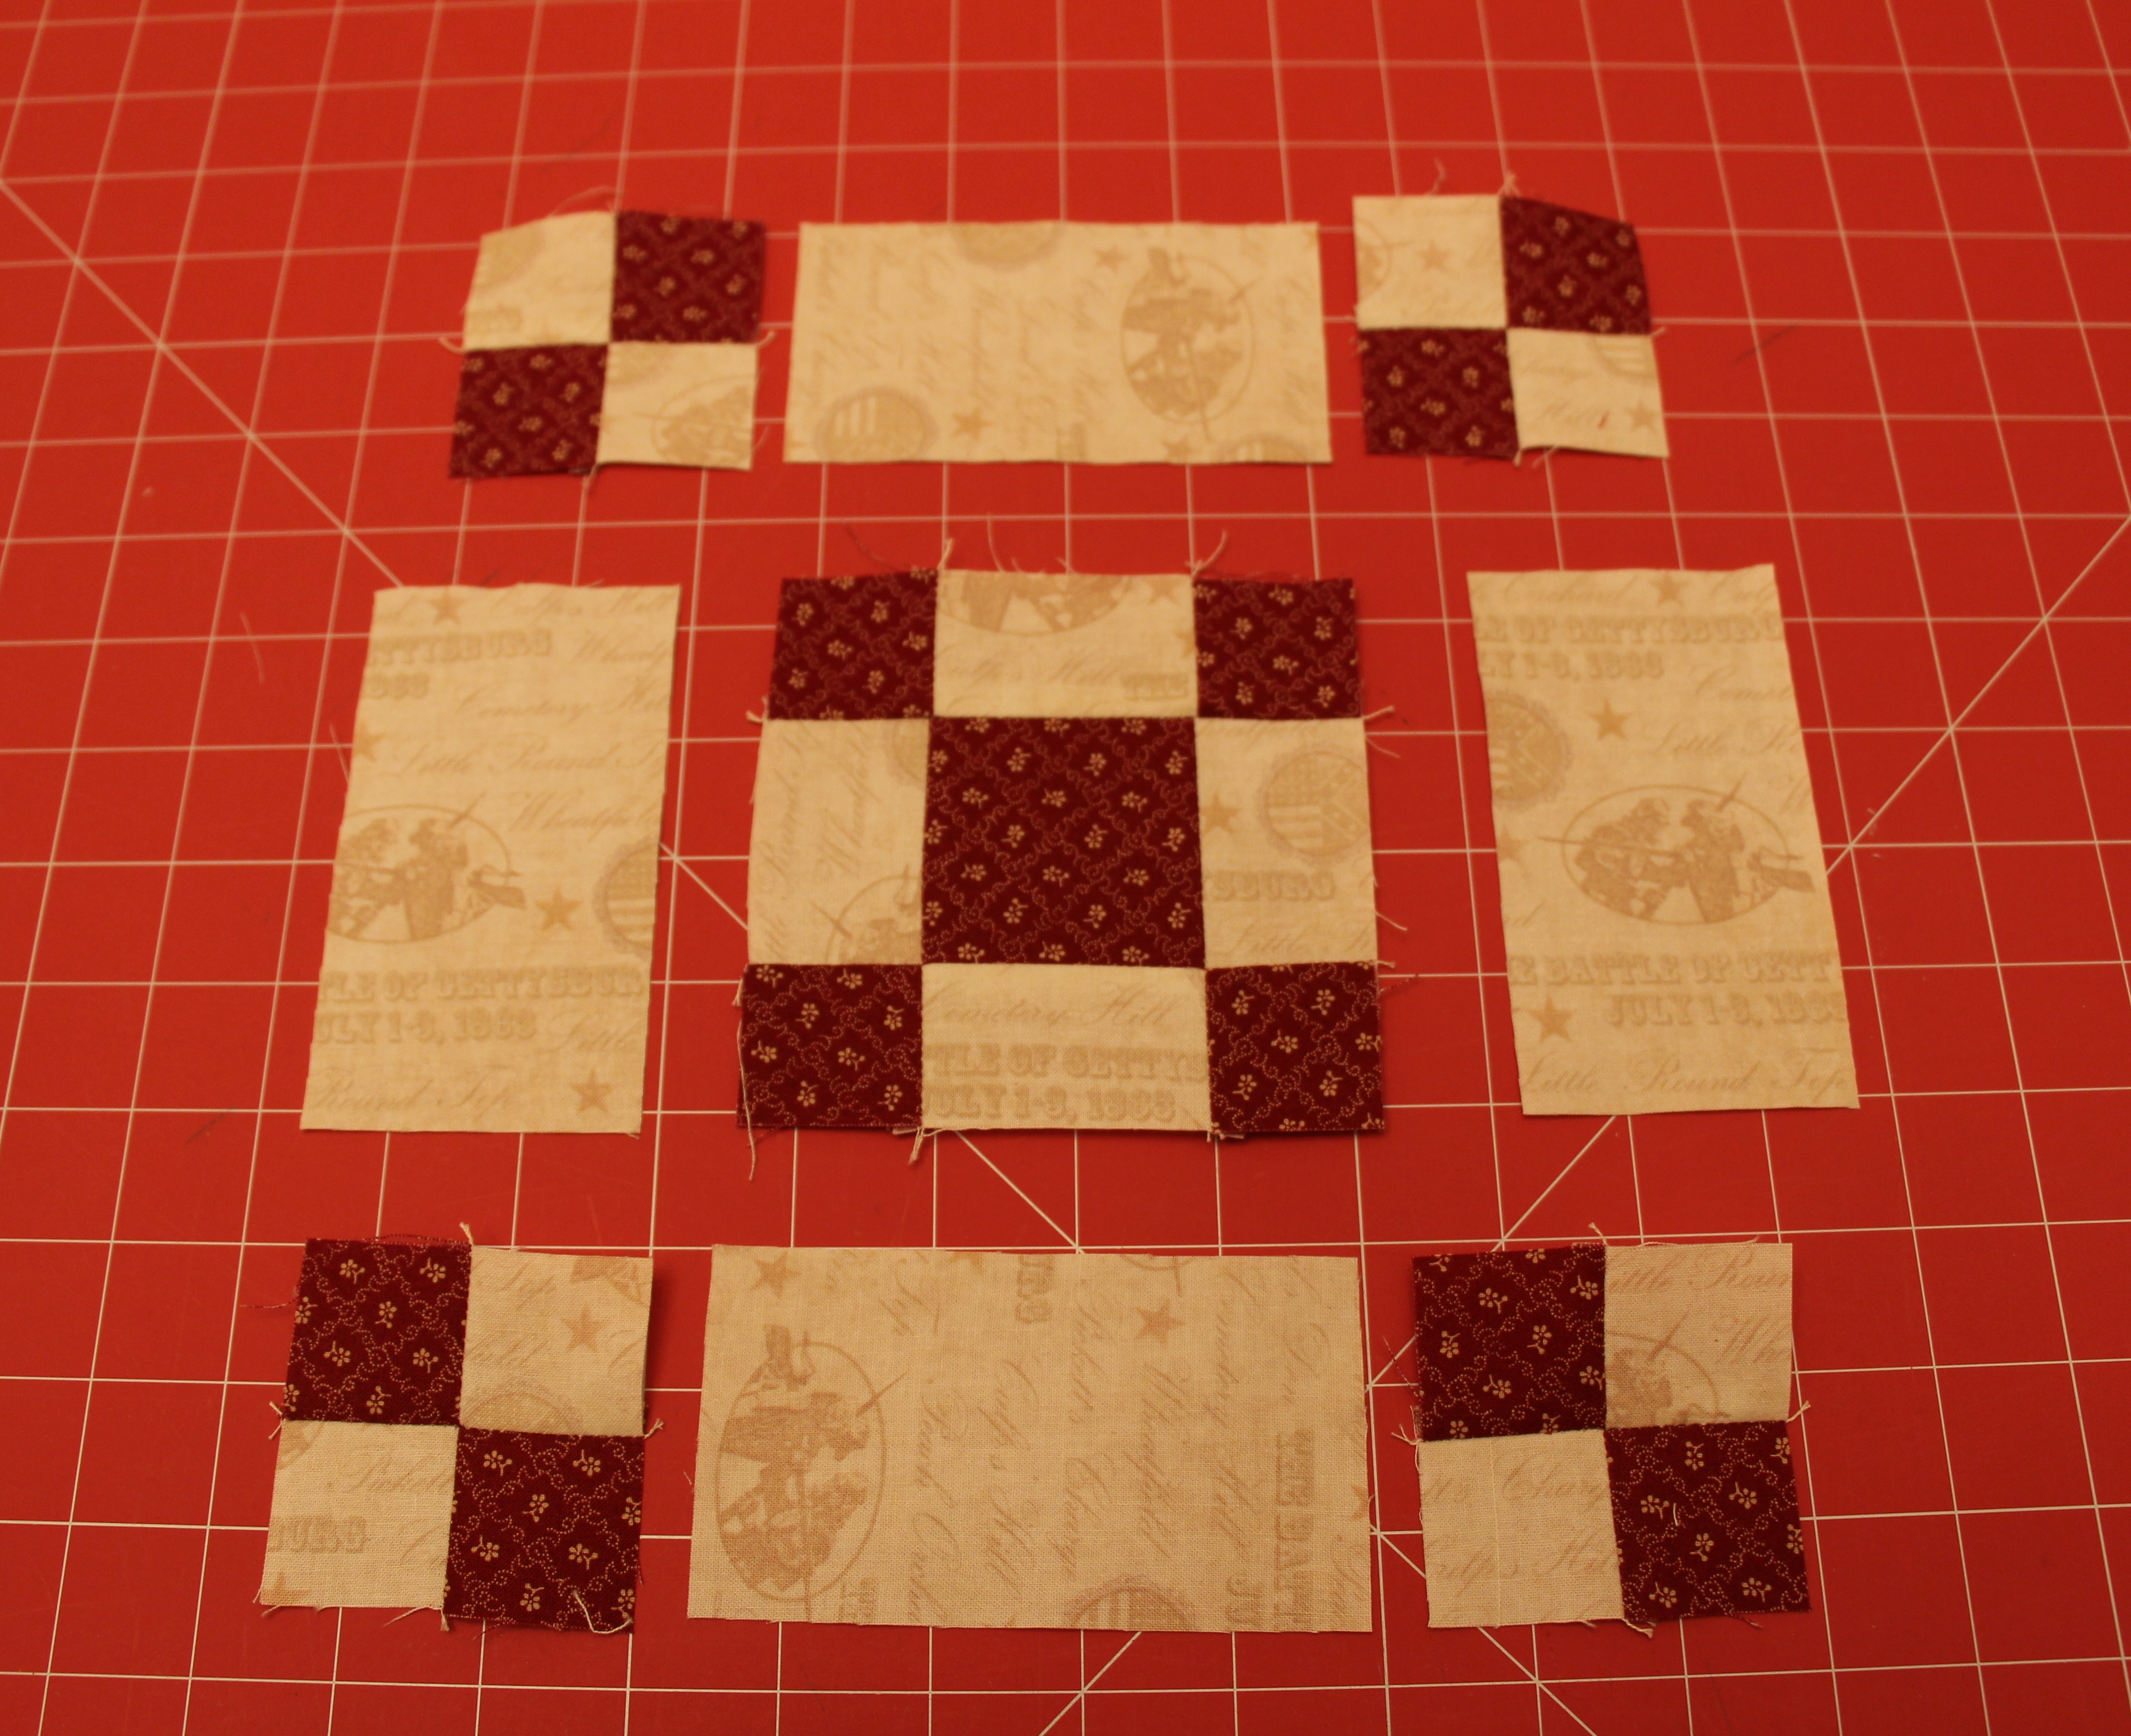
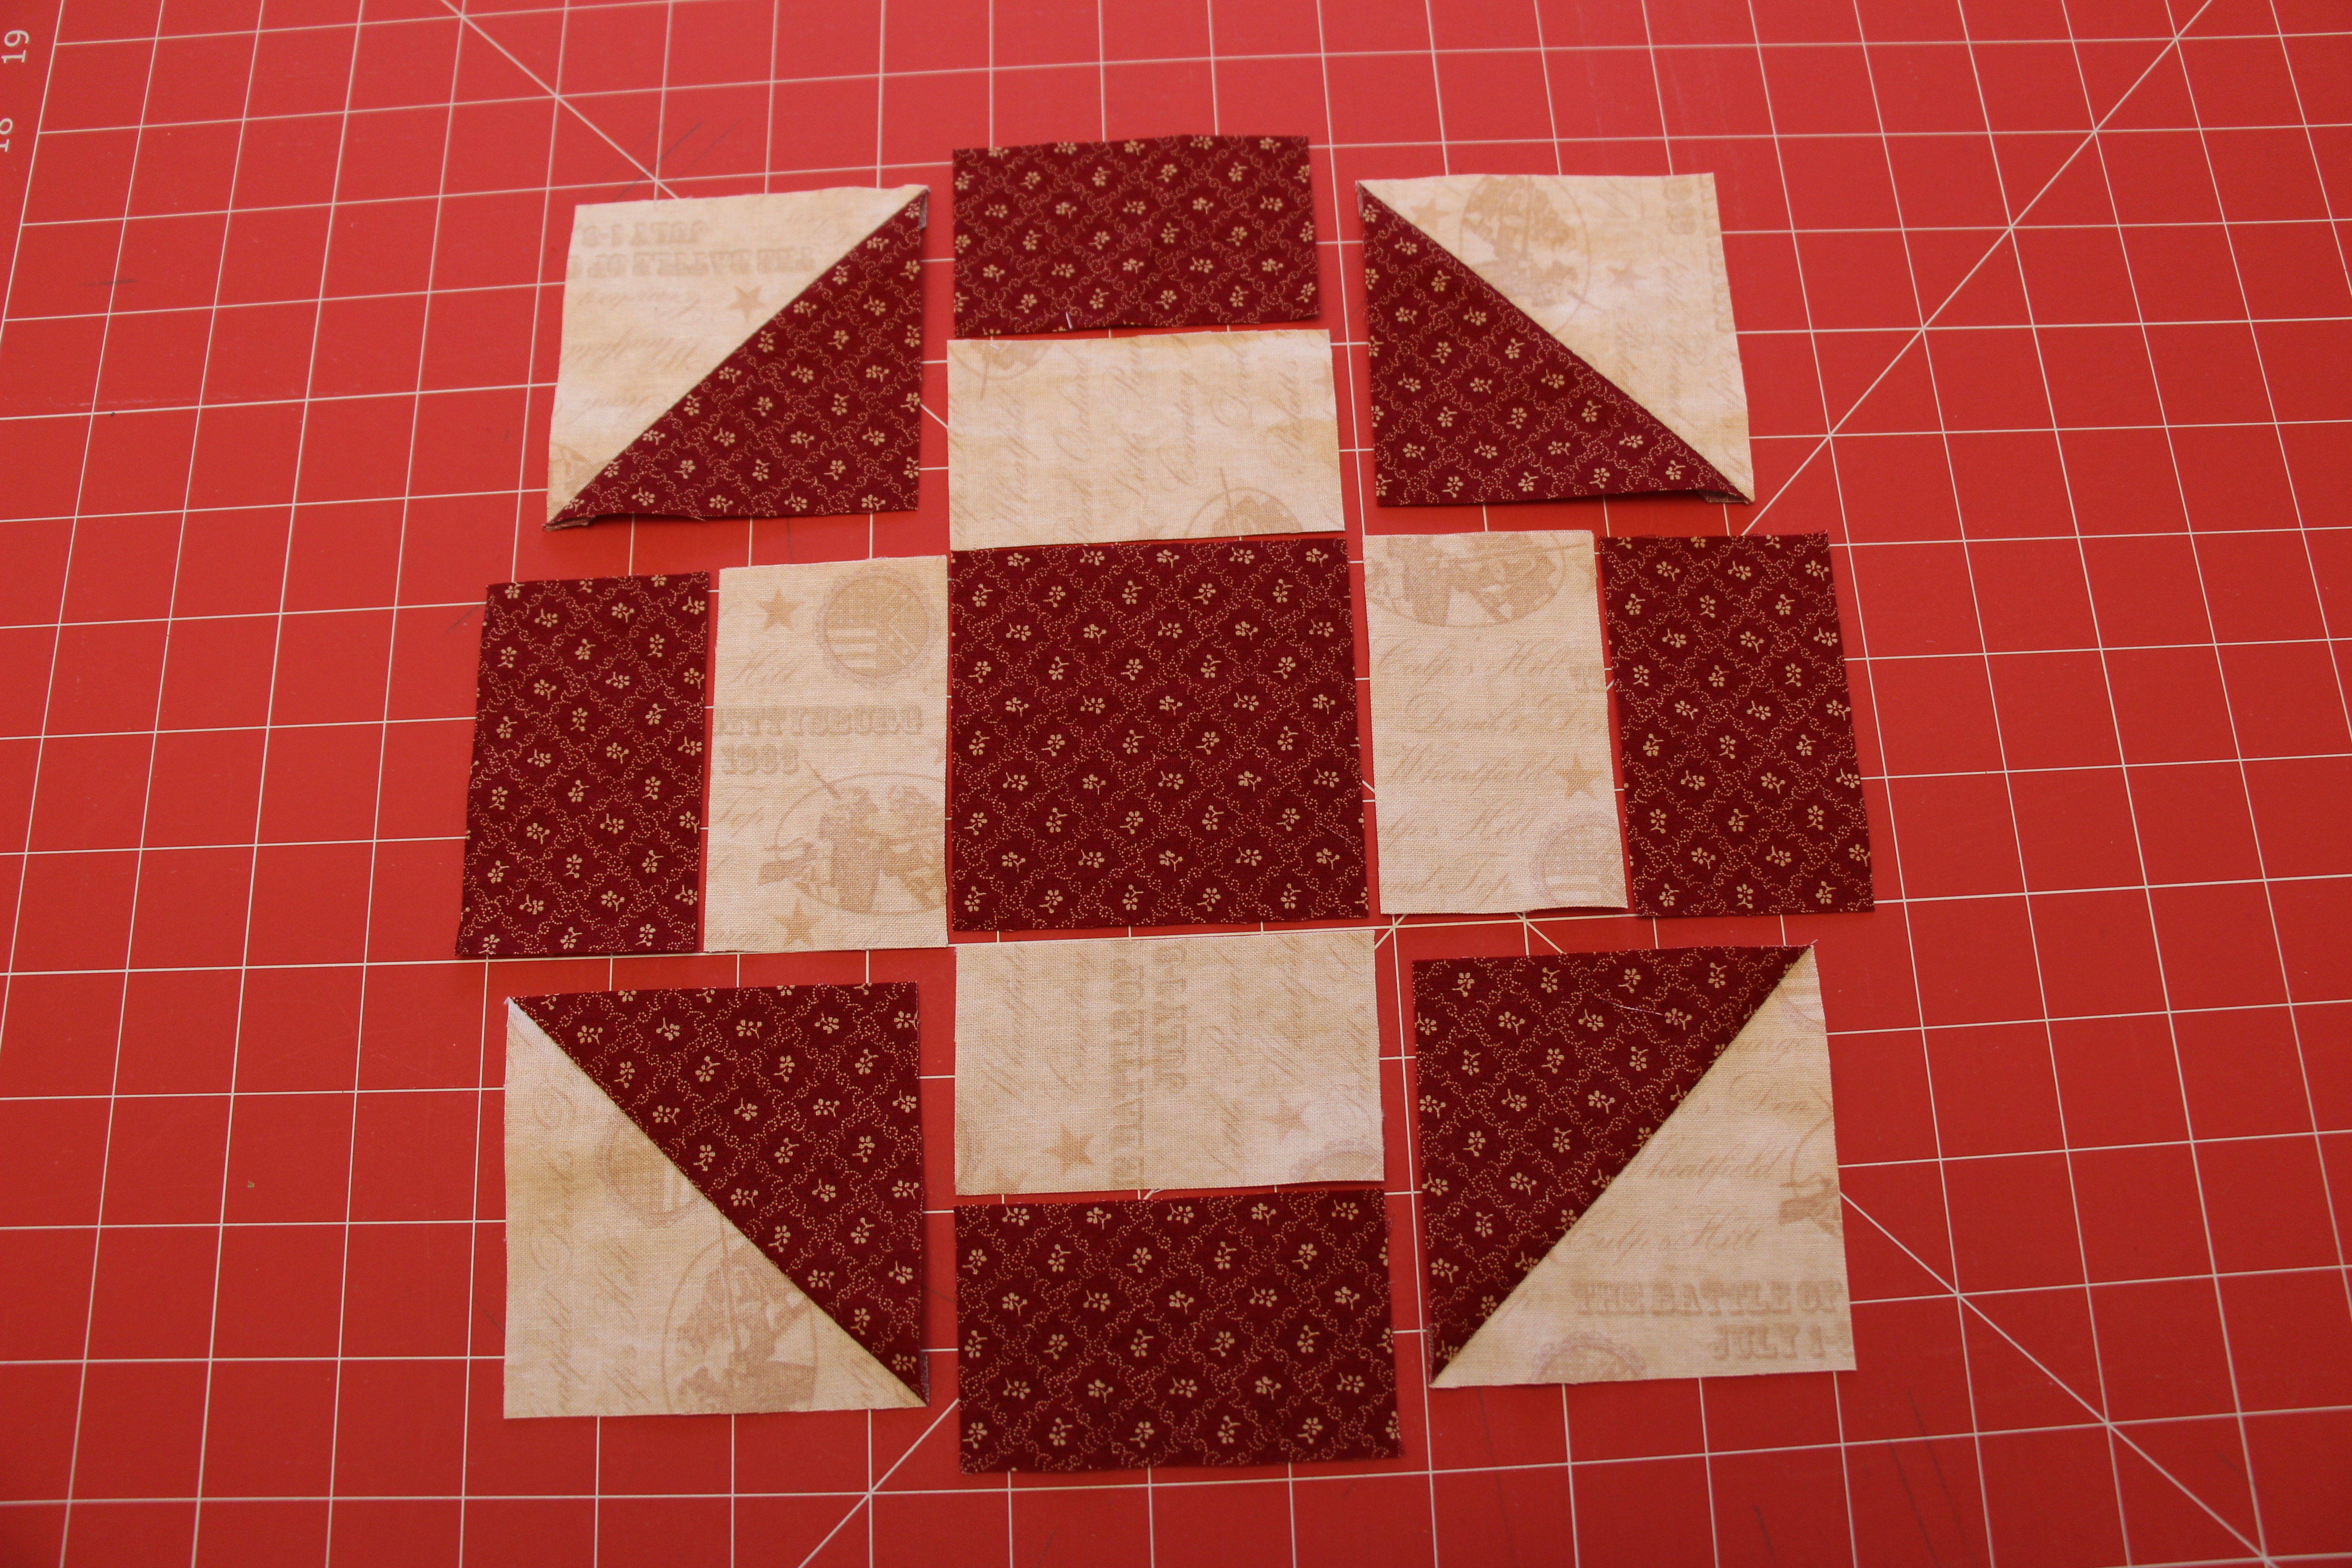
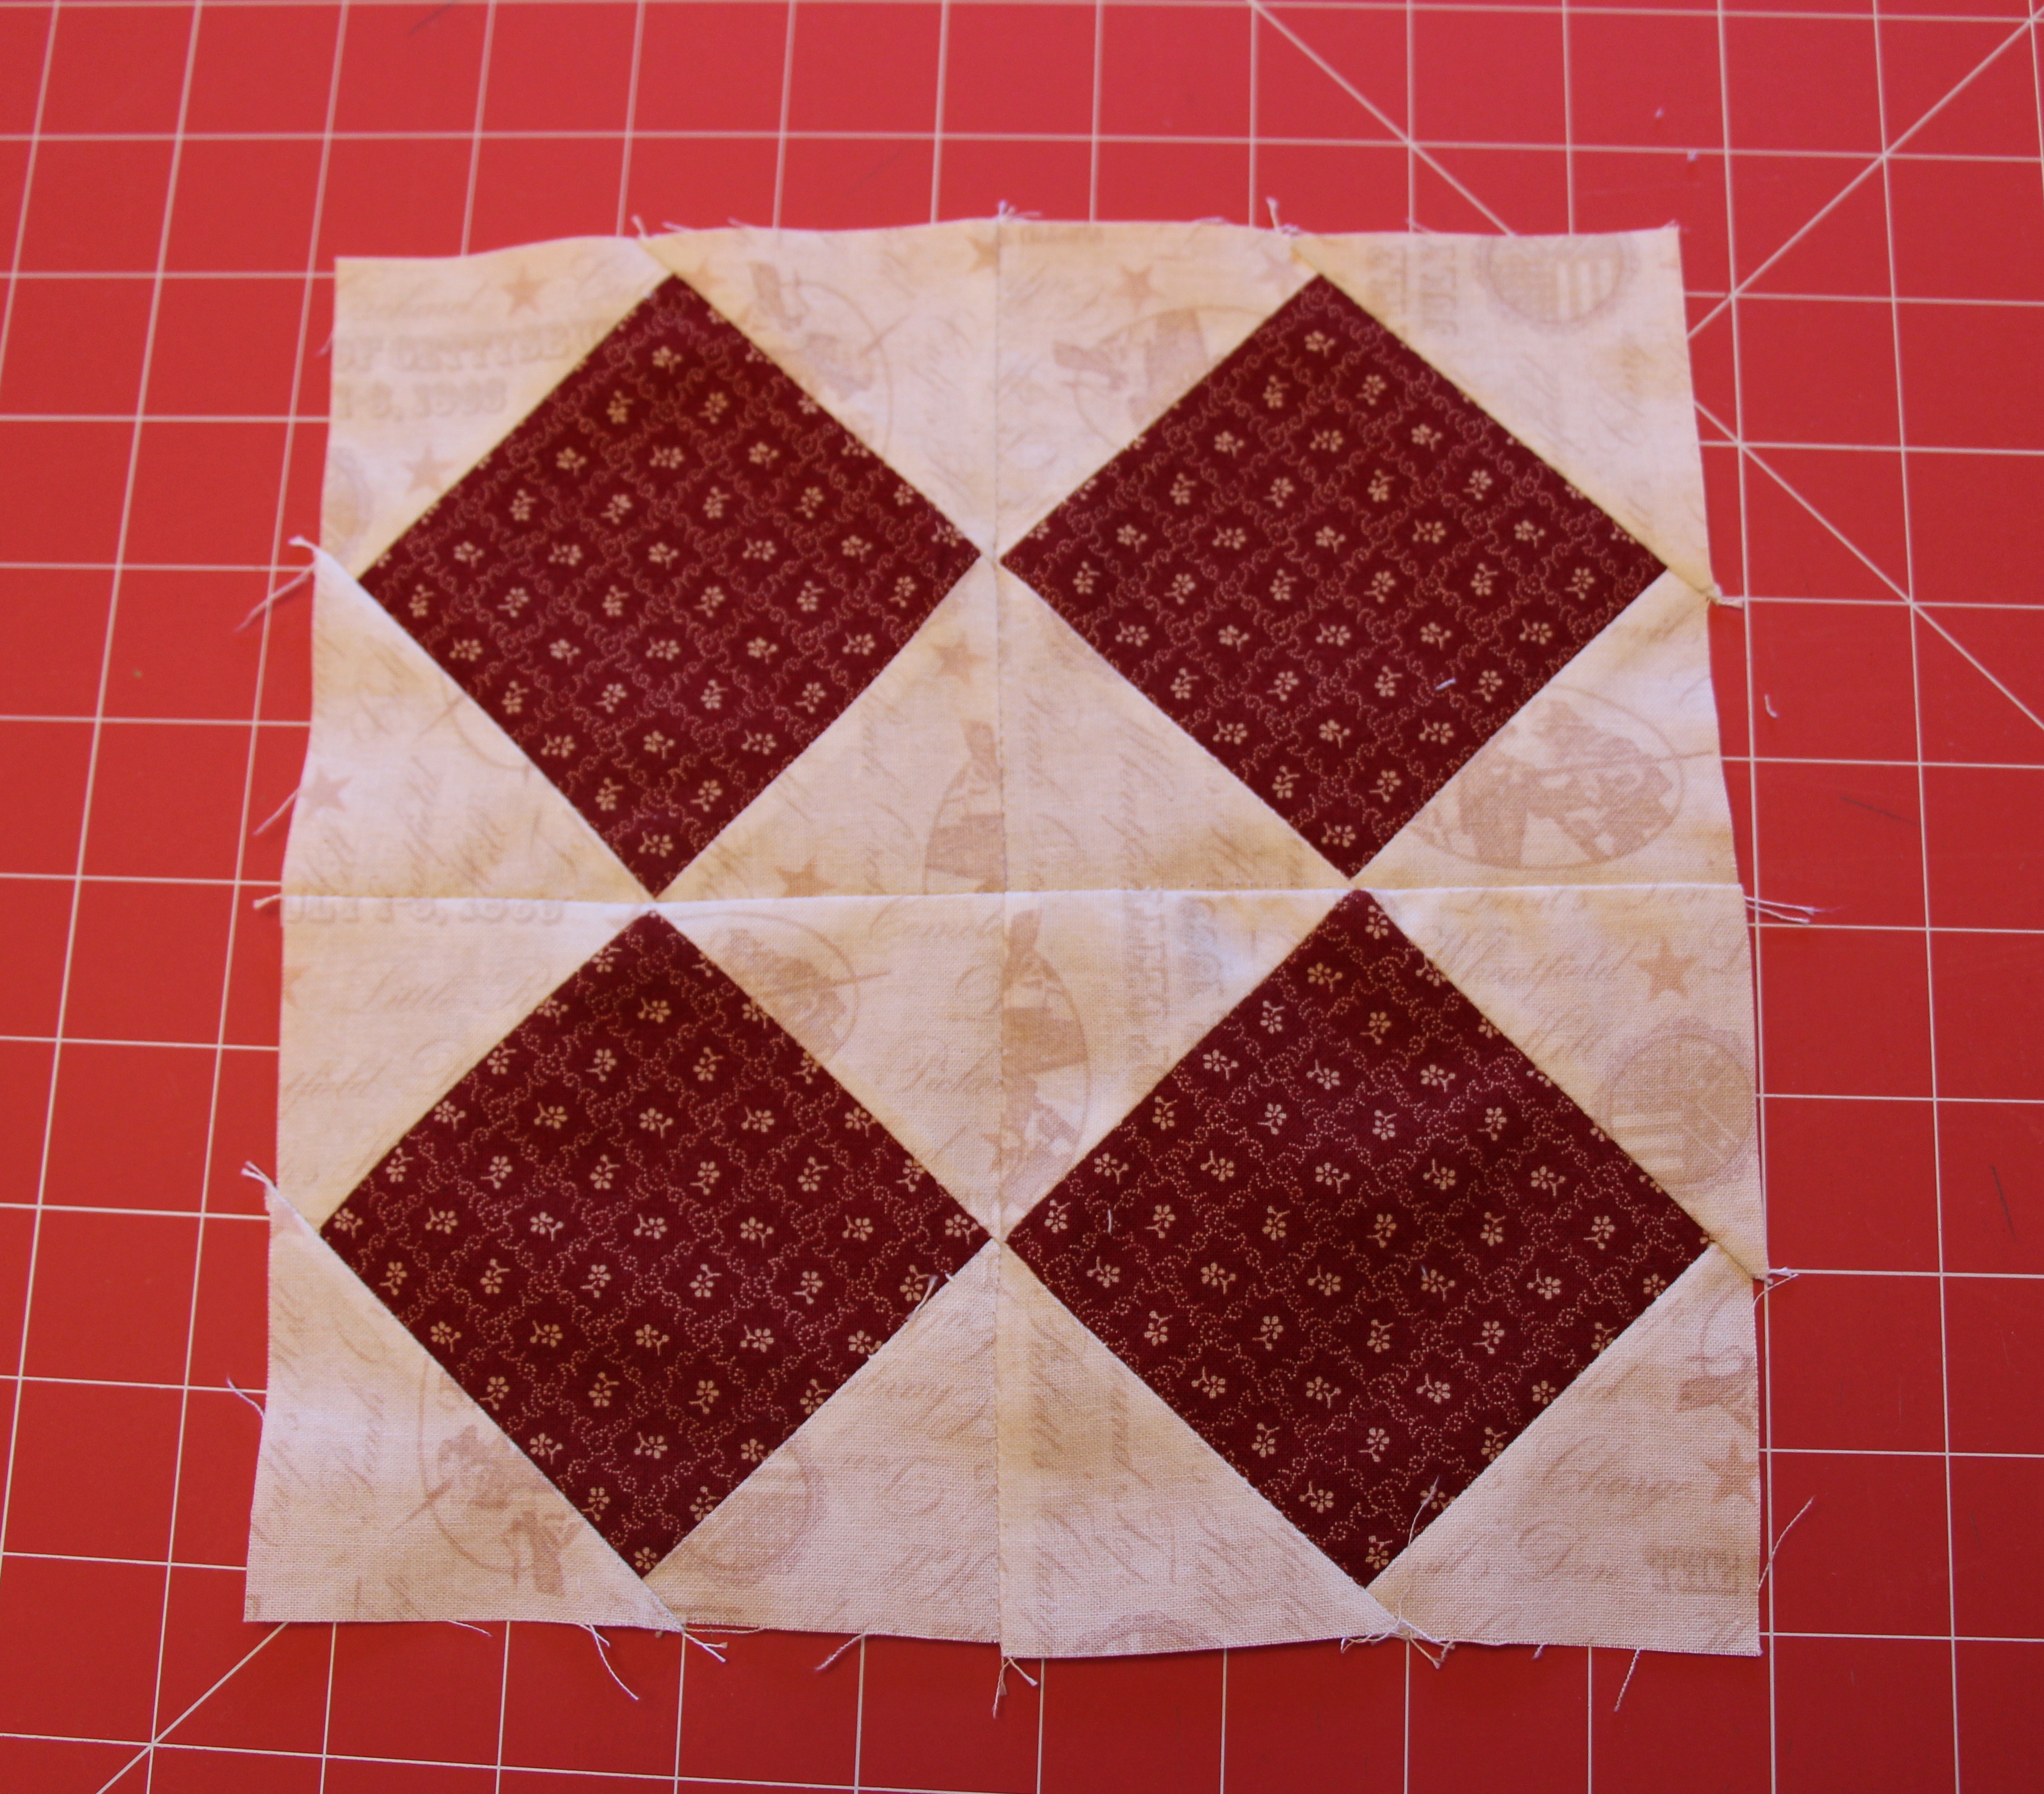
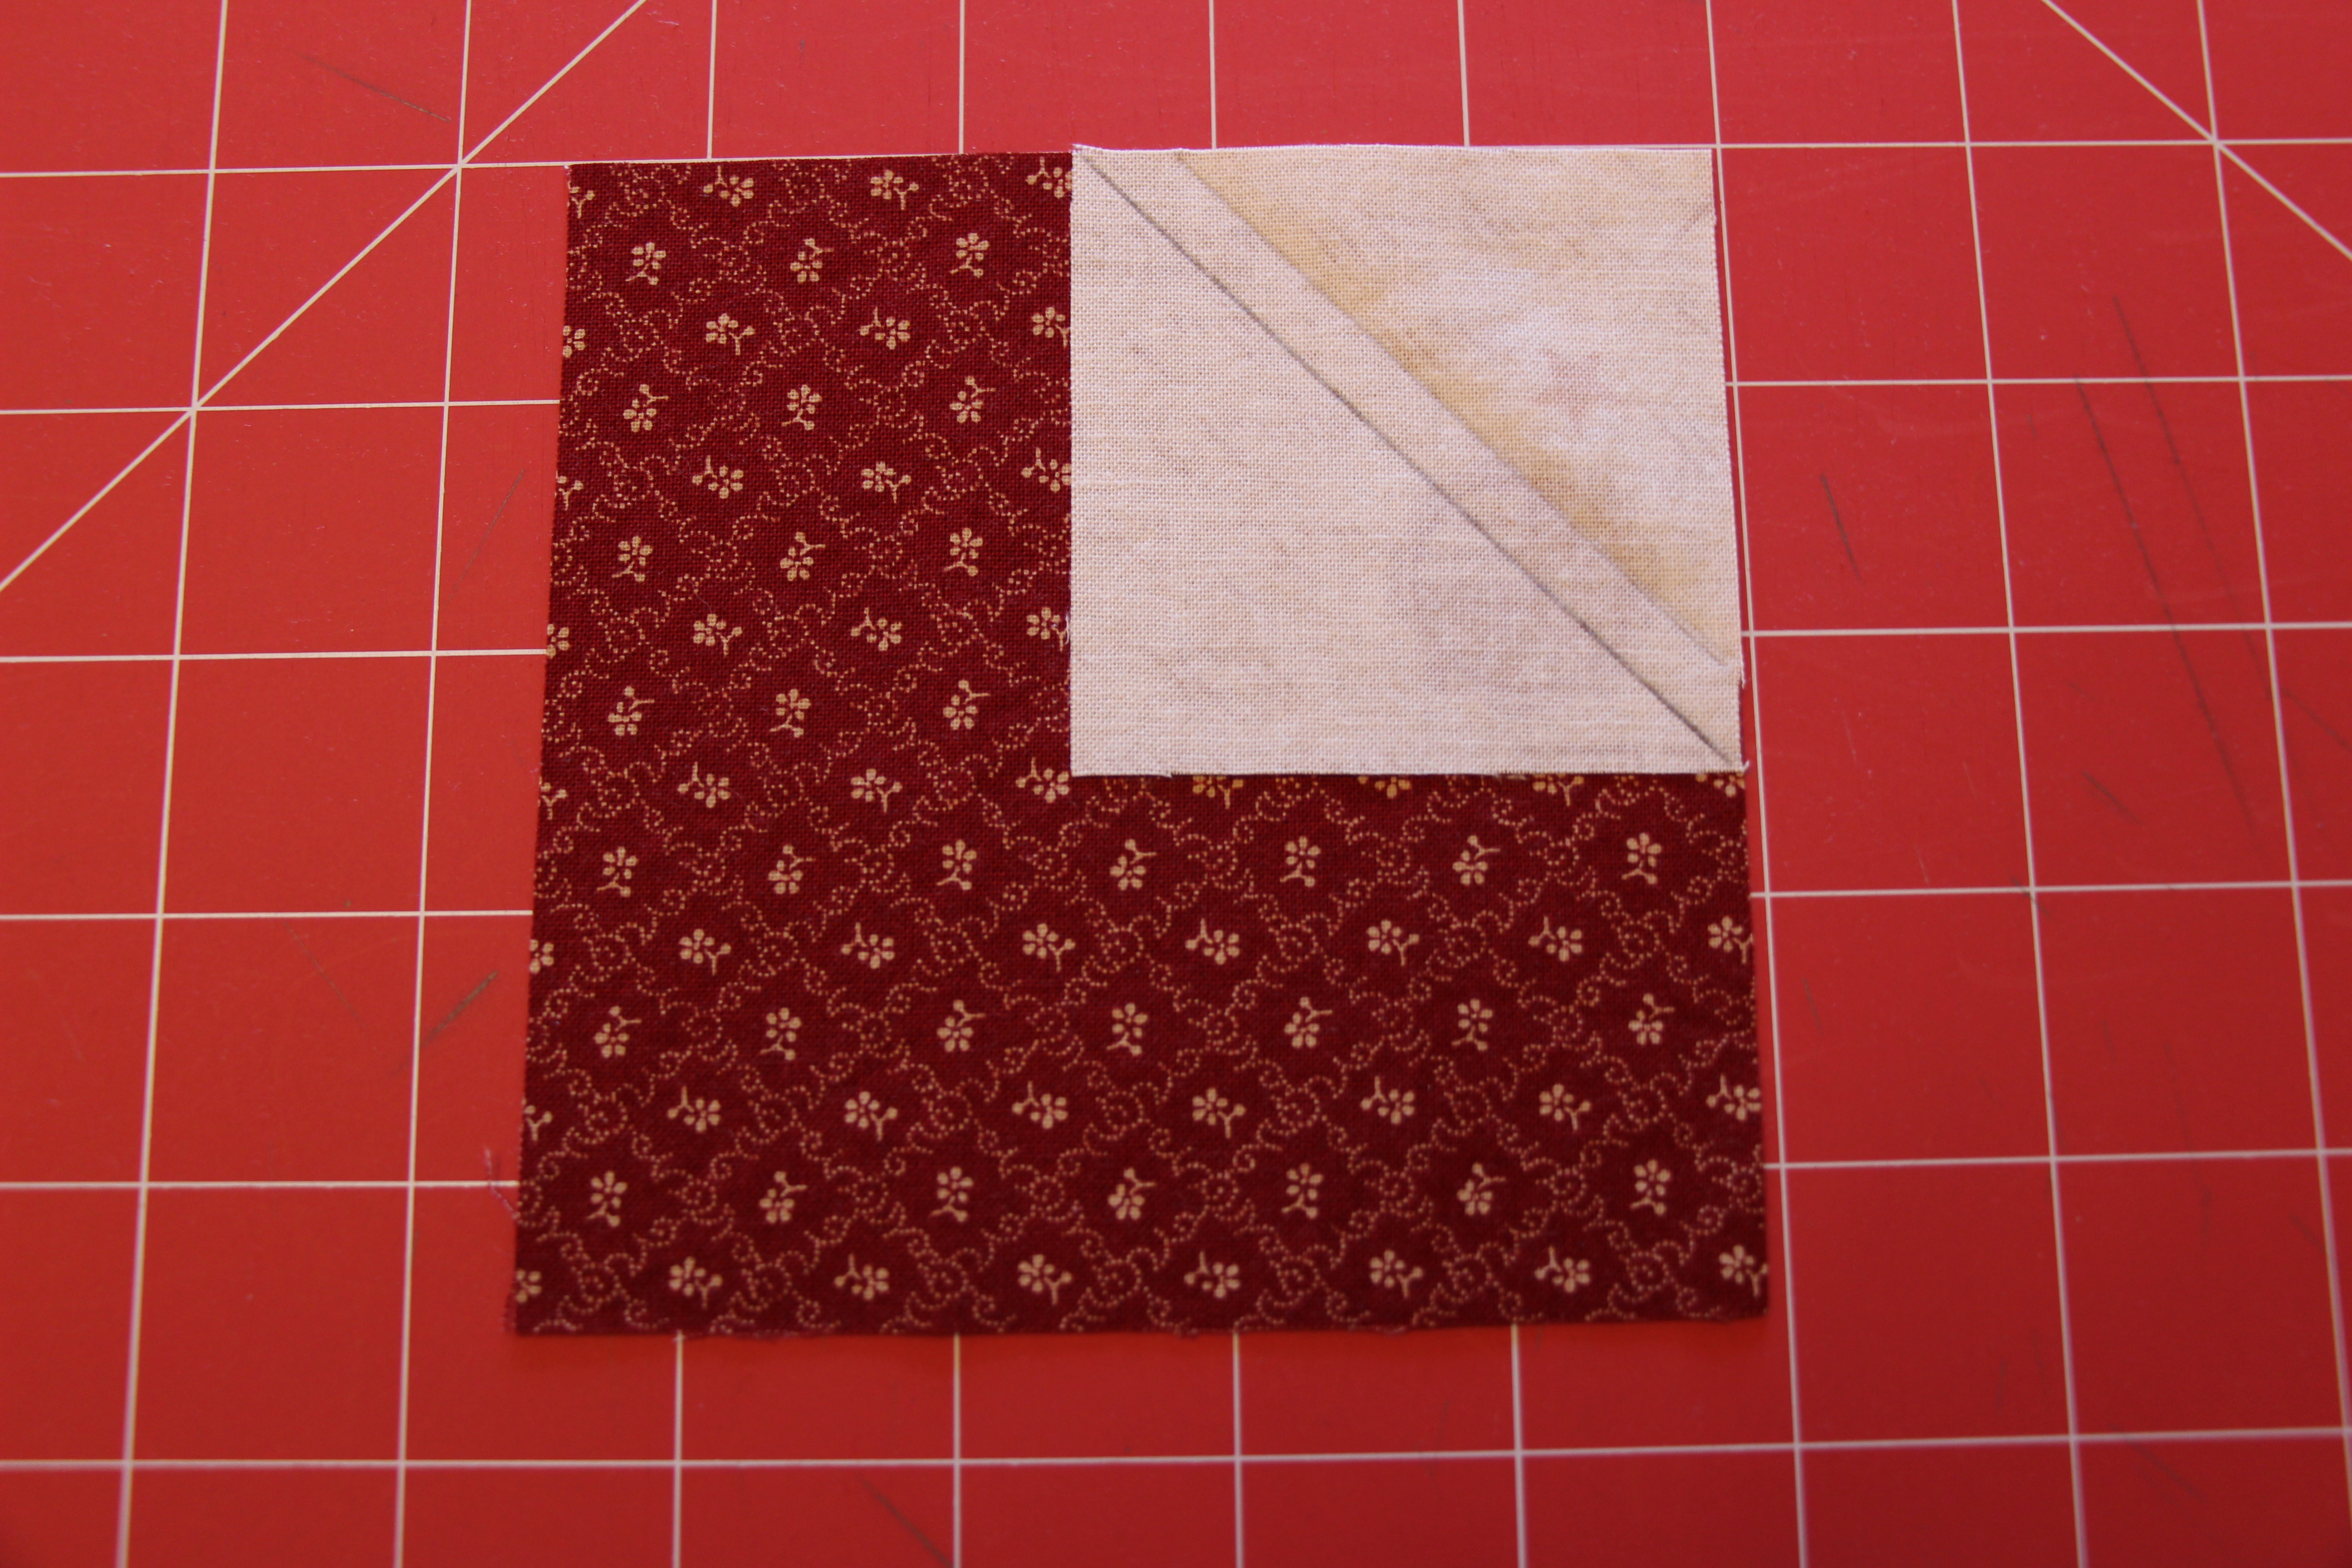
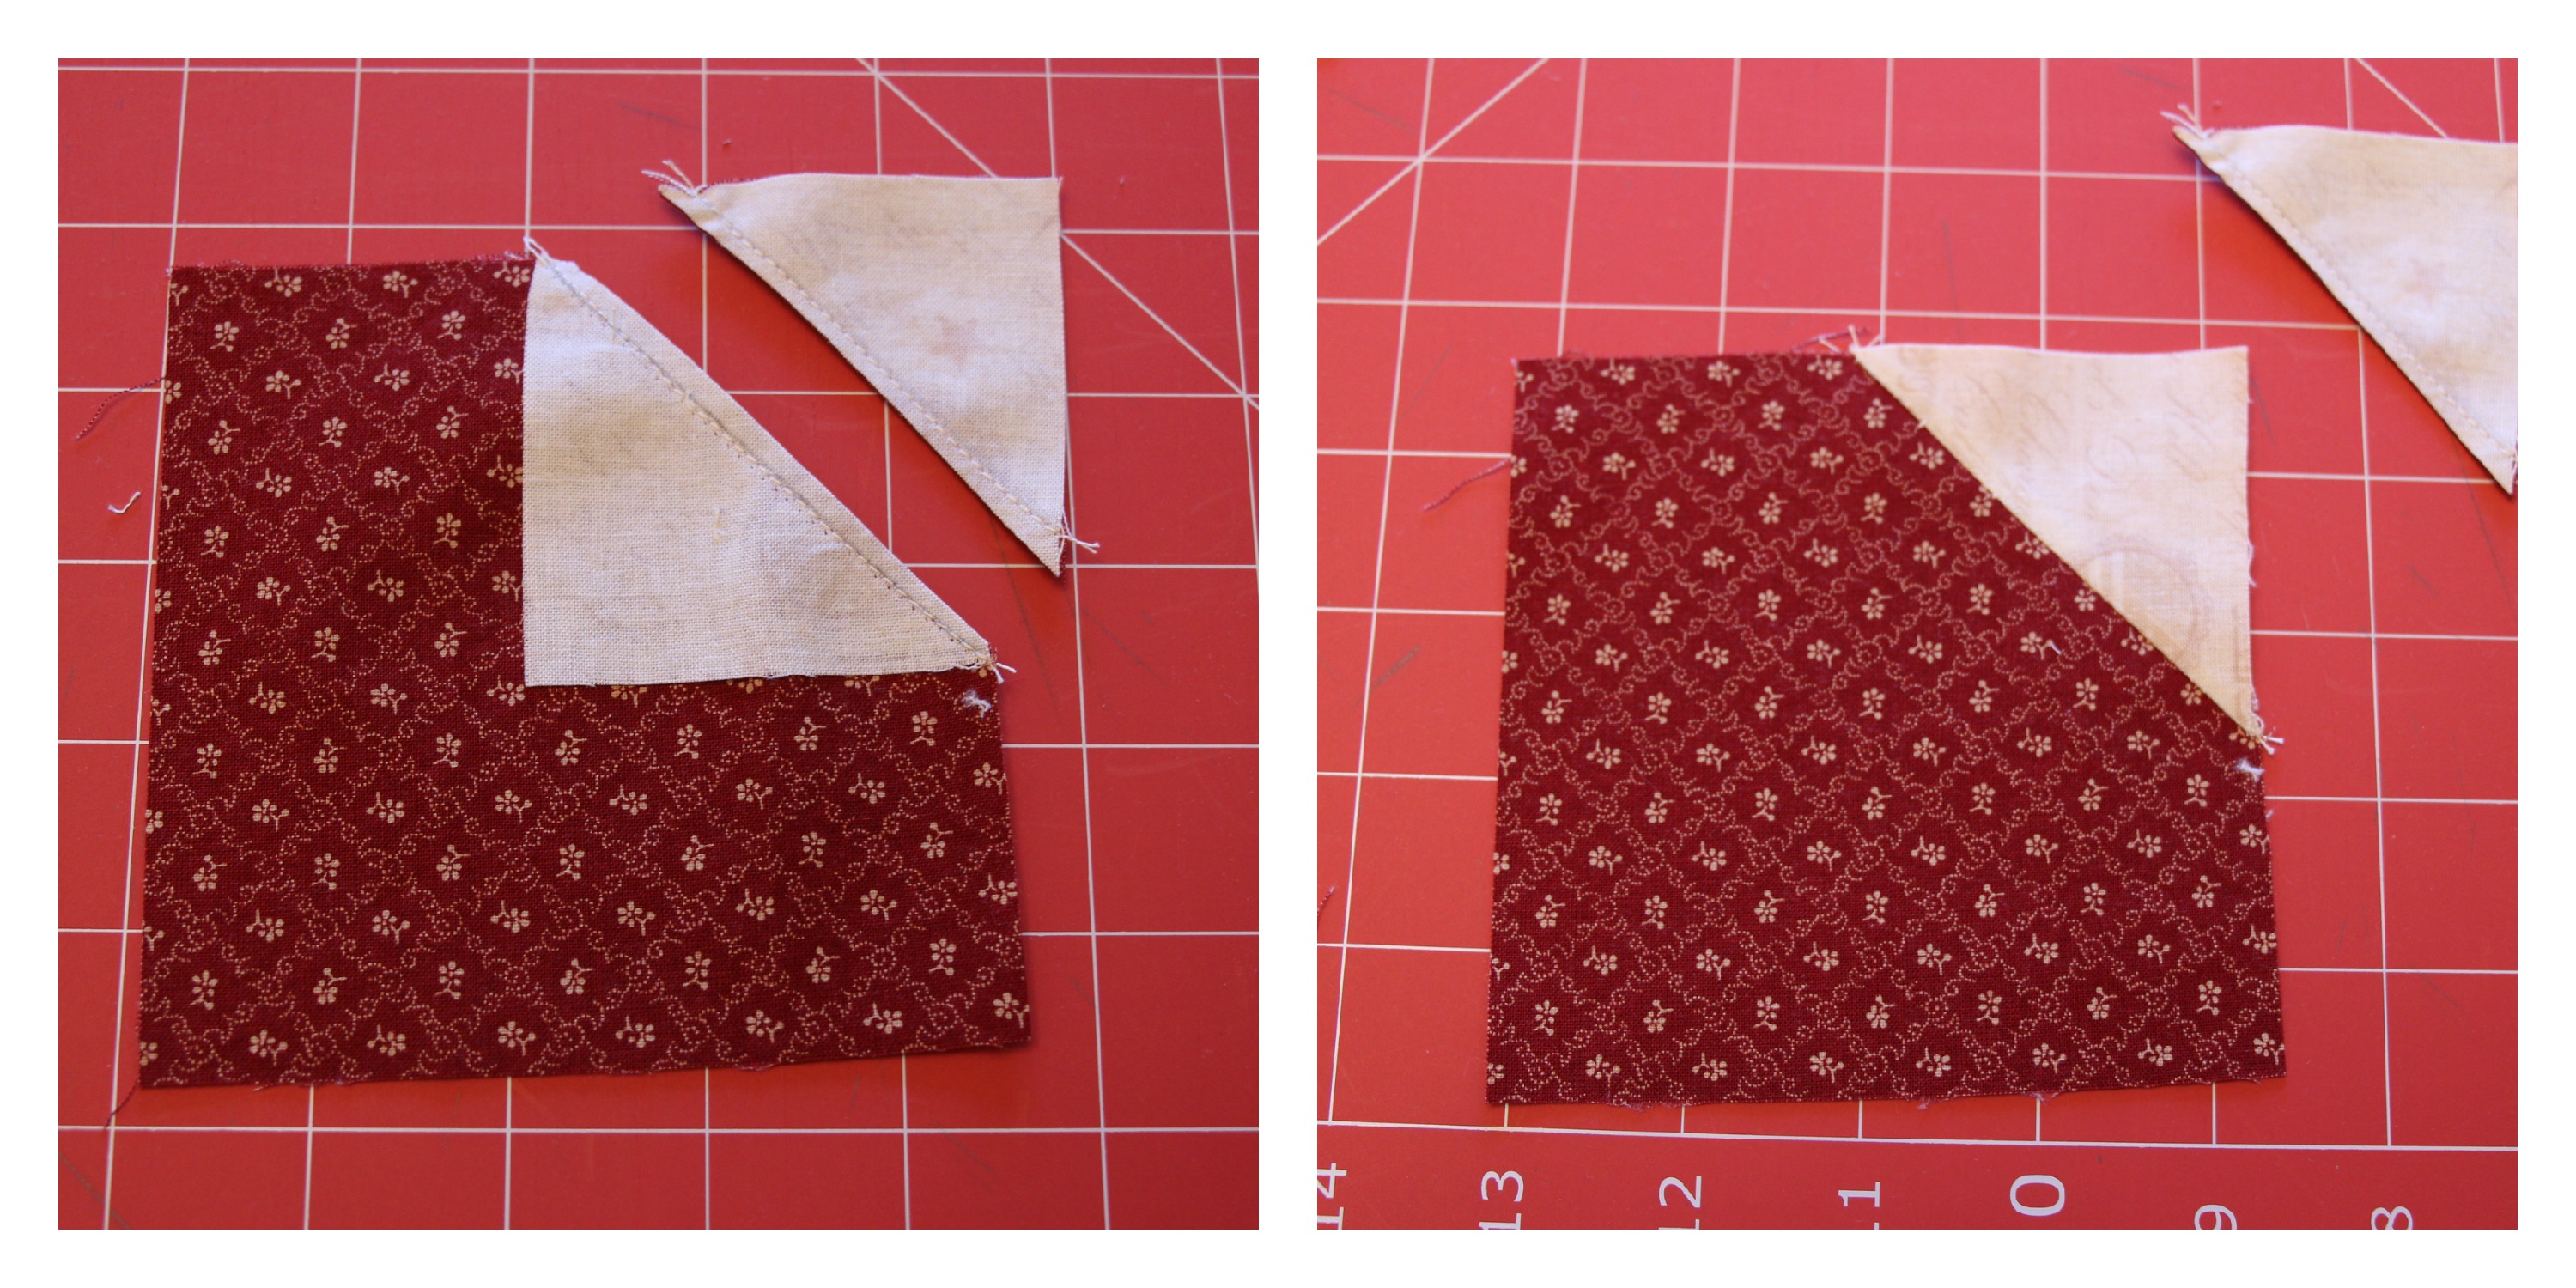
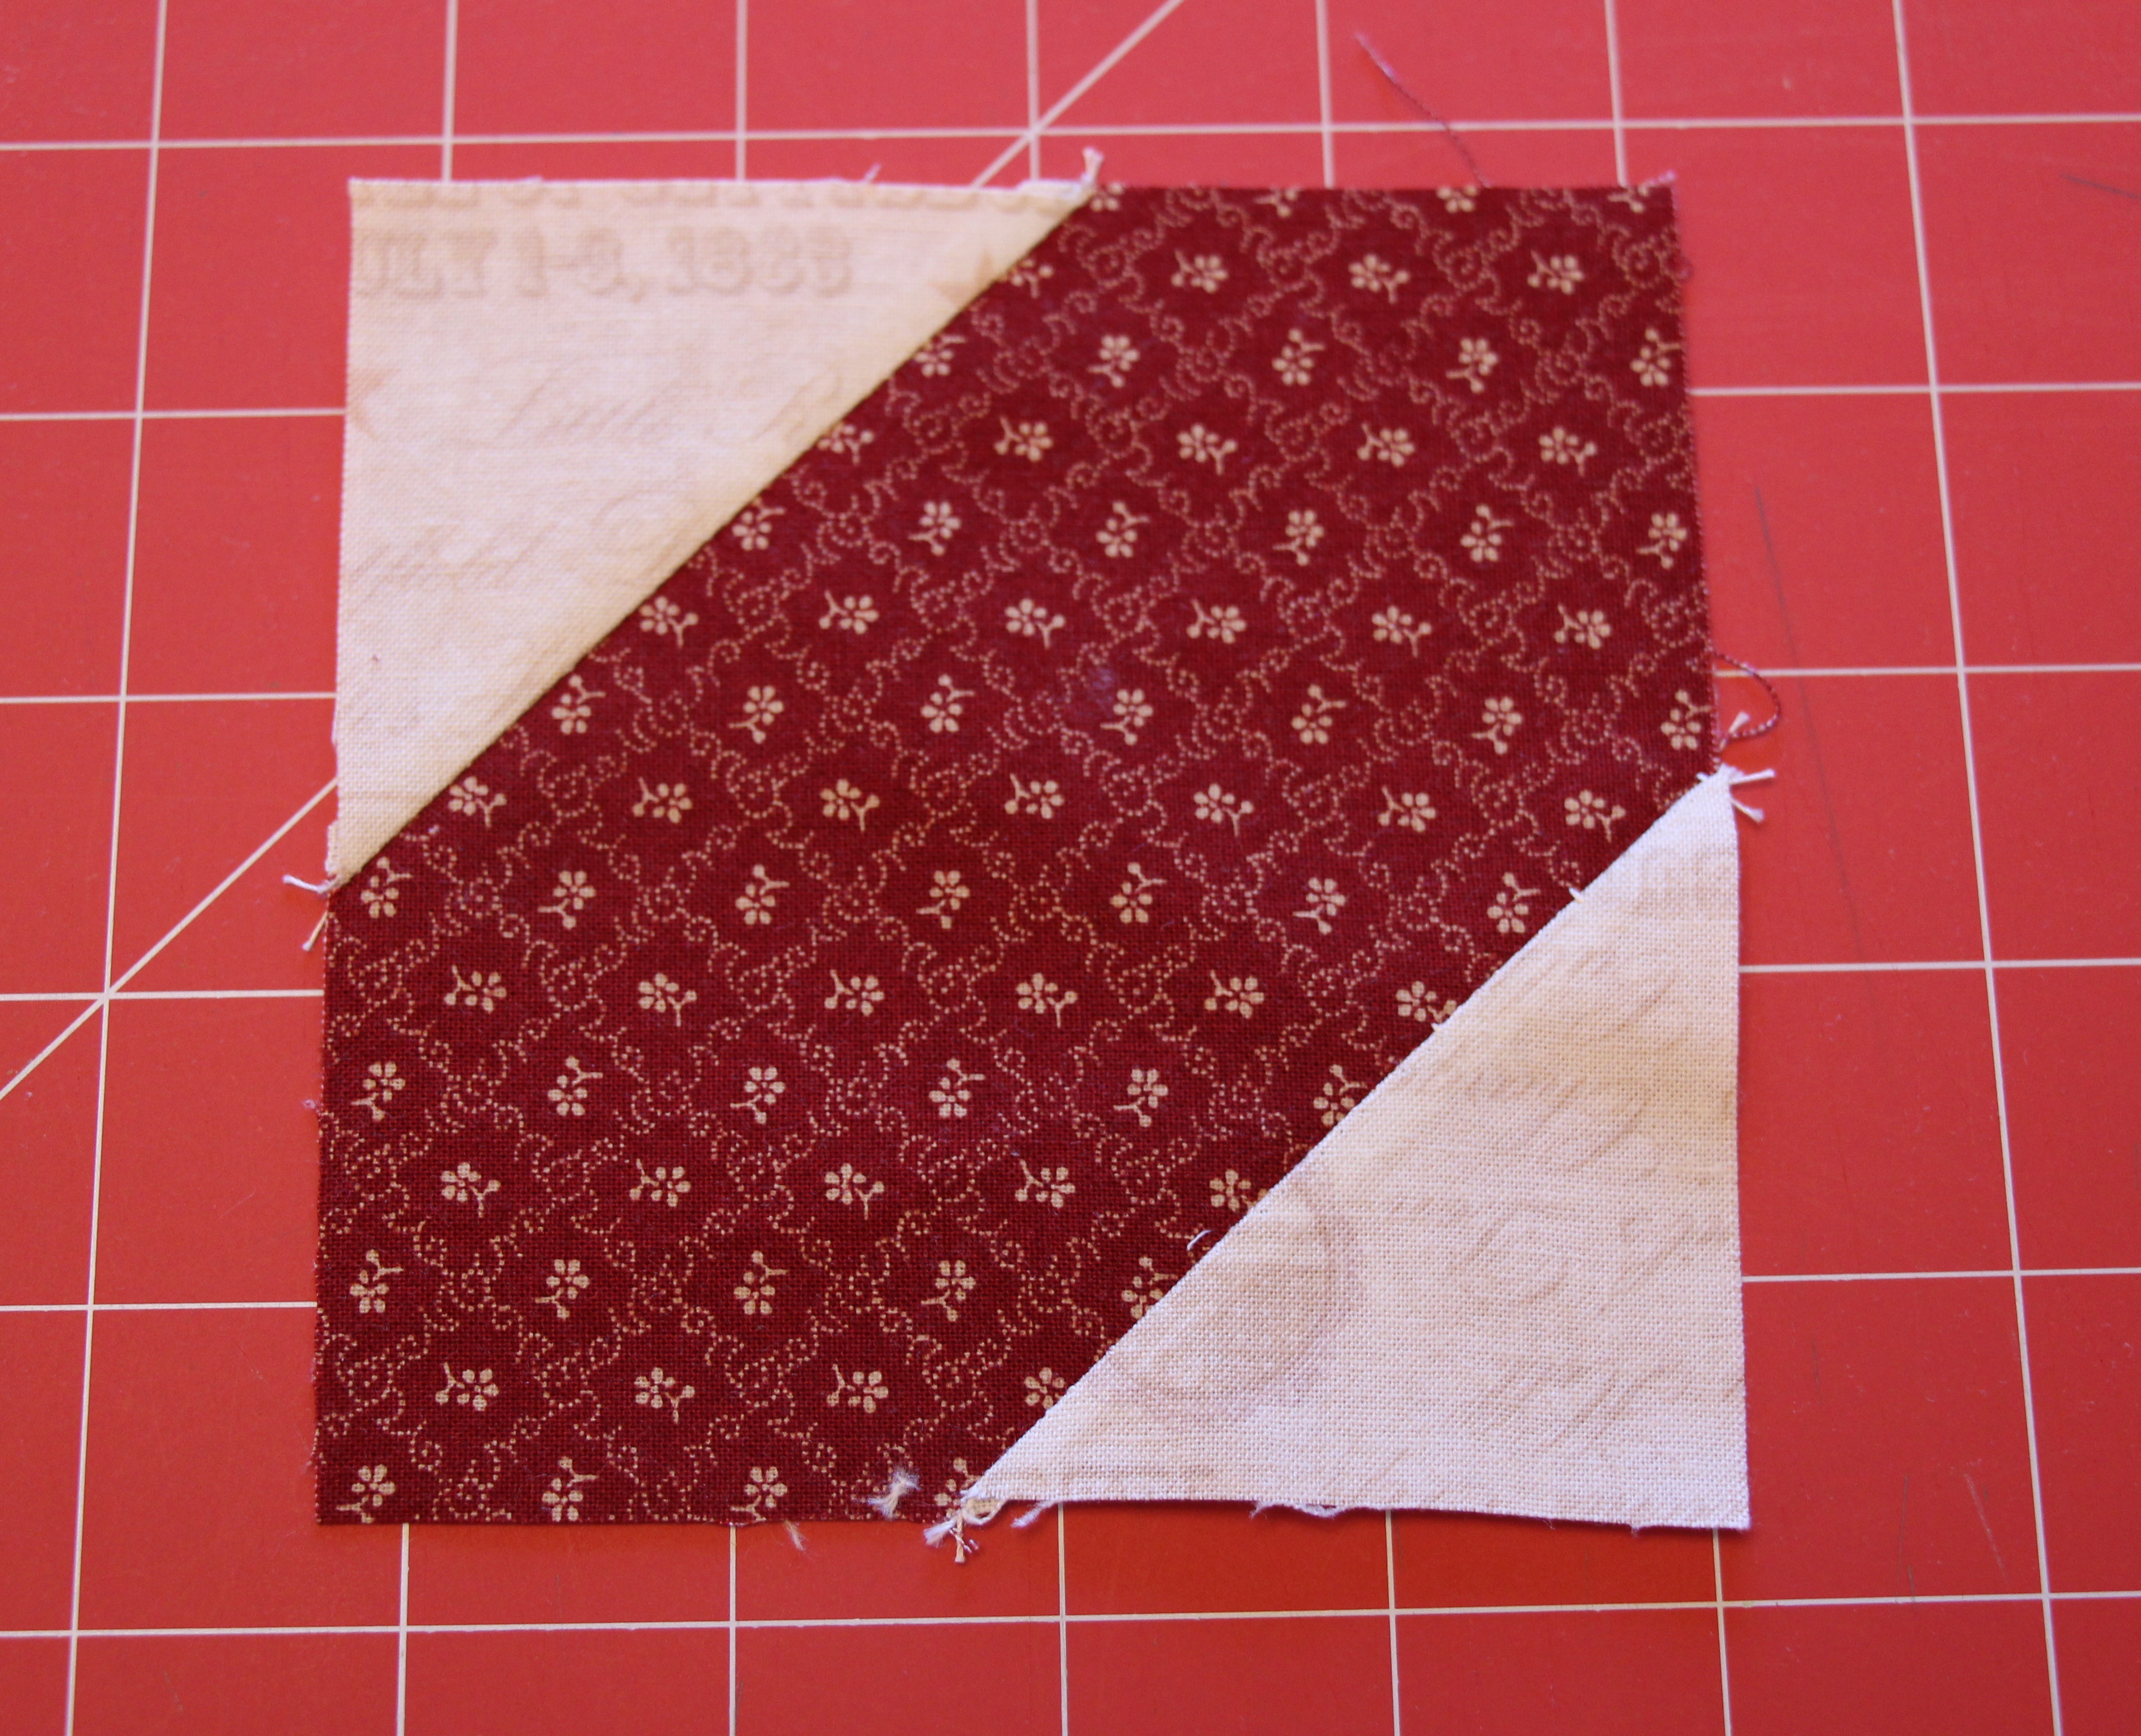
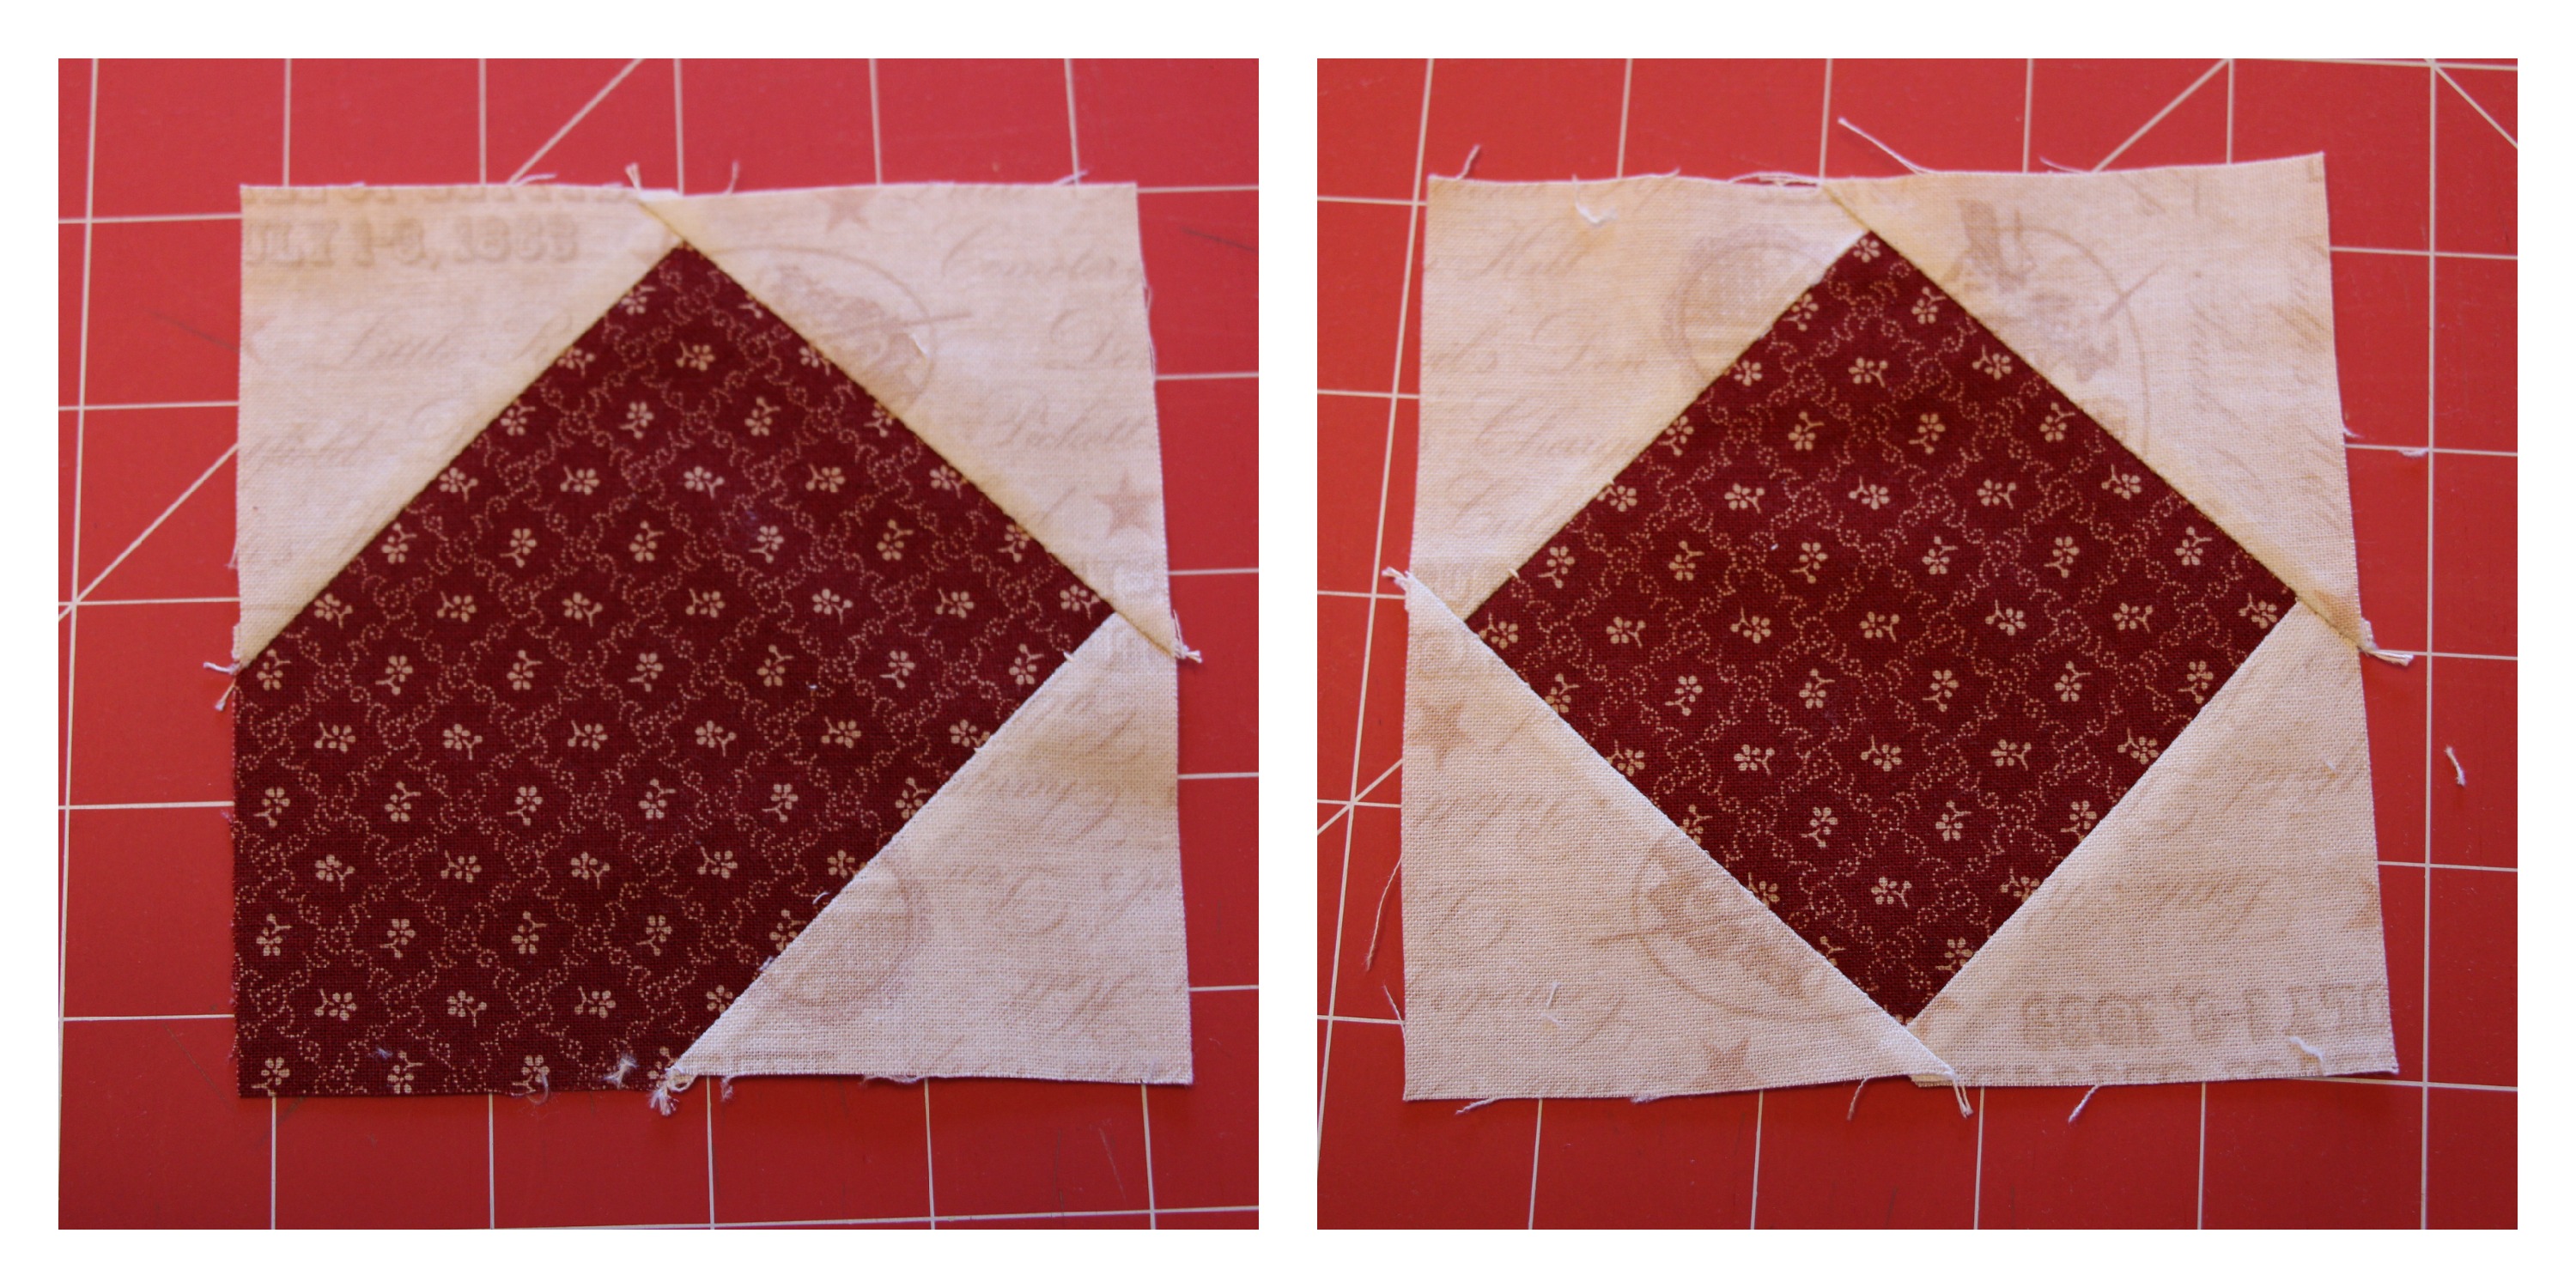
The center of the quilt is assembled from 4 of the 5 1/2″ squares into a square.

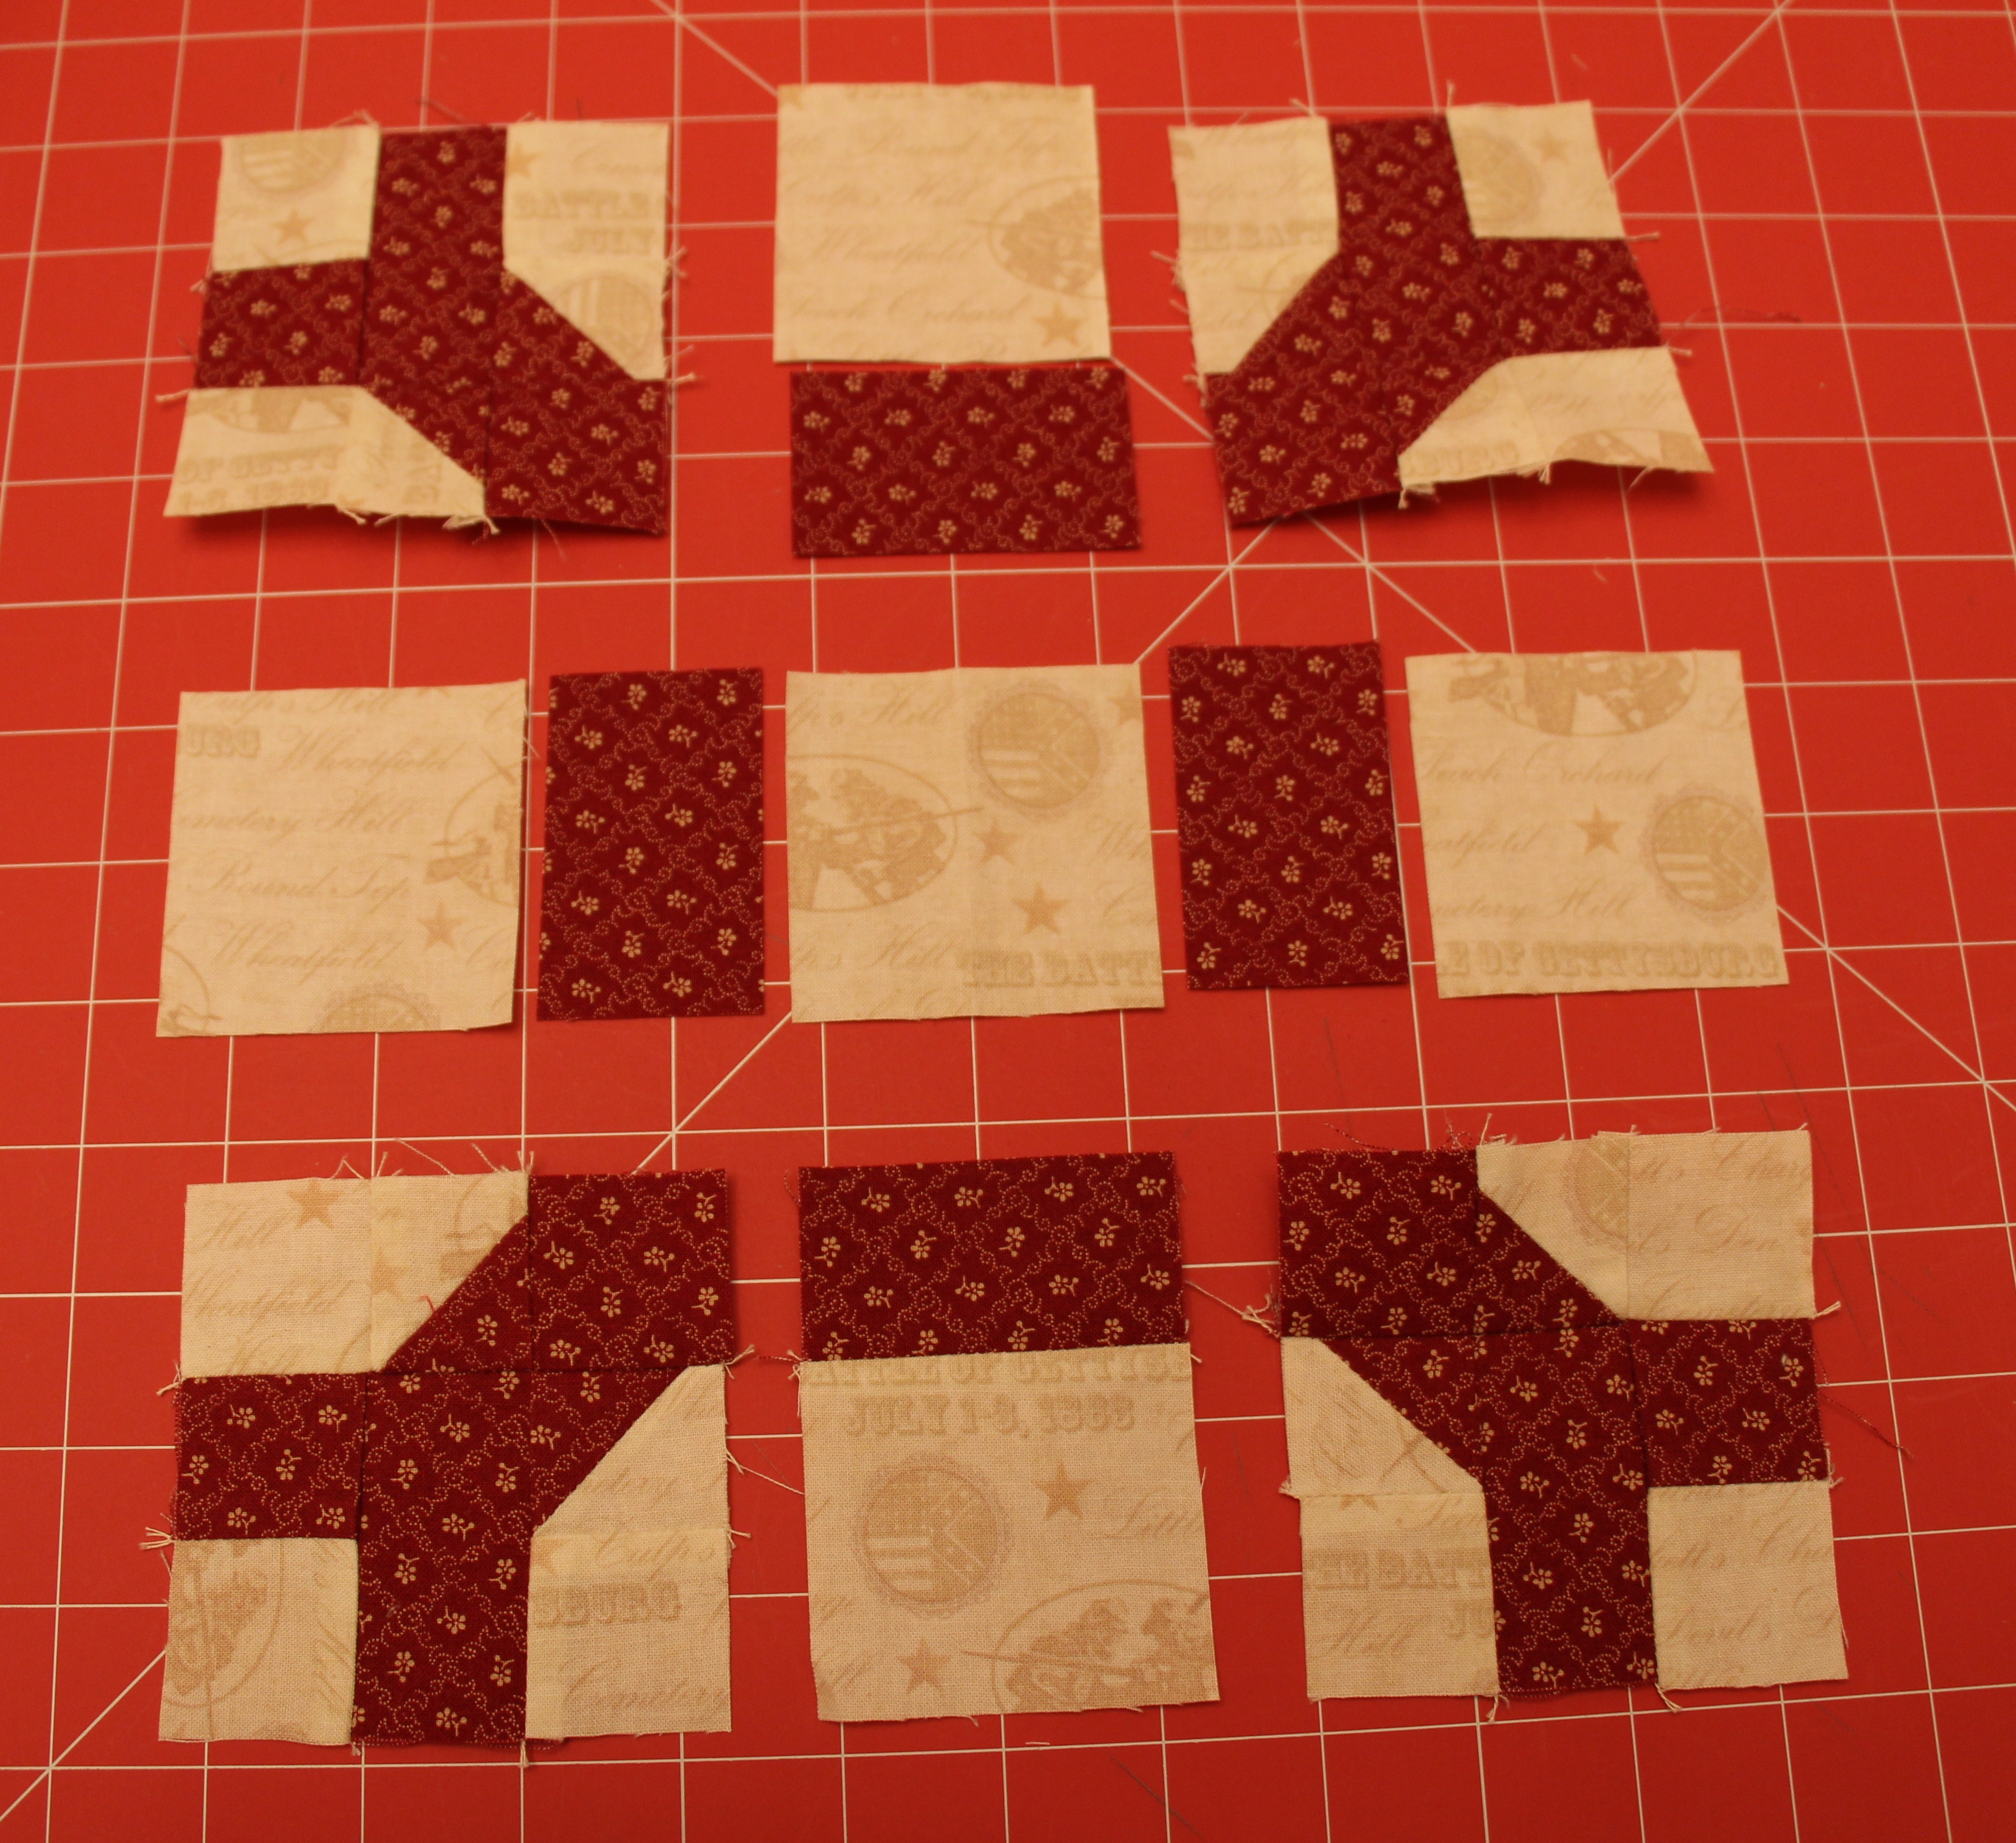
Once your center is sewn together, measure the sides and cut two strips to fit the top and bottom. Measure again after the top and bottom are sewn on and cut two more strips to fit. You now have a framed center.

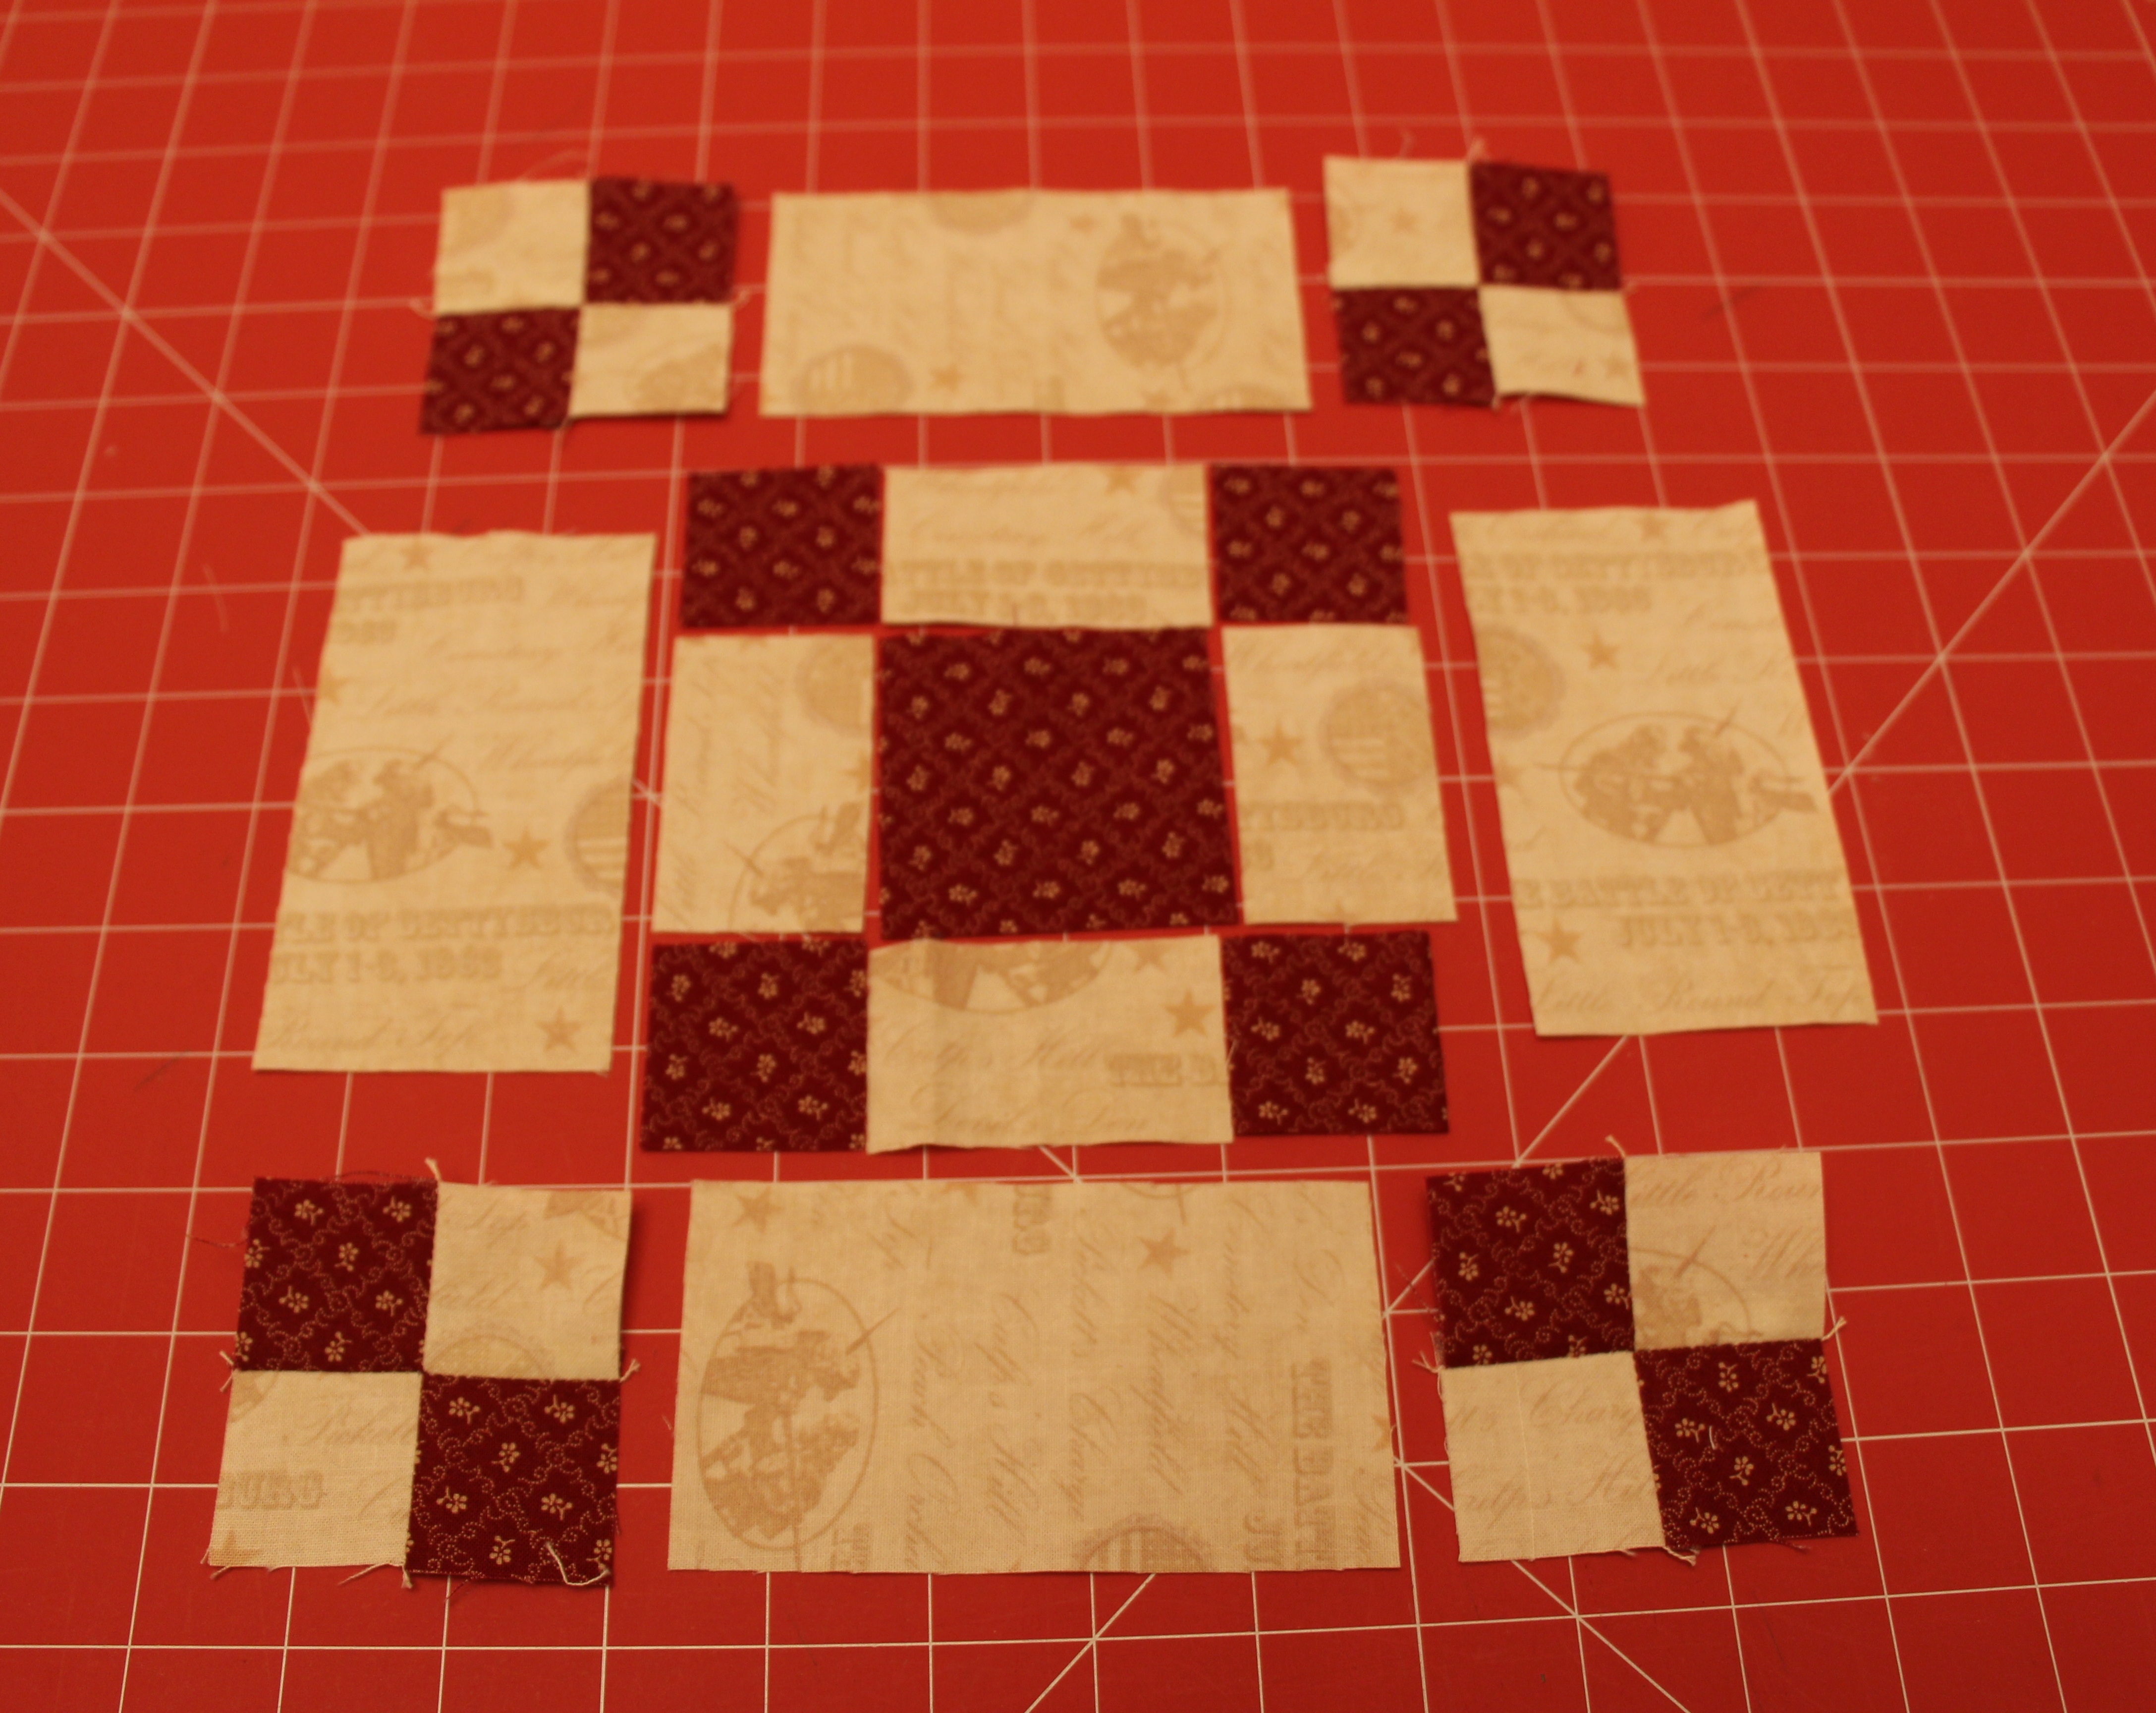
Sew two rows of 3 from the 5 1/2″ squares. Attach the rows to opposite sides of the framed center. Sew two columns of 4 from the 5 1/2″ squares. Attach the rows to the remaining sides of the center.

Once this new center is sewn together, measure the sides and cut two strips to fit the top and bottom. Measure again after the top and bottom are sewn on and cut two more strips to fit.

Sew two rows of 6 from the 5 1/2″ squares. Attach the rows to opposite sides of the framed center. Sew two columns of 8 from the 5 1/2″ squares. Attach the rows to the remaining sides of the center.

Once this new center is sewn together, measure the sides and cut two strips to fit the top and bottom. Measure again after the top and bottom are sewn on and cut two more strips to fit. You now have a finished quilt top.

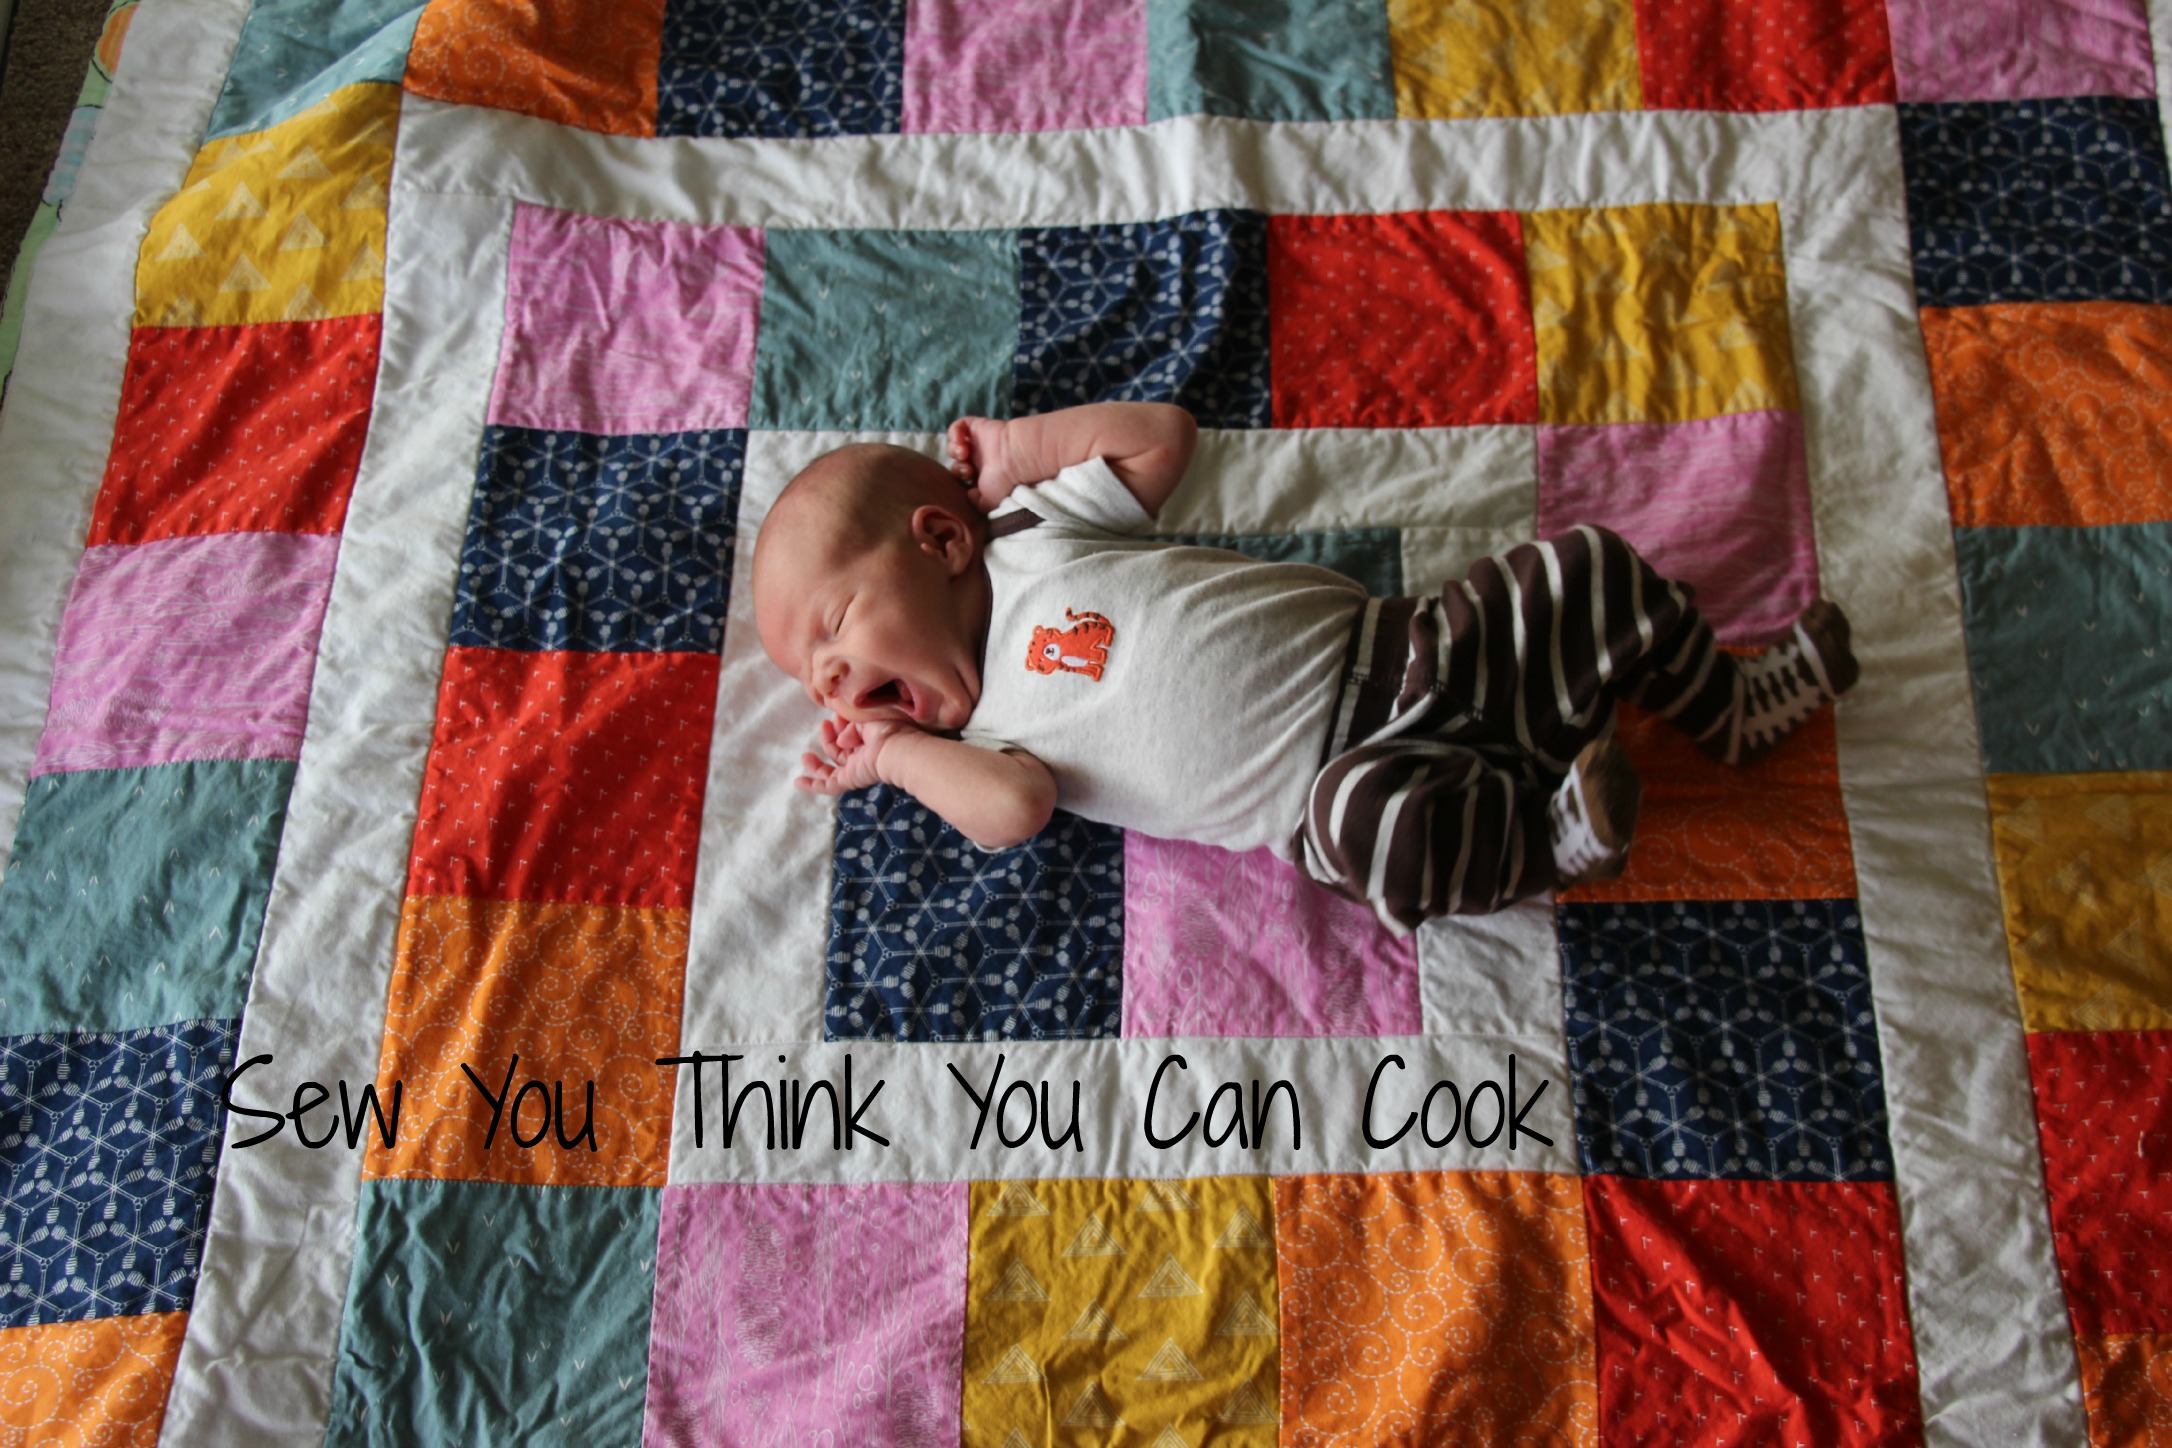
Create a sandwich with the quilt top, batting and backing (2 3/4 yd of fabric). With baby quilts I use my sewing machine to do simple quilting – the stitch in the ditch method is perfect for this project.

Once you have your quilt, trim it, and bind it (1/2 yd of fabric).

Shopping Cart Cover Tutorial

One of my favorite baby “must-haves” is the Shopping Cart/High Chair Cover that my mother-in-law bought for us. When my son was just learning to sit on his own and able to handle being in the shopping cart or high chair it was nice to have the extra cushion for him to fall against.

And of course, it’s great for germ prevention. My favorite part is that I can use the strap attached to the cover instead of the ones attached to the high chair or shopping cart. Have you ever touched the straps on a public high chair?! They’re always sticky and gross. I can wipe down the chair and other surfaces no problem, but that strap is a whole other story. As for shopping carts, the straps are always located in the most awkward location – under the armpit and they don’t allow room to breathe or move.

I knew there had to be a way to make my own and it turns out that it’s much easier than I thought it’d be. There are a lot of steps but I was able to accomplish the shopping and sewing of this cover in just half a day. (With the supervision – aka emotional support – of my mother-in-law.)

While life continues to be hectic, this cover will be my new baby shower go-to item instead of the 4 Hour Quilt.  Contrary to the title “4 Hour Quilt” they always take me longer than 4 hours, the top can easily be assembled in an afternoon but the quilting and binding extend the life of the project and with almost two children in tow one would probably take me a year… But, enough of that.

Shopping Cart Cover Tutorial | Sew You Think You Can Cook

Here is the how-to for a Shopping Cart Cover Tutorial:

Supplies:

Steps:

  1. Cut the fleece and cotton fabric to 41 1/4″ squares.
  2. Curve all four corners on the cotton fabric. Do this by folding the fabric “hotdog style” then “hamburger style” so that all four corners are together. Use a curved ruler or plate as a template and cut the corners. Use the cotton fabric as a stencil for the fleece so the curves are identical in both pieces of fabric.Shopping Cart Cover Tutorial (step 2) | Sew You Think You Can Cook
  3.  Lay out the fleece. Find the center of the bottom edge.
    1. Mark 13″ up and 1″ to the left. Place the bottom right corner of a square/rectangle template measuring at least 5×5″ (I used a DVD case) at that mark. Trace the template and cut a hole. Shopping Cart Cover Tutorial (step 3a)| Sew You Think You Can Cook
    2. Mark 13″ up and 1″ to the right. Place the bottom left corner of a square/rectangle template measuring at least 5×5″ (I used a DVD case) at that mark. Trace the template and cut a hole.
  4. Place cotton fabric face up on work surface. Place the fleece on top. Trace the leg holes from step 3 but at 1/4-1/2″ inside of the opening so that the leg hole in the cotton fabric is smaller than in the fleece. Cut. Shopping Cart Cover Tutorial (step 4)| Sew You Think You Can Cook
  5. Pin the two fabrics together. Sew a straight stitch set to a length of 4 using a seam allowance of 3/8″ around the edge of the cover leaving a 4″ wide gap on one edge.
  6. Turn the cover inside out through the gap.
  7. Mark 1″ from the edge all the way around the cover. Sew a straight stitch set to a length of 4 on that line. Still leave the 4″ wide gap from step 5. (Note: This is for 3/4″ thick elastic.)
  8. Return to the leg holes. Place cover so that the fleece layer is on top and the cotton fabric face down. Cut a 45 degree angle on the cotton fabric into the corners of the leg holes. Fold the cotton fabric onto itself and then over the fleece. Pin. Zig-zag stitch around the leg holes, making sure to close the corners. Shopping Cart Cover Tutorial (step 8) | Sew You Think You Can Cook
  9. Find the center of each leg hole and measure 12″ above it. (The 12″ includes open leg hole space.) Mark this location. This mark is the center of a buttonhole. Make sure the buttonhole is large enough to fit the webbing strap (and/or buckle if desired) – do a test first. Sew buttonhole according to your sewing machine’s instructions.
  10. Melt the ends of the webbing. Do this by (carefully) holding a flame up to the ends.
  11. Insert the webbing through the buttonholes – making sure it’s not twisted.Shopping Cart Cover Tutorial (step 11) | Sew You Think You Can Cook
  12. Attach the buckle to the webbing. Sew an “X” inside a square to lock one end of the buckle. I decided to leave the other side free for adjusting. Shopping Cart Cover Tutorial (step 12) | Sew You Think You Can Cook
  13. Insert the elastic through the edge of the cover. Tip: Place a large safety pin at the end to make it easy to pull through the gap. Sew the elastic together.
  14. Close up the gap from Steps 3 and 4.
    1. Fold the edge fabric in on itself and sew as close to the edge as possible. Be sure not to sew the elastic!
    2. Use a straight stitch set to a length of 4 to close the gap closest to the inside of the cover. Be sure not to sew the elastic!

*This tutorial is modified from Stephanickety at http://thetiptoefairy.com/2013/05/how-to-make-your-own-shopping-cart-high-chair-cover/*

Disclaimer: This post contains affiliate links.

School Girl’s Puzzle

Just because I revealed the final version of Old Glory that doesn’t mean I’m done with quilt block tutorials! Today’s block is called the School Girl’s Puzzle. This block isn’t in my quilt, but it is (or will be) in my mother-in-law’s version, which she’s named “Older Glory”. Her version of this American Flag sampler quilt is a scrappy sampler – meaning each of her blocks uses a different fabric. I can’t wait to see how hers turns out. I wasn’t brave enough to mix hundreds of fabrics so I used only 3 different reds and 2 different blues.

School Girl's Puzzle quilt block tutorial

Here is the how-to for the School Girl’s Puzzle Quilt Block:

Note: These measurements are for an 8″ block. Sew using a scant 1/4″ seam allowance.

Cut fabric:

  • 4 squares 2 1/2″ white
  • 3 squares 3 1/8″ red
  • 3 squares 3 1/8″ white
  • 2 squares 2 7/8″ white, then cut on the diagonal
  • 1 square 4 7/8″ red, then cut on the diagonal

Use the 3 squares of 3 1/8″ red and white to create 6 Half Square Triangles (HSTs) trimmed down to 2 1/2″. Click here for my tutorial on how to make Half Square Triangles.

Lay out the School Girl’s Puzzle quilt block:

School Girl's Puzzle quilt block tutorial

Looking at the top left quadrant, sew a white triangle to the HST:

School Girl's Puzzle quilt block tutorial

Then sew the other white triangle to the HST:

School Girl's Puzzle quilt block tutorial

Sew the new triangle to the red triangle. Repeat with the bottom right quadrant.

The remaining two quadrants are four patches, sew accordingly.

You now have a four patch ready to assemble:

School Girl's Puzzle quilt block tutorial | Sew You Think You Can Cook

8-Grid Chain Variation

There are many variations of the 8-Grid Chain Quilt Block. Simply google it! There are endless possibilities with using different fabrics too. This is the variation I used in my Fourth of July quilt  Old Glory.

8-Grid Chain Variation Quilt Block Tutorial

Here’s the how-to for this 8-Grid Chain Variation Quilt Block

Cut fabric:

  • 12 squares 1 1/2″ red
  • 8 squares 1 1/2″ white
  • 4 rectangles 2 1/2″ x 4 1/2″ white
  • 4 rectangles 1 1/2″ x 2 1/2″ white
  • 1 square 2 1/2″ red

Lay out fabric squares into the 8-Grid Chain Variation:

8-Grid Chain Variation Quilt Block Tutorial


Sew together the four 4-patch blocks in the corner. Also, sew together the 9-patch block in the center:

8-Grid Chain Variation Quilt Block Tutorial

The 8-Grid Chain Variation is now a simple 9-patch. Complete the three rows before sewing the rows together:

8-Grid Chain Variation Quilt Block Tutorial

Grecian Square

I used the Grecian Square quilt block before. It is also known as the Monkey Wrench. I used it in the quilt I made in honor of my grandmother. But this tutorial will look a little different. Simply reversing the neutral and color creates a very different look.

Grecian Square Quilt Block Tutorial

Here is the how-to for the Grecian Square Quilt Block:

Note: These measurements are for an 8″ block. Sew using a 1/4″ seam allowance.

Cut fabric:

  • 2 squares 3 7/8″ red
  • 2 squares 3 7/8″ white
  • 4 rectangles 1 7/8″ x 3 1/8″ red
  • 4 rectangles 1 7/8″ x 3 1/8″ white
  • 1 square 3 1/8″ red

Use the 2 squares of 3 7/8″ red and white to create 4 Half Square Triangles (HSTs) trimmed down to 3 1/8″. Click here for my tutorial on how to make Half Square Triangles.

Lay out the Grecian Square Quilt Block:

Grecian Square Quilt Block Tutorial

Sew the red and white rectangles together:

Grecian Square Quilt Block Tutorial

Now the Grecian Square is simply a 9-patch.

Bear’s Paw

The Bear’s Paw is a classic quilt block. While not the most difficult block in my Fourth of July quilt Old Glory, it requires a lot of baby steps.

Bear's Paw Quilt Block Tutorial

Here is the how-to for a Bear’s Paw Quilt Block

Note: These measurements are for an 8″ block. Sew using a scant 1/4″ seam allowance.

Cut fabric:

  • 8 squares 2 1/4″ white
  • 8 squares 2 1/4″ red
  • 4 squares 1 5/8″ white
  • 1 square 1 5/8″ red
  • 4 rectangles 1 5/8″ x 3 7/8″ white
  • 4 squares 2 3/4″ red

Use the 8 squares of 2 1/4″ red and white to create 16 Half Square Triangles (HSTs) trimmed down to 1 5/8″. Click here for my tutorial on how to make Half Square Triangles. If you’ve been following my previous tutorials you’ll now know why I went through the time to create bonus HSTs from Flying Geese and Square in a Square!

Lay out your HSTs and remaining pieces of fabric into the Bear’s Paw:

Bear's Paw Quilt Block Tutorial

Looking at one paw print at a time, sew the two horizontal HSTs together and sew the vertical HSTs to the white square:

Bears Paw Quilt Block Tutorial

Then sew the horizontal HSTs to the red square before sewing the vertical to the paw print:

Bears Paw Quilt Block Tutorial

Complete the remaining three paw prints and then follow my tutorial for sashing to complete the block:

Bear's Paw Quilt Block Tutorial

Square in a Square

Square in a SquareThe Square in a Square block is essentially a diamond. Diamonds can be made by 4 Half Square Triangles (HSTs) or you can follow this latest tutorial for a Square in a Square. Using this method will create a cleaner diamond. As it is very similar to my previous tutorial covering Flying Geese bonus small HSTs can come from the Square in a Square! The block I used in Old Glory is comprised of 4 Square in a Squares.

Here is the how-to for a Square in a Square:

Your first step will be to determine what size block you’ll be working with. This diamond simply replaces a square! Take the size of that square and add your 1/4″ seam allowance. That value will be the base. You will also need four squares cut to 1/2 of the base square plus the 1/4″ seam allowance. Example: 4″ x 4″ finished Square in a Square will require one 4 1/2″ x 4 1/2″ square and four 2 1/2″ squares. Don’t forget to ALWAYS make a practice block with scrap fabric before committing.

Draw on the diagonal of each square and if you want the bonus HST draw a line 1/4″ off center in one direction. Place one small square face down in one corner of the base. If making a HST that bonus 1/4″ line needs to be on the side of the block towards the corner:

Square in a Square Block Tutorial

Sew on both drawn lines, cut between the seams, and iron open:

Square in a Square Block Tutorial

Repeat on the opposite corner:

Square in a Square Block Tutorial

Now do the last two corners. (The white squares will overlap in the center, but that will be taken care of in the seam allowance.):

Square in a Square Block Tutorial

Flying Geese

Flying Geese Block

Flying Geese, just like Half Square Triangles (HSTs) are very versatile. Some people create entire quilts of Flying Geese, they look great strung together and used as the border of a project, and they can be arranged in an endless amount of combinations to make individual blocks.

An added benefit of making Flying Geese is that each “goose” creates two bonus HSTs! The size of your Flying Geese might influence your decision in if you want to take the extra steps to get that bonus block. Because I made small 4″ finished Flying Geese for my 8″ finished block within Old Glory I knew that very small HSTs would come in handy with other blocks in the sampler quilt!

Here is the how-to for Flying Geese:

Your first step will be to determine what size block you’ll be working with. Think of the Flying Geese as simply replacing a solid rectangle. Take the size of that rectangle and add your 1/4″ seam allowance. That value will be the base. You will also need two squares cut to 1/2 of the rectangle plus the 1/4″ seam allowance. Example: 2″ x 4″ finished Flying Geese will require one 2 1/2″ x 4 1/2″ rectangle and two 2 1/2″ squares. Don’t forget to ALWAYS make a practice block with scrap fabric before committing.

Cut your fabric:

Flying Geese tutorial

Draw on the diagonal of each square and if you want the bonus HST draw a line 1/4″ off center in one direction:

Flying Geese tutorial

Place one square on the rectangle, corner to corner. The diagonal line needs to run from corner to center of the rectangle. If making a HST that bonus 1/4″ line needs to be on the side of the block towards the corner:

Flying Geese tutorial

Sew on both drawn lines, cut between the seams, and iron open:

Flying Geese tutorial

Repeat with the other square. (It will overlap the center of the rectangle, but that will be taken care of in the seam allowance.):

Flying Geese tutorial

Again, sew on the diagonal and the bonus HST seam if using. Cut between the seams and iron open:

Flying Geese tutorial

Plaited Block

I think this block uses the smallest pieces of fabric I’ve ever cut, but the effect of it is so worth it, and it’s one of my favorites in my Fourth of July quilt Old Glory. Because of my finished quilt product, I only used two colors for this Plaited Block quilt block, I highly encourage you to look at this “twist” using three colors! Please note, if you do opt to use three colors, fabric amounts and sizes you’ll need to cut will be different, and the sewing plan will be slightly altered from what I did as well.

Plaited BlockHere is the how-to for a Plaited Block Quilt Block:

Note: These measurements are for an 8″ block. Sew using a scant 1/4″ seam allowance. 

Cut fabric:

  • 4 squares 2 1/8″ red
  • 4 squares 2 1/8″ white
  • 8 squares 1 1/2″ red
  • 12 squares 1 1/2″ white
  • 8 rectangles 1 1/2 x 2 1/2″ red
  • 5 squares 2 1/2″ white

Use the 8 squares of 2 1/8″ red and white to create 8 Half Square Triangles (HSTs) trimmed down to 2 1/2″. Click here for my tutorial on how to make Half Square Triangles.

Lay out the HSTs and other pieces of fabric into the Plaited Block quilt block.

Break off the “arrows” in the four corners to piece together. Sew the red square on the left to the the white square below it and the HST on the right to the white square below it:

Plaited Block Tutorial

Sew the new rectangles to the red rectangle. Sew the remaining three squares together:

IMG_7700

Sew the two pieces from the previous step together.

Repeat with the remaining three “arrows”.

Sew the large white squares to the red rectangles above/below it. Then create the top and bottom rows:

Plaited Block TutorialPlaited Block Tutorial

Sew the middle section together and then sew together your three rows to create your Plaited Block:

IMG_7705

Corn and Beans

This block is by far the most difficult in my Fourth of July quilt Old Glory. It requires sewing on the bias, so be sure to conquer a practice block before using your project fabric.

Corn and Beans Quilt Block

Here is the how-to for the Corn and Beans Quilt Block:

Note: These measurements are for an 8″ block. Sew using a scant 1/4″ seam allowance. 

Cut fabric:

  • 1 square 3 1/2″ red
  • 10 squares 2 1/8″ red
  • 3 squares 3 1/2″ white
  • 10 squares 2 1/8″ white

Cut each square in half on the diagonal:

Corn and Beans Quilt Block Tutorial

Lay out the Corn and Beans quilt block:

Corn and Beans Quilt Block Tutorial

Now work in quadrants:

Corn and Beans Quilt Block Tutorial

Sew the bottom left red and white triangles together on the diagonal:

Corn and Beans Quilt Block Tutorial

Sew your newly created HST to the white triangle above it:

Corn and Beans Quilt Block Tutorial

Sew the middle red and white triangles together on the diagonal:

Corn and Beans Quilt Block Tutorial

New sew the white triangle above the newly created HST and the red triangle below it to the HST:

Corn and Beans Quilt Block Tutorial

Sew the top right red and white triangles together on the diagonal:

Corn and Beans Quilt Block Tutorial

Now sew your newly created HST to the red triangle below it:

Corn and Beans Quilt Block Tutorial

Sew all of the above steps together, making sure to line up your seams:

Corn and Beans Quilt Block Tutorial

Attach the remaining two triangles to the sewn portion:

Corn and Beans Quilt Block Tutorial

Repeat three more times with the remaining quadrants.

You now have a four patch ready to assemble:

Corn and Beans Quilt Block Tutorial