Today is another Secret Recipe Club Reveal Day! In the secret recipe club, each participating blogger is assigned a blog from another participating blogger and secretly searches their site for something to recreate. The accompanying blog post then goes live on reveal day! So while I was immersed in my assigned blog, someone else was picking through mine! I’m so excited to be part of this group, to see what on my blog peaks other’s interests and to stumble upon new blogs and new recipes.
This month I was assigned Susan’s blog The Wimpy Vegetarian. While Susan eats a mostly vegetarian diet, her husband does not. She has become very successful cooking for what she labels a “mixed marriage.” Her success in the kitchen of cooking for vegetarians and omnivores has lead her to a cookbook deal. In searching her website I have high aspirations for her cookbook.
I fell in love with Susan’s blog immediately. The layout of her page and her bright photography lulled me in and I stayed for her wonderful selection of recipes. Her beautiful page not only inspired me to take the plunge and update my recipe index but the entire look of my blog! If you like it, you can thank Susan. 😉
Over ten recipes made the cut for consideration for today’s reveal day. Two of them won the bid. And a third will be part of my collection of soups in anticipation for this weekend’s Super Bowl. Curry Apple Chips, Spiced Sweet Potato Fries, and Honey Cornbread are just a few of the recipes that I vow to try. (And now that reveal day is here I can finally subscribe to her blog via email!) But for now I will be sharing Hummus with Roasted Tomatoes AND Whole Wheat Pita.
I was able to check two items off my culinary bucket list thanks to Susan! I knew that hummus was simple enough to make, especially taking advantage of canned garbanzo beans (sorry, Susan!), but I always shoved it off with a comment of “one day.” Making homemade pita wasn’t something I thought I’d tackle so soon, but how can I serve hummus during a football game without some pita bread to go with it? Conveniently, Susan had a recipe for this too. And I have to say, it wasn’t as difficult as I’d anticipated! However, I’m not sure if I went wrong in the baking time because my pita didn’t deflate – at least not the same day. I put the leftover bread in a resealable bag and stored it in the fridge. Just 10 seconds in the microwave yielded perfect pita for dipping in homemade hummus. It really is best served warm.
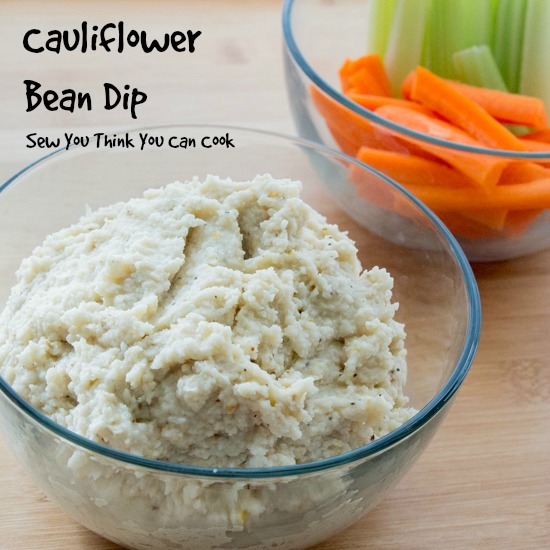
Hummus with Roasted Tomatoes
Ingredients:
- 6 roma tomatoes
- 1/4 C olive oil
- 1/2 tsp dried thyme
- 2 tsp balsamic vinegar
- 2 1/2 C cooked garbanzo beans (just under 2 15.5oz cans)
- 3 tbsp Tahini

- 1 tsp paprika
- 1 tsp white pepper
- 1 tsp salt
- 1 tsp cumin
- 2 tsp lemon juice
- 3/4 C water
Steps:
- Preheat oven to 300 degrees F. Line a rimmed baking sheet with parchment paper.
- Slice tomatoes in half and place cut side up on the baking sheet. Drizzle with olive oil and season with the thyme and S+P. Bake 4 hours. Pour balsamic vinegar over the roasted tomatoes and let cool. Chop to desired size. (Note: Not all of these tomatoes will be used for the hummus, they will keep in the fridge for up to 1 month.)
- In a food processor pulse garbanzo beans, tahini, paprika, white pepper, salt, cumin, and lemon juice. When a smooth paste is acheived slowly add the water, puree until completely smooth.
- Mix in 2 tbsp of the roasted tomatoes.
*These recipes are adapted from Susan at http://thewimpyvegetarian.com/2013/05/sundaysupper-roasted-balsamic-tomatoes/ and http://thewimpyvegetarian.com/2014/02/vegan-appetizer-roasted-tomato-hummus-sundaysupper-super-eats-for-game-day/*
Whole Wheat Pita
Ingredients:
- 2 tsp instant yeast (just under 1 packet)
- 1 tsp honey
- 1 1/4 C warm water (110 degrees F)
- 2 C bread flour
- 1 C whole wheat flour
- 1 1/2 tsp salt
- 2 tbsp olive oil
Steps:
- Gently stir yeast and honey in the warm water. Set aside and allow yeast to foam for 10 minutes.
- In the bowl of a stand mixer, combine both flours and salt. Add the proofed yeast mixture and olive oil. Using the dough hook, knead until the dough comes together around the dough hook. Turn the dough out onto a clean surface and knead until completely smooth, add more whole wheat flour if too sticky. Form the dough into a ball.
- Place the dough in a lightly greased bowl. Cover and set aside in warm location for two hours, or until doubled in size. (I did this in my microwave.)
- Divide the dough into 8 disks. Cover and let rest 20 minutes.
- Place a pizza stone in the center rack of the oven. Preheat oven to 500 degrees F.
- Roll each disk into an 8″ pita. Be sure to run the rolling pin along the edges of the pita. Cover and let rest another 10 minutes.
- Cook pita on the pizza stone for 3 minutes. Do this in batches so that the entire pita is in contact with the stone – not overlapping or hanging off the edge.
*This recipe is adapted from Susan at http://thewimpyvegetarian.com/2012/12/easy-whole-wheat-pita-bread/*

To see the other bloggers who participated in the Secret Recipe Club this month click here:

Disclaimer: This post contains affiliate links.