#BundtBakers: Stone Fruit

BundtBakers

With it being July I knew I had to take this month’s #BundtBakers theme in an All American direction. #BundtBakers is a group of bundt loving bakers who get together once a month to bake bundts with a common ingredient or theme. We take turns hosting each month and choosing the theme or ingredient. This month’s theme is stone fruit and our lovely host is Felice of All That’s Left are the Crumbs.

While I can’t get enough of the smell of fresh peaches and nectarines I don’t particularly care for them. And in thinking of something that’d be great for the 4th of July I knew I had to go with cherries.

Chocolate and cherries are a classic combination. So I knew I wanted to do a chocolate cake. But how to incorporate the cherry? IMG_9243-2
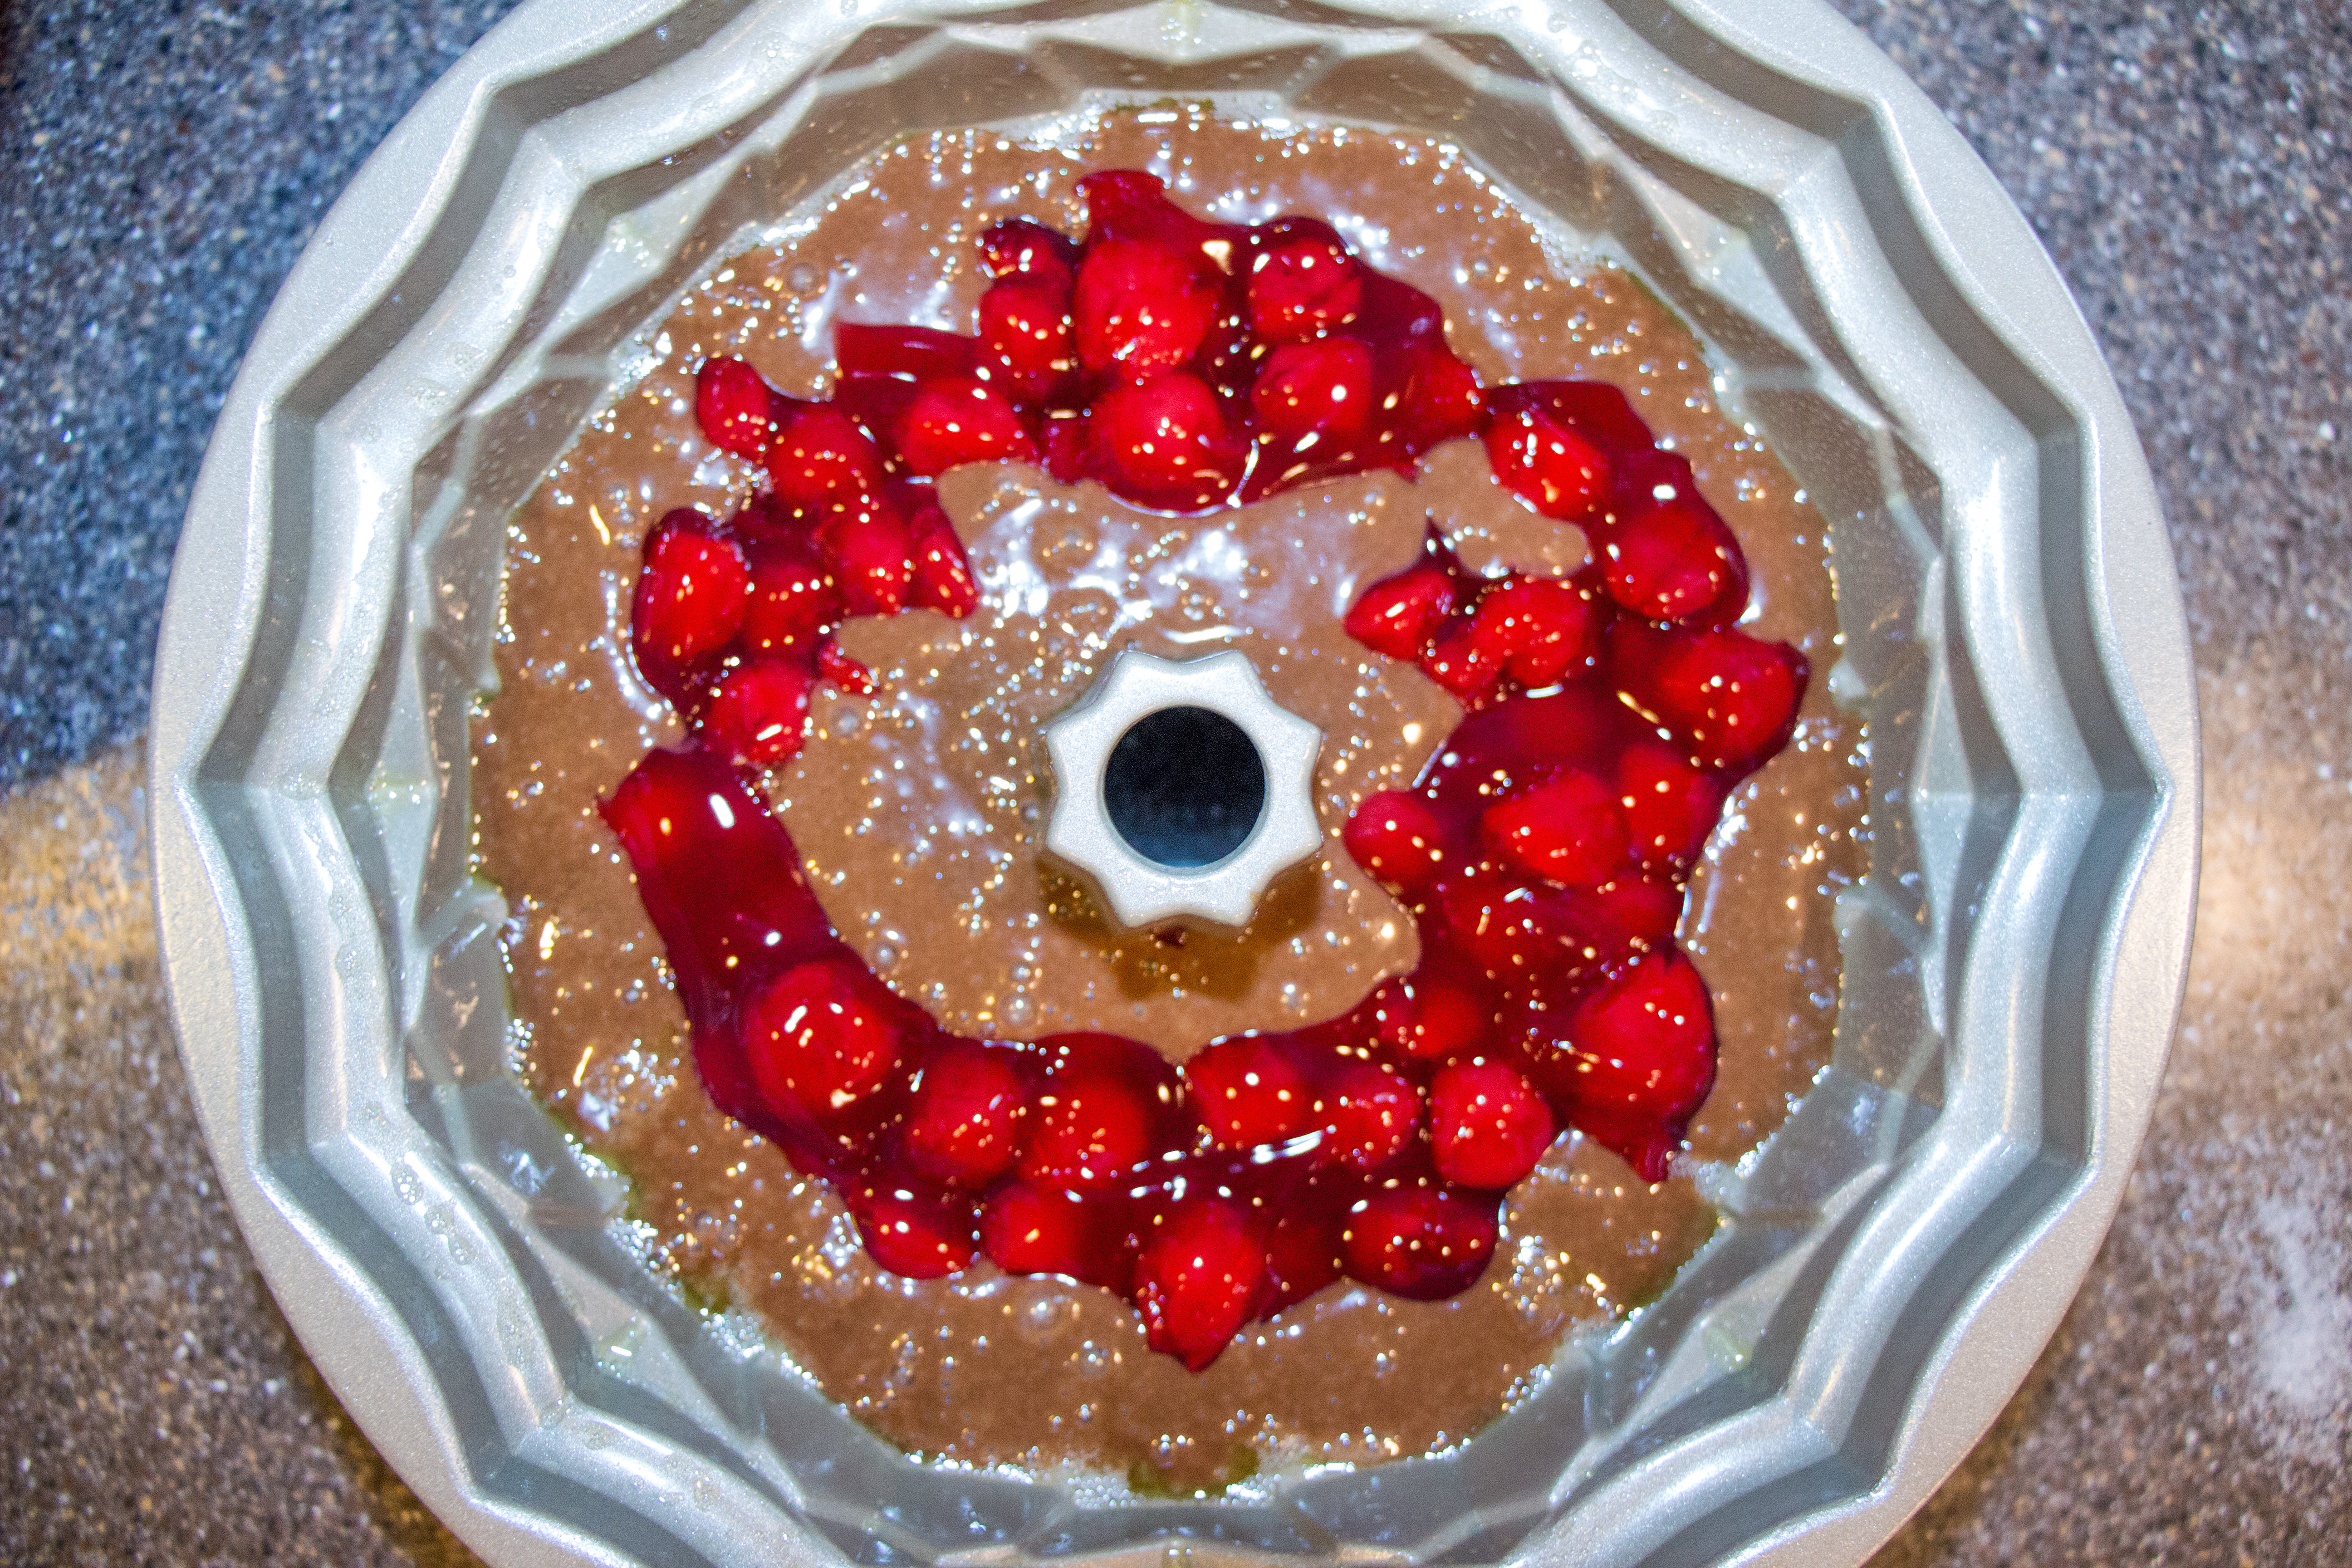
I decided to try following the method I use on my popular coffee cake and placing cherry pie filling in the middle of the batter. Well, just like my attempted Mimosa Bundt two months ago the fruit didn’t cooperate like I’d hoped. But this time it created a more beautiful result than I could have imagined! And it also eliminated my need to make a frosting. (For the record I planned on putting some cherry pie filling liquid into a chocolate glaze.) The cherry pie filling fell to the bottom of the bundt pan which created a “pre-made” cherry glaze for the cake. The only downfall is that my brand new star bundt pan didn’t get to shine in all its glory. Thankfully a couple of the stars remained filled with cake batter instead of cherries that I can still show it off.

All-American Chocolate Cherry Pie Cake

Ingredients:

  • 2 sticks butter
  • 1 C water
  • 1/3 C cocoa powder
  • 1 tsp salt
  • 2 C flour
  • 1 3/4 C sugar
  • 1 1/2 tsp baking soda
  • 2 eggs
  • 1 container (5.3 oz) cherry flavored Greek yogurt
  • 1 tsp vanilla extract
  • 1 can (21 oz) cherry pie filling

Steps:

  1. Preheat oven to 350 degrees F. Heavily grease bundt pan.
  2. In a saucepan melt together butter, water, cocoa powder, and salt.
  3. In a large bowl whisk together flour, sugar, and baking soda.
  4. Using a hand mixer add half of the chocolate mixture into the dry ingredients. When incorporated add the remaining chocolate.
  5. Add the eggs one at a time, the yogurt, and the vanilla extract.
  6. Pour half of the batter into the prepared bundt pan. Add cherry pie filling (I did not use all of the can) and top with remaining batter.
  7. Bake 50-55 minutes, or until a knife comes out cleanly. Allow to cool in the bundt pan for at least 10 minutes before turning out.

*This recipe is adapted from Maria & Josh at http://www.twopeasandtheirpod.com/chocolate-sour-cream-bundt-cake/*

All-American Chocolate Cherry Pie Bundt

If you are a food blogger and would like to join us, just send an email with your blog URL to foodlustpeoplelove@gmail.com. All recipes and photographs can be found on our individual blogs, on our Pinterest board, and the #bundtbakers homepage.

And don’t forget to take a peek at what other talented bakers have baked this month:

Cherry Chocolate Chip Bundt Cake by Renee at Magnolia Days

Cherry Carrot & Banana Bundt by Kelly at Passion Kneaded

Peaches n Cream Melba Bundt Cake by Laura at Baking in Pyjamas

Roasted Cherry Kugelhopf with Cherry Bourbon Glaze by Tux at Brooklyn Homemaker

Peachy Bundt by Margaret at Tea and Scones

Plum, Chocolate, and Orange Bundt Cake by Maria at Box of Stolen Socks

Cinnamon Peach Bundt Cake by Beatriz at I Love Bundt Cakes

Cherry Almond Ginger Bundt by Jane at Jane’s Adventures in Dinner

Chocolate Avocado Bundt Cake by Terri at Love and Confections

Black Forest Bundt Cake with Cherry Ganache Topping by Teri at The Freshman Cook

Caramel Mango Bundt Cake by Bea at Secrets from my Apron

Upside-down Apricot Butter Bundt by Stacy at Food Lust People Love

Nutella Coffee Cake

As promised I have another April Food Network Magazine recipe.

The first Monday in April kicks of National Baking week. And April 7th is National Coffee Cake Day. Two birds, one stone.

In every edition of their magazine, Food Network features a “Mix & Match” concept. Whether it’s a cake, bread, pasta, or something else. I really like this concept as they provide for you the basics of a recipe but allow you to be the mastermind behind which flavors you want to combine. It’s a great way for new recipe makers to learn how to adapt recipes to suit your tastes while still having the “science” at hand.

This month: Coffee Cake. I opted to use cocoa powder and oats in my topping and chocolate-hazelnut spread as my filling. I did contemplate making a raspberry coffee cake instead – and I just might! But when I flipped through this page it was Nutella that was on my mind – so that’s what I went with. But while making it my sweet tooth started putting up a fight, requesting raspberry instead. Too bad sweet tooth, you lost the battle to my pantry items. And while I write up this post my stomach is growling waiting for the cake to come out of the oven. Let me tell you, it smells fantastic – the cinnamon in the topping mixed with the chocolatey filling… is my hour up yet? (for the record there are 10 minutes remaining – I just hope it’s really ready!)

Nutella Coffee Cake

Ingredients for topping:

  • 3/4 C flour
  • 2/3 C brown sugar
  • 1 tsp cinnamon
  • pinch of salt
  • 5 tbsp butter, at room temperature
  • 2 tbsp cocoa powder
  • 1/2 C rolled oats

Ingredients for cake:

  • 2 C flour
  • 1 tsp baking powder
  • 1/2 tsp baking soda
  • 1/2 tsp salt
  • 1 stick butter, at room temperature
  • 1 C sugar
  • 2 eggs
  • 2 tsp vanilla
  • 1 C yogurt (original recipe called for sour cream, but I didn’t have any)
  • 8-10 tbsp chocolate-hazelnut spread

Steps:

  1. Make the topping: whisk together the flour, sugar, cinnamon, and salt. Using your fingers, break the butter into small pieces and combine with the topping. After combined add the cocoa powder and oats. Set aside.
  2. Preheat oven to 350 degrees F. Line an 8×8″ square cake pan with foil and grease.
  3. Make the cake: In a large bowl whisk together flour, baking powder, baking soda, and salt.
  4. In a the bowl of a stand mixer beat butter and sugar until fluffy. Add eggs one at a time. Add in the vanilla.
  5. Incorporate a third of the dry ingredients into the wet ingredients. Once combined add 1/2 C of yogurt/sour cream. Add another third of the dry ingredients. Once combined add the last 1/2 C of yogurt/sour cream. Add in the final third of the dry ingredients.
  6. Assemble the cake: Place half of the cake batter in the prepared cake pan. Spread the chocolate-hazelnut spread and top with remaining batter. Top the cake with the topping from step 1. (Note: I did not use all of the topping.)
  7. Bake for 1 hour, or until a knife comes out cleanly.
  8. Allow cake to cook for 5 minutes and remove the cake from the pan by the foil. Serve your cake with some fresh fruit and a cup of coffee!

Nutella Coffee Cake 1

Now that my cake is out of the oven I might suggest using a 9×9″ cake pan instead. My personal opinion – the cake was too tall. With a shorter slice of cake you could eat a bite with both topping and filling. Additionally, with a larger cake pan size I would have used more of the topping!

Nutella Coffee Cake

Stuart declared this better than any coffee cake you can buy at the grocery store bakery and now expects it every weekend. (Yea, good luck with that!)

recreatedbysrc


Eating the Bible: Dark, Dark Nights

Chapter 10 of Exodus is littered with references to darkness – three of the plagues the affect the Egyptians involve the dark (locuts the block the sun, darkness, and death of the first born at night). These plagues serve as a reminder that God controls the Light.

And they obscured the face of all the land, and the land became darkened. Exodus 10:15

I chose this passage to remind us that even in moments of darkness we can look to God to bring the Light. Darkness, and Fear, can test one’s will. During Lent we’re strengthening our faith in God and strengthening our ability to fight the Darkness.

Rena created these adorable Hidden Treasure Midnight Brownies made with dark chocolate and golden sprinkles inside. I interpret these sprinkles as the light that can be found in the dark and that out of the dark there will always be light.

Hidden Treasure Midnight Brownies

Ingredients:

  • 1 stick butter
  • 3/4 C dark chocolate chips
  • 1/2 C flour
  • 1 1/2 C powdered sugar
  • 3 large eggs
  • 3 large egg yolks
  • sprinkles

Steps:

  1. Preheat oven to 400 degrees F and grease a muffin tin.
  2. Melt together butter and chocolate using whatever method you prefer (microwave, double boiler, etc).
  3. To the chocolate add the flour and sugar. Use an electric hand mixer to combine.
  4. Beat together eggs and egg yolks and add to the chocolate and mix until combined.
  5. Fill muffin cups halfway, top with sprinkles, then spoon over remaining batter.
  6. Bake 8-10 minutes until edges are set and the centers still soft. Let cool 2 minutes before gently removing from the pan.

*This recipe is adapted from Eating the Bible by Rena Rossner*

Midnight Brownies

As you can see, I didn’t get the “lava cake” effect Rena achieved. I think I over baked my brownie-muffins. However, the dark chocolate brownie was a perfect texture of crusty on top and fudgy in the center. The sprinkles I added, although not visible provided a gentle crunch factor to the brownie.

Disclaimer: This post contains affiliate links. 

Chocolate Chip Cookies

On Tuesday nights I partake in a bowling league. Collectively, we are not the best team, but we do know how to have fun! Our team “uniform” are Hawaiian shirts, last year we made tie-dye shirts!

If you’re at all familiar with bowling, you may have heard the term “beer frame” thrown around. A beer frame is when all members except one bowl a strike in the same frame. That singleton is then responsible for buying a pitcher of beer for the group.

Instead of beer frames, we do cookie frames. And I fell on the sword, so the next week I was charged with bringing in cookies. My evening for cookie bringing was the same evening of the ice storm so I actually got an extra week to prepare. It’s a good thing too because the cookies I tried making that Monday night were a complete fail. I was following a recipe for heart cookies out of a massive cookie cookbook. Something about this recipe was off – the “dough” ended up as more “sand”. So I scrapped the idea and made Rice Krispie Treats instead. Much to my husband’s dismay those treats never left the house.

So this week I had to try again. I opted instead to follow a supposedly fool proof recipe for Chocolate Chip Cookies. This recipe actually comes from the sonographer at my doctor’s office. She has it memorized and jotted it down for me when my husband informed her of my previous cookie fail. She says she’s put many variations on the recipe using nuts, coconut, etc.

When it comes to cookies, chocolate chips are not my favorite. I lean towards thin crispy cookies, like my Busia’s oatmeal lace cookies that I haven’t even attempted and my mom has mastered. These cookies were enjoyably addicting – I think it’s the salt in the batter! By the time I got around to photographing these there were only 5 left!

Chocolate Chip Cookies

Ingredients:

  • 2 sticks butter, room temperature
  • 1 C sugar
  • 1 C brown sugar
  • 2 eggs
  • 1 tsp vanilla extract
  • 2 1/2 C flour
  • 1 tsp salt
  • 1 tsp baking soda
  • 1 bag chocolate chips

Steps:

  1. Preheat oven to 350 degrees F.
  2. In the bottom of a stand mixer cream together butter and sugars. Add eggs and vanilla. Beat until combined.
  3. In a separate bowl, whisk together flour, salt, and baking soda. Add the dry ingredients to the butter and sugar mixture in 3 batches.
  4. Fold in chocolate chips.
  5. Drop tablespoon-sized dollops of batter onto a greased cookie sheet. This recipe made 3 dozen cookies.
  6. Bake 10-14 minutes.

Chocolate Chip Cookies

Chocolate Cupcakes with Peanut Butter Frosting

Today is my husband’s birthday! Some of his coworker’s know I’m a food (mostly) blogger and are always complaining that Stuart doesn’t bring in enough leftovers at lunch for everyone. So today I’m sending him to work with cupcakes!

I wanted to make them from scratch instead of using a box. I was trying to decide what flavor profile to do and decided to go with a play on his favorite candy bar: the Almond Joy. The frosting recipe called for coconut extract, but because I have a coconut allergy I didn’t want to buy a bottle to use 1/4 tsp. I looked up how to make my own, but doing so requires a fresh coconut. I decided to substitute vanilla extract, and trust that the coconut milk used to make the frosting will keep the coconut flavor alive. They’re additionally topped with shredded coconut (and an almond).

If you notice, the title of this blog post is Chocolate Cupcakes with Peanut Butter Frosting, not Coconut. That’s because I typed up the post before I made the frosting. The frosting did not turn out well. The texture was all off – it wasn’t smooth and almost looked like glitter.

So I switched it up and decided to go with peanut butter frosting. (It’s a good thing I got the new glass KitchenAid bowl for Christmas so I didn’t have to do dishes in between frostings, thanks parents!) I asked, “Can I just pretend Reese’s are your favorite candy?” “Yes, I like Reese’s!” Also, instead of pretending to be perfect, you get to know my Plan B secret! I followed the frosting recipe I used on my Caramel Filled Chocolate Avocado Cupcakes with Peanut Butter Caramel Frosting, omitting the caramel.

Chocolate Cupcakes Peanut Butter Frosting

Chocolate Cupcakes with Coconut Peanut Butter Frosting

Ingredients for cupcake:

  • 2/3 C cocoa powder
  • 1 tsp baking soda
  • 1/2 C butter, melted
  • 1/3 C vegetable oil
  • 1 1/2 tsp vanilla extract
  • 1 1/3 C sugar
  • 3/4 tsp salt
  • 2 eggs
  • 2 egg yolks
  • 1/2 C heavy cream
  • 1 3/4 C flour

Ingredients for frosting:

  • 1 C salted butter, at room temperature
  • 1/4 C canned coconut milk
  • 1 tsp vanilla extract
  • 4 C powdered sugar
  • 1/2 stick unsalted butter, at room temperature
  • 2 C powdered sugar
  • 1/8 C + 1 tsp milk
  • 1/4 C peanut butter

Steps:

  1. Boil 1 C of water in the microwave. Mix together cocoa powder and baking soda. Whisk in the boiling water and whisk until the mixture no longer bubbles and is smooth. Set aside.
  2. In a large mixing bowl, beat melted butter, oil, vanilla, sugar, and salt with a hand mixer. Add in the two eggs and beat until combined. Repeat with the egg yolks. Add the cocoa mixture and heavy cream. Once combined add in the flour in batches, mixing after each addition.
  3. Pour cupcake batter into 2 dozen cupcake tins. Bake at 350 degrees for 18 minutes, or until a toothpick comes clean when inserted. Let cool.
  4. Make the frosting: Using a stand mixer, beat the butter and coconut milk until fluffy. Mix in the extract. Slowly add in the powdered sugar until a frosting is made! In a stand mixer beat together sugar, butter, and milk. When combined fully add in the peanut butter.
  5. Top cooled cupcakes with frosting. Top with shredded coconut and an almond, if desired.

*The cupcake recipe is adapted from Jaclyn at http://www.cookingclassy.com/2013/02/chocolate-cupcakes-with-coconut-frosting-almonds-almond-joy-cupcakes/*

Chocolate Cupcakes Peanut Butter Frosting

Busy Day Chocolate Cake

Today would have been my grandmother’s 81st birthday. In honor of her I made a cake from her recipe box – Busy Day Chocolate Cake. My brother always requested this cake for his birthday.

Busy Day Chocolate Cake, as the name suggests, is a chocolate cake that can be made on a busy day. It only takes 5 minutes to make the batter and 30 minutes in the oven. The longest process is letting the cake cool before frosting it.

Busia must’ve been helping me recreate her recipe because for the first time ever my cake came out of the pan cleanly and easily.

Busy Day Chocolate Cake

Busy Day Chocolate Cake

Ingredients:

  • 2 oz semi-sweet chocolate
  • 1 1/3 C flour
  • 1 C sugar
  • 1 tsp baking soda
  • 1/2 tsp salt
  • 1/4 C vegetable shortening
  • 1 C buttermilk
  • 1 egg

Steps:

  1. Preheat oven to 350 degrees F.
  2. Melt chocolate: microwave 30 seconds, stir, microwave another 30 seconds or until melted.
  3. Sift together flour, sugar, baking soda, and salt.
  4. Cut in vegetable shortening, and mix in buttermilk and egg. (I literally used a knife to mix in the shortening.) Add melted chocolate until combined.
  5. Pour batter into a greased and floured 9″ round cake pan.
  6. Bake for 30 minutes, until a knife/toothpick slides through cleanly.

Cream Cheese Frosting

Ingredients:

  • 4 tbsp salted butter
  • 4 tbsp cream cheese
  • 3 C powdered sugar
  • 1 1/2 tsp vanilla extract
  • milk, if needed

Steps:

  1. In a stand mixer, cream together butter and cream cheese.
  2. Add 1 C powdered sugar. Mix until combined. Add in 1/2 tsp vanilla. Mix until combined. Repeat until all ingredients are used.
  3. If needed, add a little bit of milk and/or more sugar.
  4. Frost cake and enjoy!

Busy Day Chocolate Cake

Copy Cat: Almond Joy

After this month’s Crazy Ingredient Challenge, I had a lot of coconut in my house that needed to go! I decided to make Stuart’s favorite candy – Almond Joys. I thought it could be fun for him to take to the office, but this recipe didn’t make as many candy bars as I thought it would! I didn’t have enough coconut to make two batches either.

I ran into another small problem – apparently I’m a little challenged when it comes to dipping the bars into melted chocolate. They were not pretty. And definitely not food photography worthy. I am very pleased with the beautiful bars I did create by simply drizzling the chocolate over top the candy.

Copy Cat: Almond Joy

Ingredients:

  • half of 14oz can sweetened condensed milk (7oz)
  • 2 C powdered sugar
  • 1 tsp vanilla extract
  • pinch of kosher salt
  • 2 1/2 C sweetened shredded coconut
  • whole salted almonds
  • 1 lb chocolate, melted

Steps:

  1. Stir together condensed milk and sugar until smooth – I found this to be best done by adding in the sugar in installments.
  2. Mix in vanilla and salt.
  3. Add in coconut – do this in one batch.
  4. Spread coconut onto a greased foil lined tray. Press into desired candy bar thickness. Gently score the coconut, outlining rectangles, with a knife and place two almonds onto each bar, if desired. Place in refrigerator for at least an hour.
  5. Cut candy bars along your previously suggested lines. Coat candy bars in melted chocolate. (Or give up on that and drizzle them like I did!)

*This recipe is adapted from Elizabeth at http://www.ohnuts.com/blog/almond-coconut-candy-bars-recipe/*

Image

recreatedbysrc

CIC: Avocado & Caramel

Last weekend we had a wonderful Korean-style supper at our good friends’ house. Tara is the host of Tara’s Multicultural Table and my blogging mentor. She told me about this new blogging-world challenge. It’s a challenge where you mix two ingredients that wouldn’t normally be paired together and create a recipe that encompasses both of them.  Almost like Chopped! This month’s challenge is Avocado and Caramel.

I was surprised at how quickly an idea came to me! I had just watched a Giada at Home episode where she stuffed peanut butter cupcakes with caramel. That fulfills requirement number 2. But what about requirement number 1? I’ve seen many vegan/vegetarian recipes that substitute avocado for eggs in baking, so here we have it! We stopped at Publix on the way home and the next morning I was making these!

I know my blog isn’t exactly vegan friendly, but here’s a recipe you could (dissect and) serve to your meat-free guests! I substituted cow’s milk, but you could switch it back to soy milk! However, Stuffing these chocolate beauties with caramel and topping them with frosting voids the vegan requirements…

Stuart was not excited about this avocado cupcake idea. But I had him taste the batter (that’s the best part about vegetarian/vegan cupcakes! No eggs means you can lick that spoon clean without any guilt), and he conceded to the avocado cupcake. He was even disappointed that this recipe only made 12 cupcakes!

Avocado is changing the baking world one cupcake at a time. A coworker even told me that this was the best cupcake he’s ever had, and I had a request from another for the recipe because his daughter is allergic to eggs.

Caramel Filling 1 Caramel Filling 2 Caramel Filling 3 Wet Ingredients: Chocolate Avocado Cupcakes Dry Ingredients: Chocolate Avocado Cupcakes Chocolate Avocado Cupcake Batter Peanut Butter Caramel Frosting 1 Peanut Butter Caramel Frosting 2 Peanut Butter Caramel Frosting 3

Caramel Filled Chocolate Avocado Cupcakes with Peanut Butter Caramel Frosting

Ingredients for Cupcakes:

  • 25 caramel squares
  • 1/2 C heavy cream
  • 1 avocado
  • 1 C pure maple syrup
  • 3/4 C milk
  • 1/3 C canola oil
  • 2 tsp vanilla extract
  • 1 1/2 C flour
  • 3/4 C unsweetened cocoa powder
  • 1 tsp baking powder
  • 3/4 tsp baking soda
  • 3/4 tsp salt

Ingredients for Frosting:

  • 1/2 stick unsalted butter, at room temperature
  • 2 C powdered sugar
  • 1/8 C + 1 tsp milk
  • 1/4 C peanut butter
  • 1-2 tbsp caramel

Steps

  1. In a saucepan over low heat melt caramel into the heavy cream. Stir occasionally.
  2. Preheat oven to 350 degrees F.
  3. In a food processor, puree avocado, syrup, milk, oil, and vanilla until smooth.
  4. Whisk together the remaining dry ingredients. Add wet ingredients to the dry.
  5. Assemble cupcakes: put a spoonful of batter, a spoonful of caramel, and another spoonful of batter into paper lined cupcake tins. Bake for 25 minutes.
  6. Make the frosting: In a stand mixer beat together sugar, butter, and milk. When combined fully add in the peanut butter. Using a spoon, swirl in the caramel. Pipe frosting on top of cupcakes and drizzle with extra caramel sauce if desired.

*The cupcake recipe was adapted from http://www.vegetariantimes.com/recipe/glazed-chocolate-avocado-cupcakes/. The frosting and filling were adapted from Giada deLaurentiis at http://www.foodnetwork.com/recipes/giada-de-laurentiis/stuffed-peanut-butter-cupcakes-with-swirled-peanut-butter-frosting-recipe/index.html*

Caramel Filled Chocolate Avocado Cupcake
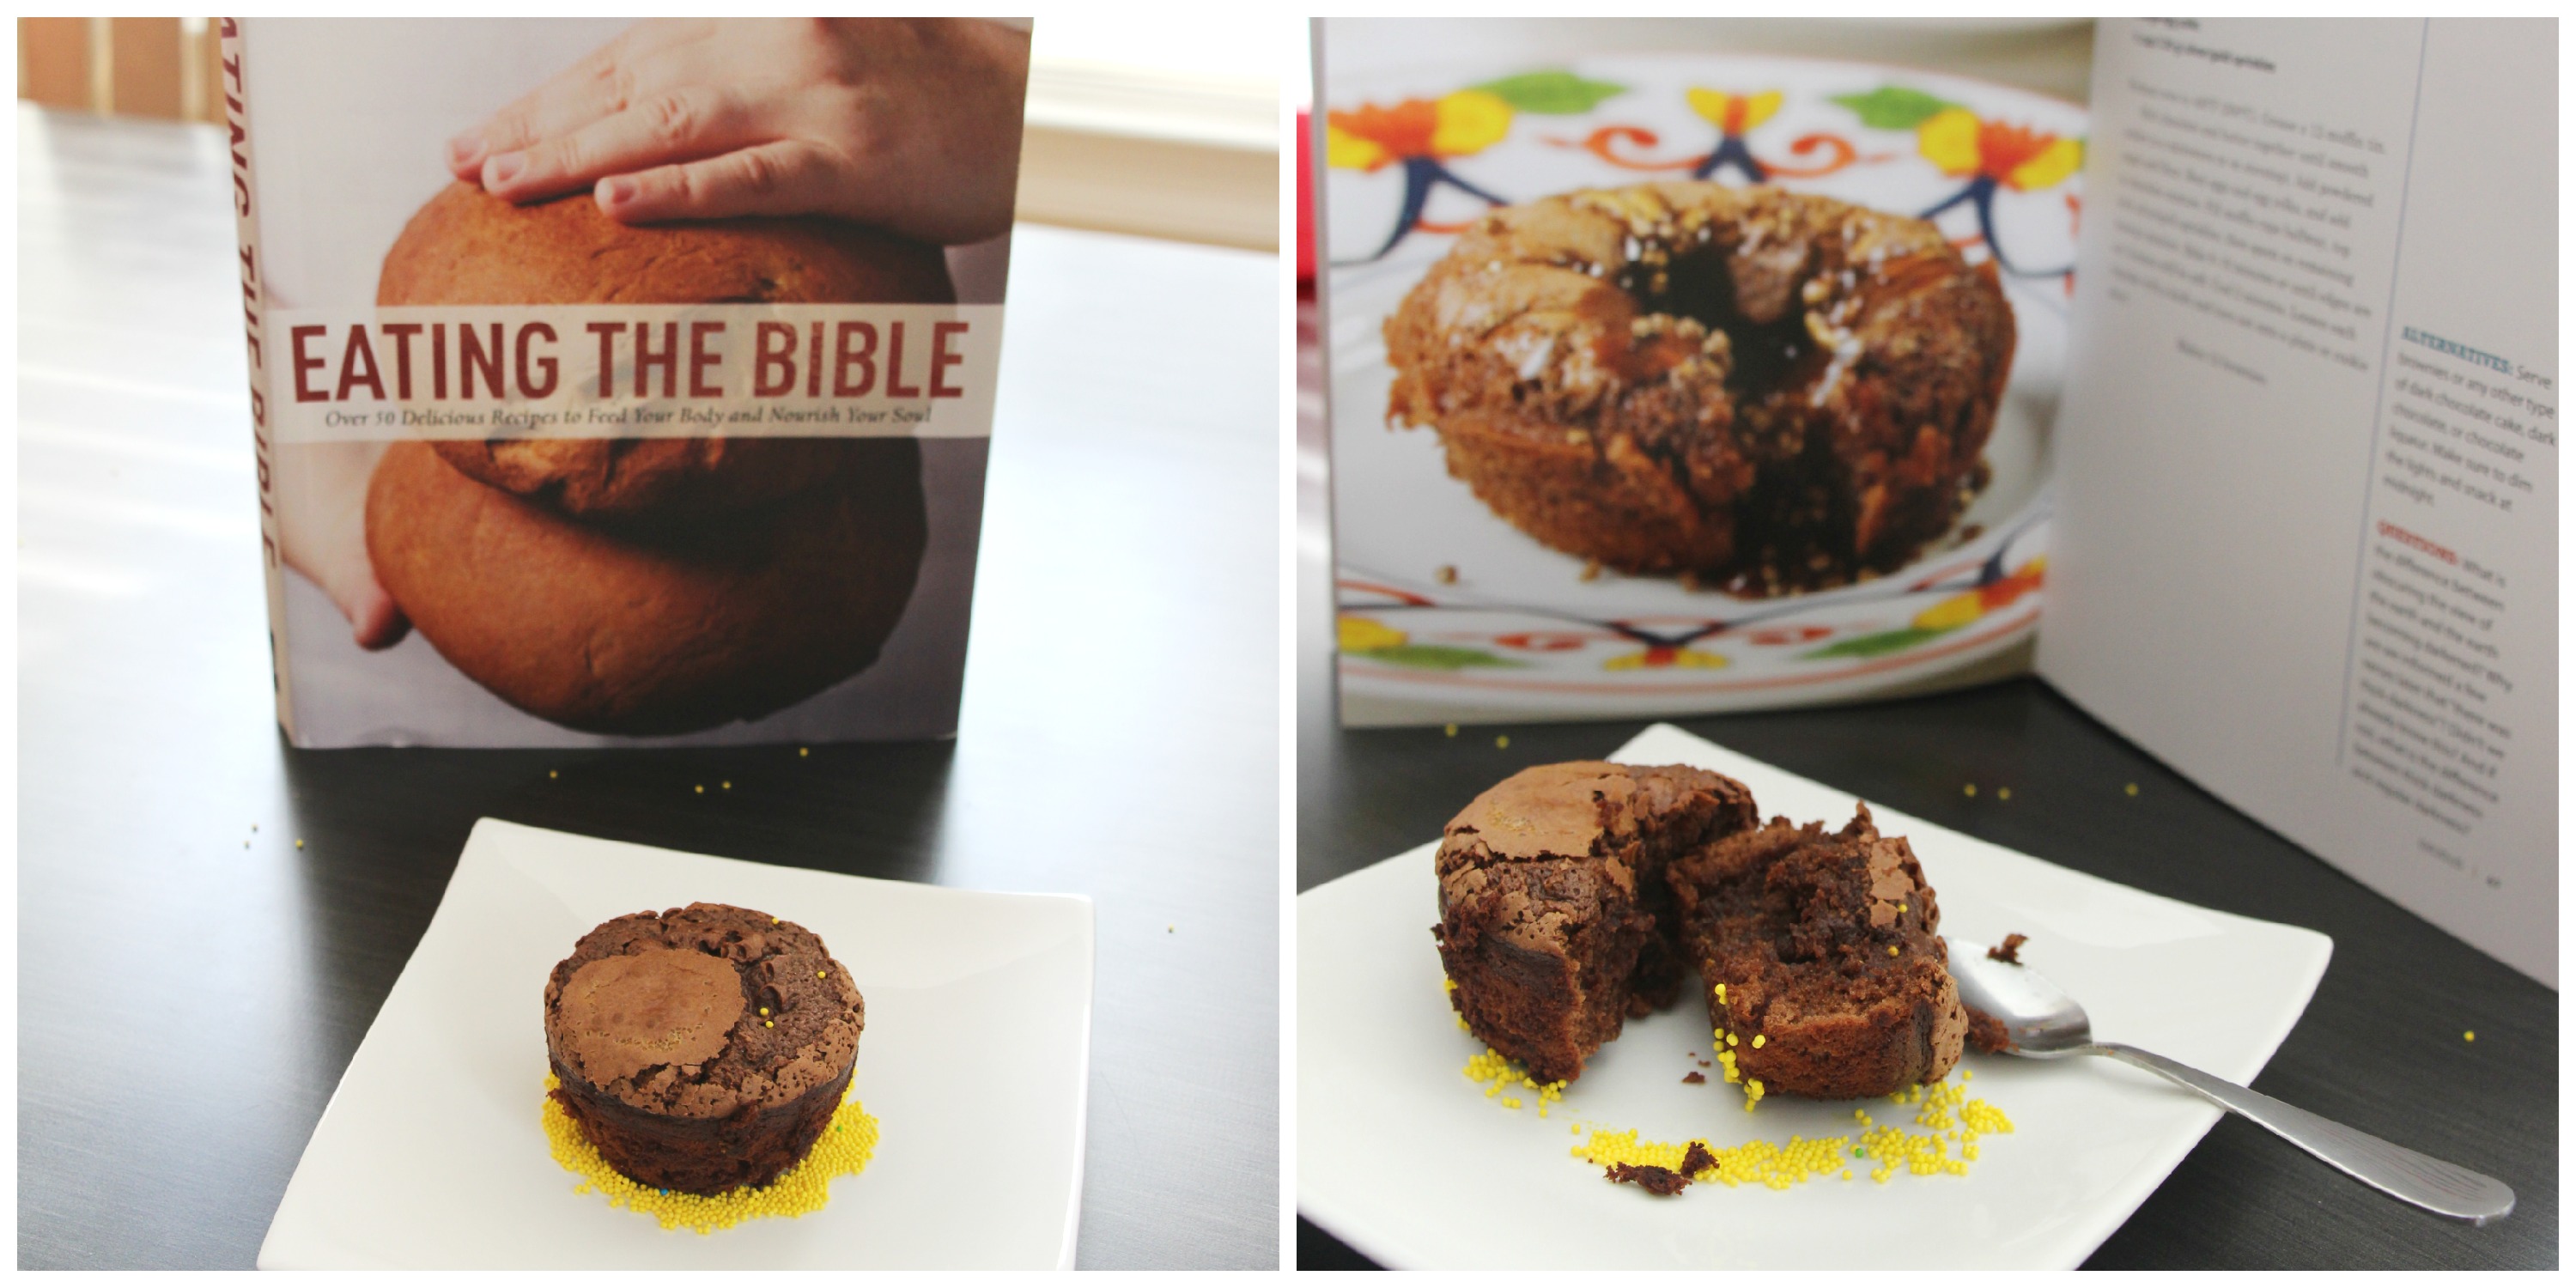
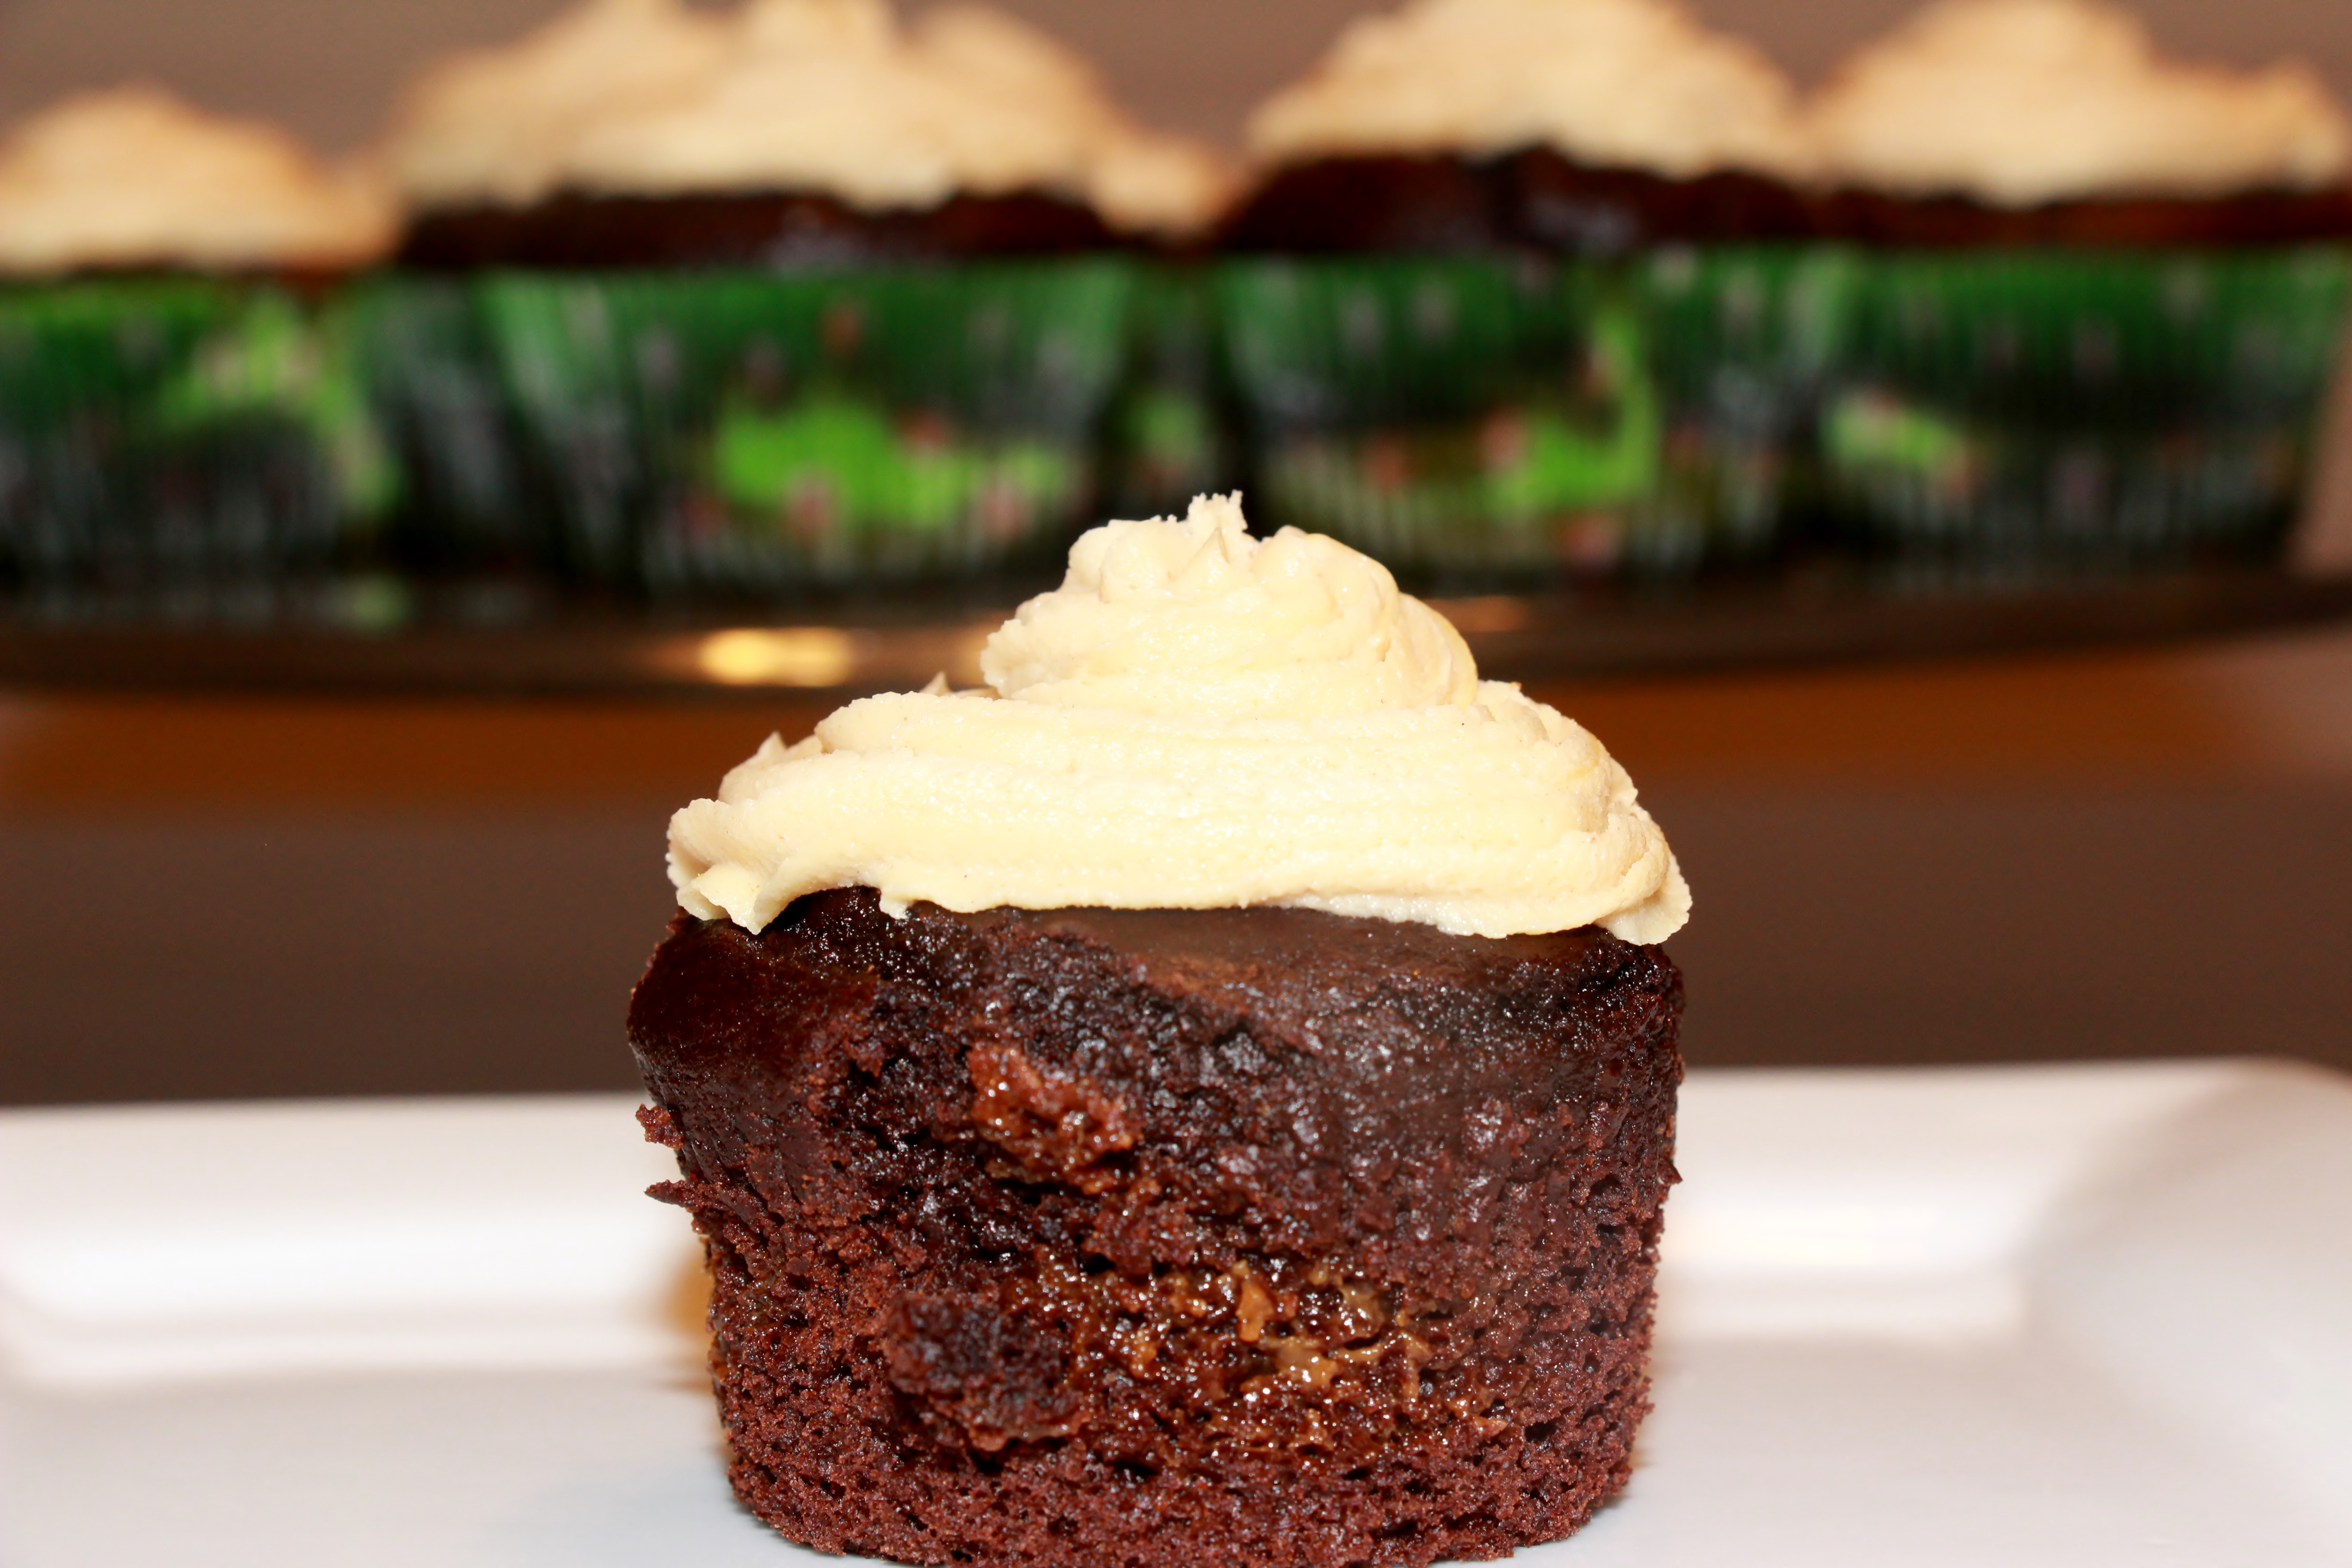
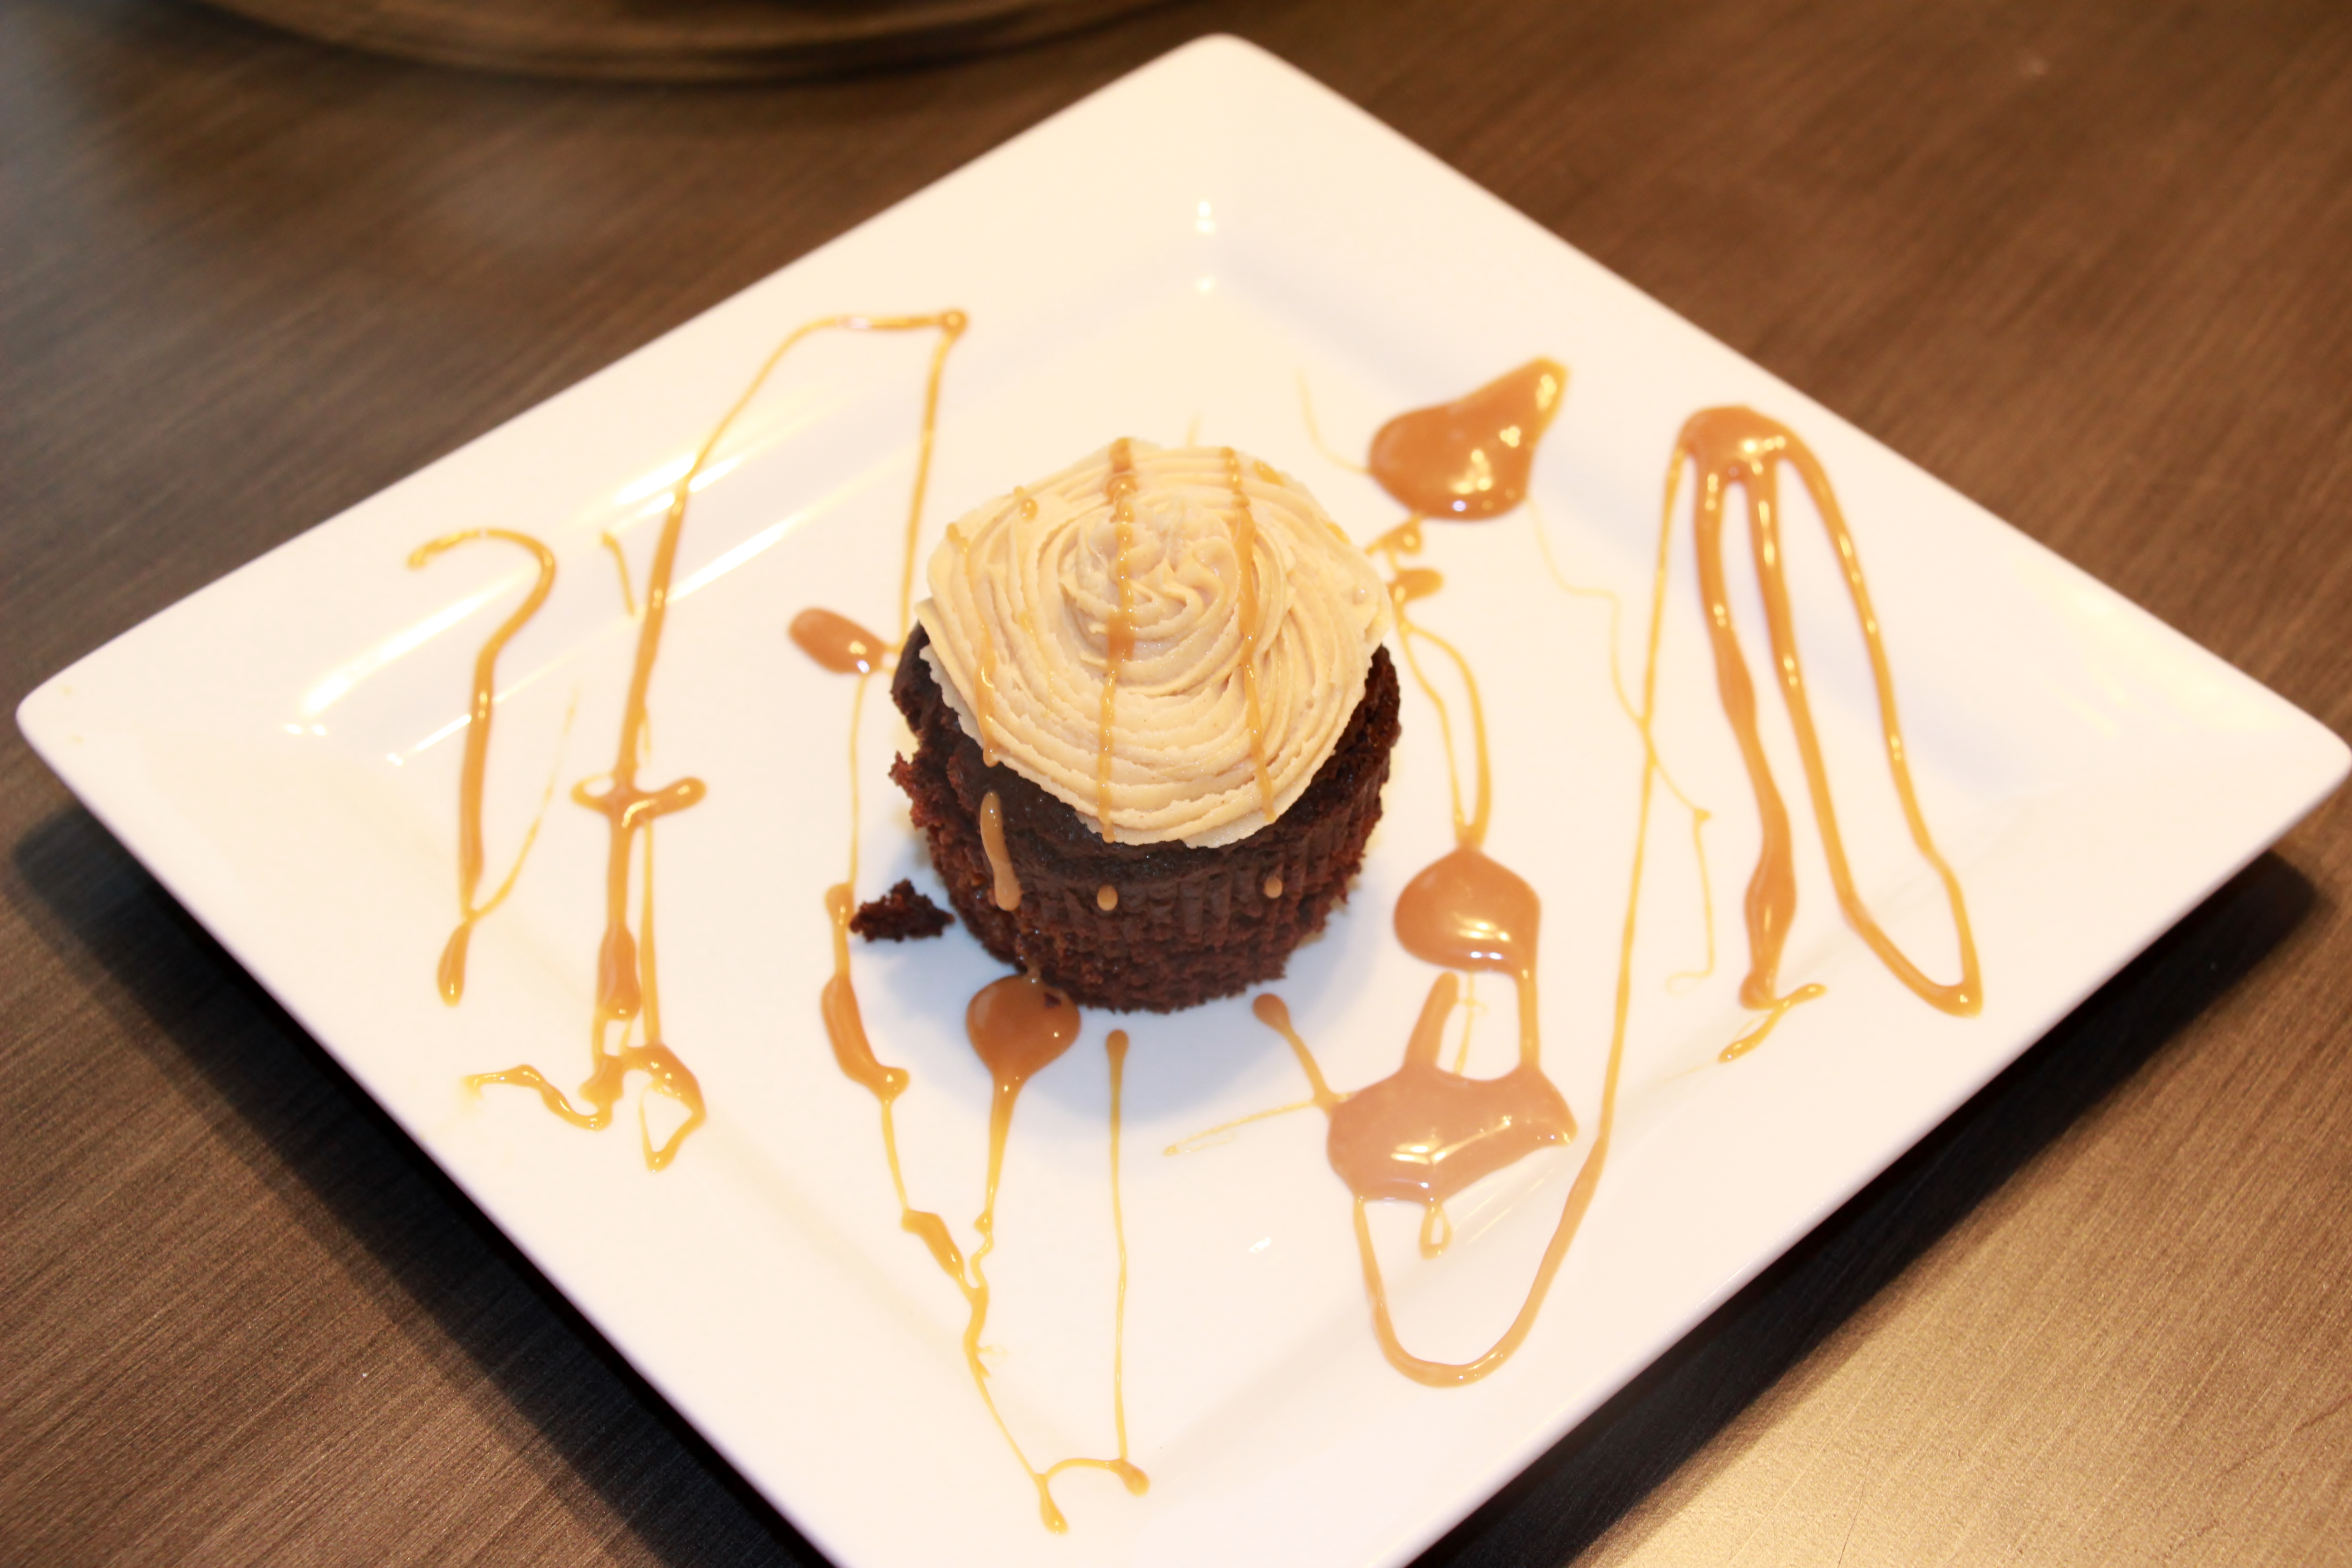
I have to admit, I was disappointed when I cut into a cupcake and wasn’t met with lava flowing caramel. The photo of Food Network’s page is very misleading; however, my results mimicked those aired on the “Stuff It” episode. (The last photo is a “cheat” 😉 )Stuart’s advice: If you think you put enough caramel in the cupcake, add a little bit more.

Caramel Filled Chocolate Avocado Cupcakes with Peanut Butter Caramel Frosting 3

Caramel Filled Chocolate Avocado Cupcakes with Peanut Butter Caramel Frosting 1 Caramel Filled Chocolate Avocado Cupcakes with Peanut Butter Caramel Frosting 4 Caramel Filled Chocolate Avocado Cupcakes with Peanut Butter Caramel Frosting 2

Caramel Filled Chocolate Avocado Cupcakes with Peanut Butter Caramel Frosting 5Here are the other blogs that participated in this month’s Crazy Ingredient Challenge.