M&M Cookies

I’ve been homeschooling Firecracker (and by proxy, Treat) this school year, which is why things have slowed down quite a bit around here in the blog-o-sphere.

But I’ve really been enjoying it!

I’ve been following a curriculum I purchased last summer, but mixing it up somewhat drastically to fit certain themes or occasions in our lives. For example: We actually started with units 9 and 16 instead of 1 and 2. We actually just did unit 2 in January!

And now that we have somewhat of a routine with how the units are organized, I’ve been venturing out and creating my own units, too! All of the units I’ve developed are centered around the holidays.

We’re currently on, you guessed it, Valentine’s Day!

And I’ve been getting really into this least favorite holiday of mine. I’ve been cutting their sandwiches and cheese slices into hearts for lunch and we’re crafting up a storm.

We even made Valentines for our long distance family members. (The photo below was sent from my beautiful sister-in-law and shared with her permission.)

img_2202

I found the idea for the Valentines on Pinterest. The boys loved having me paint their hands, saying it tickled. (Mega crafting milestone for my boys!) I cut the yarn to be the length of their arm span. The boys each picked the background color for each of their Valentines depending on who they were being sent to! It was fun to watch their little minds work in decision mode.

img_2158-2

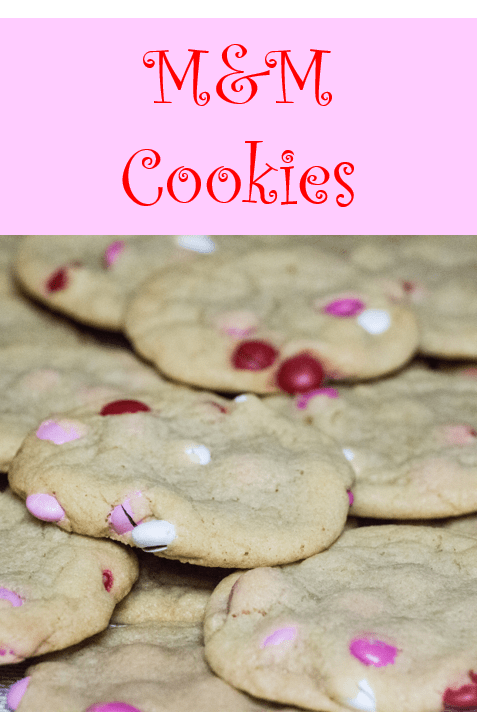
Inside their Valentine boxes were a couple of appropriately colored M&M cookies. We sent so many cookies that there was only one cookie leftover for the 4 of us to share. (I ran out of brown sugar to make more – tragedy! Seriously. I have got to hit up a grocery store, like, ASAP, so I can make more of these cookies for us!)

M&M Cookies | Sew You Think You Can Cook | http://sewyouthinkyoucancook.com

I don’t think I’ve ever baked cookies that involved melted butter before, I was skeptical. But using melted butter made the mixing of these cookies insanely easy – no stand mixer required! I love the use of brown sugar in cookies, I think it gives the cookies a great depth of flavor. And of course, holiday colored M&Ms provide the perfect texture to these soft and chewy cookies.

This recipe makes approximately 21 cookies.

M&M Cookies

Ingredients:

  • 2 C flour
  • 1/2 tsp baking soda
  • 1/2 tsp salt
  • 1 1/2 sticks butter, melted
  • 1 C brown sugar
  • 1/2 C sugar
  • 1 egg
  • 1 egg yolk
  • 2 tsp vanilla extract
  • 1 C M&Ms

Steps:

  1. Preheat oven to 350 degrees F. Line two cookie sheets with silicone baking mats, parchment paper, or spray with cooking oil.
  2. In a bowl, whisk together the flour, baking soda, and salt.
  3. In another large bowl, whisk together the melted butter and sugars until combined. Add the eggs and vanilla, mixing until fully incorporated.
  4. Slowly add the flour mixture to the wet ingredients, switching to a spatula for easier mixing. Fold in the M&Ms.
  5. Spoon onto prepared baking sheets. Bake 10-12 minutes, until the edges are golden. Let cool on baking sheets.

*This recipe is adapted from Kristyn at https://lilluna.com/giant-chewy-mm-cookies/*

M&M Cookies perfect for Valentine's Day | Sew You Think You Can Cook | http://sewyouthinkyoucancook.com

#SundaySupper: Recipes That Use Leftover Halloween Candy

It’s October 30th, the day my Treat turns the big O-N-E! It also happens to be the day before Halloween, which is why our #SundaySupper team has gathered together over 20 recipe ideas for using up all of that leftover Halloween candy. Thank you to T.R. Crumbly of Gluten Free Crumbly for hosting this sweet event.

We have lived in 4 different homes since being married in 2010 and have yet to hand out candy to more than 10 kids on a Halloween. It makes me a little saddened. Growing up our neighborhood was a great trick-or-treating destination and my parents would had out tons of candy! As the years went on people stopped going down the middle streets of the block so my parents would set up shop at the end of the driveway to let trick-or-treaters know there were houses worth stopping for.

Our first home in NWFL was a townhome on the corner across from a gas station – not exactly kid friendly. Our second home in NWFL was in a real neighborhood, but we still didn’t get any trick-or-treaters! I chalked it up to living in the bible belt, the largest church in town always did a trunk-or-treat type of thing.

I had huge hopes when we moved to Ohio. Our long standing neighborhood home was a bus stop. How could we not get trick-or-treaters?! Halloween 1 in Ohio arrived with freezing rain. The handful of children who braved the elements earned more than their fair share of our Halloween candy!

I spent Halloween 2 in Ohio in the hospital with our family’s newest addition, Treat. The grandparents manned the house, handing out candy, and taking Firecracker for his first trick-or-treating.

12191540_10103327191278871_3778182514752255641_n
My 1 day old Treat – 2015

This year is our first in California and my hopes for trick-or-treaters is close to zero. My friend informed me that one of the main streets shuts down and does trick-or-treating for two hours on Halloween. So, like most families in our area, we’ll be heading that way. I will, of course, leave a bowl out of candy, just in case!

That long “sob story” of Halloweens as an adult means I’ve definitely experienced an over abundance of candy come November. Usually, the candy would make its way to the office.

This year, I bought one bag of KitKats and Reese’s. I wanted candy in the house that I wouldn’t mind eating should I be left with a bunch of it.

Turns out, I picked candy that lends itself nicely to post-Halloween baking, too!

Peanut Butter Cup Coffee Cake | Sew You Think You Can Cook (toddler)

Peanut Butter Cup Coffee Cake

Ingredients:

  • 1 C buttermilk
  • 3/4 C vegetable oil
  • 1 egg
  • 2 1/2 C flour
  • 3/4 C brown sugar
  • 3/4 C sugar
  • 2 tsp cinnamon
  • 1/2 tsp salt
  • 1/4 tsp nutmeg
  • 1 tsp baking soda
  • 4-5 Reese’s peanut butter cups, chopped

Steps:

  1. Preheat oven to 350 degrees F. Line an 8×8″ cake pan with foil and lightly grease.
  2. Whisk together buttermilk, oil, and egg in a small bowl.
  3. In a large bowl, whisk the flour, sugars, cinnamon, salt, and nutmeg. Remove 1/2 C of the mixture and set aside. Add in the baking soda, and mix to combine.
  4. Combine the wet ingredients into the dry. Pour batter into prepared cake pan. Top with chopped peanut butter cups and reserved flour mixture.
  5. Bake 50-60 minutes, or until a knife inserted comes out cleanly.

*This recipe is adapted from Jocelyn at http://insidebrucrewlife.com/2014/05/peanut-butter-cup-coffee-cake/*

Peanut Butter Cup Coffee Cake for #SundaySupper from Sew You Think You Can Cook

Bars

Brownies

Cakes

Confections

Cookies

Snacks

Supper

Sunday Supper MovementJoin the #SundaySupper conversation on twitter on Sunday! We tweet throughout the day and share recipes from all over the world. Our weekly chat starts at 7:00 pm ET. Follow the #SundaySupper hashtag and remember to include it in your tweets to join in the chat. To get more great Sunday Supper Recipes, visit our website or check out our Pinterest board.

Would you like to join the Sunday Supper Movement? It’s easy. You can sign up by clicking here: Sunday Supper Movement

Homemade Candy Corn

I conclude my Halloween candy week with a non-chocolate holiday favorite: candy corn!

This candy endeavor is the first one that’s actually a candy – aka it involves boiling sugar. Yikes!

I had to make two attempts at this one, but I’m glad I didn’t give up because I feel quite accomplished having made homemade candy corn! In my opinion this candy tastes much better than the packaged kind. It lacks that “honey” flavor and artificial after taste. I’m not an expert in candy making but I’d imagine you could add a little honey to the corn syrup mixture if you want that taste? Maybe?

After attempt one I decided to do a little more research and found a post on The Kitchn that went into the chemistry of candy making and how to know what went wrong. (In my case, I over cooked the sugar/syrup mix.) The ingredient list was the same (but halved) so I was content to give it another go. Attempt two involved sifting the powdered sugar mixture – I do not recommend skipping this step as it mixed into the syrup mixture much easier. Attempt two also went off of sugar temperature and not time. I think that’s the real key to candy making – if you don’t have a candy thermometer, I wouldn’t recommend attempting this recipe. Another difference was spreading the candy mixture out onto a baking sheet to cool – doing this ensured even cooling of the candy and easy division into three batches.

To be a little “different” I decided to make purple and green candy corn instead of the classic orange and yellow. I just love the addition of
purple and green to the classic Halloween colors – it feels more “wicked.” But honestly, you could do any color combination you want – perfect for tailgates, birthdays, and other holidays.

IMG_6566I only made 3/4 of the batch of candy corn, sacrificing the remaining quarter to the little boy who climbed up into my lap while I was cutting my triangles. Even still, I managed to fill three 4.25 oz jars with homemade candy corn. (I knew I saved those baby food jars for something!)

Homemade Candy Corn

Ingredients:

  • 1 C powdered sugar
  • 2 tbsp + 1 1/2 tsp powdered milk
  • 1/8 tsp kosher salt
  • 2 tbsp unsalted butter
  • 1/3 C corn syrup
  • 1/2 C sugar
  • 1 1/2 tsp vanilla extract
  • food coloring

Steps:

  1. Sift together powdered sugar, powdered milk, and salt. Set aside.
  2. Place butter, corn syrup, and sugar in a medium sauce pan. Cook over medium heat until butter has melted, stirring gently a couple of times. Bring the mixture to a boil and cook, without stirring, until a candy thermometer measures 245 – 250 degrees F. Remove from heat and mix in the vanilla extract.
  3. Working quickly, mix the powdered sugar mixture into the syrup mixture (I found this easy to do in batches) until smooth and fully incorporated.
  4. Spread mixture onto a lightly greased baking sheet (or use a silipat mat if you have one). Allow mixture to cool enough to handle, about 10 minutes. Do not wait too long or the candy will become too hard to deal with, if this happens microwave the candy for 5 seconds to soften, if that doesn’t work you may need to start over. Note: For “trouble-shooting” please see the original recipe linked below.
  5. Cut the candy into thirds and knead desired food coloring into each batch. Like you would with Play-doh, create ropes from the candy. To make it easier to work with I created 4 ropes from each color. Again, microwave the candy as needed to work with easily.
  6. Line one of each color rope next to each other, press together, and flatten with a rolling pin. Cut triangles out of the trio-rope. Repeat until all candy is used up.
  7. Allow candy corn to harden at least one hour. Keep in an airtight container for several weeks – until the candy simply becomes too dry to enjoy.

*This recipe is adapted from Emma at http://www.thekitchn.com/how-to-make-homemade-candy-corn-cooking-lessons-from-the-kitchn-99717*

Homemade Candy Corn | Sew You Think You Can Cook

Homemade “Kit Kat Bars”

Before I get into today’s recipe I feel compelled to explain why I put “Kit Kat Bars” in quotations. It’s for the same reason these don’t get the tag “Copy Cat.” The Kit Kat you buy in the red wrapper does not contain nuts, this homemade version gets its goodness from Nutella. But seriously, have you ever actually smelled Nutella? And have you ever smelled a Kit Kat? Samesies!

There are a lot of “copy cat” Kit Kat recipes out on Pinterest that use a wafer cookie for the filling. This recipe uses Nutella and crushed corn flakes to get that wafer effect and it’s delicious! We could just eat that filling and forget about the chocolate. I would suggest using whatever chocolate quality you prefer, I used bittersweet chocolate.

Stuart pointed out that this recipe would work much better as truffles, forming that filling into balls and then dipping into the chocolate as my chocolate to filling ratio was way off. (User error though – I’m sure the recipe is fine.) Another option would be to make half the chocolate and spread that out, let it set, then make the filling, and top it off with the rest of the chocolate for a more traditional “sandwiched” Kit Kat Bar.

Much like the Reese’s Cups from yesterday, these melt so are best kept in the fridge. And they actually taste better the next day(s)! My husband has banned me from making them again, because you open the fridge, you see a tray of Kit Kat Bars staring at you, so naturally you have to take one. Happy Halloween, right?

Homemade “Kit Kat Bars”

Ingredients:

  • 1 oz semi-sweet chocolate chips (a scant 1/4 C)
  • 1 tbsp butter
  • 3/4 C Nutella
  • 2 C crushed corn flakes (3-4 C whole)
  • 12 oz bittersweet chocolate, broken
  • 1 3/4 C heavy cream

Steps:

  1. Melt chocolate chips and 1 tbsp butter over a double boiler. Remove from heat and mix in the Nutella. Allow the mixture to cool slightly before stirring in the corn flakes. Spread mixture onto a 9×13″ baking sheet. Set in the fridge.
  2. Melt chocolate into heavy cream over a double boiler. Pour over Kit Kat Bar filling. Set in fridge until firm. Cut into bars.

*This recipe is adapted from Balaboosta by Einat Admony*

Homemade Kit Kat Bars | Sew You Think You Can Cook

Disclaimer: This post contains affiliate links.

Copy Cat: Reese’s Cups

I can’t have a candy week without including the most popular piece of candy – Reese’s.

That chocolate and peanut butter combination has become a winning recipe in everything from cakes to ice cream.

Reese’s has been one of those candies I thought would be easiest to make as there isn’t any boiling of sugar involved. I couldn’t have been more right! Although slightly tedious, this was a chocolate product I managed to do without supervision.

I had enough chocolate to make 24 Reese’s cups – thank heavens for the invention of the spatula because I scraped that bowl clean to cover that final piece of candy. I had enough peanut butter to make probably 10-15 more chocolate peanut butter cups. (I saved that peanut butter filling for mixing into brownie batter – because, why not!?)

I was quite nervous that despite spraying them I wouldn’t be able to pull the candies out of the cupcake liners. I had nothing to fear and these tasted just like the real thing- maybe better!

Without the added chemistry type ingredients, these babies melt fairly quickly, so I suggest storing them in the fridge.

Copy Cat: Reese’s Cups

Ingredients:

  • 1 bag (11.5 oz) milk chocolate chips (you could use dark or white chocolate if you prefer)
  • 1 jar (10 oz) creamy peanut butter
  • 3/4 C + 2 tbsp powdered sugar
  • 2-3 tbsp melted butter

Steps:

  1. Line a mini muffin tray with mini cupcake liners. Lightly spray with cooking spray.
  2. Melt chocolate over a double boiler.
  3. Spoon chocolate into liners and spread it up the sides. Place tray in the fridge for 10 minutes.
  4. In a large bowl mix peanut butter, powdered sugar, and butter with a hand mixer until smooth. Place in a piping bag. Pipe peanut butter mixture into chocolate lined cups. Flatten with spoon or finger.
  5. Top peanut butter filled cups with remaining melted chocolate.
  6. Chill at least 1 hour.

*This recipe is adapted from Jillee at http://www.onegoodthingbyjillee.com/2012/04/homemade-reeses-peanut-butter-cups.html

Copy Cat: Reese's Cups | Sew You Think You Can Cook

Copy Cat: Snickers

It’s Halloween week and that means I’ve got a theme. My very first Halloween blogging I did a week of Candy Corn inspired recipes and posts, including a pillow cover and pizza. The following year ghosts hit the scene so pancakes and cookies were created in adorable ghostly shapes.

I toyed with the idea of mummies, Frankenstein’s monster, or pumpkins this year but the opportunity to make candy couldn’t be surpassed. It was time to face my chocolate and sugar fears and try making trick-or-treat favorites at home. For the these 4 days I’ll be sharing some sweet treats all made from scratch!

To kick off “candy week” I am sharing a Copy Cat recipe for Snickers! And it was much easier than I ever thought it would be. I was definitely doing a happy dance after taking my first bite of homemade candy bar. It actually tastes like the real thing! I was nervous that the amount of chocolate looked too thin, but the ratios of chocolate to nougat and caramel is perfect!

This recipe makes a 9×13″ pan of layered goodness. That’s a cake’s worth of candy bars people! I hope you have friends to share these with. Throughout my weeks of candy making I’ve realized that homemade chocolate candy bars melt/soften fairly quickly and are best kept in the fridge. Keep that in mind if you plan on gifting some homemade candy – don’t leave it on someone’s doorstep… unless there’s a lot of snow and cold to keep the candy from turning into a delicious mess.

Copy Cat: Snickers

Ingredients:

  • 2 1/2 C milk chocolate chips, divided use
  • 3/4 C creamy peanut butter, divided use
  • 1/2 stick butter
  • 1 C sugar
  • 1/4 C evaporated milk
  • 1 container (13 oz) marshmallow creme
  • 1 tsp vanilla extract
  • 1 1/2 C roughly chopped salted peanuts
  • 14 oz caramel squares, unwrapped
  • 1/4 C heavy cream

Steps:

  1. Line a 9×13″ cake pan with foil. Spray with non-stick cooking spray.
  2. In a microwave safe bowl, combine 1 1/4 C chocolate chips and 1/4 C peanut butter. Microwave 50-60 seconds, stirring every 20 seconds, or until completely melted and smooth. Evenly spread mixture into prepared cake pan. Place in fridge.
  3. In a large saucepan over medium heat melt butter. Add the sugar and evaporated milk. Stir and bring to a gentle boil. Cook 4-5 minutes, stirring occasionally to prevent the mixture from burning. Add in the marshmallow creme, 1/4 C peanut butter, and the vanilla extract. Stir until smooth. Remove from heat and fold in the chopped peanuts. Evenly spread the nougat over the chocolate layer. Return to fridge.
  4. In a microwave safe bowl, combine caramels and heavy cream. Microwave 2 minutes, stirring every 30 seconds, or until completely melted and smooth. Evenly spread caramel over the nougat layer. Return to fridge.
  5. In a microwave safe bowl, combine 1 1/4 C chocolate chips and 1/4 C peanut butter. Microwave 50-60 seconds, stirring every 20 seconds, or until completely melted and smooth. Evenly spread mixture over the caramel layer.
  6. Return to fridge and chill until completely set. Cut into bars.

*This recipe is adapted from Alyssa at http://therecipecritic.com/2013/11/homemade-snickers-bars/*

Copy Cat Snickers | Sew You Think You Can Cook

Red Hot Popcorn

My favorite snack hands down has to be popcorn. I’ve had my eyes set on making this red hot popcorn for quite some time and when we were invited to a hot cocoa party I knew this was exactly what I’d be bringing with me.

If you send treats to school with your kids for Valentine’s Day this popcorn would be a fun and different snack to break up all the chocolate and sweathearts candies.

While the beautiful color of this popcorn lends itself perfectly for Valentine’s Day enjoyment this sweet and spicy snack can be enjoyed all year round. Particularly if you like those red hot cinnamon candies!

Red Hot Popcorn

Ingredients:

  • canola oil, enough to coat bottom of pot
  • 1/2 C popcorn kernels
  • 1/2 stick butter
  • 1/2 C sugar
  • 1/8 C corn syrup
  • 3 oz red hot candies

Steps:

  1. Preheat oven to 300 degrees F.
  2. Put canola oil in pot over medium high heat along with 2-3 kernels of popcorn. Cover and stand by. Once you hear the kernels pop, add the 1/2 C of popcorn. Cover and cook over medium heat until popping slows. Gently shake the pot during the popping process so as not to burn the popcorn at the bottom. Remove from heat and remain covered until popping has ceased, unless you want to be pelted with popcorn. (If you have another method of popping popcorn, feel free to use it.) Place popcorn in a large bowl.
  3. In a saucepan over medium high heat melt together butter, sugar, corn syrup, and red hots. Carefully pour over popped popcorn and toss evenly.
  4. Spread popcorn out onto large baking sheets. Bake 20-30 minutes, tossing every 10 minutes. Allow popcorn to cool before serving.
  5. Popcorn will keep in an air tight container for 3-4 days.

*This recipe is adapted from Jaime at http://momstestkitchen.com/2014/02/red-hot-candied-popcorn.html*

Red Hot Popcorn | Sew You Think You Can Cook

You might also like: Red Velvet Puppy Chow

Bacon Wrapped Dates

It’s the time of year for cocktail parties. Saying goodbye to 2013 and hello to 2014.

Bacon-wrapped anything is always a safe appetizer to take with you to your New Year’s parties. And bacon wrapped dates are your best bet. The dates caramelize in the oven and turn into candy. The bacon crisps up. What you are left with is essentially a chewy centered candy.

I have a big lesson learned to tag along with this recipe. Bake your bacon wrapped anything on a cookie sheet with a rim! Why? Bacon releases fat/grease. This grease is not solid. This grease will most likely drip off of a flat cookie sheet. In a 450 degree oven this grease will catch fire. Now what?! Turn off the oven. According to dummies.com keep the oven door closed and the lack of oxygen will cause the fire to die. But if want to save your bacon wrapped anything quickly and carefully remove them from the oven and throw either baking soda or salt on the flame. DO NOT USE FLOUR. Apparently, flour will cause an explosion!

Bacon Wrapped Dates

Ingredients:

  • dried dates
  • bacon

Steps:

  1. Soak toothpicks in water, to prevent them from catching fire. Preheat oven to 450 deg.
  2. Cut bacon in half. On a plate, microwave bacon for 2 minutes (covered with a paper towel).
  3. Wrap each date with bacon and skewer with a toothpick.
  4. Bake 15-20 minutes, or until bacon is cooked and crispy.

*This recipe is adapted from Beau at http://oursavorylife.com/a-delicious-paleo-snack-recipe-bacon-wrapped-dates/*

Bacon Wrapped Dates

Copy Cat: Almond Joy

After this month’s Crazy Ingredient Challenge, I had a lot of coconut in my house that needed to go! I decided to make Stuart’s favorite candy – Almond Joys. I thought it could be fun for him to take to the office, but this recipe didn’t make as many candy bars as I thought it would! I didn’t have enough coconut to make two batches either.

I ran into another small problem – apparently I’m a little challenged when it comes to dipping the bars into melted chocolate. They were not pretty. And definitely not food photography worthy. I am very pleased with the beautiful bars I did create by simply drizzling the chocolate over top the candy.

Copy Cat: Almond Joy

Ingredients:

  • half of 14oz can sweetened condensed milk (7oz)
  • 2 C powdered sugar
  • 1 tsp vanilla extract
  • pinch of kosher salt
  • 2 1/2 C sweetened shredded coconut
  • whole salted almonds
  • 1 lb chocolate, melted

Steps:

  1. Stir together condensed milk and sugar until smooth – I found this to be best done by adding in the sugar in installments.
  2. Mix in vanilla and salt.
  3. Add in coconut – do this in one batch.
  4. Spread coconut onto a greased foil lined tray. Press into desired candy bar thickness. Gently score the coconut, outlining rectangles, with a knife and place two almonds onto each bar, if desired. Place in refrigerator for at least an hour.
  5. Cut candy bars along your previously suggested lines. Coat candy bars in melted chocolate. (Or give up on that and drizzle them like I did!)

*This recipe is adapted from Elizabeth at http://www.ohnuts.com/blog/almond-coconut-candy-bars-recipe/*

Image

recreatedbysrc