Lemon Ricotta Pasta with Sausage

Up until I discovered this pasta recipe, I never knew what to do with leftover ricotta cheese. I actually wasn’t quite sure if I even cared for ricotta outside of ravioli filling and lasagna layers. This quick recipe has changed how I feel about ricotta! I will be more open to other uses of ricotta. I now never worry about if the container I bought is too big because if I can’t find something else to do with it, I can make this pasta. Something I have done four times already (once without the meat, too!)

IMG_2976I chose to use veggie fusilli pasta in an effort to “sneak” veggies into my son’s mouth. (I know it doesn’t yield the best photographs.) He has loved this pasta each and every time. He now doesn’t discriminate against certain colored pasta, but the first time we enjoyed this dish he picked his way around the green spinach noodles. I also added Italian sausage as I knew my husband wouldn’t consider this a real meal. Feel free to omit the sausage (increase the garlic to 1 tbsp and saute very quickly in the oil. Add the entire garlicky oil mix to the ricotta sauce) if you prefer and make this a great side dish.
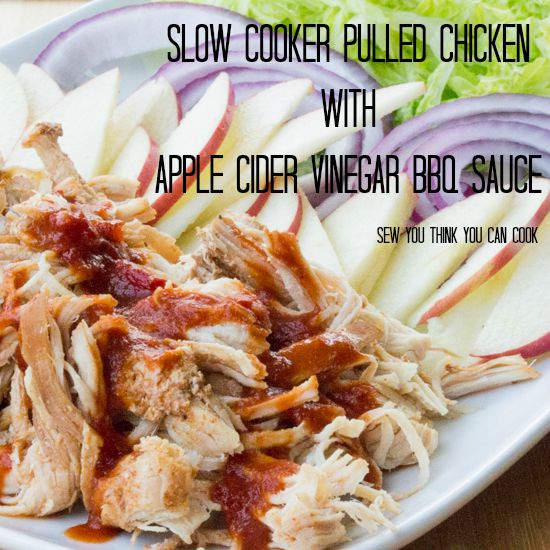
Lemon Ricotta Pasta with Sausage

Ingredients:

  • 1 tbsp olive oil
  • 2 links Italian sausage, casings removed
  • 1 tsp minced garlic
  • 1 lb fusilli pasta
  • 1 C ricotta cheese
  • 1 C heavy cream
  • zest of 2 lemons
  • juice of 1 lemon

Steps:

  1. Bring a large pot of salted water to a boil and cook pasta according to package directions. Drain and keep warm.
  2. In a small skillet, brown the sausage over medium-high heat, breaking it up as it cooks. When the sausage is almost cooked through, add the garlic and saute another minute or two. Remove from heat and set aside, draining any extra fat if needed.
  3. In a bowl whisk together ricotta, cream, lemon zest, lemon juice, and season to taste with S+P.
  4. In a large bowl toss together pasta, sausage, and ricotta sauce.

*This recipe is adapted from Cooking from the Farmers’ Market*

Lemon Ricotta Pasta with Sausage | Sew You Think You Can Cook

Disclaimer: This post contains affiliate links.

#BundtBakers: Sprinkles

4ae7b-bundtbakerspostThis month #BundtBakers are baking cakes with sprinkles! #BundtBakers is a group of bundt loving bakers who get together once a month to bake bundts with a common ingredient or theme. We take turns hosting each month and choosing the theme or ingredient. This month fun host is Terri of Love and Confections.

Surprisingly, I was stumped by the task. As much as I love Funfetti cake (I used to request it for my birthday in college) I thought, “There has to be something else I could do!” So I reached out to Kate and she provided me with this recipe for Pistachio Cake. Sprinkles BundtTo fit our sprinkles theme I used green sprinkles instead of food coloring. The cake is already a light green thanks to the pistachio pudding so my green sprinkles melted into the cake creating an almost zebra like pattern! I did take a photo of the sprinkles in the batter as proof that I did indeed use sprinkles in my cake! (Photographic evidence to the right.)

This August marks the first in 5 years that Kate and I aren’t making a birthday cake together. (Cue the tears.) Her birthday was last Thursday and mine is in 9 days. If we can’t be together I might as well use her mom’s recipe! And the real reason we (aka I agreed to Kate’s suggestion) chose this pistachio cake is because the birthstone for August is Peridot – a light, bright green. A perfect fit for our August Bundt.

Pistachio Sprinkle Bundt Cake

Ingredients:

  • 1 box yellow cake mix
  • 1 box pistachio instant pudding
  • 4 eggs, beaten
  • 1 1/4 C water
  • 1/4 C vegetable oil
  • 1 tsp almond extract, divided use
  • 3/16 C sprinkles, plus more for decoration (optional)
  • 1 1/4 – 1/2 C powdered sugar
  • 3 tbsp milk

Steps:

  1. Preheat oven to 350 degrees F. Grease a bundt pan.
  2. In a large bowl whisk together cake mix and instant pudding. Add the eggs, water, oil, and 1/2 tsp almond extract until combined. Gently fold in the sprinkles, if using. Pour batter into prepared bundt pan.
  3. Bake 37-40 minutes until a cake tester comes out cleanly. Allow cake to cool in pan at least 30 minutes before turning out onto a cooling rack.
  4. Make the glaze: whisk together 1 1/4 C powdered sugar, 3 tbsp milk, and 1/2 tsp almond (or vanilla) extract. Add more powdered sugar if a thicker glaze is desired. Pour over completely cooled cake.
  5. Decorate with sprinkles!

Pistachio Sprinkle Bundt Cake for #BundtBakers from Sew You Think You Can Cook

You can see all our of lovely Bundts by following our Pinterest board. Updated links for all of our past events and more information about #BundtBakers, can be found on our home page.

And don’t forget to take a peek at what other talented bakers have baked this month:

Black Onyx Bundt Cake from Living the Gourmet

Bourbon Walnut Pound Cake from Magnolia Days

Bubblegum Frosted Funfetti Vanilla Bean Bundt from Baking in Pyjamas

Bundt Cake Extra Chocolateado from la mejor manera de hacer…

Celebration Confetti Bundt Cake from Cali’s Cuisine

Chocolate Chip Cheese Cake from Tea and Scones

Chocolate Sprinkles Sour Cream Bundt Cake from Spice Roots

Chocolate Walnut Cake with Sprinkles from FoodJam

Confetti Bundt Cake with Whipped Chocolate Ganache Frosting from How to Philosophize with Cake

Crazy Coco Bundt Cake from Los Chatos Chefs

Eggless Vanilla Confetti Bundt Cake from SimplyVeggies

Funfetti Bundt Cake from Liv for Cake

Funfetti Bundt Cake from Recipes, Food & Cooking

‘Guild the Lily’ Bundt from Jane’s Adventures in Dinner

Irish Butter Chocolate Sprinkle Cake with Ganache from Faith, Hope, Love, & Luck Survive Despite a Whiskered Accomplice

Jammin’ Jimmies Bundt from Noshing With The Nolands

Nutella Bundt with Nutella Glaze from Food Lust People Love

Oatmeal Cookie Bundt Cake with Sprinkles from The Spiced Life

Orange Dreamscicle Confetti Cake from Our Good Life

Raspberry Ricotta Bundt Cake from Brunch With Joy

Red Velvet Sprinkle Explosion Bundt Cake from Love and Confections

Sprinkled Jelly Donut Bundt Cake from Making Miracles

Sprinkles of Love Cake from A Day in the Life on the Farm

Strawberry Sprinkled Bundt Cake from The Freshman Cook

Triple Chocolate Zucchini Cake with Sprinkles from Baking and Creating with Avril

Vanilla Bundt Cake with Sprinkles from I Love Bundt Cakes

Vanilla Mini Bundts from Passion Kneaded

Watermelon Bundt Cake from Eat, Drink and Be Mighty

CIC: Cashews and Coffee

CIC-header

I can’t believe I am actually posting with the Crazy Ingredient Challenge today! I loved seeing the winning flavor combination of Cashews and Coffee but simply kept forgetting about actually making my dish.

I immediately though of a play on a frappuccino, because you hear coffee you think Starbucks (or at least I do since my best friend is a store manager). I really wasn’t sure how to make that happen and simply pushed it out of my mind. But then I saw a commercial for cashew milk last week and this month’s challenge came screaming back to me. To be that guy in the almond milk commercials, “I don’t know what it tastes like so I don’t want to try it.” It’s not that I don’t want to try it, it’s that I don’t want to be stuck with a half gallon of cashew milk if I don’t like it!

Back to the drawing board and I thought of brownies. I know a lot of people add instant espresso to their chocolate desserts to intensify that chocolate flavor. And I only have a measly two recipes for brownies on this site. It’s a dessert I tend to forget about, but absolutely adore when I have them. These rich, fudgy brownies are studded with salty cashews for a perfect late night craving buster.

Fudgey Cashew Brownies

Ingredients:

  • 7 tbsp butter
  • 8 oz semisweet chocolate chips
  • 1 tsp instant espresso coffee
  • 1/4 tsp salt
  • 3/4 C sugar
  • 1/4 C brown sugar
  • 2 eggs
  • 1 1/2 tsp vanilla extract
  • 1/2 C flour
  • 1/2 C chopped cashews

Steps:

  1. Preheat oven to 350 degrees F. Line an 8×8 (or 9×9) pan with foil and spray with cooking spray.
  2. Place butter, chocolate, espresso powder, and salt in a large glass bowl over a double boiler. Warm over low heat until butter and chocolate are melted together. Remove from double boiler (and heat).
  3. Mix in the sugars until combined. Mix in the eggs and vanilla until smooth. Stir in the flour until there aren’t any lumps. Fold in the cashews.
  4. Pour batter into prepared baking pan. Bake 22-25 minutes, until the brownies are set. Place pan on a cooling rack. Let brownies cool before cutting.

*This recipe is adapted from Yvonne at http://www.seriouseats.com/recipes/2013/10/one-bowl-espresso-cashew-brownies-recipe.html*

Fudgey Cashew Brownies for Crazy Ingredient Challenge from Sew You Think You Can Cook

To see the other bloggers who participated in this month’s Crazy Ingredient Challenge click on the link below.

Dominican Beet Potato Salad

Remember that beet potato salad I said I made with the beets from the Farmer’s Market? Well, today’s the day I finally share the recipe!

It’s National Potato Day!

This potato salad recipe comes from one of my dad’s aunts. It’s one of those family recipes that doesn’t actually have measurements – and the ingredient values I did have were huge! I went with the flow and did my best at recreating this Dominican side dish. I used Yukon gold potatoes instead of Russet because that’s what I had, and instead of canned beets I used a fresh one from the Farmer’s Market. I will say, I added way too much onion so I’ve adjusted for that in the ingredients, I would still suggest adding it sparingly and to taste. There was a note on the “recipe” to gently mash the salad after it’s all mixed so that there’s a creamy texture but still with chunks of potato. Because I didn’t peel the potatoes this didn’t quite work, but I enjoyed it without the extra “mash” texture.

I don’t remember caring for these potatoes when I was a kid – but I definitely remember them! How does one forget pink potatoes!? My little man though greatly enjoyed it. Check out this video I posted to Instagram of him humming while he ate. 🙂

Tia’s Beet Potato Salad

Ingredients:

  • 1 small beet
  • 5 Yukon gold potatoes
  • 1 hard boiled egg, diced
  • 1/4 C mayonnaise
  • 2 tsp extra virgin olive oil
  • 1 1/2 tsp apple cider vinegar
  • 2 tsp grated onion (or less, to taste)

Steps:

  1. Peel beet and cut into quarters. Place in a small saucepan and cover with water, salt. Bring to a gentle boil and cook until tender, about 10 minutes. Drain and let cool. Finely dice the beets.
  2. Cut potatoes into quarters. Place in a saucepan and cover with water, salt. Bring to a gentle boil and cook until tender, about 5 minutes. Drain and let cool. Cut potatoes into bite sized chunks – remove skins if desired.
  3. In a large bowl whisk together mayo, olive oil, and vinegar. Add potatoes and hard boiled egg. Season to taste with S+P.
  4. Grate the onion over the bowl so as to collect the juices. Add the beets and mix until pink. Season to taste again with S+P. Note: If the onion taste is too strong, add more mayo.

Dominican Beet Potato Salad | Sew You Think You Can Cook

#WeekdaySupper: Make Ahead Meals

Today is a very special Mexican Monday because today I’m posting for a Make Ahead Meal themed #WeekdaySupper week. #WeekdaySupper is a great movement by the #SundaySupper crew. Easy weeknight meals that can be done in under 30 minutes, without crazy, hard-to-find ingredients. This initiative is one we can all get behind. It’s important to gather around the table during the week, too!

I took the “make ahead” criteria to the extreme. For the cooked chicken used in this recipe, the day before I put a whole chicken in my slow cooker with a little bit of chicken broth, salt, pepper, and placed a little butter on top. After 6 hours or so on low I very easily shredded the most tender chicken. (My husband was picking stray pieces of meat from among the bones and skin remaining in the slow cooker before helping me clean up!)

Most of that shredded chicken will join forces with melted cream cheese, green chiles, pepperjack cheese, and spices for an incredible taquito filling that would be just as good scooped up with tortilla chips for a game day snack.

Freezer Friendly Taquitos

Ingredients:

  • 8 oz cream cheese
  • 1 1/2 tsp chili powder
  • 1 tsp onion powder
  • 3/4 tsp cumin
  • 1/4 tsp garlic powder
  • 4 tbsp fresh cilantro, chopped (I used Gourmet Garden lightly dried cilantro)
  • 2 tbsp lime juice
  • 1 can (4 oz) chopped green chiles
  • 3 C cooked, shredded chicken
  • 1 1/2 C shredded pepperjack cheese
  • approximately 20 small flour tortillas

Steps:

  1. In a small saucepan over medium heat melt cream cheese. Remove from heat and add the remaining ingredients (except the tortillas).
  2. Place cream cheese mixture down the center of each tortilla, roll and place seam side down on a parchment lined baking sheet.
  3. To bake: Spray lightly with cooking spray and cook 15 minutes at 425 degrees F. To freeze: Place baking sheet in the freezer. When frozen place in a labeled zip-top freezer bag. To bake, place on a parchment lined baking sheet and spray with cooking spray, cook 15-20 minutes at 425 degrees F until crispy and filling is melty.
  4. Serve with salsa, guacamole, or sour cream, if desired.

*This recipe is adapted from Karrie at http://happymoneysaver.com/freezer-chicken-taquitos-with-cream-cheese/*

Freezer Friendly Taquitos for #WeekdaySupper from Sew You Think You Can Cook

Check out these other great make ahead meals that will be posted this week

Sunday Supper MovementTuesday – One Pot Chili Mac and Cheese by Serena Bakes Simply From Scratch
WednesdayIsland Teriyaki Chicken Packets by Palatable Pastime
ThursdayTaco Bar by eating in instead
FridayEasy Slow Cooker BBQ Pork with Homemade Sauce by Caroline’s Cooking

#SundaySupper: Back to School

Most schools are starting this coming week and some have even already been in class for a week or more! If you’re part of the lucky ones who wait until Labor Day to start the school year, enjoy the rest of your summer.

Today’s Sunday Sunday Supper menu will help you get ready for the school year, with plenty of ideas to get breakfast or dinner on the table quickly, lunches to make your kids happy, and snacks to keep you going. A big thank you to DB of Crazy Foodie Stunts and Caroline of Caroline’s Cooking for hosting this event and helping us stay organized this school year!

When I think “Back to School” I think of Peanut Butter and Jelly sandwiches. I don’t exactly need to give you a recipe for PB&J – unless it’s my grilled one! Instead I decided to make muffins! These PB&J muffins are a perfect busy weekday breakfast or after school snack.

PB&J Muffins

Ingredients:

  • 2 C flour
  • 1/2 C sugar
  • 1 tsp baking powder
  • 1 tsp baking soda
  • 1/2 tsp salt
  • 1/2 C creamy peanut butter
  • 1 C buttermilk
  • 1 tsp vanilla extract
  • 3 tbsp canola oil
  • 2 eggs
  • 1 C jam (I use all fruit grape spread)

Steps:

  1. Preheat oven to 400 degrees F. Line muffin tins with liners (makes 18-20).
  2.  In a large bowl whisk together flour, sugar, baking powder, baking soda, and salt.
  3. In another bowl stir peanut butter and buttermilk together until smooth. Add in the vanilla, oil, and eggs.
  4. Add peanut butter mixture to dry ingredients and stir until combined – it’s thick! Fold in the jam.
  5. Fill prepared muffin tins. Bake 15 – 17 minutes, until a toothpick inserted comes out cleanly.

*This recipe is adapted from Renee at http://www.reneeskitchenadventures.com/2014/05/peanut-butter-and-jelly-muffins.html*

PB&J Muffins for #SundaySupper from Sew You Think You Can Cook

Getting Started On School Days

Ideas for the Lunchbox

After School Snacks and Beverages

School Night Suppers

Sweets to End the Day

8387592742_f6164fd5a8_oJoin the #SundaySupper conversation on twitter on Sunday! We tweet throughout the day and share recipes from all over the world. Our weekly chat starts at 7:00 pm ET. Follow the#SundaySupper hashtag and remember to include it in your tweets to join in the chat. To get more great Sunday Supper Recipes, visit our website or check out our Pinterest board.

Would you like to join the Sunday Supper Movement? It’s easy. You can sign up by clicking here: Sunday Supper Movement.

Slow Cooker Pulled Chicken with Apple Cider Vinegar BBQ Sauce

As summer vacations are winding to a close there’s some denial in the “back to the grind” busy schedules. That doesn’t mean you need to give up on perfect summer fare just yet!

Pulled meat (typically pork) sandwiches slathered with barbecue sauce are one of those meals that have you thinking of picnic tables and summer get togethers.

I have adjusted an Anne Burrell recipe from the January/February 2014 edition of Food Network Magazine (Anne Burrell’s Pulled Pork Sliders) to utilize the slow cooker, meaning you don’t need to turn on the oven or be stranded at home while it roasts away. You could even make the BBQ sauce in advance if you didn’t wan, or have the time, to be at the stove 30 minutes before dinner. I used chicken instead of pork because that’s what I already had in my freezer, if you want pork she used a 3 lb Boston butt pork roast.

Slow Cooker Pulled Chicken

Ingredients:

  • 4 large boneless, skinless chicken breasts
  • 1 1/2 tbsp paprika
  • 1 tbsp garlic powder
  • 1 1/2 tsp dark brown sugar
  • 1 1/2 tsp mustard powder
  • 1 tsp cayenne
  • 1 bottle (12 oz) beer (I used a summer ale)

Steps:

  1. Season chicken with S+P. Place in the bottom of a slow cooker.
  2. In a small bowl combine paprika, garlic powder, brown sugar, mustard powder, and cayenne. Sprinkle over the chicken.
  3. Pour beer into the slow cooker. Cook on LOW 5-7 hours until the chicken shreds easily.
  4. Serve as a sandwich, wrap or salad with thinly sliced apple, red onion, lettuce, and apple cider vinegar bbq sauce (recipe below).

Apple Cider Vinegar BBQ Sauce

Ingredients:

  • 1 1/2 C apple cider vinegar
  • 1 clove garlic, smashed (I used 1 tsp Gourmet Garden garlic paste)
  • 1 Fresno chili pepper, deseeded and halved (I used 1 tbsp Gourmet Garden lightly dried chili pepper)
  • 2 tbsp dark brown sugar
  • 2 tbsp tomato paste
  • 1 tbsp Dijon mustard

Steps:

  1. Place all ingredients in a saucepan. Bring to a boil over medium high heat then reduce to a simmer. Cook 20 – 30 minutes, or until a desired consistency is achieved. Remove the garlic and chili pepper, if used.

Slow Cooker Pulled Chicken with Apple Cider Vinegar BBQ Sauce | Sew You Think You Can Cook

recreatedbysrc

Blogger CLUE: Homemade Gingerale

blogger CLUE

Come August most people (although I’m not one of them) are ready for fall to arrive and bring cooler weather. To help cope with the late summer sun Blogger Clue is on a mission to bring you recipes to “Beat the Heat!”

This month I was assigned the blog Taking on Magazines written by Christiane aka “The Mom Chef.” I absolutely love the concept behind her blog! Like most of us, we make a recipe and mentally (or if we’re on top of it, physically) make a note as to what we liked and didn’t like in case we made the recipe again. (I have post-it notes in my cookbooks with our reviews and comments.) Christiane took this idea and created a beautiful blog from it. She cooks recipes from magazines, displays the recipe as is, gives a detail on the process, then gives her opinions on what she’d do differently the next time, and finally indicates “the verdict.” Brilliant! Definitely one of those “why didn’t I think of that?!” moments.

Given our task to “beat the heat” I limited myself to searching through beverages and salads, although she does have a wonderful selection for ice creams too! (There are a fair amount of sweets being handled in my kitchen right now so I stayed away.) The Grapefruit-Mint Salad sounded like a contender as did the Citrus Dressing and while the Arnold Palmer Slushie was definitely tempting, I couldn’t get my mind off of her Homemade Gingerale!

I noticed as I unloaded my groceries that I accidentally bought orange flavored seltzer water. I decided to run with it and use a little fresh squeezed orange juice in the syrup! Honestly, I couldn’t tell; the gingerale syrup is spot on.

Christiane noted that the original ratio of syrup to setzer was too syrupy for her taste and I thought I’d agree. I found the perfect formula (at least for me) to be 3 tbsp of syrup to 1 1/2 C of seltzer.

Also, I probably broke about fifty parenting rules (please read this as if I were Hermione about to make Polyjuice Potion) and let my 1 year old try a sip. To say he liked it was an understatement!

Homemade Gingerale

Ingredients:

  • 1 4-5″ piece fresh ginger root, peeled and chopped
  • 2 C sugar
  • juice 1 lime
  • juice 1 orange
  • seltzer water

Steps:

  1. Place ginger and sugar in a food processor and pulse until the ginger is finely ground.
  2. Place ginger sugar in a saucepan with 2 C water. Bring to a boil, stirring often. Reduce the heat and simmer 30-40 minutes until syrupy. Remove from heat, cover, and let cool 20 minutes. Strain and place in a jar. Syrup can be kept in the fridge for 2 weeks.
  3. To serve: Put 3 tbsp of syrup in a large glass with ice and 1 1/2 C seltzer.

*This recipe is adapted from Christiane at http://www.takingonmagazines.com/homemade-ginger-ale-from-all-you-magazine/*

Homemade Gingerale for Blogger CLUE from Sew You Think You Can Cook

Here’s a list of the other players of Blogger CLUE this month:

Chipotle Lime Shrimp with Strawberry Salsa

They say you eat with your eyes first.

That must be true because viewing the stunning food photography by Jessica of How Sweet it is caused me to try this intriguing flavor combination: chipotle, strawberry, and black beans.

I admit, I added the black beans – the addition that really had my husband scratching his head. Instead of eating this Mexican Monday meal as tacos, we had tostadas. And tostadas call for refried beans to act as the “glue” that holds the meat and toppings in place. I didn’t think traditional refried beans would really be the way to go with shrimp so I opted for refried black beans. I’m very relieved to inform you that it worked!

I cut some serious heat from the original recipe and I still found it to pack on the spice. Because I freeze my chipotle in adobo in ice cube trays I never know until the cube thaws if I have just sauce, just pepper, or a combination of both. Jessica’s recipe calls for the sauce to be in the marinade – instead I had a pepper which I cut in half and tossed in the bag. This method is a great alternative if you don’t want too much heat but still want that smokey spice from the chipotle peppers. Additionally, I only used half of one (large) jalapeno instead of two whole jalapenos in the strawberry salsa – by all means, if you like it spicy add as much jalapeno as you like!

Chipotle Lime Shrimp

Ingredients:

  • 1 chipotle pepper in adobo, halved
  • 2 limes (zest and juice)
  • 1 tsp minced garlic
  • 2 tbsp olive oil
  • 1/2 tsp salt
  • 1/2 tsp black pepper
  • 1 lb peeled and deveined shrimp

Steps:

  1. Place all ingredients in a bowl, cover and refrigerate 30 minutes.
  2. Cook shrimp 2 minutes on each side. I did this on a lightly greased grill pan. If you cook the shrimp in a skillet, add 1 tbsp of olive oil.
  3. Serve shrimp with strawberry salsa (recipe below) in a taco with lettuce and cheese or as a tostada with refried black beans and cheese.

Strawberry Salsa

Ingredients:

  • 8 oz fresh strawberries, diced
  • 1/2 red onion, finely diced
  • 1/2 jalapeno, seeded and diced
  • 1/4 C fresh cilantro (I used Gourmet Garden lightly dried cilantro)
  • juice of 1 lime

Steps:

  1. Combine all ingredients and season to taste with salt. Refrigerate until ready to serve.

*These recipes are adapted from Jessica at http://www.howsweeteats.com/2014/04/chipotle-lime-shrimp-tacos-with-strawberry-salsa-you-can-totally-preorder-my-book/*

Chipotle Lime Shrimp with Strawberry Salsa | Sew You Think You Can Cook

Pineapple Beef Lettuce Cups

“Quick! The little man is sleeping! Go write something!”

At least that’s what the little voice in my head is telling me right now.

But it’s not telling me anything else!

Hello, writer’s block, we meet again.

How do you jump the hurdle and share a wonderful story? Help!

At least I have this great recipe to share with you, though. It’s Stir Fry Day Friday, everyone! And today’s edition is getting all dressed up in a bright lettuce cup suit. (I’d actually suggest some added bling by very finely dicing some more fresh pineapple as garnish and an extra drizzle of Sriracha to the lettuce cup!)

This recipe only serves two. In fact, it might be better off as a lunch or even an appetizer. However, you could always serve the stir fry over rice to “beef” it up for dinner.

Pineapple Beef Lettuce Cups

Ingredients:

  • 1 C cubed fresh pineapple
  • 1/4 C soy sauce
  • 1/4 C molasses
  • 2 tbsp apple cider vinegar
  • 1-2 tbsp Sriracha
  • 1 tbsp ketchup
  • 2 tsp minced garlic (I used Gourmet Garden stir-in chunky garlic paste)
  • 1 tsp grated fresh ginger (I used 1 tsp Gourmet Garden stir-in ginger paste)
  • 1 lb stir-fry beef strips
  • 1 tbsp vegetable oil
  • 1 red bell pepper, thinly sliced
  • 1/2 sweet onion, thinly sliced
  • 1 carrot, thinly sliced
  • 8 leaves Bibb lettuce
  • sesame seeds, for garnish

Steps:

  1. Place pineapple, soy sauce, molasses, vinegar, Sriracha, ketchup, garlic, and ginger in a blender. Blend until combined. Pour into a bowl and add the beef. Place in the fridge and marinate for 1-6 hours.
  2. Remove beef from the marinade. Heat the oil in a large, non-stick skillet (or wok) over medium-high heat. Stir-fry the beef for 3-5 minutes; do this in batches if needed so as not to over crowd the pan. Remove from skillet and cover to keep warm.
  3. In the same skillet or wok saute the thinly sliced veggies until tender, season with S+P. Remove and cover to keep warm.
  4. Assemble the wraps by dividing the beef and veggies among each leaf of lettuce. Garnish with sesame seeds and more Sriracha, if desired.

*This recipe is adapted from Liz at http://www.floatingkitchen.net/spicy-pineapple-beef-lettuce-wraps/*

Pineapple Beef Lettuce Cups | Sew You Think You Can Cook

And he’s awake. Until next time!