SRC: Honeyed Lemon Fruit Salad

newsrcbanner

Good morning and welcome to another edition of The Secret Recipe Club. For a little “behind the scenes” information, The Secret Recipe Club (SRC) is divided into three groups. Each group posts on a different Monday of the month. I am in Group C and always post on the 3rd Monday of the month. Which meant that during those special months with five Mondays there’d be two weeks without any fun reveal day! So now, on the 5th Monday of the month there is a themed reveal and it’s a “free for all,” which means that there aren’t any group restrictions. I’m looking forward to getting to know some of the other bloggers in the club.

The end of May unofficially marks the beginning of barbecue season and so today, the Secret Recipe Club is sharing recipes that would be perfect for your upcoming summer picnics and barbecues.

I was assigned the blog An Affair from the Heart written by Michaela. Michaela and I sound like we could be great friends! She describes herself as a “party thrower, gift giver, wish I were craftier, liver & lover of life” kind of gal. It’s that “wish I were craftier” bit that made me smile as I can relate completely. She is a stay-at-home mom to four children and has been married for 25 years this year!

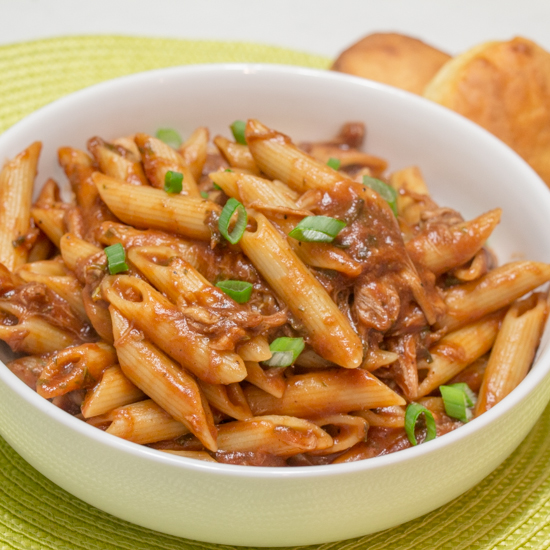
I searched for great side dishes to accompany any summer picnic barbecue or family reunion. I always love a good pasta salad to eat alongside my grilled burger or dog and her Creamy Bacon Ranch Pasta Salad is definitely on my radar. Any family reunion isn’t complete without my Aunt’s 7 Layer Dip and Michaela’s Not Your Average Mexican Layered Bean Dip looks like it could compete (because it’s avocado free, an allergy I developed while pregnant with Firecracker that I won’t try again until I’m done breastfeeding Treat). Ultimately I went with a fruit salad, after being distracted by a Shirley Temple Float, because how could I not be?!

I altered her recipe to use fruits that were available to me and that met my family’s taste preferences. That’s the beauty of fruit salad – make it however you want! Because of my overall volume of fruit, I only ended up using one carton of yogurt instead of two. I didn’t adjust the honey accordingly and my local variety of Eucalyptus honey was quite over powering. I would of course make this fruit salad again (and use a sweeter honey). My husband loved having it as his mid morning snack in his lunches all week. Truth be told, this fruit salad was part of the very first meal we cooked in our new home!

P.S. I know I said in my SRC Reveal Post two weeks ago that I was supposed to get internet that day, well, it didn’t happen and now today’s the day! Theoretically. I’m not holding my breath on it though, that’s for sure. So, once again, I’m sorry to my fellow club members, but I promise I’ll be stopping by all your picnic worthy posts soon!

Honeyed Lemon Fruit Salad

Ingredients:

  • 2 C grapes, halved (I used red)
  • 2 C cubed fresh pineapple
  • 1 ½ C chopped strawberries
  • 2 tangerines, segmented
  • 1 Granny Smith apple, cubed
  • 1 container (6 oz) lemon yogurt
  • ¼ C honey
  • Juice ½ large lemon

Steps:

*This recipe is adapted from Michaela at http://www.anaffairfromtheheart.com/2015/08/honey-lemon-fruit-salad/*

Honeyed Lemon Fruit Salad for Secret Recipe Club from Sew You Think You Can Cook

To see the other bloggers who participated in the themed Secret Recipe Club this month click here:

SRC: Double Chocolate Cookies

newsrcbanner

It’s Secret Recipe Club Reveal Day! In the Secret Recipe Club, each participating blogger is assigned a blog from another participating blogger and secretly searches their site for something to recreate. The accompanying blog post then goes live on reveal day! So while I was immersed in my assigned blog, someone else was picking through mine! I’m so excited to be part of this group, to see what on my blog peaks other’s interests and to stumble upon new blogs and new recipes.

It’s actually a miracle I’m even posting with The Secret Recipe Club today! We moved to California from Ohio last month and I felt quite confident that skipping out of April’s SRC reveal day would be the only break necessary to get through the travel.

I had no problem selecting and making my dish for today’s reveal, but I did have a problem blogging it! We got the keys to our new home April 16th, moved in April 18th, and received delivery of our goods on April 19th. I’m supposed to get internet installed today. Hopefully that happens. It’ll be a while before I get a chance to stop by and check out all of the other SRC posts today, but you can see them via the link at the bottom of my post.

Everything I’ve been doing has been via mobile, except for the rare occurrences when I was able to get away from the boys and sit at a coffee shop with wifi. I actually never left the house, if I had to drive, without my computer so I could at least type up blog posts (this one included) in Word so that when I did get a moment of internet bliss I could quickly and efficiently schedule some posts!

We met a few of our neighbors after moving in and one of them generously and thoughtfully brought over a 6 pack of beers from local breweries that he put together. I knew I’d be searching through my assigned blog, Dessert Before Dinner written by Stephanie, for a thank you treat. The Jalapeno Beer Cheese Bread caught my eye, but it was another SRC post. I knew everyone loves cookies so I decided on her White Chocolate Chunk Chocolate Cookies. I put most of the cookies in a large mason jar and tied it with a bow. It’s a good thing I did, too, because I found these cookies to be insanely addictive. I definitely broke my “only two cookies at a time” rule and even sneaked one for breakfast the following morning.

Double Chocolate Cookies for Secret Recipe Club from Sew You Think You Can Cook (1)

This recipe makes 18-20 cookies.

Double Chocolate Cookies

Ingredients:

  • 1 stick butter, softened
  • 1/3 C sugar
  • 1/3 C brown sugar
  • 1 egg
  • 1 tsp vanilla
  • 1 C flour
  • 1/4 C + 2 tbsp cocoa powder
  • 1/2 tsp baking soda
  • 1/4 tsp salt
  • 3/4 C white chocolate chips

Steps:

  1. Preheat oven to 350 degrees F.
  2. In the bowl of a stand mixer fitted with the paddle attachment, cream together the butter and both sugars until fluffy.
  3. Add the egg and vanilla and mix until combined.
  4. In a bowl, whisk together the flour, cocoa powder, baking soda, and salt. Add to the stand mixer and mix until combined. Fold in the white chocolate chips until evenly distributed in the dough.
  5. Drop spoonfuls of the cookie dough onto two baking sheets. Bake 10-13 minutes. Allow cookies to cool 5 minutes on the pan before removing to a cooling rack.

*This recipe is adapted from Stephanie at http://dessert-before-dinner.blogspot.com/2011/07/white-chocolate-chunk-chocolate-cookies.html*

Double Chocolate Cookies for #SecretRecipeClub from Sew You Think You Can Cook (2)

To see the other bloggers who participated in the Secret Recipe Club this month click here:

Meyer Lemon Olive Oil Shrimp

We’re feeling pretty settled here in California (minus still not having Internet installed – this post comes from my WordPress app on my phone) and we couldn’t be happier with our home’s location. We live across the street from a park that Firecracker loves and the beach! 

We didn’t go to the beach very much when we were living in FL and now that we’ve got the boys we have some serious beach preparations to make before any real trips by the water happen. I want to get a tent so that Treat can stay in the shade and have space to crawl around. 

I can walk most places I need to go and appreciate not getting in the car daily. There are a lot of restaurant options in either direction about a mile away and we’ve enjoyed walking to dinner once a week. 

On one evening outing we found ourselves in a tiny vendors market. We stopped and talked to a man selling specialty balsamic vinegars and olive oils. Stuart took the bait and we tried some flavor combinations. We ended up purchasing a 4 pack including our choices of rosemary olive oil, Meyer lemon olive oil, original balsamic vinegar, and raspberry balsamic vinegar


The Meyer lemon olive oil has gotten a lot of love already. We immediately created a vinaigrette with the Meyer lemon olive oil and raspberry balsamic vinegar to dress a spinach salad with chorizo, glazed walnuts, caramelized onions, and strawberries. 

I also whipped together a chicken cream pasta dish by sautéing sliced chicken in the oil and butter. Then sautéing some mushrooms, onion, and broccoli in the same skillet. A deglaze with chicken stock and a little bit of cream created a very satisfying pasta dinner in next to no time. 

Our desire though was to use it with shrimp and that’s the simple recipe I’m sharing with you today. 

Meyer Lemon Olive Oil Shrimp

Ingredients:

  • 3/4 lb shrimp
  • 1/2 lb asparagus, cut in thirds
  • 4 baby Bella mushrooms, cut in quarters 
  • 1/2 sweet onion, sliced 
  • 1/4 C Meyer lemon olive oil 
  • 2 tbsp butter, cubed

Steps:

  1. Preheat oven to 400 degrees F. Lightly grease a casserole dish.
  2. Arrange shrimp and vegetables in the dish, either organize them or mix them up. 
  3. Top with the olive oil and dot with the butter. 
  4. Bake 20 minutes, or until shrimp is cooked through. 


#MuffinMonday: Apple Carrot Muffins

Muffin Monday

#MuffinMonday is a group of muffin loving bakers who get together once a month to bake muffins to brighten their Mondays. There isn’t a theme to #MuffinMonday posts so anything goes, as long as it’s a muffin!

You can see all our of lovely muffins by following our Pinterest board. Updated links for all of our past events and more information about Muffin Monday can be found on our home page.

My cookbook library received a well deserved expansion this past Christmas and we excitedly started cooking out of them immediately. One of the books I received was a signed copy of Giada’s Happy Cooking. This cookbook is quite different from her previous cookbooks in both feel and format. Looking through the book makes me feel like I’m going through a beautiful magazine instead of a book book. There’s even a very honest introduction written by Giada.

The first thing we made were the black bean brownies. All I can say is these were… different. To be fair, we changed it up and used a can of refried black beans instead of regular black beans. Stuart took the interesting result to work for others to try our experiment. Successful wouldn’t be the term to describe that baking adventure! Maybe we’ll give them another go and follow her recipe exactly.

Apple Carrot Muffins for #MuffinMonday from Sew You Think You Can Cook (2)

Today’s muffins came from Happy Cooking. I did have to use all AP flour because I was out of wheat flour and omitted the flax meal. As always, I used cinnamon applesauce in place of the unsweeted regular applesauce called for. I also substituted golden raisins in place of dried goji berries. (I wouldn’t recommend shredding baby carrots, but you do what you gotta do!) Even with my changes, these muffins were definitely successful!

This recipe makes one dozen muffins.

Carrot and Apple Muffins

Ingredients:

  • 6 tbsp butter, at room temperature
  • 1 C dark brown sugar
  • 2 eggs
  • 1 1/4 C flour
  • 1 1/2 tsp baking powder
  • 1/2 tsp cinnamon
  • 1/2 tsp salt
  • 1/8 tsp allspice
  • 1/4 C cinnamon applesauce
  • 1/4 C apple juice
  • 1/2 – 2/3 C shredded carrot
  • 1/4 C golden raisins

Steps:

  1. Preheat oven to 350 degrees F. Line a muffin tin with liners.
  2. In the bowl of a stand mixer fitted with the paddle attachment, beat the butter and brown sugar until fluffy. Add in the eggs, one at a time.
  3. In a large bowl, whisk together the flour, baking powder, cinnamon, salt, and allspice. Add half of the flour mixture to the stand mixer and mix until combined.
  4. Add the applesauce and apple juice. Mix until incorporated.
  5. Add the remaining flour mixture and mix until combined. Fold in the carrot and raisins.
  6. Divide batter among the prepared muffin tin.
  7. Bake 18 – 20 minutes, or until a toothpick inserted comes out cleanly. Allow muffins to cool in the pan 5 minutes before removing to a cooling rack.

*This recipe is modified from Giada’s Happy Cooking*

Apple Carrot Muffins for #MuffinMonday from Sew You Think You Can Cook (1)

And don’t forget to check out these other muffin recipes:

Blueberry Cornmeal Sourdough Muffins from Karen’s Kitchen Stories

Cherry Chocolate Chip Muffins from Palatable Pastime

Cinnamon Molasses Muffins from Passion Kneaded

Cranberry White Chocolate Muffins from Making Miracles

Peanut Butter Cup Stuffed Chocolate Muffins from Food Lust People Love

Sour Cream and Green Onion Corn Muffins from A Day in the Life on the Farm

Spicy and Sweet Hummus Muffins from Kelli’s Kitchen

Strawberry Vanilla Yogurt Muffins from Farm Fresh Feasts

Disclaimer: This post contains affiliate links. 

#SundaySupper: Regional Specialties

I couldn’t resist this perfectly themed Sunday Supper event! We just moved to California and have a whole new culinary world open to us. I knew I had to participate in today’s event hosted by Sue of A Palatable Pastime.
While we were house hunting, and then waiting for move-in day, we were staying in temporary housing about a half an hour away (without traffic – ha!) from where we want to live. Our little room has been like living in a tiny house, except that the bed isn’t a loft space. The kitchen has all the essentials: stove/oven, microwave, coffee pot, fridge with freezer. There are even some dishes for our use: pots and pans, cutting board, knife set, plates/bowls, etc.

You can’t get in the car without seeing a donut shop or a burger joint, but those options weren’t easily feasible given my current kitchen situation. I wasn’t about to deep fry some donuts or fry up some juicy burgers in a small space where a warning that the fire alarm is very sensitive predominantly posted above the sink.

Southern California is predominantly known for Mexican food and avocados. So, I decided to make tacos for today’s event. My husband requested fish tacos, so that’s what I did. I’m glad too because it felt nice to eat fresh, homemade food after a week long road trip and countless meals eaten out. I was nervous about cooking fish in such a small space, but I was happily surprised that there wasn’t any odor from cooking fresh fish in the microwave. Seriously, who knew!? The fish was flaky, tender, and juicy, too. Dare I say my best fish yet? Although, some salt would’ve been nice. I’ve always taken salt for granted that I didn’t think to purchase any on my grocery trip. Oh well.

I didn’t have a container large enough to make the full pound of fish I purchased so I made half of it one night for dinner as a trial run. I prepared the dish again for lunch the following day to take advantage of the Southern California sunlight!

 I set up my food styling on a pizza pan and used the fresh produce to give some life to my taco display. I had to place the dish on the floor outside our room, but I think it turned out great. I’m looking forward to seeing an improvement in my photography skills while we’re in Cali for the next 2-4 years!

The knives available to me are horrendous. I can flex the blades with my hands making it near impossible to cut anything, if you look closely you can see the grooves the knife left on the avocado slices! But, I powered through and was impressed with how well I could shave the onion (because the knife couldn’t actually go through the vegetable).

Cali Inspired Fish Tacos for #SundaySupper from Sew You Think You Can Cook (2)

This recipe serves two.

Cali Inspired Fish Tacos

Ingredients:

  • juice 1 lime, plus more for serving
  • 2 tsp olive oil
  • 1 tsp chili powder
  • 1 tsp corriander
  • 1/2 lb fresh white fish
  • 4 fajita-sized tortillas (I used a corn-wheat blend)
  • cole slaw mix (shredded cabbage and carrots – no dressing)
  • thinly slice red onion
  • fresh cilantro
  • avocado, sliced

Steps:

  1. In a small bowl, whisk together the lime juice, olive oil, chili powder, and corriander. Season to taste with S+P.
  2. Place fish in a microwave safe dish. Pour marinade over the fish, flip to coat. Refrigerate for 25-30 minutes.
  3. Microwave, slightly covered, for 3 minutes. Flake into bite sized pieces.
  4. Assemble tacos: place cooked fish, slaw, onion, cilantro, and avocado in tortillas. Squeeze with fresh lime.

*This recipe is adapted from Kate at http://www.food.com/recipe/california-fish-tacos-ww-480056*

Cali Inspired Fish Tacos for #SundaySupper from Sew You Think You Can Cook (1)

Appetizers:

Beverages:

Breakfast:

Salads:

Sauces:

Side Dishes:

Soups:

Main Dish:

Desserts:

Plus:

8387592742_f6164fd5a8_o
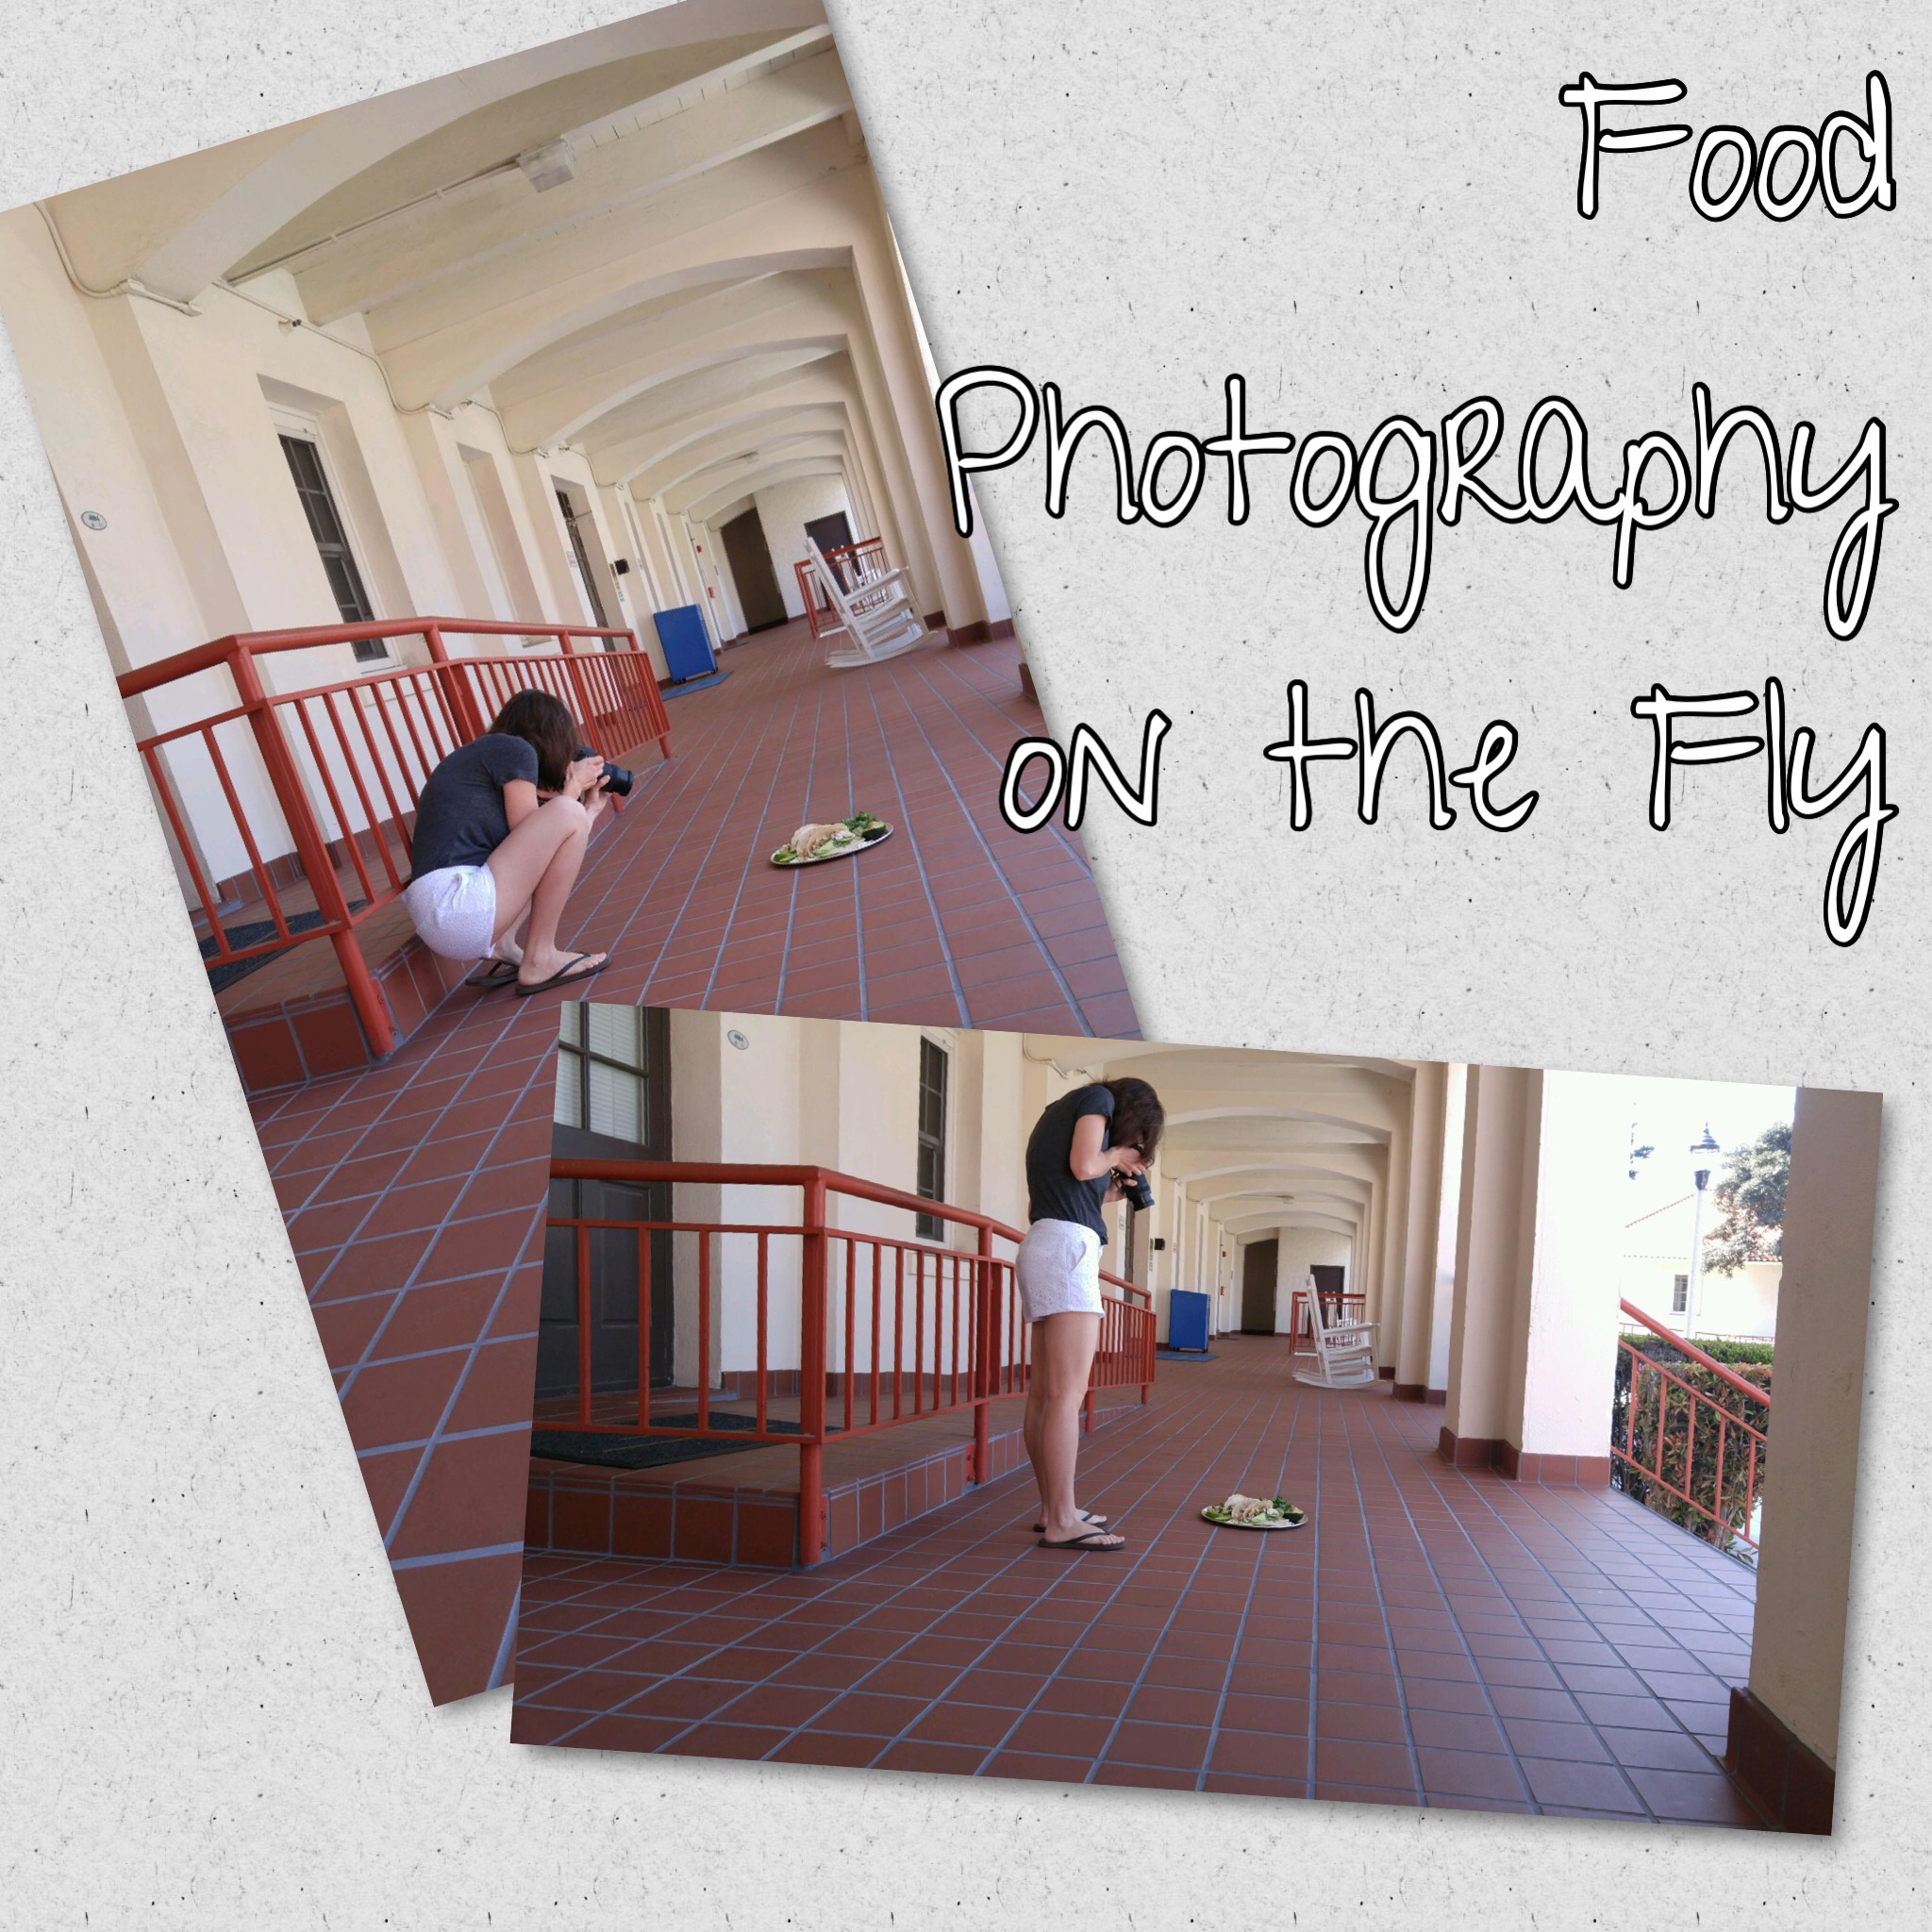
Join the #SundaySupper conversation on twitter on Sunday! We tweet throughout the day and share recipes from all over the world. Our weekly chat starts at 7:00 pm ET. Follow the#SundaySupper hashtag and remember to include it in your tweets to join in the chat. To get more great Sunday Supper Recipes, visit our website or check out our Pinterest board.

Would you like to join the Sunday Supper Movement? It’s easy. You can sign up by clicking here: Sunday Supper Movement.

Blueberry Scones

The last time my mom came to visit (in Ohio) she made a batch of blueberry scones. She had an early flight out of town and wanted to take one with her in the cab to the airport. Apparently, she makes these scones almost once or twice a month as an easy grab-and-go breakfast.

I decided I’d take advantage of her spontaneous baking and take pictures of the scones, but every time the thought crossed my mind I’d get distracted. Probably had a diaper to change, ha! And then before I knew it, there was only one scone left. The boys in my house quickly gobbled up these scones.

My mom had the scone batter made and popped in the oven before I even knew what was happening. There isn’t any excuse not to make these myself, especially because I now have the recipe.

My mom usually uses frozen blueberries but she used fresh blueberries the last time she made them and declares them better that way. Use whatever you have, other fruits would work in this recipe, too.

Blueberry Scones

Ingredients:

  • 2 1/2 C flour
  • 1 tbsp baking powder
  • 1/2 tsp salt
  • 1 stick cold butter, cubed
  • 1/4 C sugar, plus more for sprinkling
  • 2/3 C milk
  • 1/2 C fresh or frozen blueberries

Steps:

  1. Preheat oven to 425 degrees F.
  2. In a large bowl, whisk together the flour, baking powder, and salt. Cut in the cubes of butter until it looks like crumbs.
  3. Stir in the sugar. Add the milk and mix with a fork until combined. Fold in blueberries.
  4. Form (“mush” is the term my mom used) dough into a disk and place on a baking sheet. Cut into 6-8 wedges. Spread wedges apart slightly if you want crispy edges or leave touching for soft edges. Sprinkle scones with a little extra sugar, if desired.
  5. Bake 15-20 minutes, or until golden brown on the edge/top. Scones will be done when  toothpick inserted comes out cleanly.

*This recipe is adapted from http://www.food.com/recipe/simple-sweet-scones-66409*

Blueberry Scones - Sew You Think You Can Cook

Broccoli Artichoke Dip

Right before the Super Bowl the Sunday Supper Movement hosted a Big Game Day Recipes event. During that event I shared Slow Cooker Thai Wings. There were a good number of recipes I wanted to try, but the Roasted Broccoli Artichoke Dip by Cooking Chat was the one I’d picked to make first! With only two (maybe 2.5) of us, I halved the recipe. I shouldn’t have though, because I ate about half of it for lunch that day! The rest of it was inhaled by my husband. Between the two eating sessions, I stored the dip in the fridge. When cold, it got a little too hard for the chips to hold up against, but a quick 10-15 seconds in the microwave fixed the broken chip problem.

We ate this dip with multigrain tortilla chips (our favorite!), but it would be wonderful with pita, too.

broc dip 1 FG1

Broccoli Artichoke Dip

Ingredients:

  • 1 head broccoli, florets chopped
  • ½ tbsp olive oil
  • 1 tsp minced garlic, divided use
  • ½ can (14 oz) artichoke hearts, drained
  • 4 oz cream cheese, at room temperature
  • ¼ C sour cream, at room temperature
  • 1 scallion, chopped
  • ¼ tsp dried parsley
  • ¼ tsp cumin
  • 1/8 C Parmesan cheese
  • Lemon juice, as needed

Steps:

  1. Preheat oven to 400 degrees F.
  2. Toss broccoli in olive oil with ½ the garlic. Season with S+P. Place on a baking sheet and roast 15-20 minutes, until softened. Set aside to cool.
  3. Place broccoli, artichokes, and scallion in a food processor. Pulse until finely chopped.
  4. Add cream cheese and sour cream to the food processor and pulse until combined. Mix in the parsley, cumin, and Parmesan, pulse until fully incorporated. Add lemon juice, S+P to taste.

*This recipe is adapted from David at http://cookingchatfood.com/broccoli-artichoke-dip/*

broc dip 2 FG1

BBQ Pulled Pork Pasta

Once upon a time I saw a bbq spaghetti on an episode of Diners, Drive-ins, and Dives. I couldn’t shake the urge to try it, so when we had a lot of leftover pulled pork from the Super Bowl I knew I’d have to make some barbecue pasta sauce. Because I stored the leftover pork and sauce separately I used a bottled barbecue sauce instead of the Carolina BBQ for this recipe.

I just loved this mashup of cuisines. It takes your tastebuds a moment to get over the “culture shock” of a spicy, smokey, sweet sauce instead of the expected acidic tomato sauce.

I urge you, the next time you have leftover pulled pork, do something a little different and try this barbecue pasta instead!

BBQ Pulled Pork Pasta

Ingredients:

  • 3 1/2 C dry pasta
  • 1 C tomato sauce
  • 3/4 C barbecue sauce
  • 1/2 C water
  • 3 tbsp tomato paste
  • 1 tsp Italian seasoning
  • 1/4 C chopped fresh basil (I used Gourmet Garden lightly dried herbs)
  • 2 C cooked, pulled pork
  • 2 scallions, sliced

Steps:

  1. Cook pasta in boiling salted water, until al dente. Drain.
  2. In a medium saucepan, combine tomato sauce, barbecue sauce, water and tomato paste. Bring sauce to a simmer over medium-high heat. Stir in the herbs and pulled pork.
  3. Put drained pasta into the pasta sauce. Garnish with the scallions.

*This recipe is adapted from Anna at http://hiddenponies.com/2013/05/bbq-pulled-pork-pasta/*

BBQ Pulled Pork Pasta is a fantastic way to use up leftover pulled pork! From Sew You Think You Can Cook

#FoodieExtravaganza: Coffee Cake

foodieextravaganza-300

Today’s post is coming to you from a hotel room. We have made it to California, but we don’t yet have a place to call home. I’ll share stories about our road trip later this month, so if you’re curious to see how a week long drive went with two under two, stay tuned!

I told myself I wouldn’t be participating in any blogging events in April as I had/have no idea when I’ll have a kitchen again, let alone our belongings. And once we get our things, I’d need to be spending time unpacking boxes and organizing a new home, not losing myself in blog-land.

And then Caroline, of Caroline’s Cooking, chose coffee cake as the theme for Foodie Extravaganza. How could I turn down that theme!? Well, I couldn’t. (The coffee cakes on my blog are some of my most popular posts, all a variation of the Nutella Coffee Cake)  Luckily the theme was declared well enough in advance that I could do some planning. I decided I couldn’t do another flavor combination of the tried-and-true recipe, so I searched my Pinterest account for “coffee cake.” I came down to a couple of contenders and looked at the ingredient lists to see what would be best for emptying out my supplies.

I settled on Coffee Cake Cookies.

I made these cookies when my husband’s family was in town for Treat’s baptism so I doubled the recipe. Doing so utilized all of my flour (I actually had to use two different varieties), shortening, butter, and vanilla bean paste. Happily, the cookies turned out and they absolutely taste like coffee cake, but in a more portable (and therefore dangerous) format. The remainder of my baking supplies went home with my mother-in-law so they wouldn’t have to thrown away! (Actually, my brother-in-law and his fiance took a good bit of our furniture to their new house, and my in-laws graciously offered to store some miscellaneous items for us, too!)

This recipe makes approximately 4 dozen cookies.

Coffee Cake Cookies

Ingredients for topping:

  • 1 stick butter, melted
  • 1 2/3 C flour
  • 1/3 C brown sugar
  • 1/3 C sugar
  • 2 tsp cinnamon
  • 1/2 tsp salt

Ingredients for cookies:

  • 5 3/4 C all purpose flour
  • 1 1/4 C cake flour (you could use all AP flour)
  • 2 tbsp cinnamon
  • 4 tsp baking powder
  • 1 tsp salt
  • 2 1/2 sticks butter, at room temperature
  • 2/3 C vegetable shortening, at room temperature
  • 2 C brown sugar
  • 1 C sugar
  • 4 eggs
  • 2 tbsp vanilla bean paste (I used Nielsen-Massey)

Steps:

  1. Make crumble topping: Mix all ingredients until fully combined. Break apart with fingers to desired texture. Place in the refrigerator.
  2. Preheat oven to 350 degrees F. Line baking sheets with parchment paper.
  3. In a large bowl, whisk together the flours, cinnamon, baking powder, and salt.
  4. In the bowl of a stand mixer fitted with the paddle attachment, cream together the butter and shortening with the sugars. Add the eggs, one at a time. Stir in the vanilla bean paste.
  5. Add the dry ingredients in batches, just to combine.
  6. Form heaping 1/8 C cookies. Press an indent in the center of each cookie. Top with the crumble.
  7. Bake cookies 19-21 minutes, or until set. Allow cookies to cool on the pan 2 minutes before removing to a cooling rack.

*This recipe is adapted from Laura at http://piesandplots.net/coffee-cake-cookies-cookielicious/*

Coffee Cake Cookies for #FoodieExtravaganza from Sew You Think You Can Cook

Be sure to check out these other great coffee cake recipes:

Almond Raspberry Cake by Food Lust People Love

Blueberry vanilla coffee cake by Fearlessly Creative Mammas

Cappuccino Cake by G’Gina’s Kitchenette

Caramel Coconut Coffee Cake by cookinandcraftin

Classic Coffee Cake by Basic N Delicious

Coffee Cake in a Jiffy by Our Good Life

Coffee Cake Muffins by I’m Hungry

German Beer Coffee Cake by Wholistic Woman

Gluten free hazelnut pear cake by Caroline’s Cooking

Kärleksmums (Swedish Coffee Cake) by Tara’s Multicultural Table

Lemon Thyme n Mint Loaf by Baking in Pyjamas

Orange Coffee Cake with Pecan Streuse by A Day in the Life on the Farm

Polish Placek by Cooking With Carlee

Simple Coffee Cake by Sneha’s Recipe

Strawberry Coffee Cake Muffins by Making Miracles

If you are a blogger and would like to join our group and blog along with us, come join our Facebook page Foodie Extravaganza. We would love to have you! If you’re a spectator looking for delicious tid-bits check out our Foodie Extravaganza Pinterest Board! Looking for our previous parties? Check them out HERE.

Scalloped Potato Muffins

One afternoon last month, amidst the mayhem of daily life, Firecracker pulled down his silicone muffin cups from his  “Cook It in a Cup!” kit from the counter. (Someone tell me when my little man got so tall?!)

I like that he enjoys spending time in the kitchen and now he can even say “cook” in addition to “mix.” So, I stopped folding laundry and looked through his cookbook for something we could whip up with whatever ingredients we had.

Scalloped potatoes was the answer. Granted, I had to substitute every ingredient! I changed the potato variety, I used a different dairy, I substituted garlic powder instead of fresh garlic, and even used a different cheese. So really, the only ingredients that stayed true to the recipe in the book were salt and pepper! But hey, I wouldn’t have thought about making scalloped potatoes in the little muffin cups!

Firecracker enjoyed putting the {very unevenly cut} potato slices (my bad) into the cups and watching me fill the cups with the half-and-half.

making scalloped potatoes  sew you think you can cook

…Too bad he wouldn’t try them!

Scalloped Potato Muffins

Ingredients:

  • 1-2 Russet potatoes, peeled and sliced
  • 1 C half-and-half
  • 1/4 tsp garlic powder
  • 1/2 C shredded cheddar cheese

Steps:

  1. Preheat oven to 350 degrees F. Place 6 silicone muffin cups on a baking sheet.
  2. Divide the sliced potatoes between the muffin cups.
  3. In a measuring cup, whisk the half-and-half, garlic powder, and S+P. Pour over the potatoes to cover.
  4. Bake for 20 minutes, or until bubbly and potatoes are tender.
  5. Top with cheese and bake another 2-4 minutes, or until cheese is melted.

scalloped potato muffins  sew you think you can cook