#BundtBakers: Strawberry Bundts

4ae7b-bundtbakerspost

I have been sitting on this cake for months! And that is not an exaggeration. Tammy of Living the Gourmet is hosting and announced the theme of “Strawberry Bundts” back in spring and I baked this beauty in early June.

#BundtBakers is a group of bundt loving bakers who get together once a month to bake bundts with a common ingredient or theme. We take turns hosting each month and choosing the theme or ingredient.

We eat strawberries by the pound here. They’ve been my kids’ favorite food/fruit for well over a year now. With a weekly Farmers Market across the street dishing out California fresh berries year round, we’re never without these red beauties.

And yes, this is my fourth strawberry recipe since my “break“. Told you we like strawberries around here!

boys want cake

When I think of using strawberries in a creative way I immediately go to balsamic vinegar. So, is that really creative? Meh. It’s a delicious combination either way.

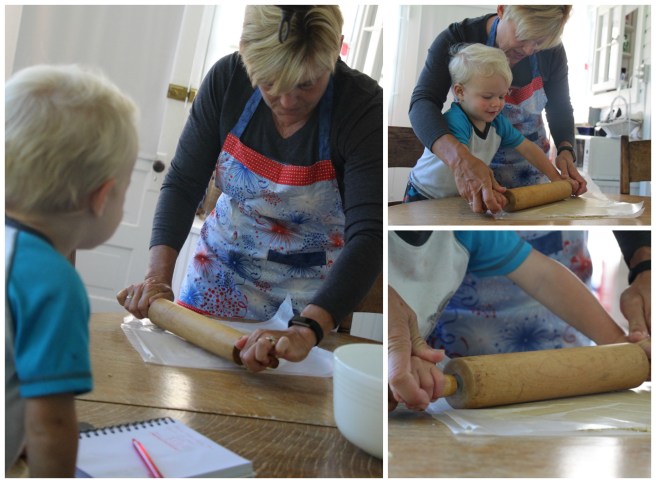
This cake has a lot of moving parts. Cake. Frosting. Drizzle. Berries. And is it all worth it? Yes! Will I do it all again? Yes! I have some of the frosting in the freezer and Firecracker can’t stop talking about baking a strawberry cake with Tilly when she comes to visit. (Update: He forgot all about baking anything once she was here. We kept busy creating his Homeschooling corner, hanging artwork that’s been leaning against the wall for the past 16 months, going to the beach and the tide pools, and even sewing!)

Strawberry Balsamic Bundt Cake for #BundtBakers from Sew You Think You Can Cook

Strawberry Balsamic Bundt Cake

Ingredients for the cake:

  • 2 sticks butter, softened
  • 1 C dark brown sugar
  • 1 C granulated sugar
  • 5 eggs
  • 1 tbsp vanilla bean paste
  • 3 C cake flour
  • 1 tbsp baking powder
  • 1/2 tsp salt
  • 1 1/4 C buttermilk

Ingredients for the frosting:

  • 1 lb fresh strawberries, chopped
  • 1 C + 6 tbsp sugar, divided use
  • 2 tsp balsamic vinegar
  • 4 egg whites
  • 3 sticks butter, softened

Ingredients for the garnish:

  • 1 lb fresh strawberries, finely diced
  • 3 tbsp sugar
  • 1 tsp balsamic vinegar
  • 1/4 tsp vanilla extract

Ingredients for the drizzle:

  • 1/2 C balsamic vinegar
  • 2 tbsp dark brown sugar

Steps:

  1. Preheat oven to 350 degrees F. Heavily grease a bundt pan.
  2. In the bowl of a stand mixer fitted with the paddle attachment, cream together the butter and sugars until smooth. Add the eggs, one at a time, and the vanilla, mixing until fully incorporated after each addition.
  3. In a large bowl, whisk together the cake flour, baking powder, and salt. Add the dry ingredients to the mixer, alternating with the buttermilk. Pour batter into prepared bundt pan. Bake 60 minutes, until a cake tester comes out cleanly.
  4. For the frosting, put the chopped strawberries, 2 tbsp sugar, and balsamic vinegar in a small saucepan over medium heat. Cook, stirring occasionally, until the berries are soft, 5-8 minutes. Let cool slightly before transferring to a blender to puree until smooth. Chill.
  5. Also for the frosting, whisk the egg whites and the remaining sugar in a large heatproof bowl over a pot of simmering water. Whisk consistently until a thermometer measures 160 degrees F and the sugar is dissolved. Transfer to the bowl of a stand mixer fitted with the whisk attachment and beat on medium-high speed for 8 minutes, until stiff peaks form. Reduce speed to medium and add in the softened butter 2 tbsp at a time, until fully incorporated, and frosting is thick and smooth (it will most likely curdle during the process, just keep going and keep trusting!). Add in the cooled strawberry puree until fully incorporated.
  6. Make the garnish: Stir together the diced strawberries, sugar, vinegar, and vanilla in a bowl. Let macerate 20-30 minutes.
  7. For the drizzle: Reduce the balsamic and sugar in a small saucepan over medium heat down to 4 tbsp. Set aside.

*This recipe is adapted from Annie at http://www.annies-eats.com/2013/06/07/strawberry-balsamic-cupcakes/*

Strawberry Balsamic Bundt Cake for #BundtBakers from Sew You Think You Can Cook

You can see all our of lovely Bundts by following our Pinterest board. Updated links for all of our past events and more information about #BundtBakers, can be found on our home page.

And don’t forget to take a peek at what other talented bakers have created this month:

Chocolate Covered Strawberry Poke Bundt by Faith, Hope, Love, & Luck Survive Despite a Whiskered Accomplice

Freeze Dried Strawberry Bundt with Cream Cheese Glaze by Sweet Sensations

Jam Strawberry Bundt Cake by Bizcocheando

Lemon Strawberry Poke Bundt by A Day in the Life on the Farm

Neapolitan Zebra Bundt Cake by All That’s Left Are The Crumbs

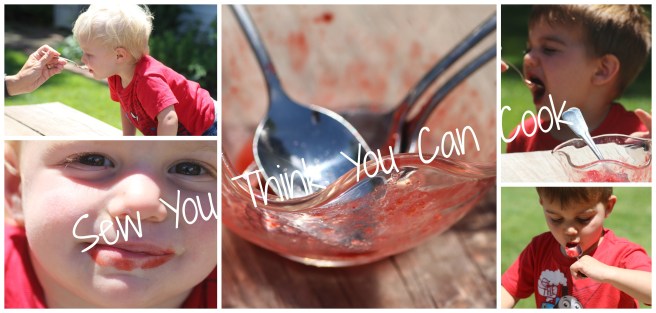
Strawberry Balsamic Bundt Cake by Sew You Think You Can Cook

Strawberry & Cream Bundt Cake by Patty’s Cakes

Strawberry Crunch Bundt Cake by Cookaholic Wife

Strawberry Bundt Mousse Cake by Sneha’s Recipe

Strawberry Bundt Cake with White Chocolate Ganache by The Queen of Scones

Strawberries & Cream Naked Bundt Cake by Living the Gourmet

Strawberry Key Lime Cheesecake Bundt by The Crumby Kitchen

Strawberry Orange Bundt Cake by I Love Bundt Cakes

Tuesday Tattles: 3rd Birthday

It’s time for another Tuesday Tattles.

A very long overdue Tuesday Tattles, at that!

Over a month ago, my Firecracker had his golden birthday and is now a three year old!

IMG_4338

It has been an absolute joy becoming a mother with my Firecracker. His turning 3 has been the most emotional, yet! 1 felt like a milestone and an accomplishment, but he was still a baby. 2 was a quiet birthday with a party a couple of weeks late. But 3! At 3 my little man has such a personality, with strong opinions, a sassy attitude, and a smart vocabulary, it’s hard to remember he’s still just a little kid. (<- Yes, I just plagiarized that from my personal Facebook status. You’re not experiencing dejavu, Mom.)

Because 3 was his golden birthday, I really wanted to throw a Quidditch party with emphasis on the Golden Stitch. And while he says he likes Harry Potter, he really doesn’t know much about it. I let go of my obsession and gave him the option between Harry Potter and Space. He chose space.

Okay, time to “vent.” WHY AREN’T THERE SPACE PARTY DECORATIONS?! Once again, I found myself creating my own birthday party.

To make his birthday banner, I went the easy route this year. I found large black letter stickers at Michael’s. I made sure they fit inside the star shape, which I then traced onto gold cardstock. Cut out the stars, stuck on the stickers, and taped the string to the back. Easy as pie!

IMG_4334

The most important decoration was the golden 3 balloon, and I got the last one from the party store! Phew! 3 gold stars were also on my decorating wish list; another mission accomplished. But even using blacks and yellows for the tablescape, the space theme only came to life with my food.

Space Themed Birthday Party (food) | Sew You Think You Can Cook

Planet Pizzas and Solar System Salad were delivered by a local, Chicago-style thin crust pizza joint. The Suns were a giant bowl of clementines. Carrots, cauliflower, broccoli, and yellow tomatoes were arranged to look like Rocket Veggies. Pineapple and green grapes were arranged to look like a Saturn Fruit Tray. We used a small star cookie cutter to cut cheese slices into stars which were served with round Ritz crackers for the Stars & Moons. We used my grandmother’s Christmas cut-out cookie recipe to make Golden Star Cookies. The trusty Walmart Bakery provided the chocolate cupcakes with yellow frosting, we added the star sprinkles to turn them into Cosmic Cupcakes.

birthday boy

My husband had one request for the party. The no-bake cookies from his childhood. I had him make them with Firecracker for the day. This recipe comes from his high school best friend’s mom. I’ve renamed them Asteroids for the purpose of this space themed party.

IMG_4303

Asteroids


Ingredients:

  • 1 stick butter
  • 2 C sugar
  • 3 tbsp cocoa powder
  • 1/2 C milk
  • 1/2 C creamy peanut butter
  • 1 tsp vanilla extract
  • 3 C quick oats

Steps:

  1. Bring butter, sugar, cocoa powder, and milk to a boil in a large pot over medium heat.
  2. Remove from the heat and stir in the peanut butter and vanilla until smooth. Mix in the oats.
  3. Form into balls, or asteroids, and place on a sheet of wax paper to cool completely.

No-Bake Cookies: renamed asteroids, they're perfect for a Space Themed Birthday Party

If you’re really intuitive, you might recognize the background of these pictures. We flew to Wisconsin to celebrate his birthday. And again, I need to give a HUGE thank you to my parents for allowing us to have his party at their summer home.

Thankfully the rain clouds parted the hour before the party and our outdoor gathering was a wonderful reunion with my cousins. If there’s anything my Firecracker loves, it’s making friends, and boy were there plenty of new friends to be had – we had a total of 16 (including my 2) kids running around the yard, playing baseball, and throwing 200 water balloons in a matter of minutes.

water balloons

Those kids went home with goodie bags filled with star shaped sunglasses, bubbles, lollipops, and glow bracelets.


Fresh Strawberry Pie

Here it is, the third and final recipe made with the 8 quarts of strawberries we picked while staying with my parents in Wisconsin in June.

kids berry picking

1 quart was turned into Strawberry Honey Sorbet. 1 quart was turned into No-Churn Strawberry Ice Cream. Almost 2 quarts became this incredible deep dish strawberry pie. The remaining half of the strawberries were gobbled up by mostly my kids.

My mom really wanted to make pie with the strawberries. I’m not the biggest pie fan. I have a thing against warm fruit. But I’m getting better, I’ll at least give it a go on occasion. But, of course, I had to try the stunning pie I watched her make with her grandsons!

pie filling

These strawberries were quite different than those I get from the Farmers Market here in California. They’re different from the Florida Strawberries you can find in the winter months (depending on where you live). These berries were small, dark, and slightly tart. They also let off a lot of juice. My mom likes her pies to be a little on the “runny” side compared to the average pie eater and we ended up having to take the boy’s {clean} Tylenol syringe to syphon off some juice.

berry picking

The recipe for the pie dough was handed down from my grandmother and it’s my mom’s all time favorite crust. Unlike myself, my mom opts to make her dough over buying one from the freezer section. After watching her make the crust in a matter of minutes, I really don’t see why I couldn’t do that from now on, too.

pie dough

Fresh Strawberry Pie

Ingredients for the crust:

  • 2 C flour
  • pinch of salt
  • 1/2 C vegetable oil
  • 1/4 C milk

Ingredients for the filling:

  • 7 C sliced strawberries
  • 2 tbsp cornstarch
  • 1/2 – 3/4 C brown sugar
  • 1 tbsp butter, cubed

Steps:

  1. Preheat oven to 400 degrees F.
  2. Make dough: Whisk flour and salt in a large bowl. Create a well in the center. In a measuring cup, combine the milk and oil. Pour into the flour and mix until combined. Form into two balls. Roll one of the pieces of dough between two sheets of wax paper into a large circle. Place in the bottom of a pie pan, patch up any tears.
  3. Make the filling: Combine ingredients in a large bowl. Adjust sugar to taste depending on the sweetness level of your strawberries. Spoon the filling into the pie pan, leaving excess juice behind. Dot with butter.
  4. Roll the remaining pie dough between two sheets of wax paper. Option to cut out stars for topping the pie, or simply lay the top crust on top with a couple of slits in the center.
  5. Bake 40 minutes, covered with foil. Bake another 30-33 minutes, uncovered, until golden and bubbly.

Fresh Strawberry Pie | Sew You Think You Can Cook | http://sewyouthinkyoucancook.com

We had a lot of fun with photography while the boys were playing in the backyard, going “old school” and putting the pie in the literal window to cool. Trust me, had the kids been inside, that pie would’ve been placed on top of the counter out of reach.

cell phone photos

And seriously, my all-time favorite photo of this pie is the one taken on my iPhone through the Instagram app. Check it out here! And if you don’t already, give me a little follow to keep up with our crazy life in between blog posts.

#BundtBakers: Untraditional Bundts

4ae7b-bundtbakerspost#BundtBakers is a group of bundt loving bakers who get together once a month to bake bundt cakes with a common ingredient or theme.

Except that this month, Colleen of Faith, Hope, Love & Luck Survive Despite a Whiskered Accomplice is breaking that mold and challenging us to think outside of the bundt pan. To bake something in our favorite cake pan that isn’t cake!

I didn’t know if I was going to sign up for this one given my summer blogging break but one of my best friends from college shared a Facebook video with me. Her timing couldn’t have been more perfect! The video was for a fajita bundt cake. Yes. Fajitas. In a bundt. It looked so fun, we just had to try it!

Picture your bundt cake. But instead of a rich cake center, imagine fajita seasoned chicken and veggies. Instead of a cake crust to cut through, imagine tortillas. And instead of frosting and sprinkles, imagine sour cream and cilantro.

The dinner was so fun and would definitely be a show stopper for company.

Chicken Fajita Bundt Cake (cut) for #BundtBakers from Sew You Think You Can Cook

Chicken Fajita Bundt Cake

Ingredients:

  • 3 chicken breasts, sliced
  • 2 bell peppers, sliced
  • 1 onion, sliced
  • 2 tbsp fajita seasoning
  • 2 tbsp olive oil, plus more for greasing the pan
  • 1 tbsp salt
  • 9 flour tortillas
  • 1 1/2 C shredded Mexican blend cheese
  • 2 tbsp fresh cilantro, chopped
  • 1 tomato, diced
  • 1 C sour cream
  • 1 lime

Steps:

  1. Preheat oven to 400 degrees F.
  2. On a large rimmed baking sheet, toss together the chicken, bell peppers, onion, fajita seasoning, olive oil, and salt. Bake 30 minutes.
  3. Reduce oven temperature to 360 degrees F.
  4. Brush a bundt pan with olive oil. Tuck 5 tortillas into the pan, add the remaining 4 tortillas behind the first layer. Put half of the cheese into the tortilla-lined bundt pan. Top with the cooked chicken mixture, tomato, cilantro, and remaining cheese.
  5. Press tortillas over the cheese. Bake 25 minutes.
  6. Flip out the fajita cake.
  7. Mix sour cream with a little lime juice, to taste. “Frost” the “cake.” Garnish with chopped cilantro and lime zest.

*This recipe is adapted from Tom at http://twistedfood.co.uk/giant-chicken-fajita-donut/*

Chicken Fajita Bundt Cake for #BundtBakers from Sew You Think You Can Cook

You can see all our of lovely Bundts by following our Pinterest board. Updated links for all of our past events and more information about #BundtBakers, can be found on our home page.

And don’t forget to take a peek at what other talented bakers have created this month:

Bacon, Zucchini, Raisins and Cheddar Bundt Cake from I Love Bundt Cakes

Cheesesteak Bundt from Cookaholic Wife

Cherry Bundt Breakfast Danish from Faith, Hope, Love & Luck Survive Despite a Whiskered Accomplice

Chive Potato Filled Cheeseburger Meatloaf Bundt from Food Lust People Love

Classic Vanilla Flan Bundt from All That’s Left Are The Crumbs

Pasta Chicken Bundt from Sneha’s Recipe

Soap Bundt Cake from La Mejor Manera

Spinach Pasta Surprise from A Day in the Life on the Farm

#FantasticalFoodFight: Ice Cream

unnamed

Fantastical Food Fight has done it again, a food fight worthy of returning to my blog.

I’m laughing a little bit because my uncle teased me for blogging so much after declaring I was taking a break. (Thanks for being a true fan, Uncle Lar!)

The kids and I spent the end of June at Lake Geneva with my parents while my husband was doing a two week stint at the Pentagon. While on our trip, we went strawberry picking in Bristol. A lot of strawberries! We used those strawberries to make pie, sorbet, and no-churn ice cream.

Because I was at my mom’s house, sans ice cream maker, I had to go with a no-churn method for ice cream making. Luckily this food fight allows no-churn varieties of ice cream!

No-Churn Strawberry Ice Cream

Ingredients:

  • 1 qt frozen strawberries
  • 1 can (14 oz) sweetened condensed milk
  • 1 tsp vanilla extract
  • 1 pt heavy cream

Steps:

  1. Place a metal pan in the freezer to chill (we used a bundt pan!).
  2. Thaw strawberries 10-20 minutes.
  3. Place strawberries in a food processor and pulse until pea-sized. Add the condensed milk, vanilla, and a pinch of salt. Pulse until combined.
  4. Using a hand mixer, beat the heavy cream until stiff peaks are formed.
  5. Fold 1 C of the whipped cream into the ice cream base then pour that into the remaining whipped cream until blended.
  6. Pour into the chilled pan and freeze 2-5 hours.

*This recipe is adapted from Food Network at http://www.foodnetwork.com/recipes/food-network-kitchen/no-churn-strawberry-ice-cream-3364490*

No-Churn Strawberry Ice Cream for #FantasticalFoodFight from Sew You Think You Can Cook

To check out these other Fantastical Ice Creams click here:

 If you would like to join our Fantastical Food Fight, you can learn more on our informational page.

#SundaySupper: Simple Mixed Drinks for a Refreshing Summer

Before my husband discovered the Moscow Mule last year, a Pimm’s Cup was his drink of choice for about two years.

While he’s currently in a “dry season” due to training for World’s Toughest Mudder, I think he’d like to celebrate his race, not with the customary beer, but with something a bit more refreshing.  (Not immediately, mind you, it’ll be a miracle just making it back home after the 24 hours of conquering the WTM course!)  Given that our house is currently void of vodka, I think I’ll remind him of this beauty.

The Pimm’s Cup is perfect for sharing with today’s #SundaySupper Simple Mixed Drinks for a Refreshing Summer! Thank you to Christie of A Kitchen Hoor’s Adventure for hosting this event.

The Pimm’s Cup has been a popular English summer drink for the past 46 years. It is the official drink of the Wimbledon Tennis Tournament. Fun fact, the finals are next weekend, so you might as well gather all the ingredients and pretend you’re in London watching the match, but from the comfort of your much-less-expensive couch.

This recipe is intended for individuals ages 21 & up. Please drink responsibly.

Pimm’s Cup

Ingredients:

  • 1 part Pimm’s No. 1
  • 2 parts lemonade
  • 1 part gingerale
  • cucumber slices

Steps:

  1. Combine all ingredients and serve over ice.

Pimms Cup

Classics with a Twist

Make Mine a Mocktail

Simply Different

Tasty and Tropical

Very Vino

For even more inspiration check out these Simple Mixed Drinks for a Refreshing Summer by Sunday Supper Movement

Sunday Supper MovementJoin the #SundaySupper conversation on twitter on Sunday! We tweet throughout the day and share recipes from all over the world. Our weekly chat starts at 7:00 pm ET. Follow the #SundaySupper hashtag and remember to include it in your tweets to join in the chat. To get more great Sunday Supper Recipes, visit our website or check out our Pinterest board.

Would you like to join the Sunday Supper Movement? It’s easy. You can sign up by clicking here: Sunday Supper Movement

#IceCreamSocial: Strawberry Honey Sorbet

Hello, Summer. You’ve been here 10 days and it’s high time we’ve had an Ice Cream Social to celebrate your arrival. After all, July is National Ice Cream Month.

The Festive Foodie Events Planning Group (formerly Holiday Fun with our Blogging Friends) is having said Ice Cream Social with all treats frozen. We’re talking ice cream, frozen yogurt, gelato, sorbets, ices, affogatos, malts and shakes, ice cream cakes, ice cream pies, ice cream sandwiches, sundaes, popsicles, etc. If it’s frozen and it’s a treat, bring it on to the party! Thank you Sue of Palatable Pastime for hosting!

19399035_10104959073808201_7818881682960017989_n
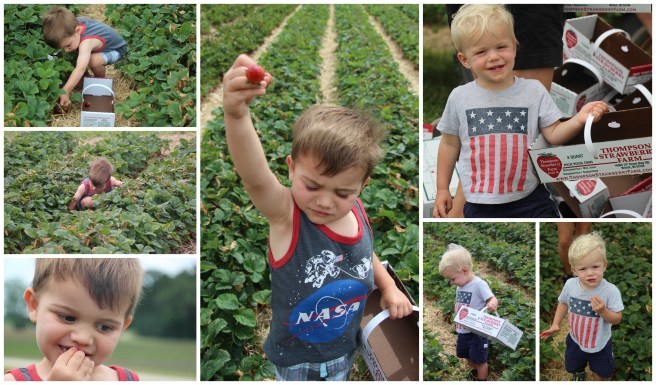
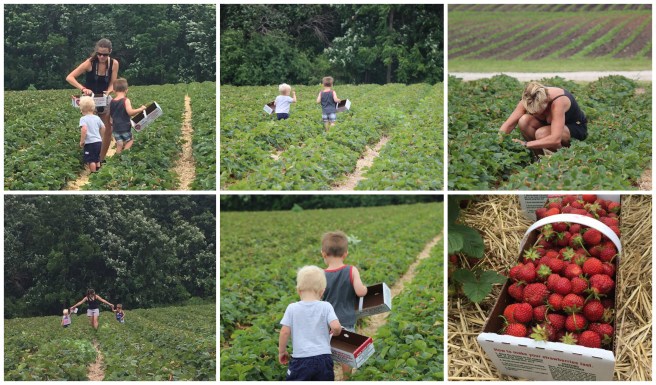
The boys and I went strawberry picking with my mom the Thursday before last and brought back 8 quarts of strawberries! That’s a lot of strawberries. Particularly when they’re super tiny. These Wisconsin strawberries are half the size of those I get from the Farmer’s Market back in California.

Using about 7 cups of strawberries, Mom (with a little help from Treat) baked a beautiful pie. We filled two freezer quart bags to be used in both an ice cream and a sorbet. And there was a 48 oz container remaining for our daily Vitamin C intake.

On a beautiful (and only slightly chilly) Monday morning, Firecracker woke up asking to make ice cream. I checked my potential blogging opportunities and decided to tackle the sorbet first.

There’s a slight chance we busted my mom’s little blender, so I’m not sure if the no-churn ice cream we want to make will end up happening. I’ll need to get on that quite soon before we head back to sunny SoCal!

After lunch the sun came out and outside play called for some Strawberry Honey Sorbet. This treat melts quickly, especially in the sun, but it’s quite refreshing! Sweetened only with honey, I didn’t feel too guilty about letting the boys dig in!

Strawberry Honey Sorbet (kids) | Sew You Think You Can Cook

The three ingredient recipe was inspired by a Facebook Video my mom found.

I encourage you to have a taste of summer by whizzing up your own, three-ingredient sorbet.

Strawberry Honey Sorbet

Ingredients:

  • 1 qt frozen strawberries
  • 1/2 C water
  • 1/2 C honey

Steps:

  1. Place ingredients in a food processor and pulse until smooth.
  2. Transfer to a freezer friendly dish, cover, and freeze at least an hour.

*This recipe is modified from Pierce at https://www.buzzfeed.com/pierceabernathy/3-ingredient-mango-sorbet?bffbtasty&ref=bffbtasty&utm_term=.fmrJbAWaw#.kpa9N6Edq*

Strawberry Honey Sorbet for #IceCream Social from Sew You Think You Can Cook

Be sure to check out these other frozen treats for your next Ice Cream Social:

Chocolate Mousse Ice Cream by Culinary Adventures with Camilla

Cowtipper Shake by Jolene’s Recipe Journal

Easy Nutella Popsicles by All That’s Jas

Fresh Mint Chocolate Chip Ice Cream by Amy’s Cooking Adventures

No Churn Cherry Vanilla Ice Cream by Hezzi-D’s Books and Cooks

Old Fashioned Cola Float by Family Around the Table

Peanut Butter Chocolate Chip No Churn Ice Cream by Cooking with Carlee

Raspberry Ripple Ice Cream by Red Cottage Chronicles

Sour Cherry Ice Cream with Chocolate Chunks by A Day in the Life on the Farm

Strawberry Frozen Yogurt by Palatable Pastime

Strawberry Honey Sorbet by Sew You Think You Can Cook

Strawberry Peaches & Cream Popsicles with Gingersnap Crumbles by Tip Garden


#FantasticalFoodFight: Peaches & Cream

unnamed

I’ve declared that I will be taking a break from blogging for a bit. So what am I doing just a couple weeks later with a brand new blog post?!

Well, I also stated that Sew You Think You Can Cook wouldn’t disappear either. I have a couple of fun blog link-up events in the near future, yet. It’s looking like one, maybe two, per month throughout the summer months.

Hopefully I’ll be back a little less sporadically come the start of the school year in September. Sew You Think You Can Cook just might have a slightly new vibe come then.

My fun post for June is the one you’re reading right now – today’s Fantastical Food Fight! The task? Peaches & Cream. The requirement? A dish that involves both peaches and cream.

Originally I was thinking an ice cream.

I’m sorry to burst that bubble, but as fate had it, my husband requested some sort of French toast with our Farmer’s Market peaches for breakfast over Memorial Day weekend.

Perfect!

This French toast is quite simply. Eggs + milk (or cream!) + bread. What makes this dish pop are the caramelized peaches you put on top of that French toast. A dollop of whipped cream doesn’t hurt anything, either.

Peaches & Cream French Toast

Ingredients:

  • 6-8 slices bread
  • 5 eggs
  • 1/2 C milk or cream
  • 3/4 C sugar
  • 1/2 C water
  • 5 tbsp butter
  • 2-3 peaches, sliced or chopped
  • cinnamon sugar, for serving
  • whipped cream, for serving

Steps:

  1. Whisk together the eggs and milk/cream in a shallow bowl.
  2. Preheat griddle or a large pan over medium heat.
  3. Dip bread in the egg mixture, coating both sides. Cook on greased griddle until golden on both sides.
  4. In a small pan over medium-high heat, combine sugar and water. Once the sugar is dissolved do not mix. Allow mixture to caramelize 8-10 minutes. Melt in the butter. Add the chopped peaches and cook 3-4 minutes. Pour over French toast.
  5. Sprinkle with cinnamon sugar and serve with whipped cream.

*This recipe is adapted from Dina at http://simplyhomecooked.com/caramelized-peach-french-toast/*

Peaches & Cream French Toast for #FantasticalFoodFight from Sew You Think You Can Cook

To check out the other Fantastical Peaches & Cream recipes click here:

If you would like to join our Fantastical Food Fight, you can learn more on our informational page.

Thursday Thoughts: Taking a Break

Thursday Thoughts

After almost 4 years of solid blogging, it’s time for me to slow down and focus on my family and myself.

Everson -8
Photo credit: Magical Moments by Megan
Blogging has been a great adventure and I’ve “met” some fantastic people. I’ve enjoyed cooking around blogging events, expanding my culinary horizons, and working with fun companies during themed weeks.

I’ve been feeling the pull to step back from Sew You Think You Can Cook since before last year’s holiday season. But how could I take a break during the busiest cooking and baking season of the year?! I couldn’t!

A little over a year ago I thought I’d attempt to monetize Sew You Think You Can Cook, but I never managed to find the time to put towards exploring that side of blogging. And truth be told, making money had never been my goal.

I started this blog almost 4 years ago as a way to stay busy. My husband and I had been trying to conceive for over a year and I simply needed something to help take my mind off it!

Since we’d been married in 2010, I’d been perusing Food Network, food blogs, and foodgawker and cooking unique dishes each night. I’d type up the weekly menu as well as each recipe and send that Word Document to my mom. I’d include how I planned on changing up each recipe. So in a way, I’d already been blogging. I just wasn’t photographing every little bite!

35952_854183427471_6415061_n
Photo credit: Cher Hanna Photography
My site will not be dead. I’ll keep my eye out for some blogging events that I simply can’t pass up and join in the fun. In the mean time, I’m going back to my old way of menu planning and going back through these past 4 years of cooking and remaking some family favorites. Odds are I’ll be re-photographing them and updating some old posts. Because, can I really cook something and not photograph it anymore?!

So what are my plans now?

This summer we have some travel time on the calendar, Firecracker’s 3rd birthday, and some VBS fun at two different churches.

Healing my sprained wrist is also a major priority! I tripped over a soccer ball in April, landed on my weak wrist, and two weeks later I found myself at the doctor’s office receiving a brace. Another two weeks later I returned to the doctor’s office to get an X-ray, as my wrist was getting worse. Latest news: it might be fractured. I have an MRI scheduled next week. Either way it’s going to take a while to heal. Raising two young active toddlers doesn’t exactly allow me much recovery time. Which brings me back to needing to take a break. Doing too many dishes aggravates my wrist and typing isn’t the easiest thing to do either.

The biggest and newest project I’ll be tackling is homeschool.

The cost of preschool is quite high here in the South Bay of Los Angeles and after some serious discussion, we’ve decided that I would homeschool Firecracker for a year. If it goes well, maybe for two years. Three if Treat stays home with me until he goes to Kindergarten, too!

I know the time I used to set aside after bedtime for blogging will need to be preparing our curriculum (aka crafting prep!). Who knows, maybe this blog will be turning into a crafting blog with some cooking instead of a cooking blog with some crafting.

As an exhausted mom, I can’t tell you how much I was looking forward to sending Firecracker off to school a couple of days a week. However, the more I’ve been thinking about our schooling plans, I’ve been getting a little excited. I think it will be fun to figure out what Firecracker really is interested in and finding ways to use those interests to help grow his brain.

I know I’m going to miss having alone time with Treat, but other moms have assured me that he really isn’t “missing out.” Besides, he’s going to learn a lot by watching his big brother!

I’m looking forward to seeing where my little bit of “R&R” will take me. I’m hoping for more relaxed playtime with my boys. For more “me time” before crashing into bed each night. For less distracted time with my husband.

18698317_10104849389182071_2611128298871484070_n

I’d like to thank my readers for stepping into my little world of the internet and I hope to see you again, soon!

Iced Herbal Ginger Lime Tea

Disclaimer: I received products from KitchenIQ in exchange for my honest review. All opinions are my own.

Every once in a while there’s a kitchen product that comes around and changes your life.

Okay, maybe not your life.

But your culinary world.

A citrus zester is a great example. Can you imagine if we still had to carefully and thinly slice the peel from a lemon and then chop it up into teensy pieces?! I know I certainly wouldn’t make that effort. There are a lot of citrus zesters out there that make the task of zesting a lime much simpler.

But KitchenIQ took that precious tool and made it even better! Their V-etched Better Zester! provides the smoothest zesting experience I’ve ever had thanks to the nonstick coating on those v-shaped blades. But the feature I love the most is the container attached to the back of the tool. Not only does it catch the zest, it has lines indicating tablespoons and mL. You’ll never again be guessing if the zest of one lime gives you a teaspoon or not. (I know I never actually measure the zest in a recipe and always “wing it.”) A quick {gentle} bang on the countertop and the zest falls to the bottom for easy measuring.

KitchenIQ didn’t stop their with their mind-blowing gadgets. I’m so excited to have The Grate Ginger Tool in my life. I must admit, I’ve ever enjoyed working with ginger simply because it wasn’t an easy ingredient to prep. First there’s peeling the skin. I’ve heard the back of a spoon works quite nicely but it’s never been as easy as it looks on TV, I always end up cutting off the skin and as a result losing a lot of the usable ginger. Ginger is also quite fibrous. Using a microplane grater on it always left me with a stringy piece of ginger in my hand, and chopping it finely just isn’t that fun.

The Grate Ginger Tool answers each of these problems. There is a removable spoon-like device peels the ginger quite nicely and the non-stick v-shaped blades makes grating the ginger as easy as cutting through softened butter. The ginger shavings end up in a little compartment inside the gadget which pulls out easily. There’s even a slicer on the back!

If their new V-etched Spice Grater works just as well as the previous two products, I can’t wait to get my hands on some whole spices!

An Original Recipe

Iced Herbal Ginger Lime Tea

Ingredients:

  • 1 tsp freshly grated ginger root
  • 1/4 tsp freshly zested lime
  • 12 oz hot water
  • simple syurp, to taste
  • ice

Steps:

  1. Place ginger and lime in a loose leaf tea ball infuser.
  2. Pour hot water over the tea infuser in a large heat proof cup. Allow tea to steep 3-5 minutes.
  3. Divide ice into 2-3 serving glasses, fill with tea, and sweeten to taste with simple syrup. Garnish with a lime wheel.

Iced Herbal Ginger Lime Tea | Sew You Think You Can Cook