Cauldron Trick or Treat Bag

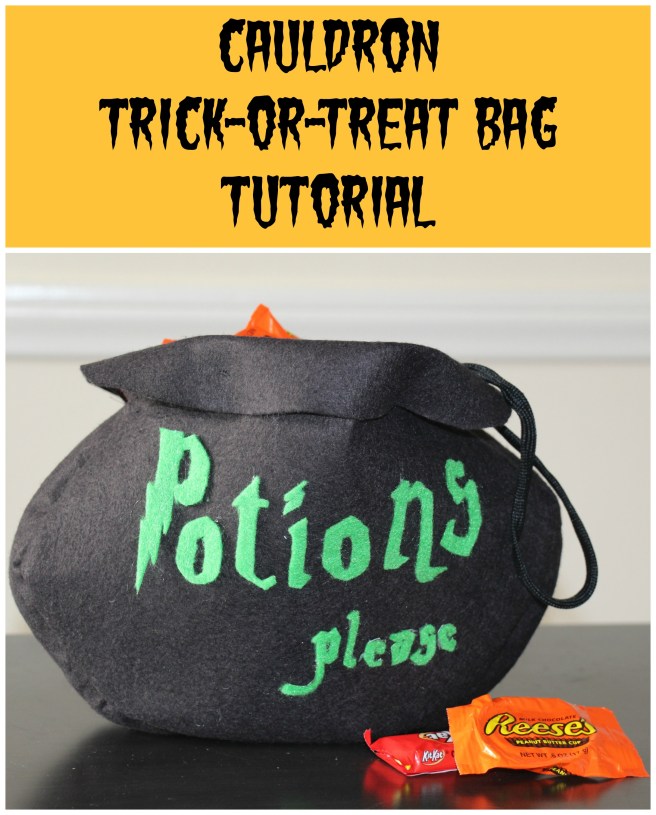
The Harry Potter themed week continues with a sewing tutorial for a trick-or-treat bag! This bag in the shape of a cauldron is perfect for your little witch or wizard to collect their sweets on Halloween.

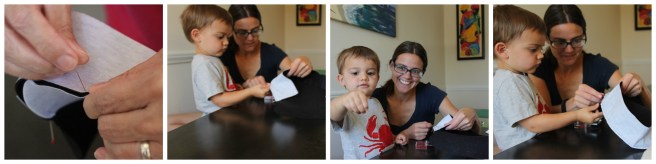
A huge thank you goes out to my mother-in-law for coming up with the prototype for our original project!

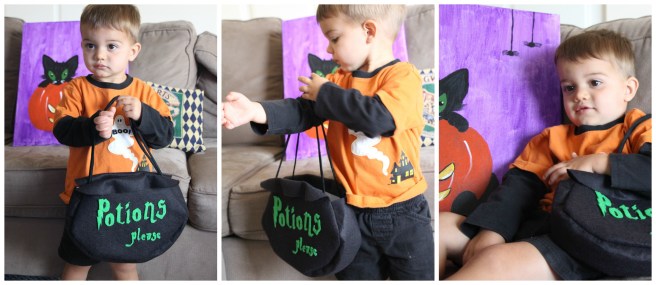
Firecracker loved getting in on the action, too. That sweet boy of mine always wants to offer his help.

Cauldron Trick-or-Treat Bag Tutorial | Sew You Think You Can Cook | http://sewyouthinkyoucancook.com

Here is the how-to for a cauldron tote bag:

Print out a template for a cauldron from a simple google search to desired size. Trace the template onto black wool felt with chalk. Cut out two cauldrons.

Use a string to measure the cauldron bottom. That value is your length. Cut a piece of black wool felt 3″ wide and the length just measured. (Mine was 28″)

Cauldron Trick-or-Treat Bag Tutorial | Sew You Think You Can Cook | http://sewyouthinkyoucancook.com

Iron on craft-fuse to the rectangular piece of felt, and the bowl portion of the cauldrons.

Cauldron Trick-or-Treat Bag Tutorial | Sew You Think You Can Cook | http://sewyouthinkyoucancook.com

Using a lot of pins, attach the rectangle to one of the cauldrons, so that the black sides face each other. Pin the center and the ends and ease your way until there are pins all around!

Cauldron Trick-or-Treat Bag Tutorial | Sew You Think You Can Cook | http://sewyouthinkyoucancook.com

Sew using a 1/4″ inseam, making sure to reinforce at the ends.

sewing

Repeat with the second side of the cauldron. Turn right-side-out.

Fold the top lip of the cauldron over and sew it down by hand using black thread with a few stitches in 1/3 from each edge. Repeat on the other side.

folding

I downloaded a Harry Potter font and cut out letters from felt and used a hot glue gun to add the words “Potions please”.

To create the handle, I sewed a black shoe string on each side.

Cauldron Trick-or-Treat Bag Tutorial | Sew You Think You Can Cook | http://sewyouthinkyoucancook.com

Happy Halloween

I love decorating for the holidays, and Halloween is no exception. Pinterest has fueled my decorating passion and this year I spent a lot of time with my hand in the scissors.

Last year was my first Pinterest Halloween and I did a Mummy front door. It was a great hit so I did it again! The original creators of the Mummy Door used white streamers. Living in a very humid climate I opted to use white ribbon. Yes, it’s more expensive, but it’s reusable year-to-year! I used a solid white and had a little bit of see-thru white ribbon to put over the bottom layer in diagonals. I secured the ribbon with double sided tape on the threshold sides of the door. I gave the mummy a sunken-eye look by excluding whites – he’s all pupil! I also decided to leave ribbon hanging at the door knob to give it that unraveling texture.

Mummy Door

I put spider webs with spider rings in the windows next to the front door – making the Mummy creepier rather than cute!

I’ve always used orange Christmas lights in my windows but this year I added even more decoration to the window panes. Silhouettes! I purchased a Martha Stewart window cling for the upstairs window (it claims to be reusable) and cut my own figures for the porch window. I printed templates from the internet, cut them, traced them onto black poster board, and cut that. Double stick tape secured them to the glass.

Halloween Windows

Halloween Windows

For the spider web I followed this tutorial.

I also brought the Halloween decor outside with 4 black foam bats hanging from the porch eaves. I printed out a template, cut it, traced it onto the black foam, and cut that. I then used a hole punch at the top of each bat’s head. Fishing line gives the bats their flying through the air illusion.

Bats