Slow Cooker Caramelized Onions

Caramelized onions can take a sandwich to the next level, but you don’t always want to spend the time making caramelized onions just for a grilled cheese! I stumbled upon this fantastic idea to make caramelized onions in the slow cooker! It’s definitely one of those, “Why didn’t I think of that?” moments. Sure, it definitely takes longer but it’s so much easier and all the prep-work is done whenever you do want caramelized onions because you can freeze them too!

sliced onions
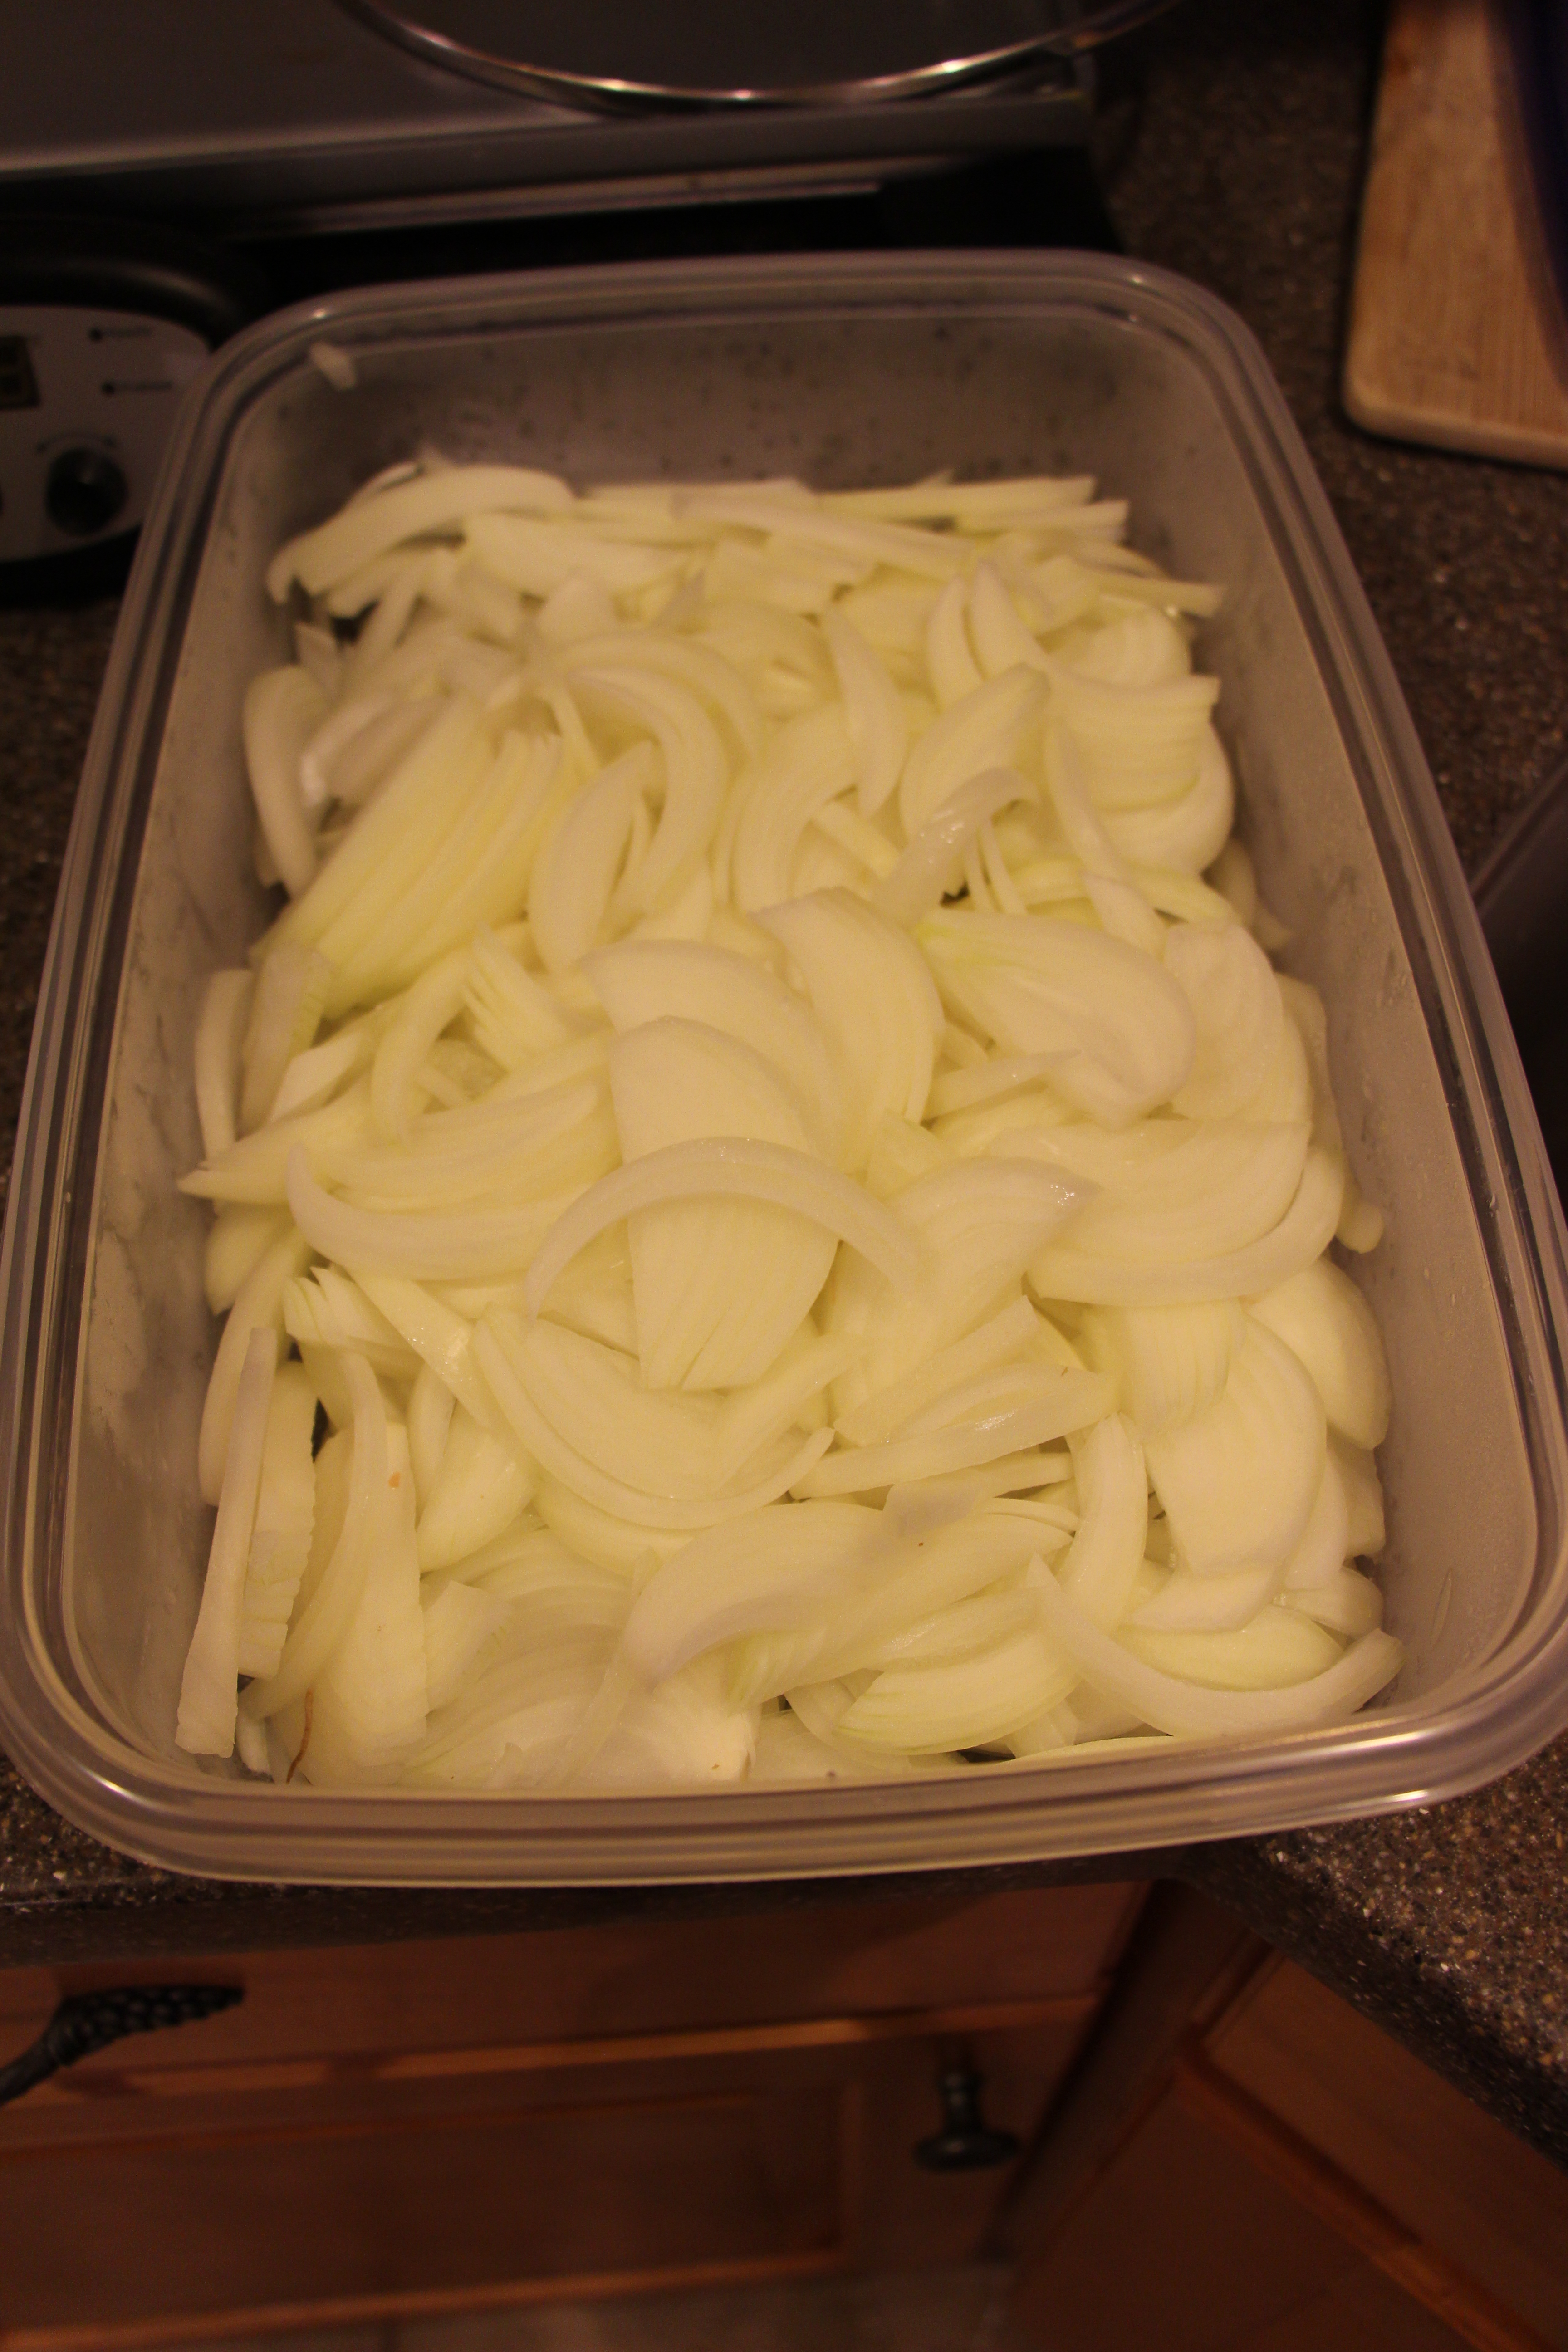
I actually cut my onions the night before, put them in a container which I then wrapped in plastic wrap and double bagged to keep the onion smell from permeating my entire refrigerator overnight. (No one wants to go to the office smelling like raw onion.) So in the morning all I had to do was dump my 3 lbs of onions into the crock pot with 3 tbsp of butter!

If you aren’t already hungry when you get home (I always am!), the smell of caramelized onions wafting over you as soon as you open the door will make you anxious to use them immediately! I used the onions for French Onion Soup – taking 30 minute off of my active cooking time. We also served them with burgers.

Slow Cooker Caramelized Onions

Ingredients:

  • 3 lb yellow onions
  • 3 tbsp butter, cubed

Steps:

  1. Using a sharp knife, slice onions thinly.
  2. Lightly spray inside of slow cooker with non stick cooking spray. Dump in onions and butter. Spritz top of onions with another hit of cooking spray.
  3. Cover and cook on high for 10 1/2 hours.

*This recipe is modified from Dorothy at http://www.shockinglydelicious.com/crock-pot-caramelized-onions-slow-and-steady-does-the-trick/*

Caramelized Onions

How To Cut A Pineapple

About 9 months ago my husband drank the CrossFit Kool-Aid. (Really, I can’t complain!) The CrossFit gym on base has classes during the lunch hour, and if I don’t pack him a lunch he’ll run to Einsteins Bros. Bagels on his way back to his desk. In an effort to stay healthy, he always gets the fruit cup in addition to his bagel sandwich. (Fruit with lunch is an Everson household rule) The fruit cup has pineapple in it, and an addiction was born. He always examines all available fruit cups and buys the one with the most pineapple.

When you buy a pineapple from the store, there’s usually a tag on one of the leaves telling you how to cut the fruit. If you’ve tried this, you know as well as I do that it’s not as easy as the cartoon drawings make it seem. And I was determined to find an easier way if Stuart was going through a whole pineapple every 5 days!

For a while I’d cut the entire pineapple into circles, and then trim off the skin and cut around the core. Although this method is simple, it’s time consuming and very sticky.

Here’s how I do it now!

Here’s what you’ll need: a sharp knife

Here’s what you’ll do: Chop off the top and bottom of the pineapple and stand it up on the now flat bottom. Run your knife between the flesh of the pineapple and the skin. Cut the flesh of the pineapple away from the core. Cut into cubes.

How to Cut a Pineapple 1 How to Cut a Pineapple 2

How to Cut a Pineapple 3 How to Cut a Pineapple 4

Fun fact: Eating an entire pineapple 1-3 days before getting your wisdom teeth removed will help to prevent swelling! There is a chance that doing so will affect your taste buds’ opinion of the fruit though.

How to Peel Tomatoes

I have a slight addiction/OCD when it comes to peeling things. It all started with my first Christmas. It’s Christmas morning, we’re opening presents. It’s all new and exciting. But then it’s nap time? Nap time on Christmas?! Well I didn’t think so! When my mother came back into my room, I had managed to peel the wallpaper off the wall by my crib. I still peel things – it’s why I never get my nails done. If there’s tape on a door/wall, it’ll be removed before I finish walking by. If paint is peeling off a desk, it’ll be stripped before class is over. And I happily open up all new CDs and DVDs. So why I didn’t think I’d like peeling tomatoes is beyond me!

When a recipe called for peeling and crushing fresh tomatoes, I thought about skipping that step and buying them out of a can. But when I saw that the tomatoes at the grocery store were in good shape, I decided to just go for it. It’s actually really easy (and fun)!

Here’s what you’ll need: paring knife, gently boiling water, bowl of ice water

Here’s what you’ll do: Cut an “x” in bottom side of tomato (opposite end of stem). Put in water for no more than 30s until the tomato starts to open up. Transfer tomato to the ice water. Peel!

How to Peel Tomatoes

How to Peel Tomatoes How to Peel Tomatoes How to Peel Tomatoes

Freezing Herbs

My husband and I have no shame in admitting that we both have black thumbs. So naturally, I do not grow my own herbs. Maybe 17 years from now when we own a house I’ll attempt it. Or maybe my future children (no mothers this is not a hint) will be blessed with the green thumb of my grandfather, my parents, and mother-in-law. Even if you can successfully grow your own herbs, this tutorial will help you during the winters when your plants are in hibernation yet you still want that freshness.

I try my best to plan my weekly menu to generate as little food waste as possible, but even still, the herbs go bad before I get the chance to use the entire bunch. I can’t even successfully keep them thriving in a glass of water! I’ve tried wrapping them in damp paper towels in the fridge because I read to do that somewhere on the internet (and they can’t put anything on the internet that isn’t true). Yea, I couldn’t do that either.

Here’s what you’ll need: An ice cube tray! (Well, you need a freezer too…)

Here’s what you’ll do: Chop up your herbs. Pack them into an ice cube tray. Boil water. Pour over herbs. Freeze. Remove into freezer bag. Each ice cube yields about 1 tbsp fresh herbs. When you want to use them, simply pull out a cube and toss into your dish!

This quick how-to method works for soft leafed herbs (i.e.: basil, cilantro, mint, parsley).

Image

Note: These herbs are now for cooking. I haven’t tried letting the ice cube melt to see what the delicate leaves will look like. If you try it out before I do, let me know if you can still garnish your dish with previously frozen herbs!

Slow Cooker Engineering

Just like any busy cook, one of my best friends in the kitchen is my slow cooker. But what do you do when you find a recipe that makes your mouth water and your stomach growl that on LOW only takes 5 hours? Depending on how far from the office you live, there is the opportunity to go home during your lunch hour and prep dinner. Or, if your slow cooker has a fancy “delay” button, then no worries. But what if it doesn’t and you can’t get away in the middle of the day? Well, this engineer has figured out a solution!

Here’s what you’ll need: An outlet timer like those used for holiday lights ($10) and a simple slow cooker with a dial, not the electric kind ($30).

Timer Slow Cooker 

Note: The electric slow cookers will not work because to turn them on you have to be home to physically push the buttons.

Here’s what you’ll do: Plug your slow cooker into the timer and the timer into the outlet. Set your timer to turn on for as long as the recipe calls for, making sure the hours you set it for coincide with when you want to eat! Turn the dial on your slow cooker to LOW (or HIGH based on the recipe). Fill ‘er up, put on the lid, and walk away! Image

The only disadvantage to this method is that the slow cooker will not be able to switch to “keep warm” once the timer turns off because at this point your slow cooker will also be off. I don’t consider this to be a show stopper though because I know I’ll be home close enough to the time it turns off.