Treacle Tart

Happy Halloween week everyone!

If you’ve followed along with Sew You Think You Can Cook over the past three years (Thank you) you’ll know that I love having a theme for the week leading up to Halloween. If you’re new here, I hope you’ll be excited about this year’s theme and stick with me all week!

We’ve celebrated candy corn, ghosts, and homemade candy. This year, we’re exploring the wizarding world of Harry Potter!

halloween-themes-on-sew-you-think-you-can-cook

To some (okay, most) of my friends I’m the biggest Harry Potter fan they know. But in this worldwide web I’ve quickly discovered that I have menial fan status compared to many!

Growing up my closet doors were plastered with Harry Potter pictures. Photos from those page-a-day calendars, movie posters, newspaper articles, soundtrack CD jackets, birthday cards, movie tickets, etc. I went to every midnight movie release (dressed up as Hermione) beginning with Prisoner of Azkaban and never settled for only seeing it once. It became the norm for me to leave the movie theater at 2 in the morning feeling let down by the screen play’s adaptation to the books I’d so adored that I came to expect and accept it. Knowing that I’d simply have to “adjust” to the movie version and simply see it again!

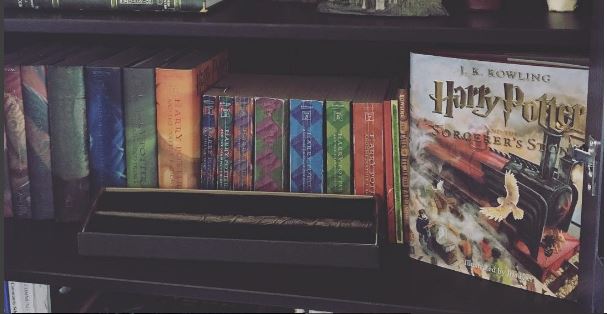
I own two copies of each book (hardcover and soft) as well as the new illustrated version of The Sorcerer’s Stone. I have read each book more times than I can count and have the audio books on CD in my car on constant repeat. (I’m currently near the end of book 6 if anyone wants to listen along.) I’m also already looking forward to delving into The Cursed Child again, too.

hp-book-collection

For our 1 year anniversary 5 years ago (wow that makes me feel a little old) we went to Orlando to experience Harry’s world first hand. We returned the following year for my birthday, too. hp-collectiblesDuring that birthday trip I was chosen by Ollivander to get my own personal wand. (Minute 1:20 of this vacation video.) Unfortunately, I never got the chance to experience the Diagon Alley expansion having delivered Firecracker opening week and moving to Ohio less than two months later. We do have plans to explore California’s Hogsmede and Hogwarts soon, though!

My Ollivander’s wand joined my collection of Harry Potter collectibles including a replica of Hermione’s wand and Time Turner.

As you can see… I’m easily distracted when it comes to Harry Potter…

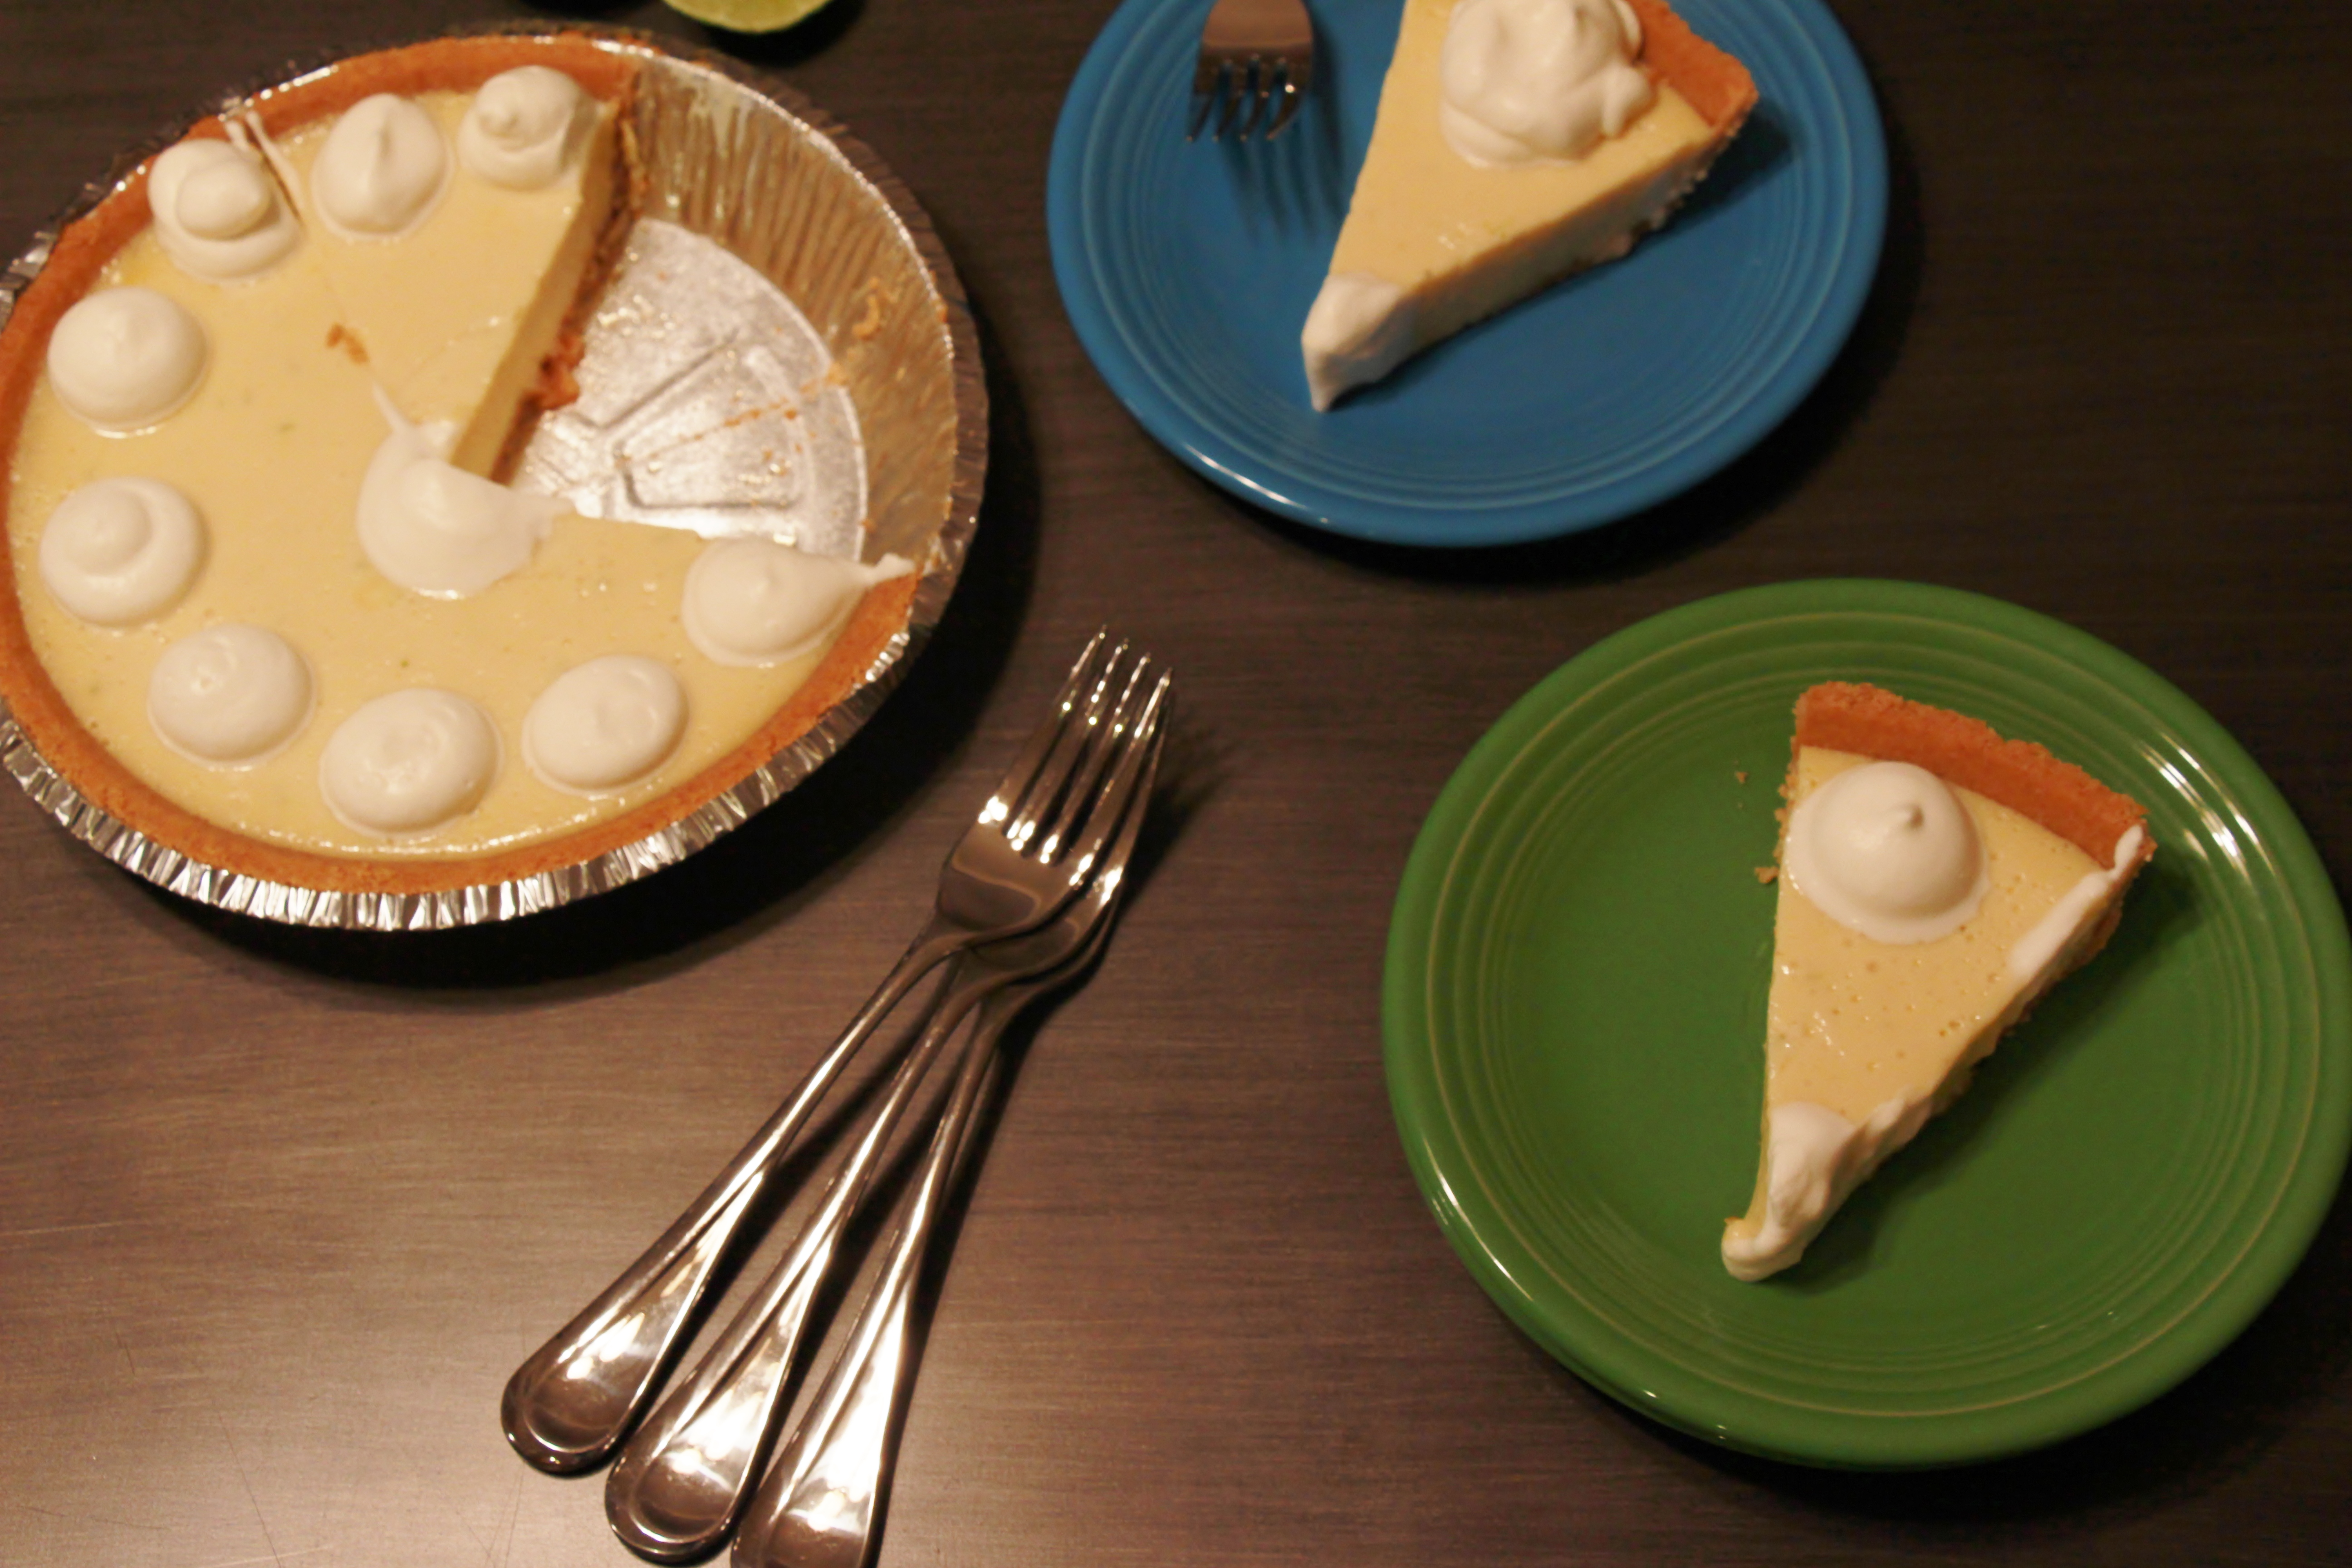
To kick off the week I’m starting with Harry’s favorite dessert: Treacle Tart.

Esther of Why’d You Eat That? has a beautiful post describing the history of treacle – I highly recommend you read it!

This dessert is sticky, sweet, and tart. I found myself doing a lot of recipe searching and found large discrepancies for the amount of bread crumbs used in the filling but always the one cup of golden syrup. Some recipes included ginger while some stuck with just lemon. The tart crust was also a recipe that varied, as was what to do with the topping. The only consistencies were the use of golden syrup and fresh (not packaged) breadcrumbs.

Treacle Tart | Sew You Think You Can Cook | http://sewyouthinkyoucancook.com (2)

Treacle Tart

Ingredients for crust:

  • 2 C flour
  • 1/4 C sugar
  • 1/2 tsp salt
  • 2 sticks cold butter, cubed
  • 2 egg yolks
  • 1/4 – 1/2 C heavy cream
  • 2 tbsp fresh lemon juice
  • 1 tsp vanilla extract
  • 1 whole egg, divided

Ingredients for filling:

  • 6 slices white bread
  • 1 C golden syrup
  • zest 1 lemon
  • juice 1/2 lemon
  • pinch ground ginger

Steps:

  1. Make the crust: Put flour, sugar, and salt in a food processor fitted with the dough blade and pulse to mix. Add in the cold cubed butter a little at a time pulsing to create crumbs.
  2. In a small bowl whisk together the egg yolks, 1/4 C heavy cream, vanilla, and lemon juice. Pour into the food processor and blend until the dough comes together. Add up to another 1/4 C heavy cream one tablespoon at a time if needed.
  3. Divide dough into two disks, wrap, and refrigerate 2 hours.
  4. Preheat oven to 350 degrees F. Place bread on a baking sheet. Toast 10-15 minutes. Remove crusts and pulse, in batches if needed, in a food process until small crumbs. (Do not fill processor bowl more than half way.)
  5. Roll out one disk of dough on a heavily floured surface. Brush off excess flour before transferring to a tart or pie pan. Cover and refrigerate 30 minutes.
  6. Preheat oven to 375 degrees F.
  7. Place golden syrup in a glass bowl over a double boiler. Heat until easily stirrable then add the bread crumbs, lemon zest, lemon juice, and ginger.
  8. Brush the tart crust with egg white before pouring in the filling.
  9. If using a top crust, roll out the second disk of dough and cut strips. Brush with an egg wash mixture of egg yolk and 1 tbsp heavy cream and create a lattice top to the tart.
  10. Bake 20-25 minutes until set. Allow tart to cool before serving with whipped cream or ice cream.

*This recipe is modified from Kathryn at http://www.instructables.com/id/Harry-Potters-Favorite-Treacle-Tart/?ALLSTEPS*

Treacle Tart | Sew You Think You Can Cook | http://sewyouthinkyoucancook.com

Disclaimer: This post contains affiliate links.


SRC: Cranberry Tart

newsrcbanner

Good morning and welcome to another edition of The Secret Recipe Club. For a little “behind the scenes” information, The Secret Recipe Club (SRC) is divided into four group. Each group posts on a different Monday of the month. I am in Group D and always post on the 4th Monday of the month. This means that those special months with five Mondays there’s a week without any fun reveal day! That is all about to change, beginning with today. On the 5th Monday of the month there will now be a themed reveal and it’s a “free for all,” which means that there aren’t any group restrictions. I’m looking forward to getting to know some of the other bloggers in the club.

With Thanksgiving behind us it’s time to set our eyes on the holidays and that’s why our themed reveal this month is Holiday Treats. My assignment this month comes from Group A, Anna over at BCMom’s Kitchen. Anna views recipes as “suggestions,” something I’d always had a problem doing. As I’ve been blogging and cooking I’ve become more accustomed to this line of thought and can comfortably change recipes to suit the ingredients in my pantry (and budget).

Given the theme for the month I immediately went to Anna’s “sweets” index and searched with the holiday frame of mind. I found myself being pulled to anything and everything cranberry! Apple Cranberry Crisp, Cranberry Tart, and although not a dessert, Cranberry Cream Cheese Dip.

We had this “tart” for our Thanksgiving dessert. My Thanksgiving menu this year was a little unconventional because we had a small group (just us and my in-laws). Instead of turkey we had pork roasts, cornbread dressing, sweet potato casserole, and green bean casserole. We had my Award Winning Chili on Saturday so we did get some turkey during the holiday weekend.

I chose the cranberry tart, but found it difficult to call this dessert a tart. I struggled with how to categorize it though. It’s not quite a tart because there isn’t a crust topped with a filling. It’s almost a pie with a crust going on top of the filling, but it’s not a crust, it’s a batter. It’s probably most like an upside down cake, but I didn’t photograph it upside down – I had to take the pictures Wednesday, before we ate it, while there was light. There was no way I’d risk turning the “tart” upside down in case it didn’t work that way. I’ve decided to call it a “pie cake.” Whatever you call it, it’s delicious – a perfect blend of sweet and tart with some texture.

I found this dessert best served warm alongside a scoop of vanilla ice cream.

Cranberry Tart

Ingredients:

  • 2 C fresh (or frozen) cranberries
  • 1/2 C chopped pecans
  • 1 1/2 C sugar, divided use
  • 1 C flour
  • 1 1/2 sticks butter, melted
  • 2 eggs
  • 1 tsp almond extract

Steps:

  1. Preheat oven to 350 degrees F. Grease a 9″ pie pan.
  2. Place cranberries, pecans, and 1/2 C sugar in the pie pan.
  3. In a bowl mix the flour, remaining sugar, melted butter, eggs, and extract. Pour over the cranberries.
  4. Bake 40-45 minutes until the tart has risen slightly, is set, and lightly golden.

*This recipe is adapted from Anna at http://recipes.alwaysbcmom.com/2011/06/cranberry-tart.html*

Cranberry Tart for #SRCHolidayTreats from Sew You Think You Can Cook

To see the other bloggers who participated in the themed Secret Recipe Club this month click here:

Caesar Tart

Sometimes salads can be boring. Even your favorite salad can end up leaving you wanting more. I challenge you to “fancify” your next salad by placing it atop a tart!

My favorite salad is Caesar and the tart it’s been placed upon is roasted garlic. When I found this recipe 8 months ago I’d been searching for the perfect time to make it. For a side dish it seemed like quite a lot of work. So when we were invited to our neighbor’s home for dinner I was provided my opportunity! Without the added responsibility of creating an entree I could spend my time on this fancy salad.

Turns out you can make this side dish in stages! My excuse for not having made it sooner was simply made invalid. You can make the dressing in advance. You can make the tart shell in advance. You can even shave or shred your Parmesan ahead of time. I waited to dress the salad until we were ready to eat, gently placed it on top of the tart shell, and topped it with Parmesan. Note: there aren’t any croutons in this salad – the tart shell acts as your croutons, but if you simply can’t live without them, feel free to add them to your salad too.

If you want to make this more of a main dish feel free to top your tart with some grilled chicken or salmon.

Caesar Tart

Ingredients for the Roasted Garlic Tart:

  • 1 head of garlic
  • 1 tbsp olive oil
  • 1 stick butter, at room temperature
  • 1/4 C grated Paremsan cheese
  • 1/4 tsp salt
  • 1 1/4 C flour

Ingredients for the Caesar Dressing:

  • 3 cloves garlic, minced
  • 6 anchovies
  • 4 tsp red wine vinegar
  • juice of 1 lemon
  • 1/4 tsp salt
  • 1/4 C extra virgin olive oil
  • 1/2 tsp sugar

Ingredients for the salad:

  • 3 hearts of romaine, chopped
  • 1/4 C grated Parmesan cheese

Steps:

  1. Preheat oven to 350 degrees F.
  2. Cut off the top of the head of garlic, so the bulbs are exposed but still in tact. Pour the olive oil overtop the garlic. Wrap in aluminum foil. Bake 40 minutes. Allow to cool.
  3. When garlic is cool, squeeze the cloves into the bowl of a stand mixer. Add the butter, Parmesan, and salt. Beat the mixture until combined. Add in the flour and mix until crumbly.
  4. Press the dough into a greased tart pan (I don’t have one and used a foil lined pie dish). Bake 20-25 minutes, or until golden. Allow tart to cool.
  5. Make the dressing: Place all of the ingredients in a small food processor or blender. Pulse until combined. Taste to check for additional salt or sugar (will depend on how juicy the lemon is).
  6. In a large bowl toss the lettuce and Parmesan with as much dressing as desired. Top the tart with the dressed salad.

*This recipe is adapted from Mary at http://homemadecravings.com/caesar-salad-sweet-garlic-butter-crust/*

Casear Tart | Sew You Think You Can Cook

Key Lime Pie

As I’ve gotten “older” my sweet tooth has gotten smaller. When a craving hits, it’s usually for something salty – like popcorn. But there is one dessert that I can never say no to. And because today is my 25th birthday, I am going to indulge.

Key Lime Pie is my absolute favorite dessert, and Publix (sorry to anyone not in the South!) makes the best one! …. Or so I thought. I am very proud to declare that I now make the best Key Lime Pie. I’m particularly excited for this because I now know that I can have perfect key lime pie even when we leave the land of Publix.

A couple years ago I made a key lime pie for my brother’s fiancé’s birthday as it’s also one of her favorites. (Her favorite is actually pumpkin pie but my brother hates it, and her birthday is in July anyway.) I had actually squeezed the juice out of actual key limes! That pie was unbelievably tart. I don’t even recall which recipe I used.

This time I found Nellie & Joe Key West Lime Juice and happily used that (no funky ingredients involved). I would love to say that this was only my second attempt at key lime pie. But that’d be a lie. I made two pies for my birthday. The first was a complete disaster. My can of sweetened condensed milk had expired. And I didn’t notice it until I was emptying the contents into the egg yolk mixture. I immediately went to the internet and established that I should still be okay to use it. 

IMG_3072

So I carried on. Key lime pie is not naturally green (but if you want it to be by all means add a drop or two of food

coloring), but it’s definitely not supposed to be marigold. 

It’s not supposed to smell overpoweringly like sweetened condensed milk either. I did still taste it – the texture was a little off and it was still just a little too sour. So I went back to the store and back to square one. 

That failed attempt was actually a blessing in disguise because I found the perfect, better-than-Publix recipe! Third time’s the charm. 😉

Key Lime Pie

Ingredients:

  • 3 egg yolks
  • 1 egg white, beaten until frothy
  • 1 14oz can sweetened condensed milk
  • zest 1 lime
  • 1/2 C key lime juice
  • 9 in graham cracker pie crust
  • 1/2 C heavy whipping cream
  • 1/4 tsp vanilla extract
  • 1 tsp powdered sugar

Steps

  1. Preheat oven to 350 degrees F.
  2. Using a hand mixer, beat egg yolks with lime zest and sweetened condensed milk. Add in lime juice. Add the egg white.
  3. Pour pie filling into pie crust. Bake 15 minutes. Allow pie to cool to room temperature for at least an hour before covering and putting in the fridge.
  4. Using a hand mixer, make the whipped cream. Beat the heavy cream until it starts to get thick, then add in the vanilla and sugar. Beat until stiff peaks form. Top pie with whipped cream right before serving. Note: I don’t like my whipped cream to be too sweet, so feel free to add more sugar/vanilla to taste.

*This recipe is adapted from The Big Cheese at http://www.food.com/recipe/traditional-key-lime-pie-109918*
Key Lime Pie 1

Key Lime Pie 2