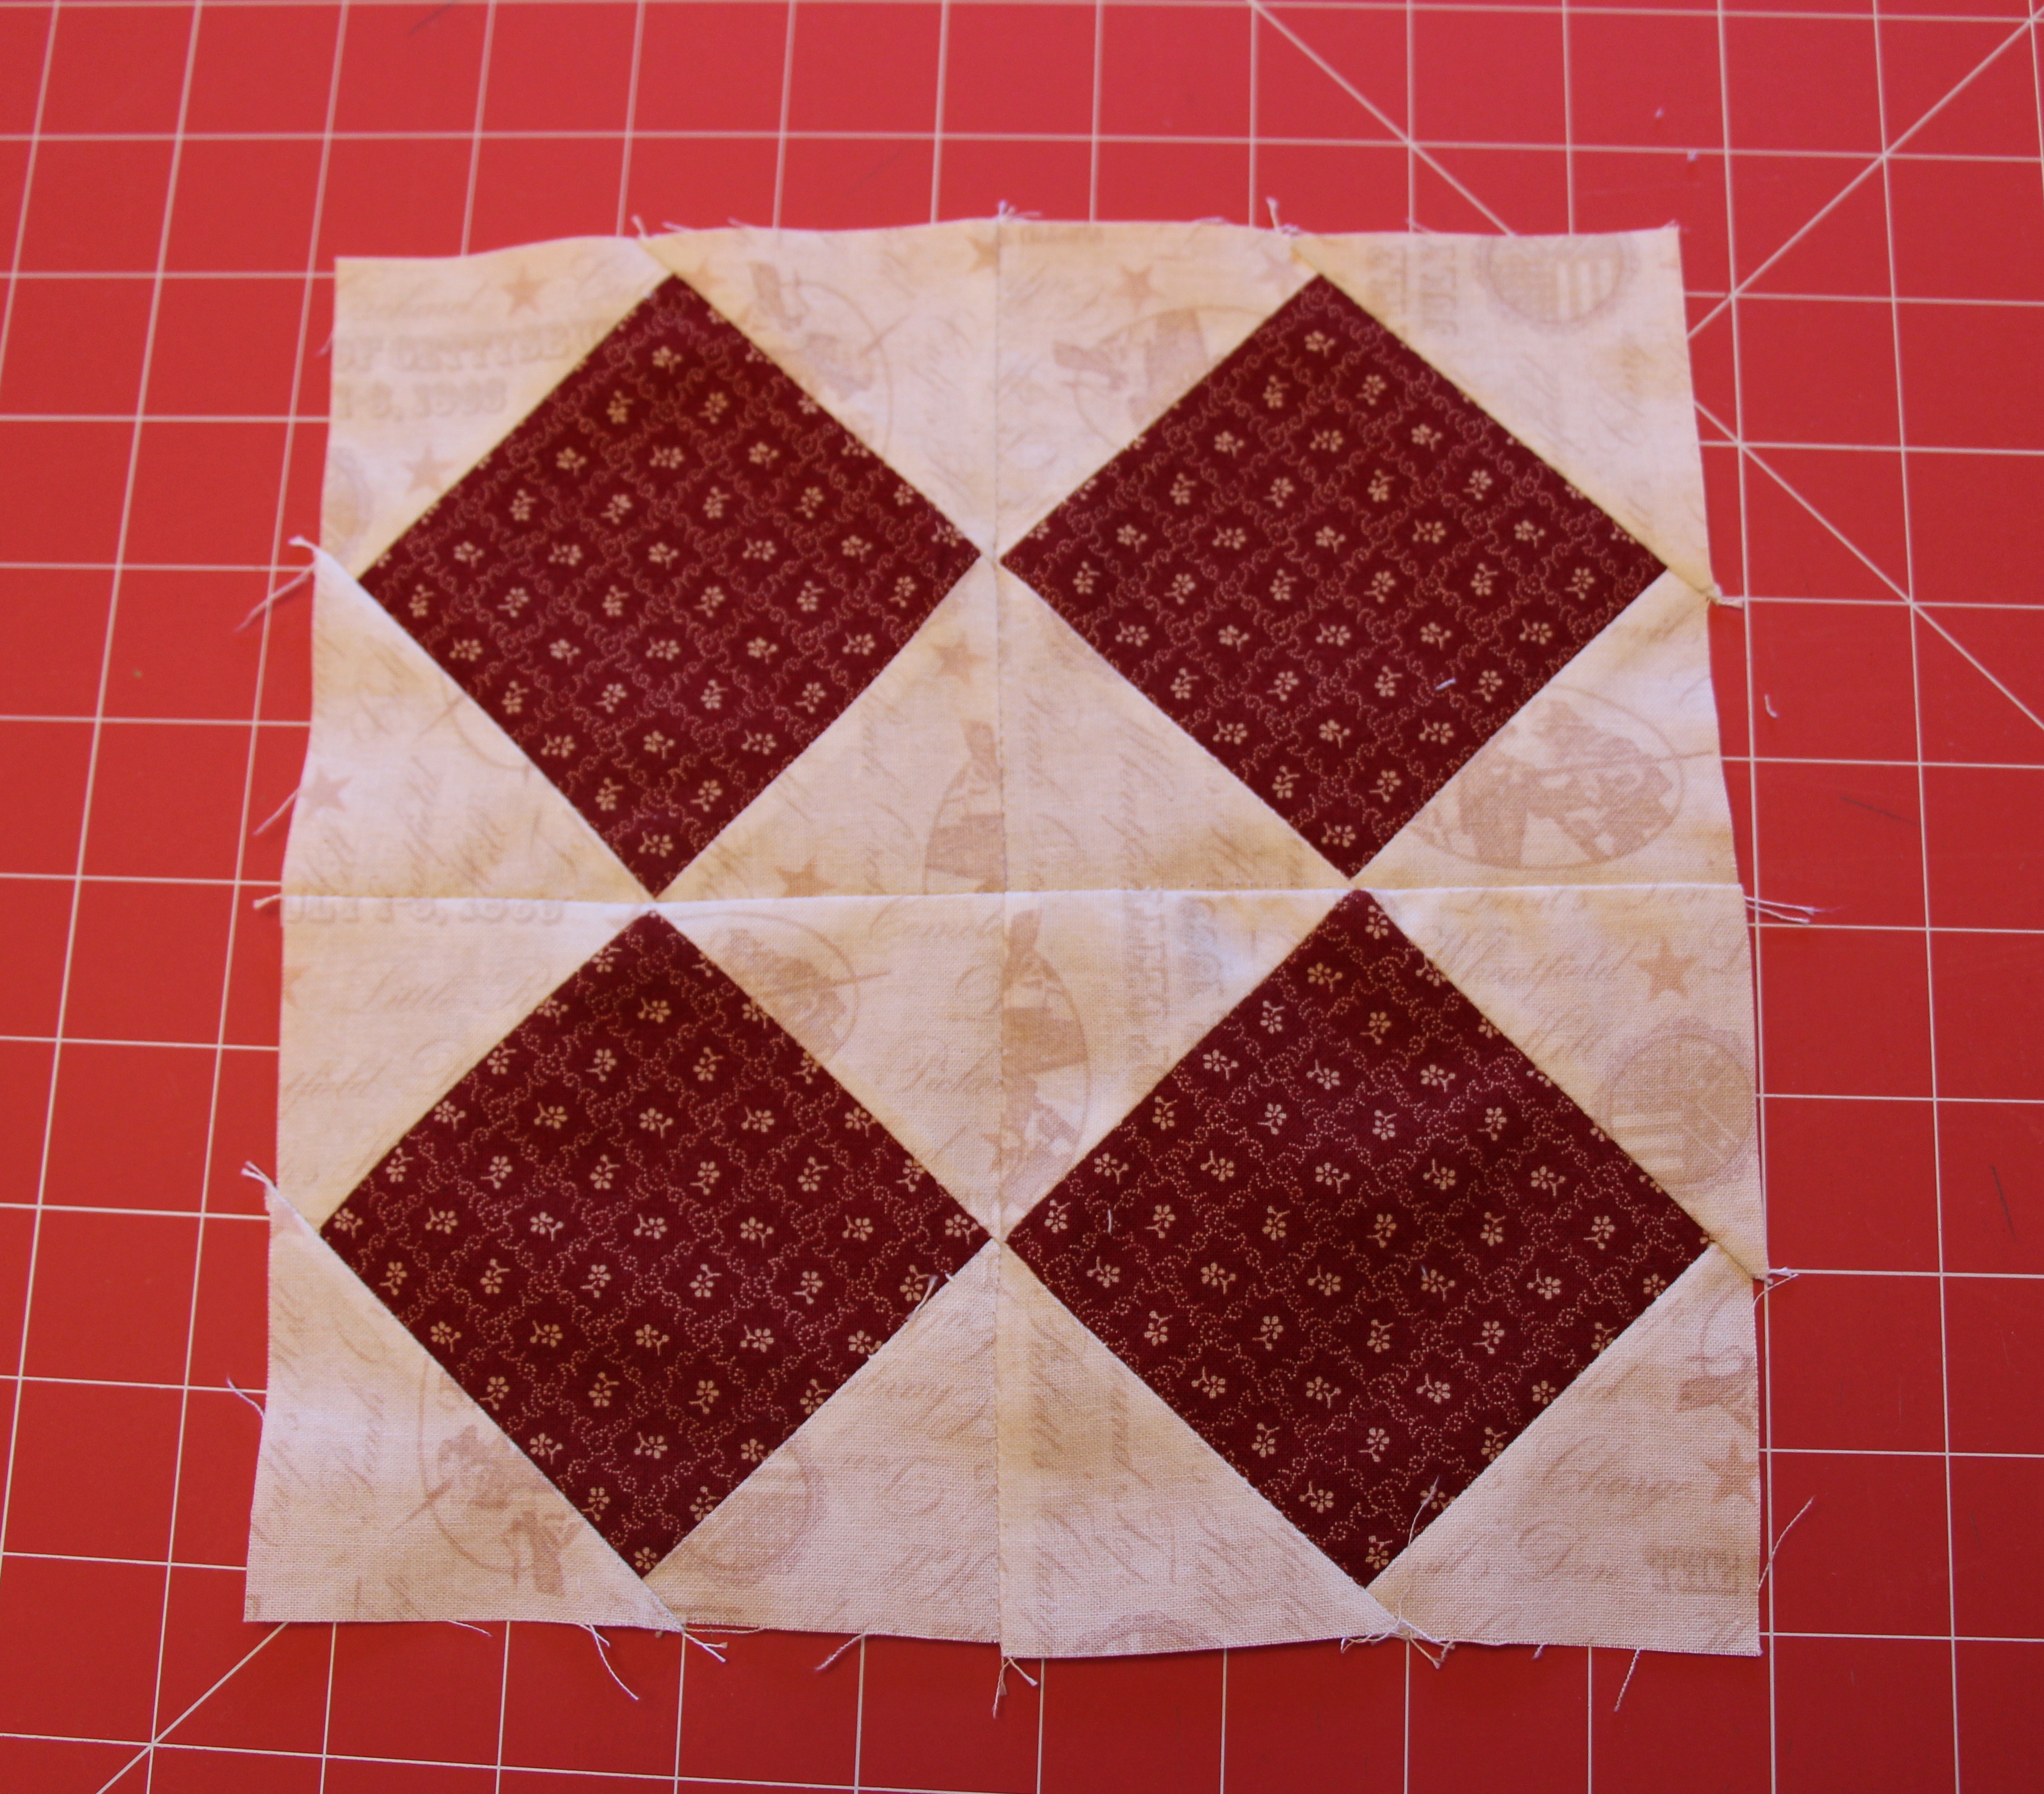
 The Square in a Square block is essentially a diamond. Diamonds can be made by 4 Half Square Triangles (HSTs) or you can follow this latest tutorial for a Square in a Square. Using this method will create a cleaner diamond. As it is very similar to my previous tutorial covering Flying Geese bonus small HSTs can come from the Square in a Square! The block I used in Old Glory is comprised of 4 Square in a Squares.
Here is the how-to for a Square in a Square:
Your first step will be to determine what size block you’ll be working with. This diamond simply replaces a square! Take the size of that square and add your 1/4″ seam allowance. That value will be the base. You will also need four squares cut to 1/2 of the base square plus the 1/4″ seam allowance. Example: 4″ x 4″ finished Square in a Square will require one 4 1/2″ x 4 1/2″ square and four 2 1/2″ squares. Don’t forget to ALWAYS make a practice block with scrap fabric before committing.
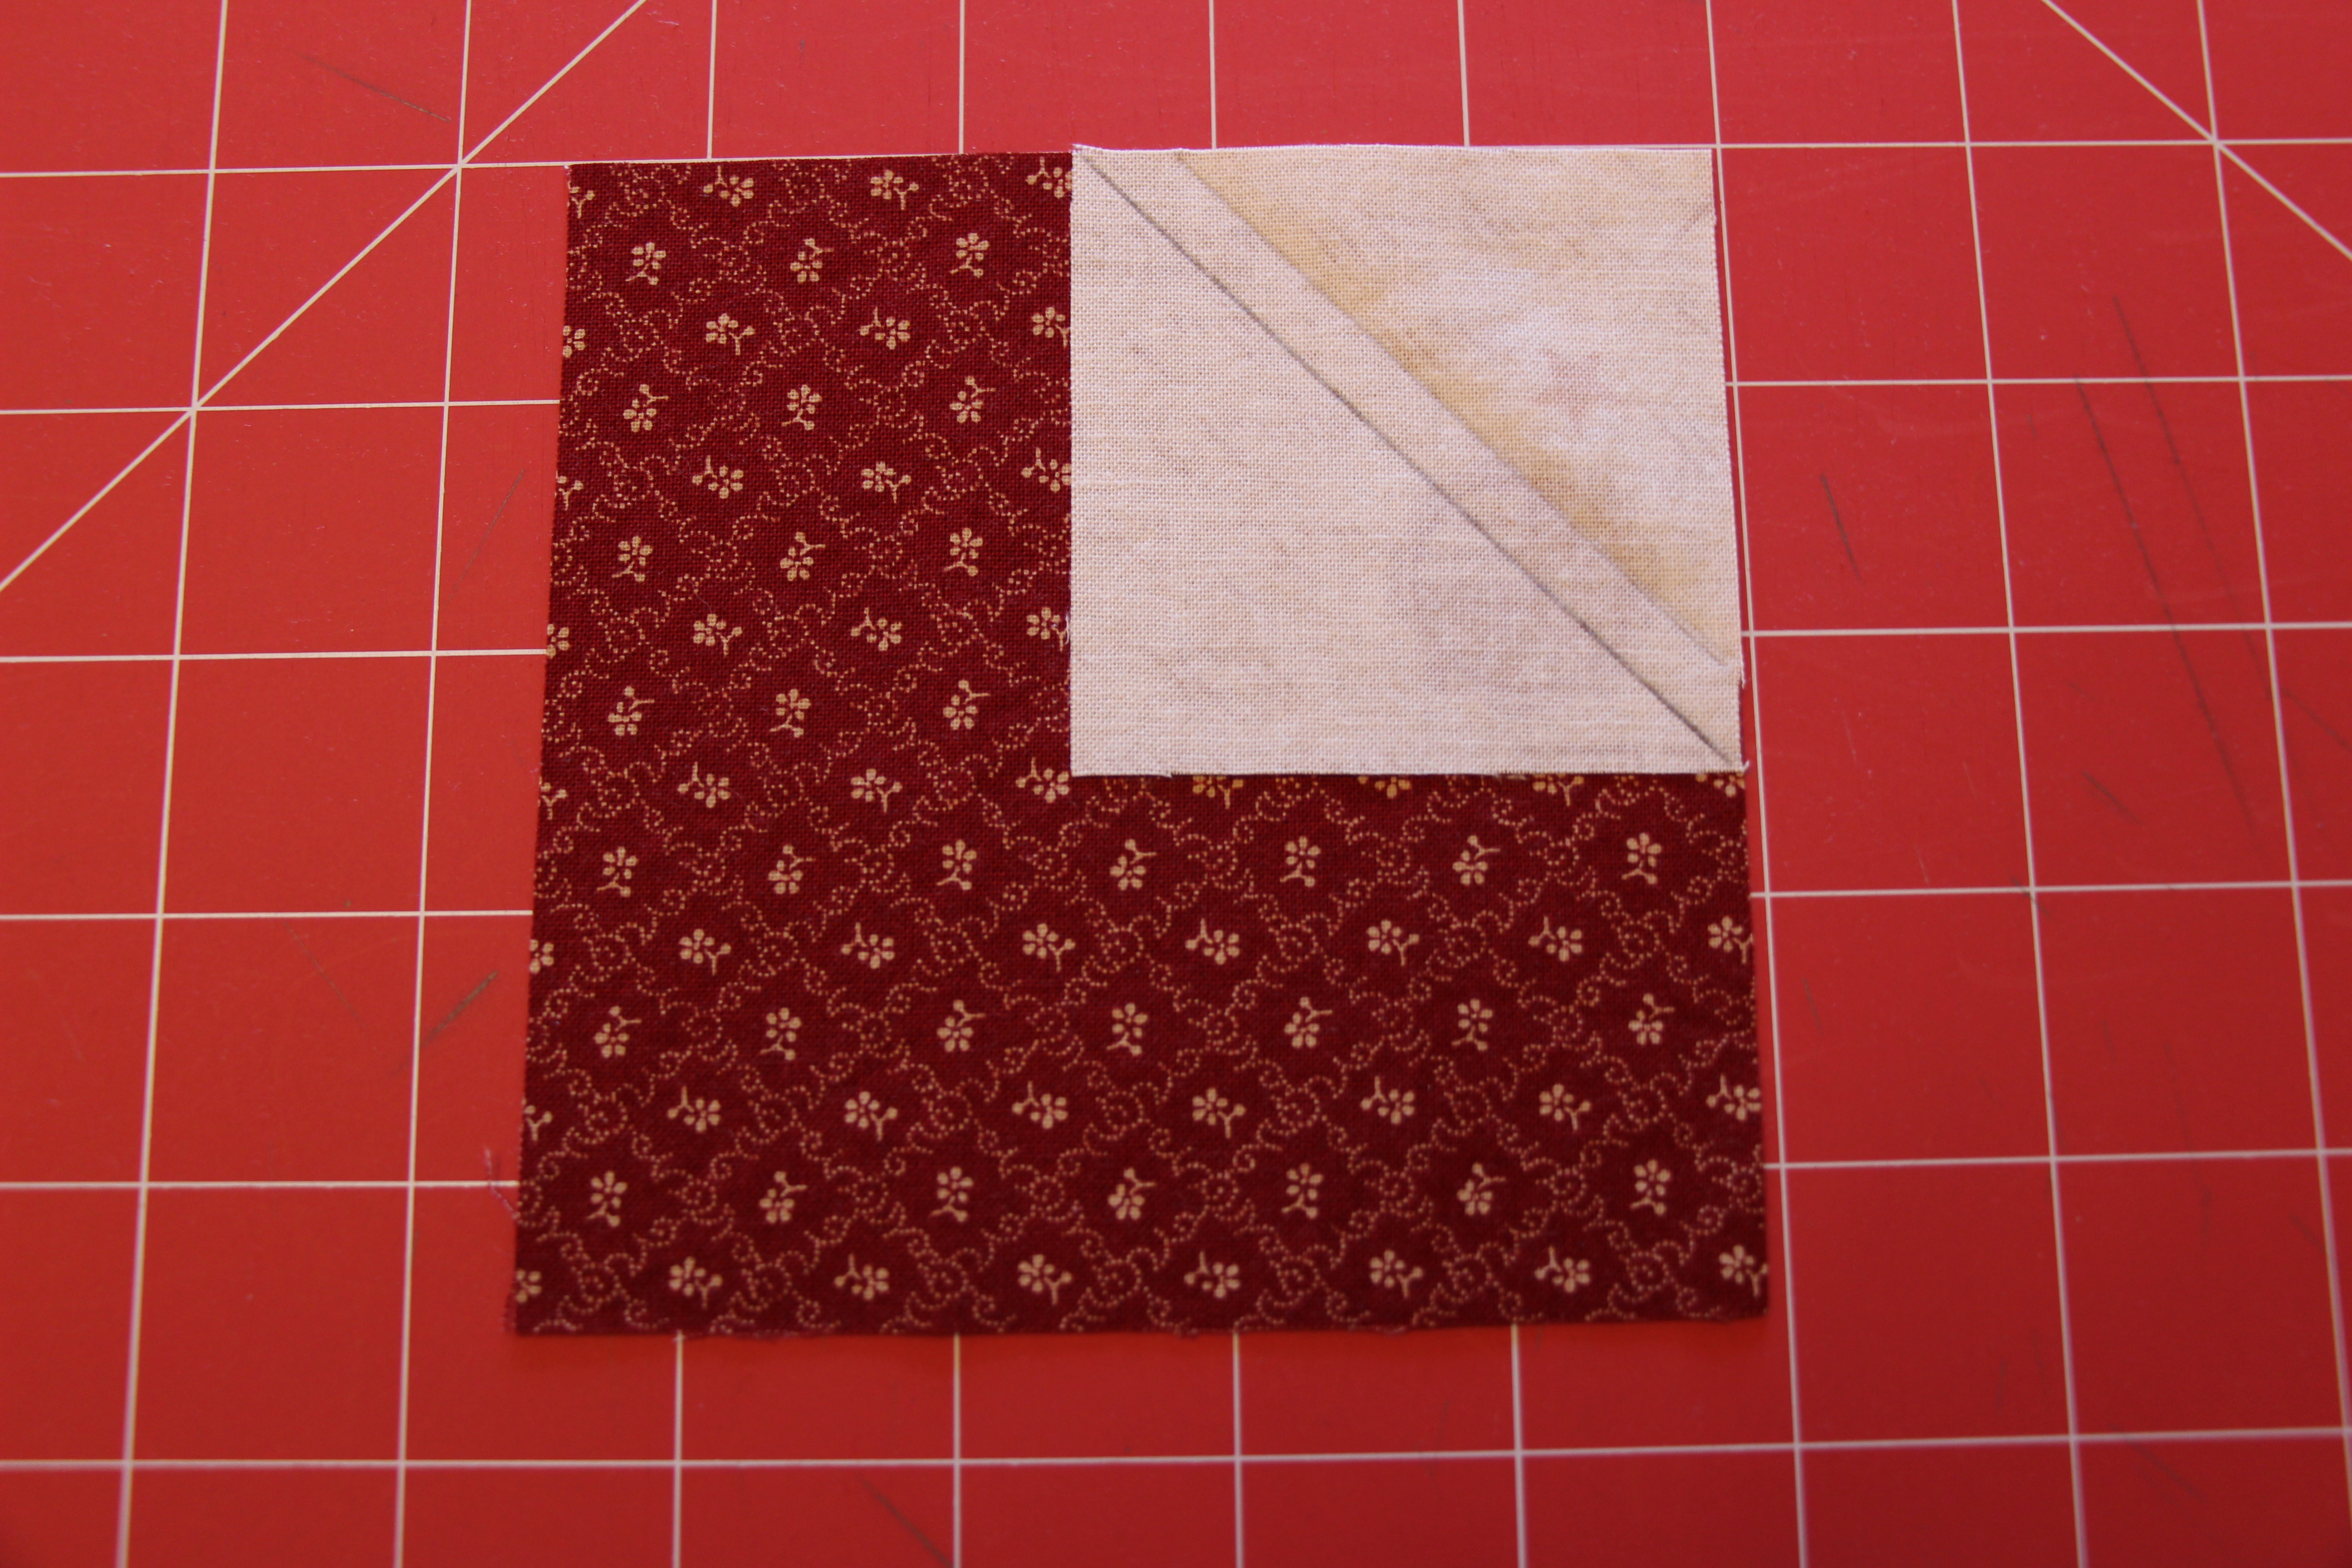
Draw on the diagonal of each square and if you want the bonus HST draw a line 1/4″ off center in one direction. Place one small square face down in one corner of the base. If making a HST that bonus 1/4″ line needs to be on the side of the block towards the corner:
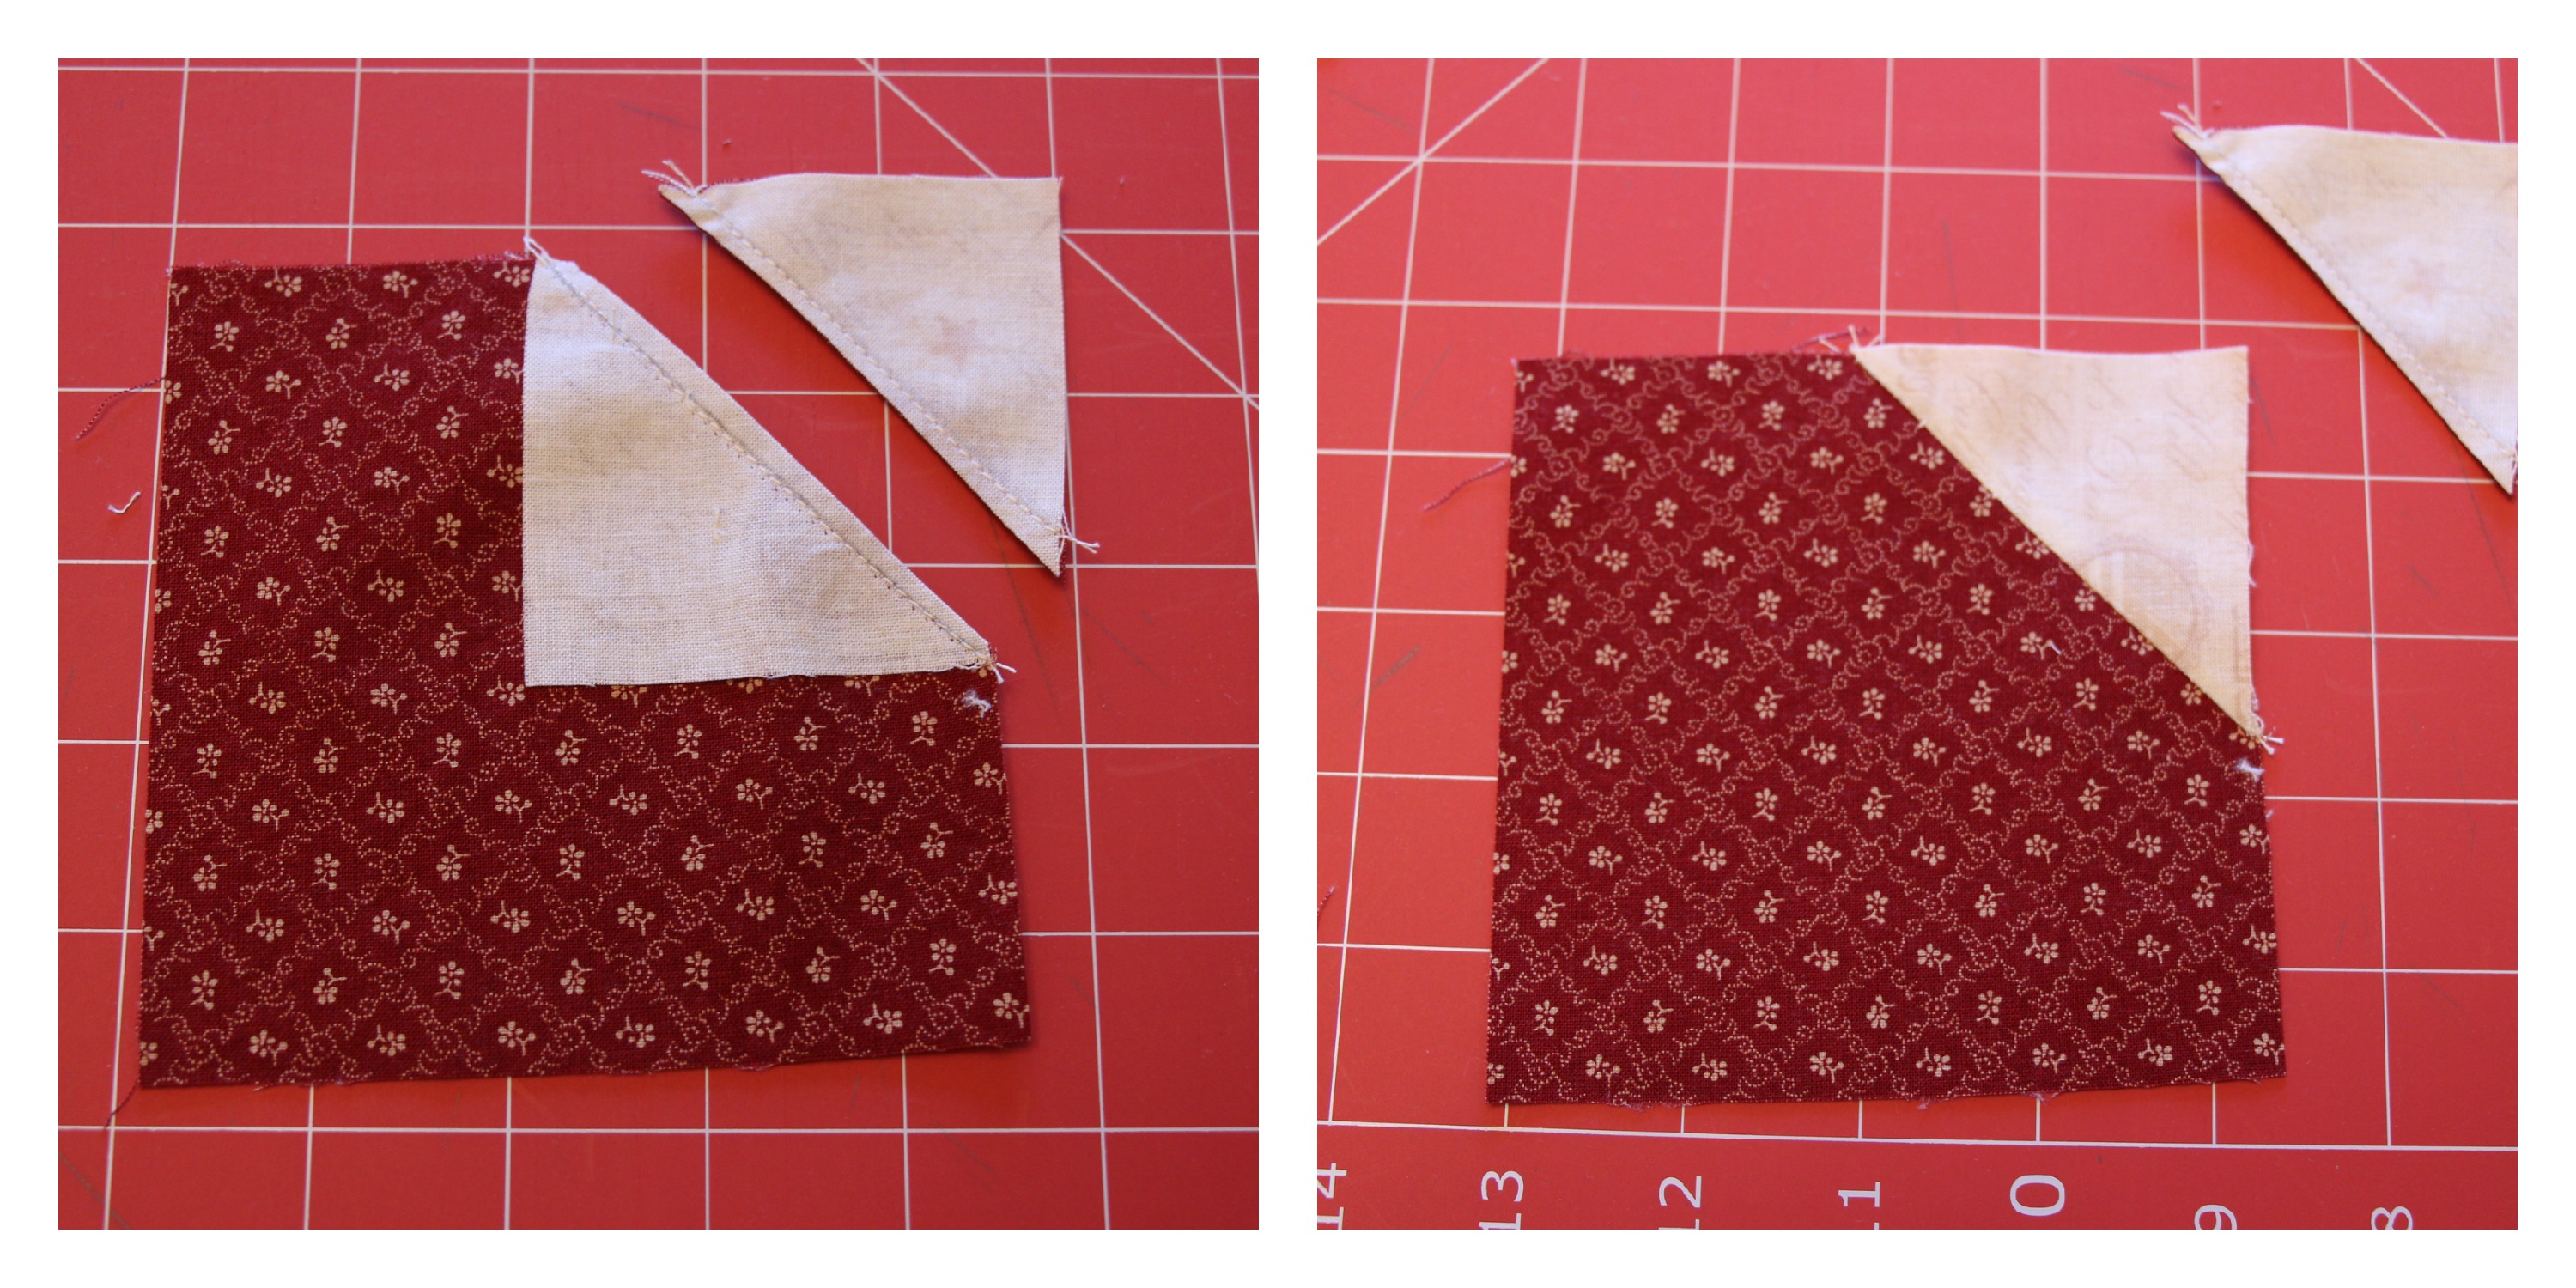
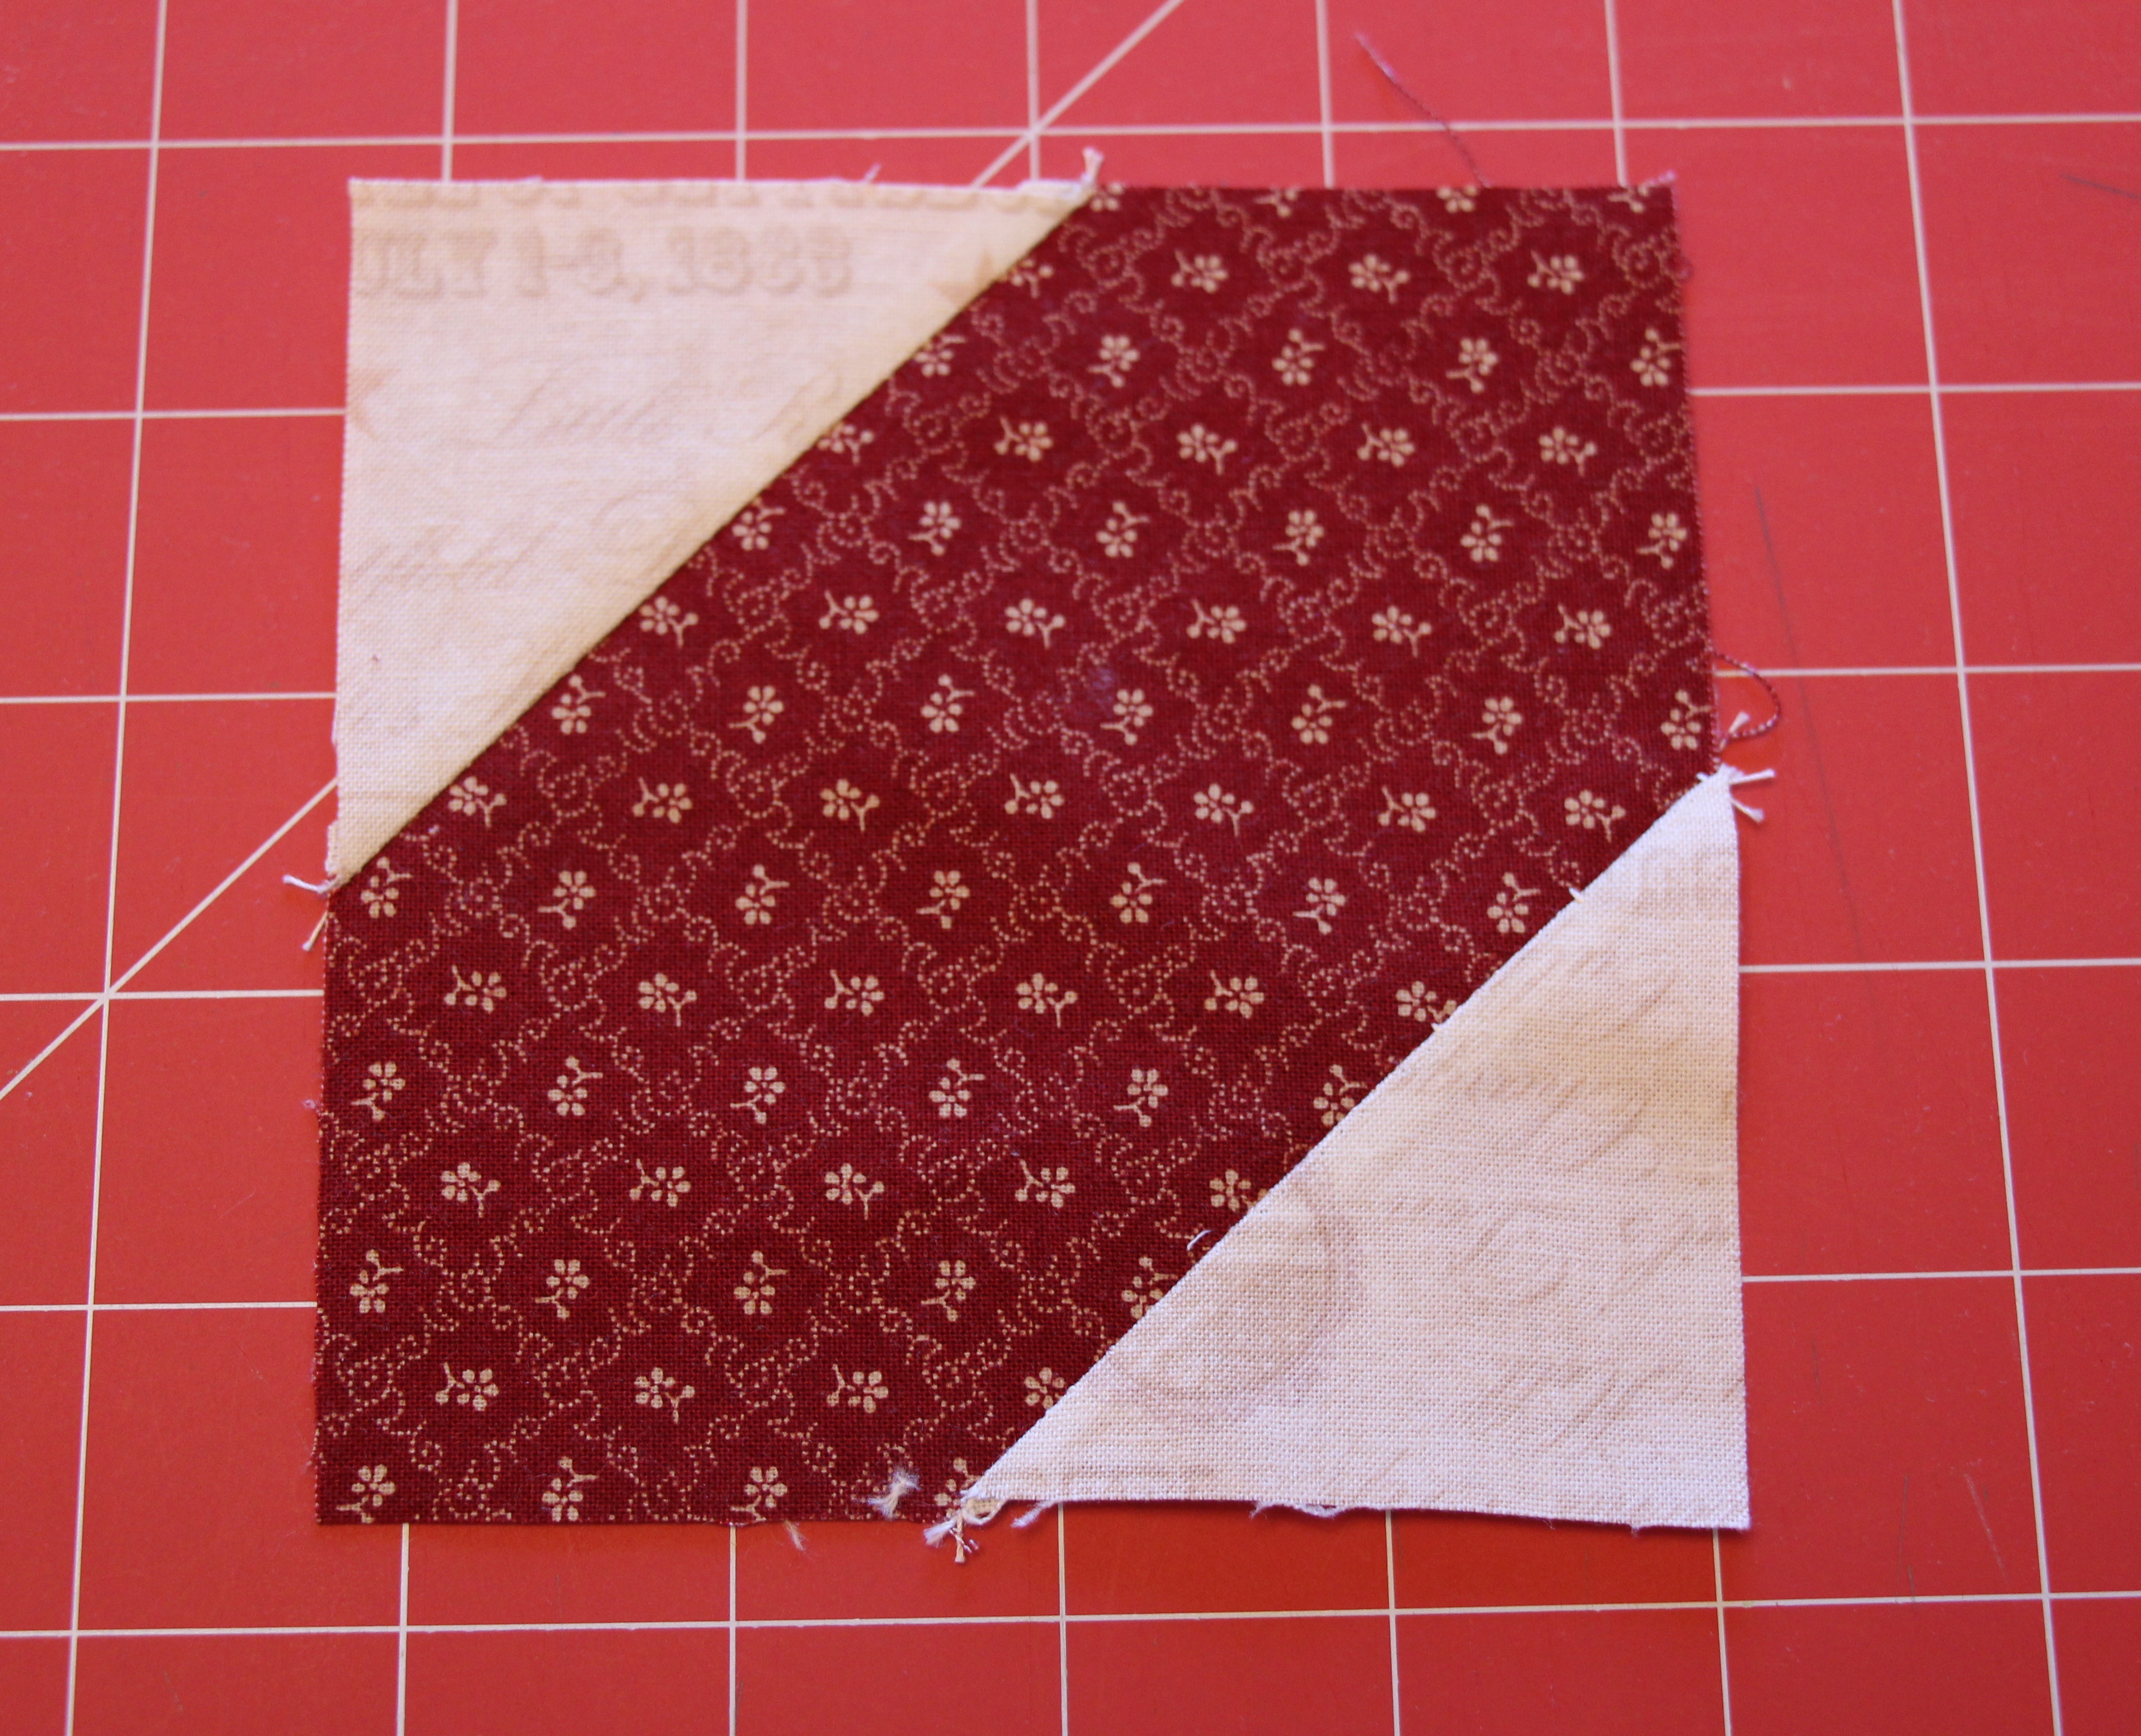
Sew on both drawn lines, cut between the seams, and iron open:
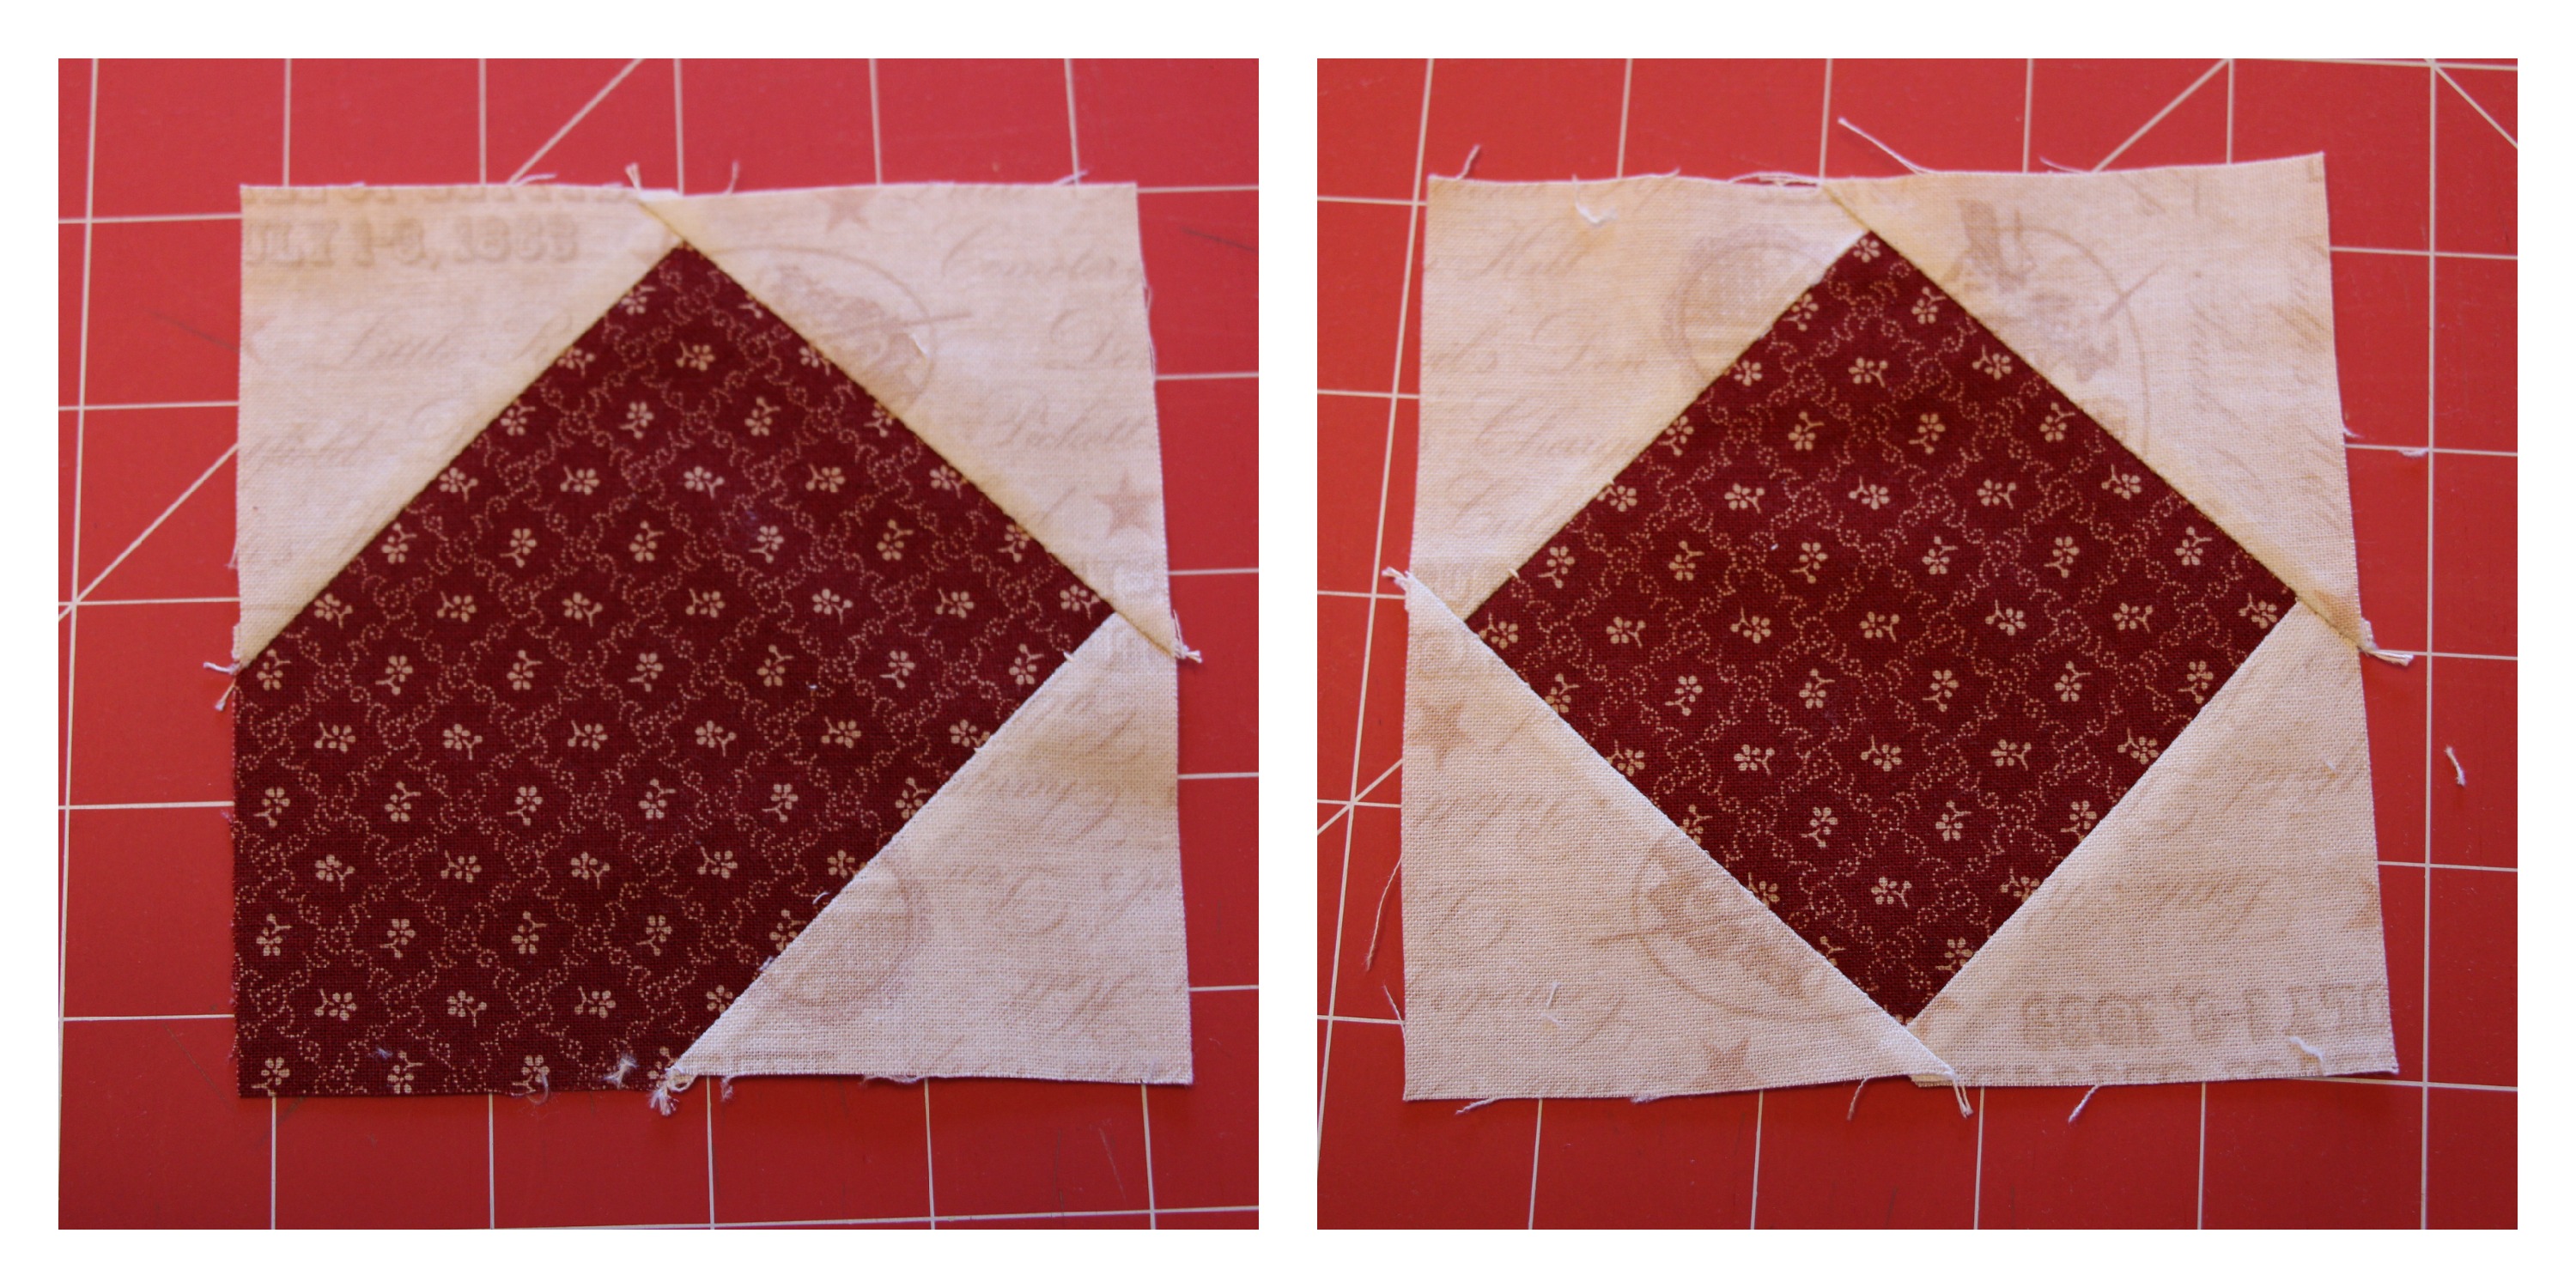
Repeat on the opposite corner:
Now do the last two corners. (The white squares will overlap in the center, but that will be taken care of in the seam allowance.):