I got really excited when I saw that beets and eggs was one of the combination options for this month’s Crazy Ingredient Challenge. I actually made my dish before the winner was announced. And it only won by one vote! (The close runner up was garden peas and cheese.) I don’t think eggs are a particularly challenging ingredient – they’re easy to hide. So, I decided to think in the Chopped mentality and make it a star. Now, I am not a fan of eggs – I’ve finally determined that it’s the yolks that I don’t like. That means scrambled eggs are out; quiches and frittatas a no-go. What I decided on doing challenged me in the kitchen – Eggs Benedict. I’ve had a couple at nice brunch restaurants, and the runny egg yolk doesn’t bother me when it’s mixed with the rest of the ingredients on the plate.
My Roasted Beet Eggs Benedict required me to tackle my fear of poaching eggs. In fact, it tackled everyone’s fear! My brother and his fiance were in town meeting Wesley for the first time. I’ve watched countless Food Network stars poaching eggs, so I knew the general idea. I am proud to say, that even though it took four of us, every egg poached was a perfect success!
To poach an egg, bring a wide mouthed pot of water to an almost boil. With a spoon create an eddy in the water. Break the egg into a small bowl and drop it slowly into the vortex of the eddy. Cook the egg for about four minutes – until the whites are set and the yolk still runny – and remove with a slotted spoon.
I also got to attempt making a Hollandaise Sauce. I followed Alton Brown’s recipe. I have to say, I thought it was going great! I enjoyed watching the sauce transform after each addition of butter. But adding lemon juice the second time caused my sauce to separate. If I whisked enough it came back together, and it tasted right too. Unfortunately, I made this sauce way too early. The rest of the Eggs Benedict elements were not ready. (And I had a very hungry infant requiring my attention.) When we came back to the sauce, there wasn’t any saving it. Happily though, no one missed the Hollandaise Sauce on their Eggs Benedicts!
There was yet a third new experience to try. Beets! I’ve had beets before (a caprese salad w/ roasted golden beets), but I’d never worked with them myself. I followed this tutorial to roast them. (The left over beets were used in smoothies! If you decide to put roasted beets in a smoothie, note that a little bit goes a long way, the flavor tends to over power the other fruits/vegetables.)
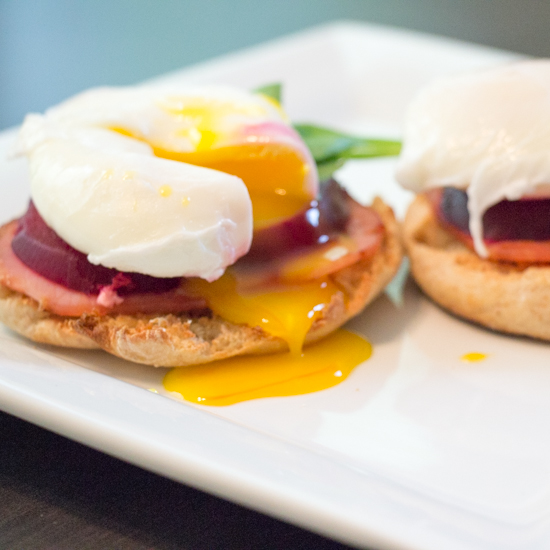
Roasted Beet Eggs Benedict
Ingredients:
- 1 English muffin, halved and toasted
- 2 slices Canadian bacon
- 2 slices roasted beets (instructions linked above)
- spinach leaves
- 2 eggs, poached (instructions posted above)
- salt and pepper
Steps:
- Assemble Eggs Benedict by placing a slice of Canadian bacon on each half of the English muffin. Top with the roasted beet and spinach leaves. Place the poached eggs on the top of the open faced sandwiches. Season with S+P.
To see other blogs that participated this month click on the link below. And if you’re a blogger and interested in joining us, contact Dawn at spatulasonparade@gmail.com. You don’t have to participate every month, but if you’re up for the challenge, we’d love to have you!


 Twice we stopped at