Adding Half Square Triangles (HSTs) to your block repertoire can add so much versatility to your quilting designs. There are multiple tutorials out there for creating HSTs, but this is the way I was taught and it works beautifully well.
Here’s the how-to for a Half Square Triangle:
Your first step will be to determine what size square you need to be working with. Think of the HST as simply replacing a solid square. Take the size of that square and add 1 1/8” to that. Example: a 4” finished HST will need to be cut to 5 1/8”. Don’t forget to ALWAYS make a practice block with scrap fabric before committing.
You will then cut your fabric to that new measurement. Sandwich the two fabrics so that right sides are together. 
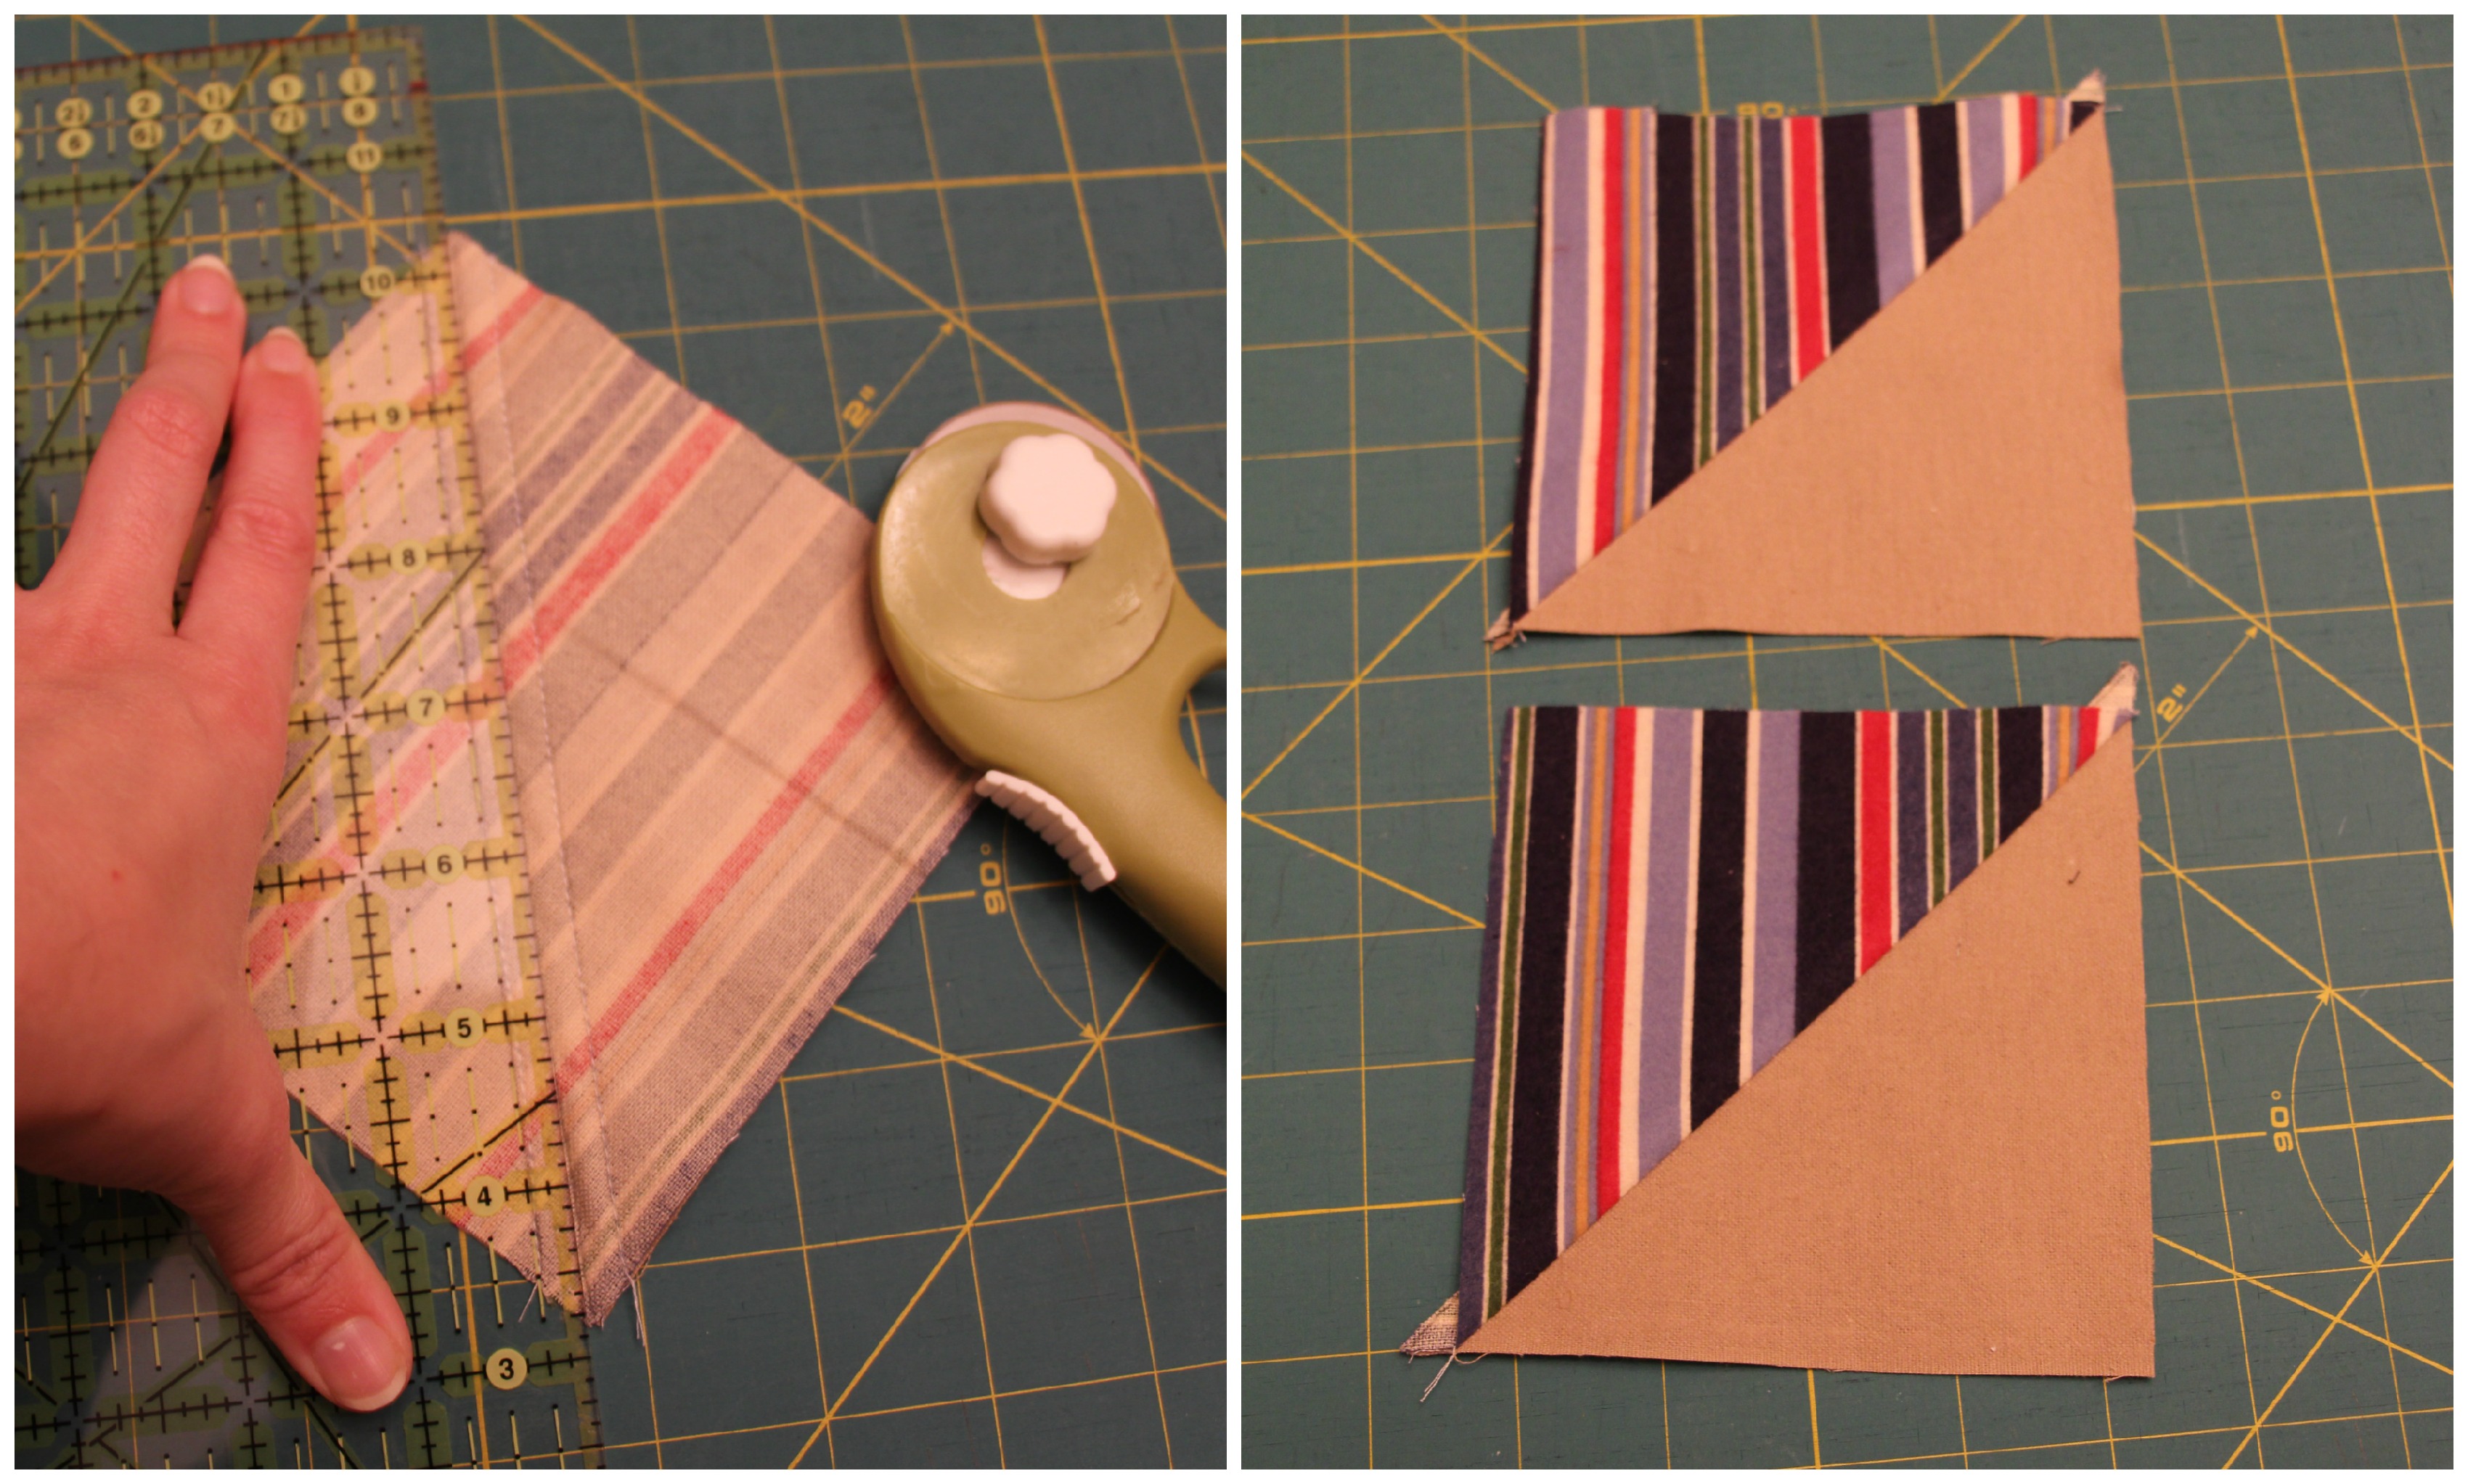
Draw on the center line of your sandwich. Then draw on a line 1/4″ from that on each side.

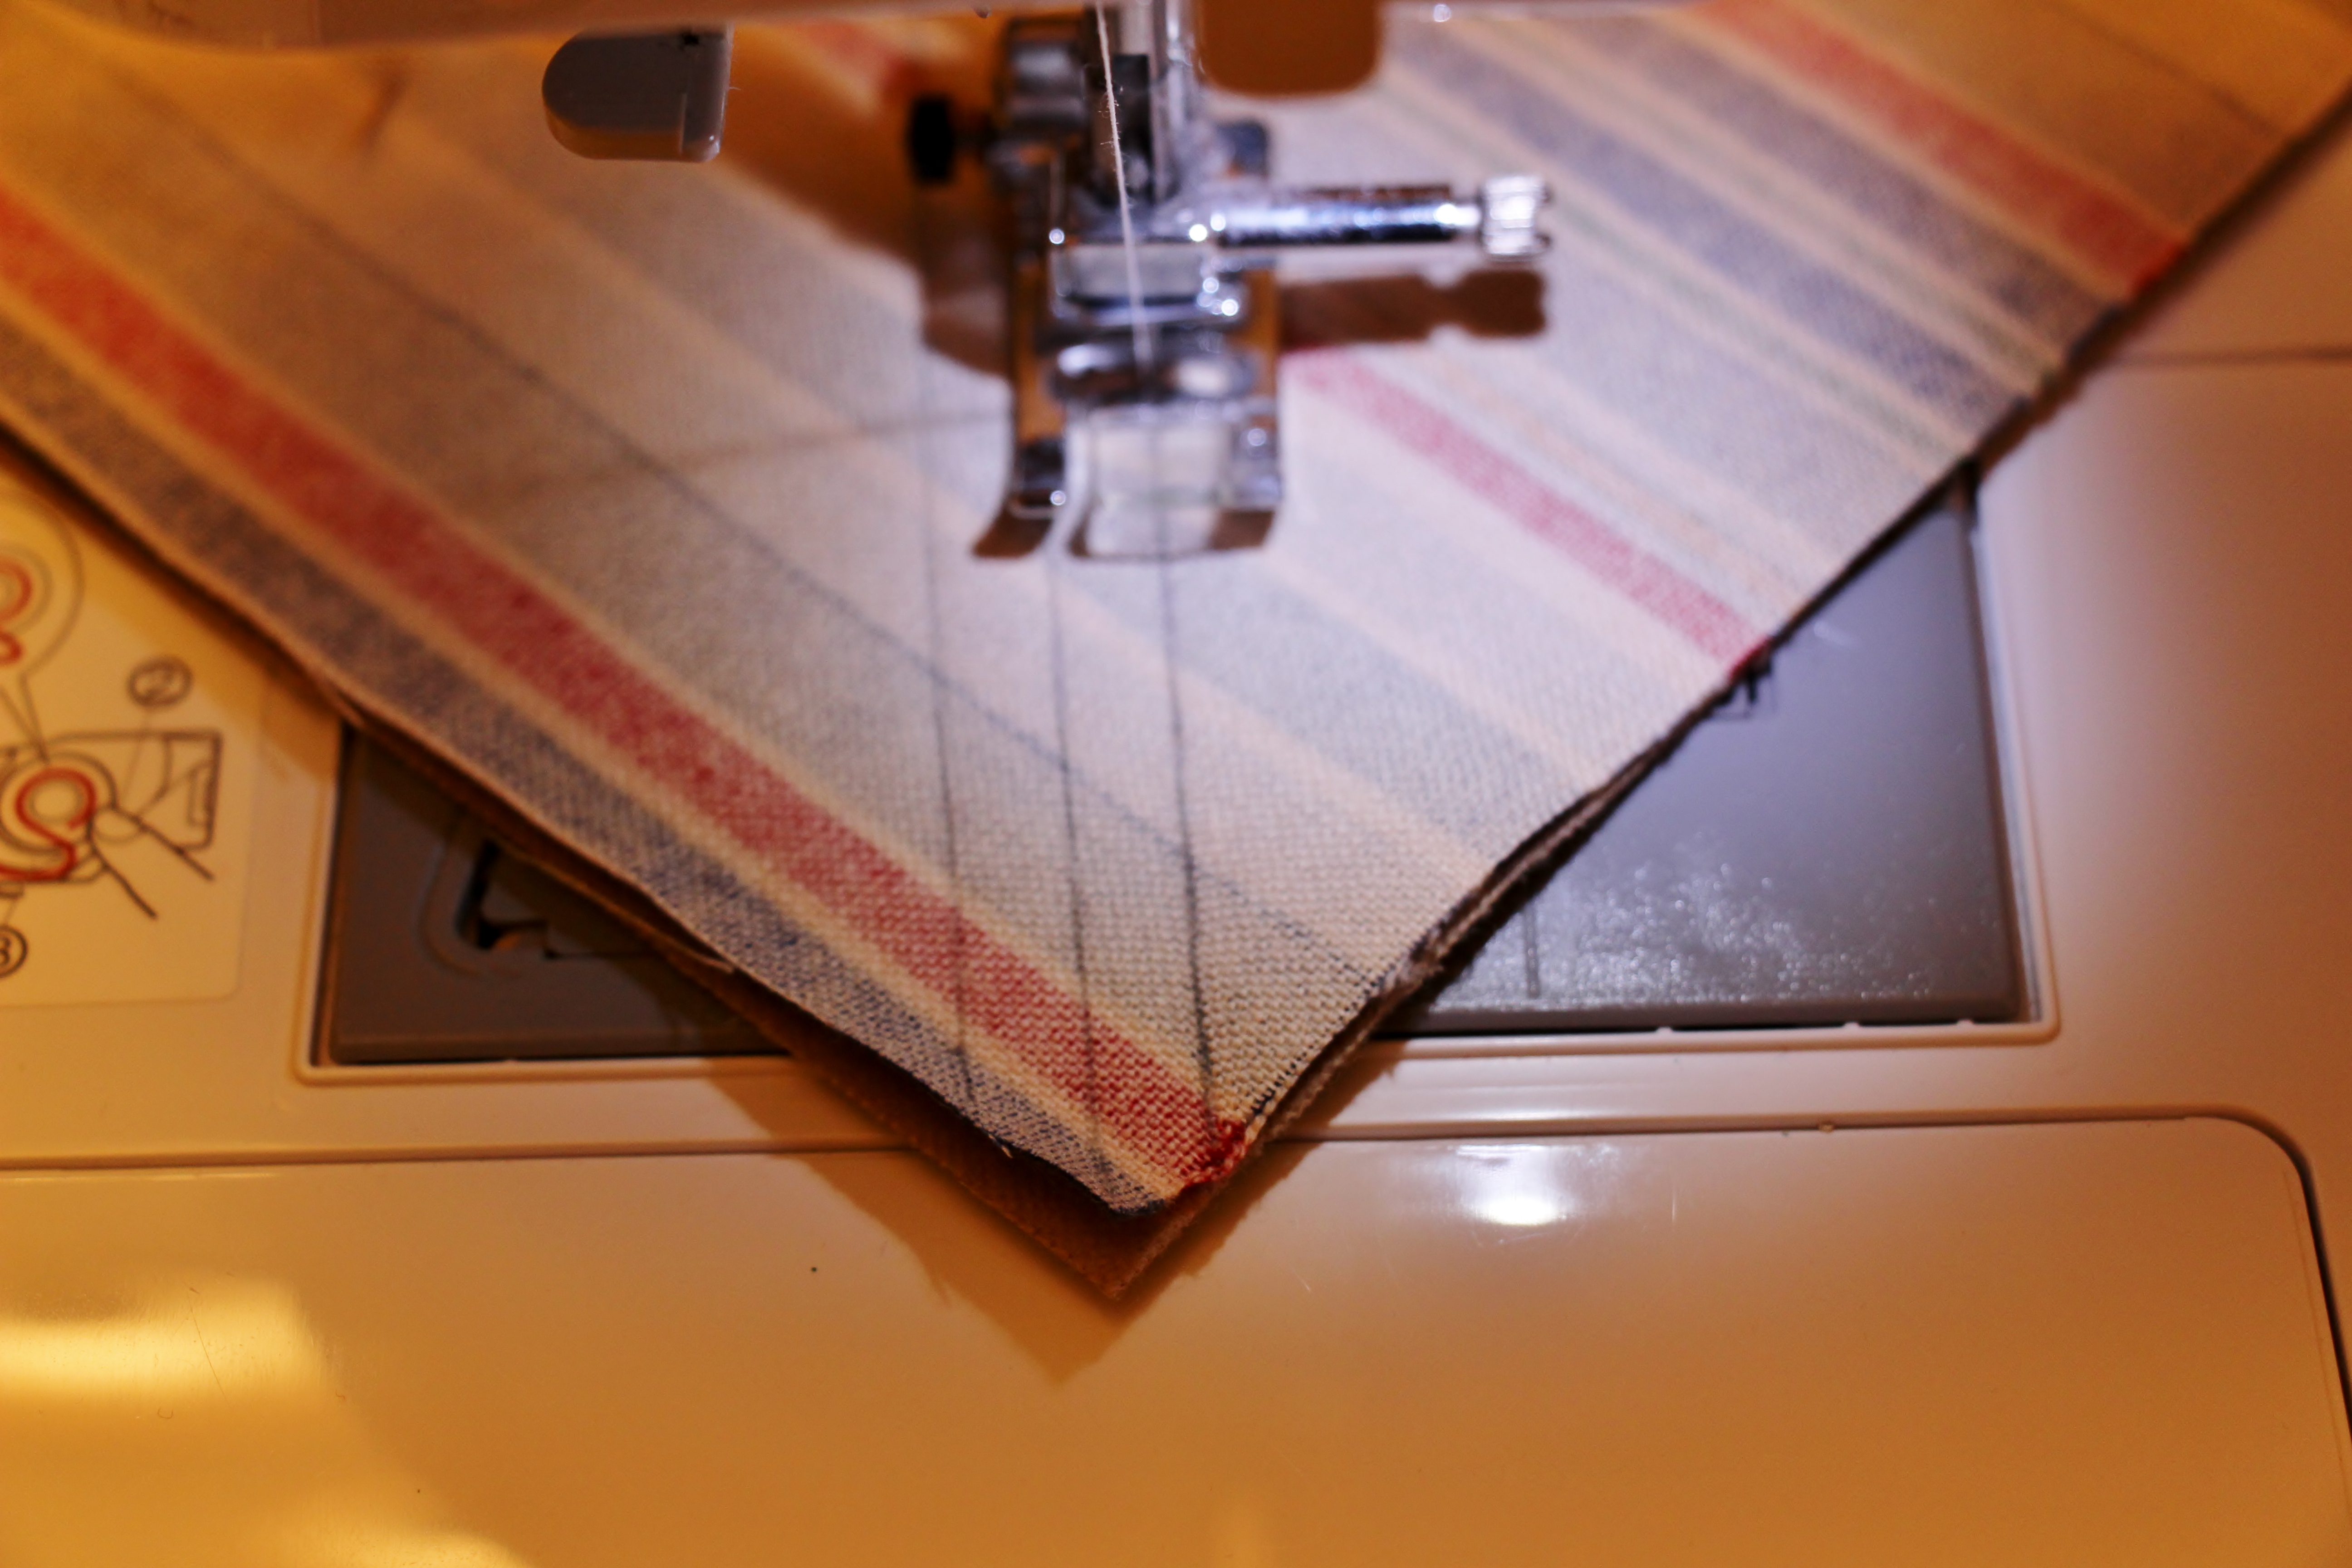
Sew on the two 1/4″ lines.
Cut down the center line. You now have two HSTs. Open them up and iron to them open – unless your quilt pattern suggest otherwise, iron so that the folded seam is pressed against the darker of the two fabrics. “Quilters always iron to the dark side”.
You will now have to trim down the HSTs to your finished size plus ½”. So for that 4” block, you need to trim the HST down to 4 1/2”. Do this by treating your diagonal seam as straight and trim off the top and right side to just slightly larger than size.
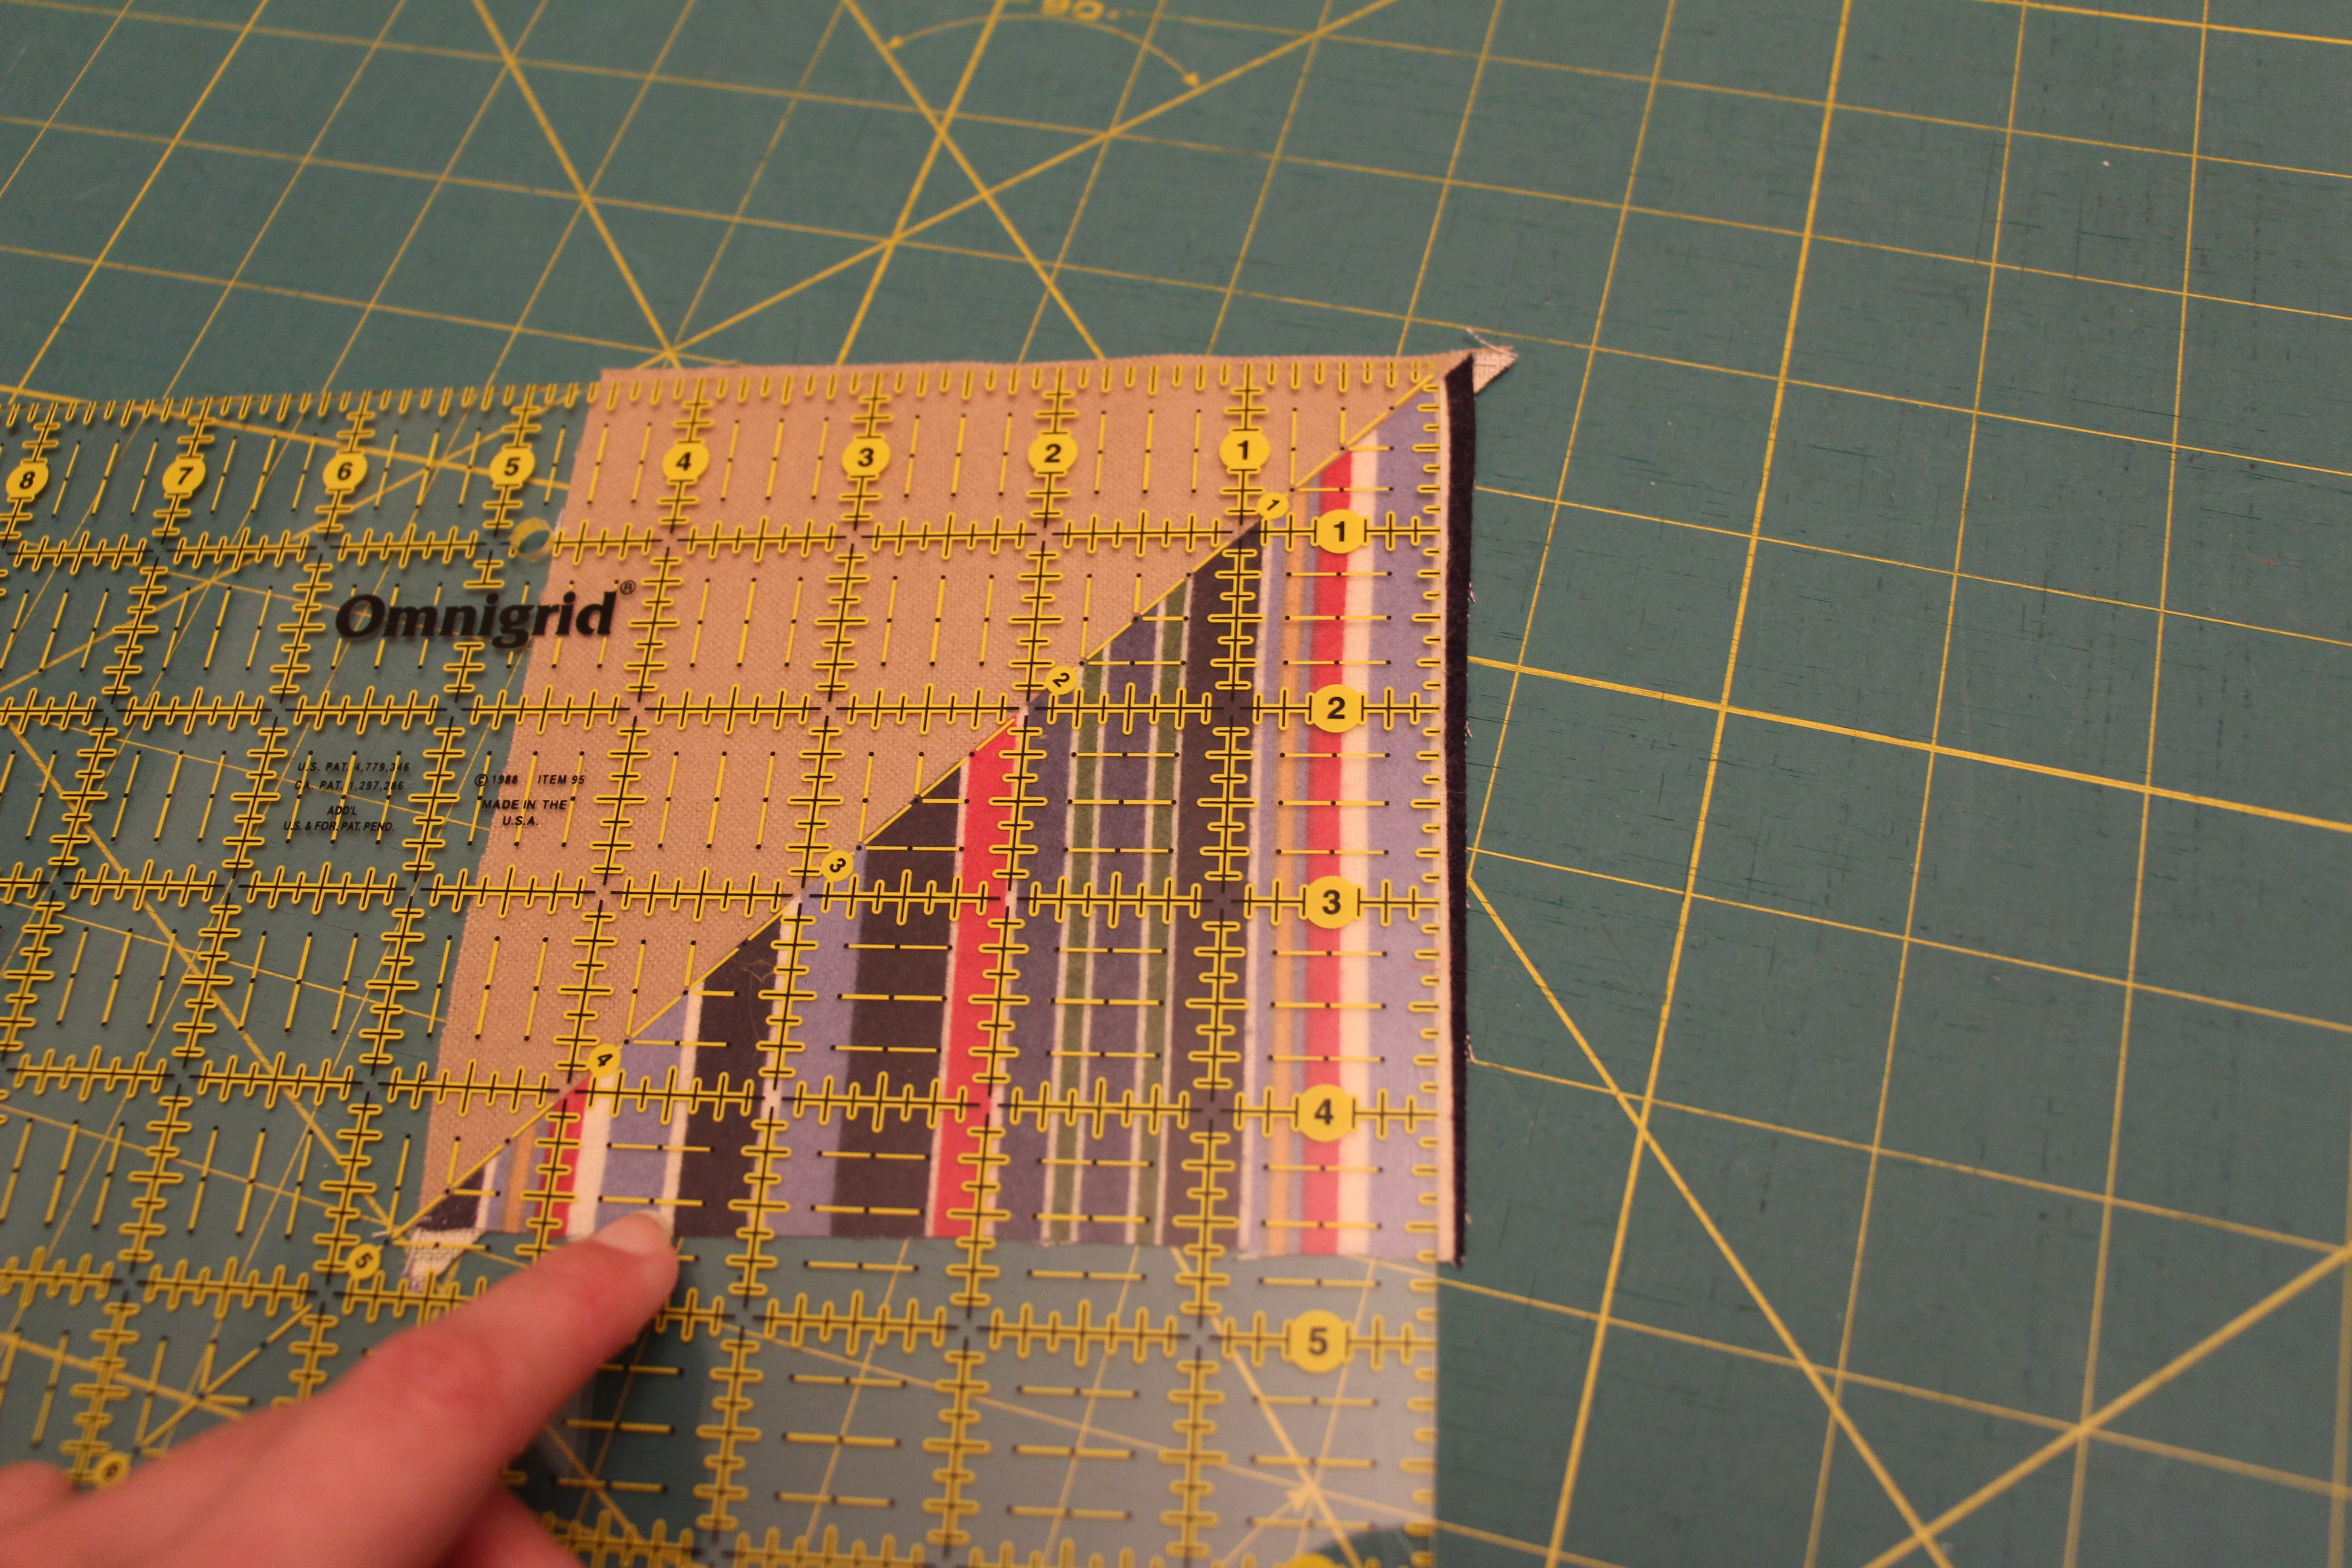
Flip the block and now align your ruler with the cut edges. Finish to the right size (4 1/2″).

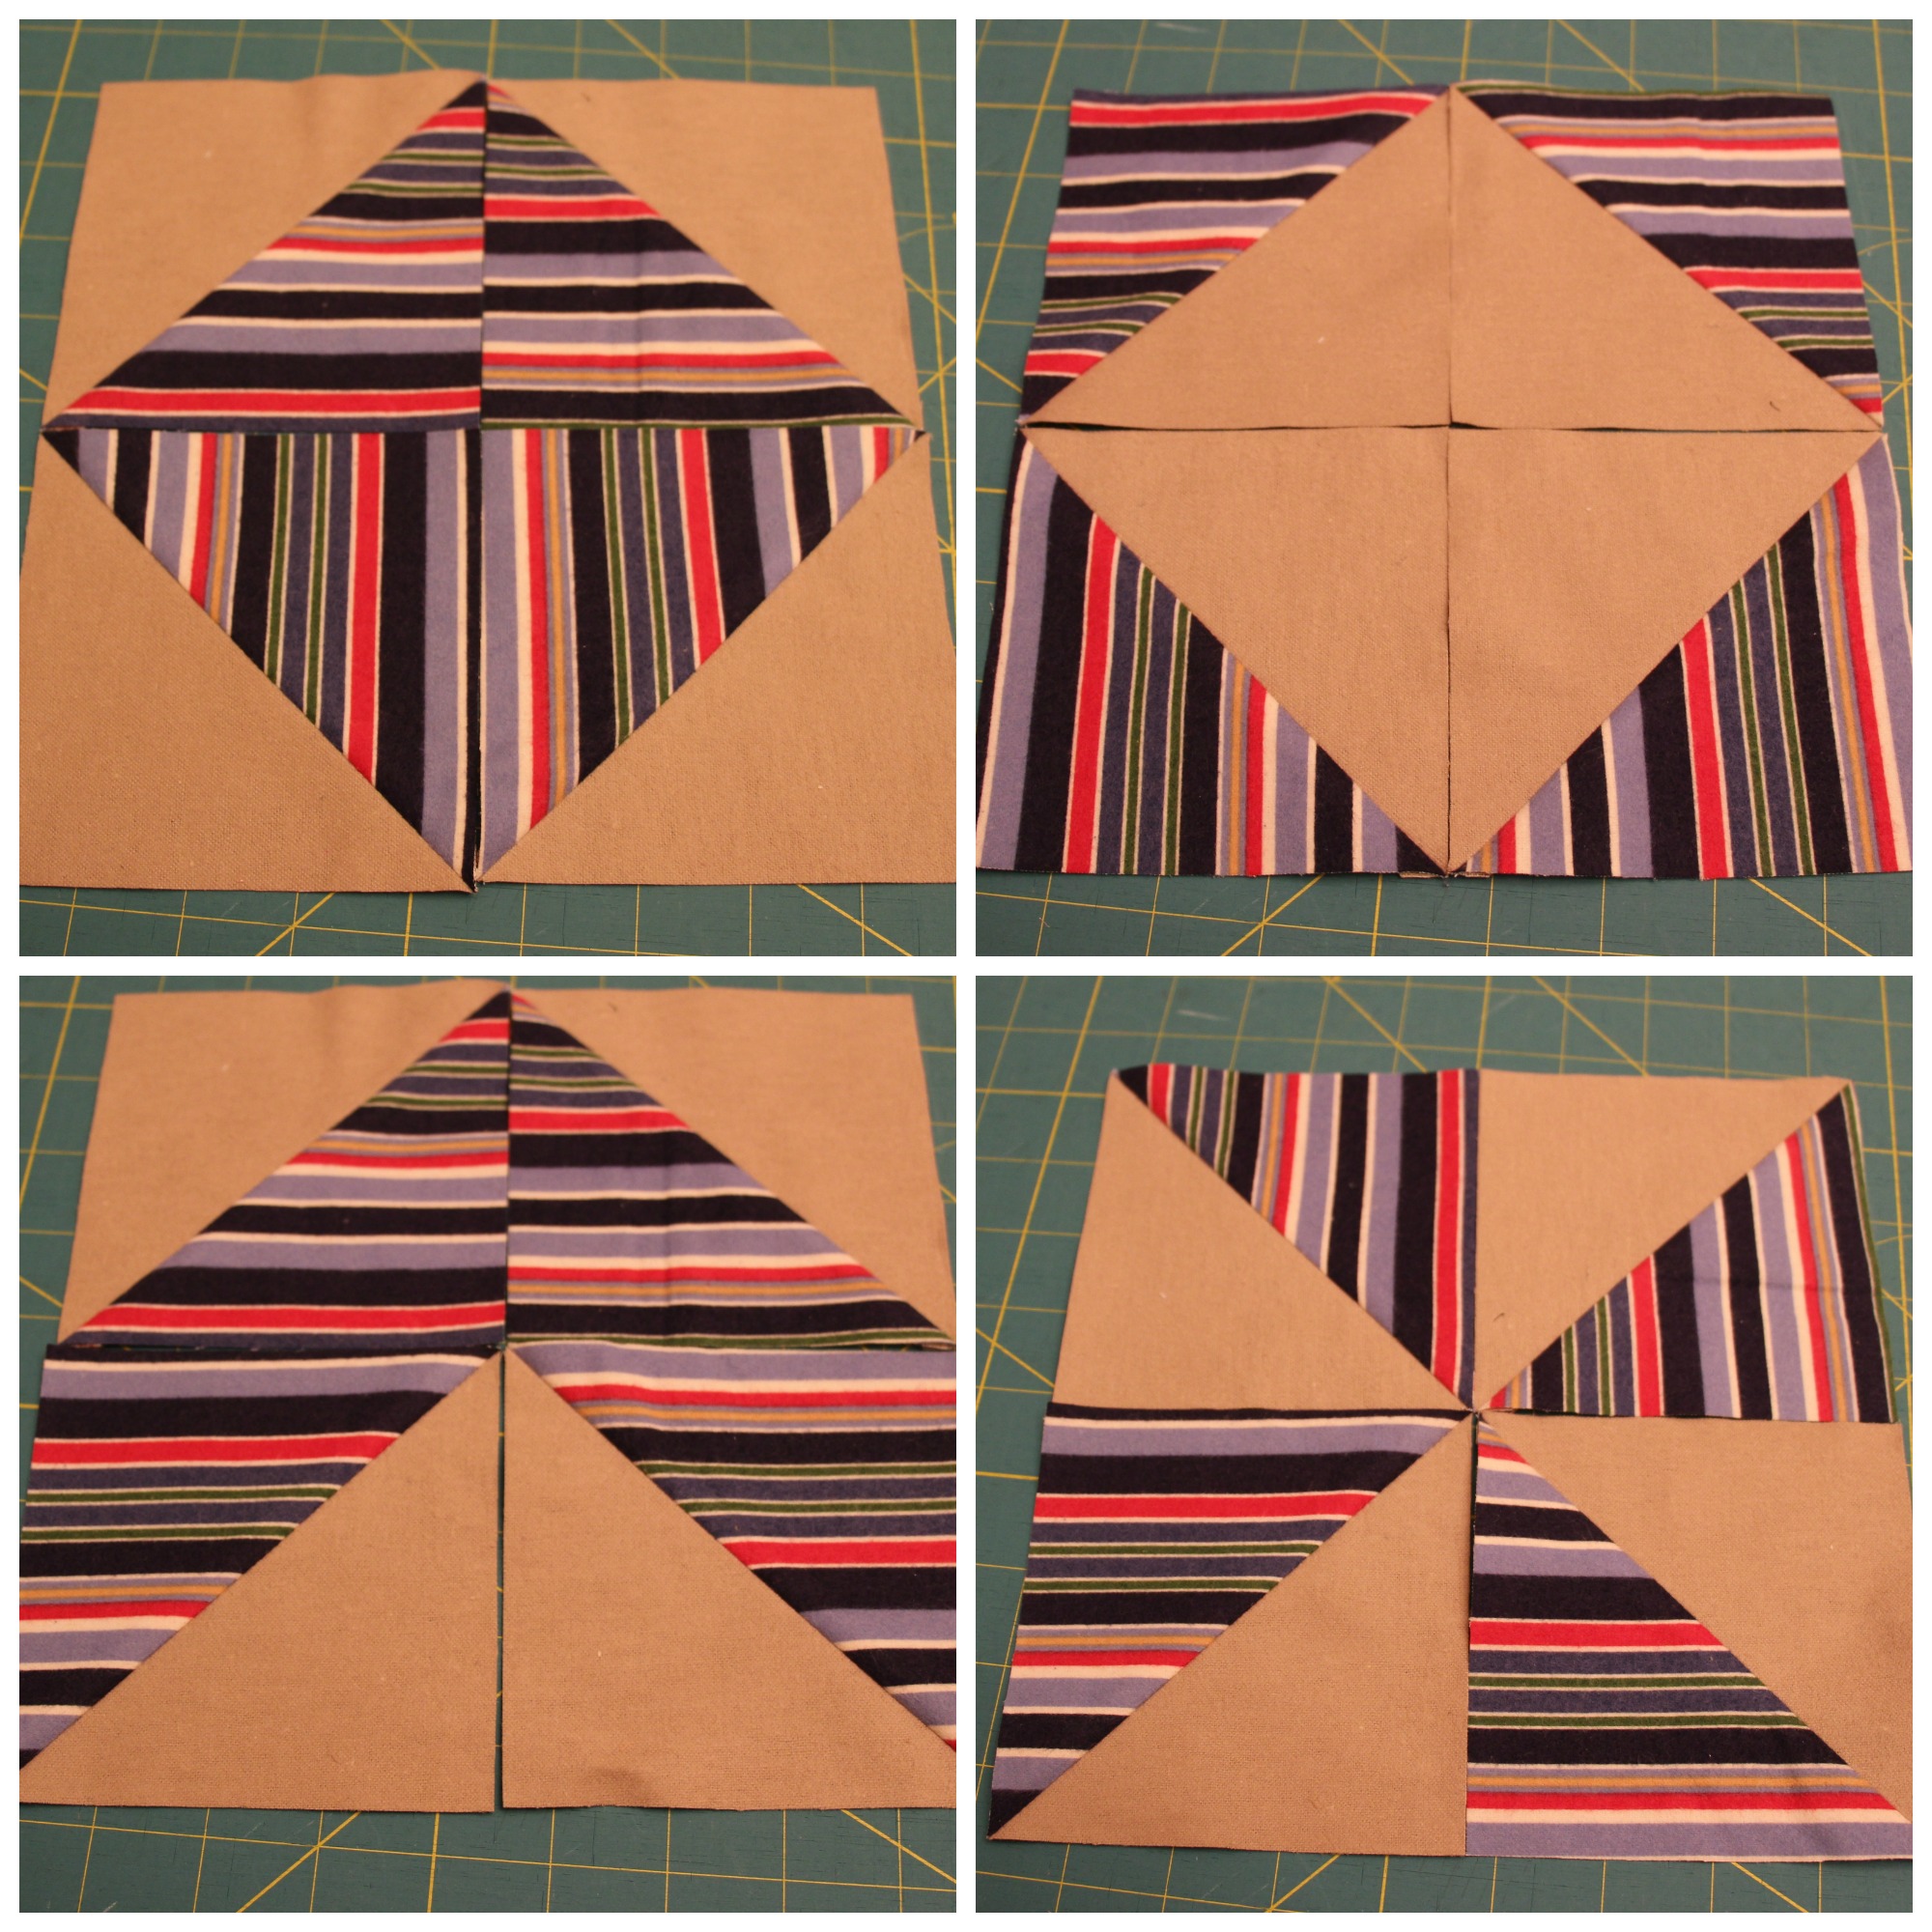
With HSTs you can assemble pinwheels, diamonds, and even the ever-so-popular chevron. You can even use them in the border of a quilt to create a candy cane stripe zigzag!