Homemade Irish Cream Liqueur

Happy St. Patrick’s Day!

Yesterday I shared an alcohol free beverage option in my Pot ‘O Gold Punch. Today, it’s all about the adults.

Making Irish Cream Liquor at home is simple, quick, and easy. And better yet, actually tastes like the real thing. Although my mom thought it was a tad weaker than the stuff in the bottle.

You can enjoy this liquor straight out of a glass with ice, over ice cream, or use it in a new favorite dessert. The latter is a teaser for a recipe coming at you next week, so stay tuned!

This recipe makes 3 C and will keep up to 2 weeks in the refrigerator.

Homemade Irish Cream Liquor

Ingredients:

  • 1 C heavy cream
  • 1 tsp instant espresso powder
  • 1/2 tsp cocoa powder
  • 3/4 C whiskey
  • 1 tsp vanilla extract
  • 1 can (14oz) sweetened condensed milk

Steps:

  1. Whisk together 1 tbsp heavy cream with the espresso and cocoa powders until smooth. Whisk in remaining ingredients. Store in an air tight container up to two weeks in the fridge.

*This recipe is adapted from Cory at http://www.saveur.com/article/recipes/homemade-irish-cream*

Homemade Baileys | Sew You Think You Can Cook

To get your creative juices flowing, I’ve assembled a round-up of some fun ways to use your homemade liquor:

Bailey’s Bundt Cake

Bailey’s Chocolate Chunk Ice Cream

Bailey’s Chocolate Mousse

Bailey’s Chocolate Pudding

Bailey’s Cocktail Poptails

Bailey’s Irish Coffee Caramels

Spiced Bailey’s Ice Cream Floats

Pot ‘O Gold Punch

Every St. Patrick’s Day since 2010 has been celebrated with my wonderful friend Kate. For a history of our holidays see last year’s {failed} Irish Bread Braid. I am trying the braid again tomorrow and hope to update that post, so wish me luck!

As I was pregnant last year and Kate doesn’t particularly enjoy boozy beverages, we made a non-alcoholic punch. By all means, add some vodka if you feel so inclined.

I will warn you though, there’s a lot of sugar in this pot ‘o gold. I had a doctor’s appointment the following day and my sugar levels were through the roof. Whoops. Eh, the little guy turned out just fine… I type as he’s screaming, fighting a nap.

This year it’s just the three of us and it’s going to seem pretty lonely. I’ll be sticking with my tradition and make meatloaf and mashed potatoes. Along with a green vegetable of some kind – something the little guy might eat.

Pot ‘O Gold Punch

Ingredients:

  • 1 pkt (0.2oz) lemonade Kool-Aid powder
  • 1 C sugar
  • 1 1/2 C lemon-lime soda
  • 1 1/2 C citrus soda
  • 2 C pineapple juice
  • 6 C cold water
  • decorating sugar for garnish (optional)

Steps:

  1. Combine all ingredients in a large pitcher. Keep cold until ready to serve.
  2. If desired: Place decorating sugar on a shallow plate. Place the lip of the glasses in water then coat with the sugar. Pour punch into rimmed glasses.

*This recipe is adapted from Melissa at http://luluthebaker.com/2012/03/st-pattys-day-punch.html*

Pot o Gold Punch | Sew You Think You Can Cook

Vegetable Pot Pie

Pi Day is celebrated every March 14 by math fans around the world – and also bakers and pastry chefs. Pi is an non-repeating, infinite number represented by the Greek letter π, and used to represent the ratio of the circumference of a circle to its diameter. Today, March 14, 2015, is an extra special Pi Day, because at 9:26:53 AM it creates the “Pi Moment of the Century”. The first ten digits of Pi are 3.141592653 (3/14/15, 9:26 AM and 53 seconds). This exact date and time happens once every hundred years – a once in a lifetime moment for most of us. How cool is that?

march-14-2015-will-be-epic-pi

This year I’m happy to be celebrating this nerdy, foodie holiday with a collection of 20 other fantastic bloggers. Hooray for not stuffing my face with pie all by myself!

Last year I made a quick pie at the last minute with only three ingredients.

There have been a lot of sweets happening in the Sew You Think You Can Cook kitchen lately and while I’ve discovered a new love for almost anything chocolate I needed to step away from the sugar and try my hand at a savory pie.

I’ve had my eyes on this easy veggie pot pie from Mom’s Test Kitchen ever since she was my assignment for Secret Recipe Club 11 months ago. With it being Lent AND pi(e) day, I finally had the perfect excuse to whip up this easy dinner.

If you feel cheated out of pie day by my savory direction, be sure to check out the list of more traditional pies (and not so traditional ones) at the end of this post.

A big thank you to Terri of Love and Confections for gathering us all together for some nerdy deliciousness.

Vegetable Pot Pie

Ingredients:

  • 2 cans (8 oz) refrigerated crescent roll dough
  • 2 tsp seasoning blend, divided use (I used Penzey’s Frozen Pizza Seasoning)
  • 1 can (10.75 oz) cream of celery soup
  • 1 can (10.75 oz) cream of potato soup
  • 1/3 C milk
  • 1/2 C frozen peas
  • 1/2 C frozen corn
  • 1/2 C diced carrots

Steps:

  1. Preheat oven to 375 degrees F.
  2. Arrange 1 can of crescent rolls on the bottom of a lightly greased 9″ pie dish, points of the triangles in the center. Sprinkle with 1 tsp of your seasoning blend. Bake 6 minutes.
  3. In a saucepan over medium-high heat combine soups, milk, veggies, and remaining seasoning blend. Season to taste with S+P. Pour pie filling into the partially baked crust.
  4. Top pie with second can of crescent rolls, arranging the triangles so the the points meet in the center. Lightly spray the top of the dough with cooking spray, sprinkle with a little bit of Kosher salt and more seasoning blend (optional). Bake 20-25 minutes, or until crust is golden and cooked through.

*This recipe is adapted from Jaime at http://momstestkitchen.com/2014/03/easy-vegetable-pot-pie.html*

Veggie Pot Pie | Sew You Think You Can Cook

Enjoy a slice of one of these fantastic pies today:

Apple Pear Pie with Crumble Topping from Baking and Creating with Avril

Apple Rhubarb Strawberry Pie from Food Lust People Love

Buffalo Chicken Shepherd’s Pie from Healthy. Delicious.

Chocolate Mousse Pie from A Day in the Life on the Farm

Chocolate Silk Pie from Famished Fish, Finicky Shark

Coconut-Pistachio Pie from The Spiffy Cookie

Curried Lamb Potpie from Culinary Adventures with Camilla

Fresh Strawberry Pie from Taste Cook Sip

Hillbilly Apple Pie from My Catholic Kitchen

Kentucky Derby Pie from Kelli’s Kitchen

Mixed Berry Slab Pie from Making Miracles

Peach-Blueberry Pie from The Redhead Baker

Salted Honey Pie from girlichef

Sicilian Ricotta Pie from Cake Duchess

S’Mores Brownie Pie from Cheese Curd in Paradise

Strawberry Daiquiri Pie from Love and Confections

Thin Mint Pie from Amy’s Cooking Adventures

Top Secret Derby Pie from A Kitchen Hoor’s Adventures

Triple Berry Pot Pie from {i love} my disorganized life

Pie Day 02

Potato Bread

Am I the only one who really likes grocery store commercials? I think they must hire Hallmark admen to help out, especially during the holidays!

Publix takes the cake for most touching commericals – ever. It makes me feel like a huge nerd to admit that I miss Publix commercials. (Along with certain Publix products. And Publix subs.) Winn-Dixie does a decent job at tugging at the heartstrings too, again, during the holiday season. I don’t have Winn-Dixie up here either. Now, I shop at Kroger. I haven’t caught myself crying at a Kroger ad but I do enjoy their commercials nonetheless. They’ve really been pushing their generic brands lately, in particular their organic one (Simply Truth). Their most current commercial shows the wide variety of products they have covered in the Kroger brands. And at the end of the commercial they announce a promotional price on potatoes. A 5lb bag of Kroger Idaho Potatoes for 99 cents! Again, nerd-alert, I got really excited.

I feel like I need to stop a moment and tell you that I was not asked to promote any grocery stores or products! Sometimes I just get on a roll…

I put potatoes on my grocery list and found ways to use them up! I got brave and decided to try my hand at baking bread. (Without the help of my mom.) I was introduced to potato bread from my good friend Kate; it’s her bread of choice. It’s sweeter than white bread and a little heartier. And good news, it’s not too difficult to make! Case in point, I made four loaves in three days! One loaf was given to the neighbors as a thank you for clearing the snow off our drive way, one was devoured immediately, one put in the freezer with the destination of becoming French Toast, and the last is sitting on my counter almost gone.

As with all yeast work, the most difficult part is making sure the yeast proofs. The key to that is not killing it by putting it in too hot or too cold liquid. The perfect temperature is between 105-115 degrees F; there’ll be instructions on your yeast containter, too. Don’t go off of “feel”, unless you’re a bread baking pro, use a thermometer to check your liquid temperature.

This recipe calls for mashed potatoes, you can use leftover mashed potatoes if you have them. Any flavorings you put in it will add uniqueness to your bread. I cooked and mashed potatoes for the purpose of bread making so I didn’t add anything to them. I mashed them up and used some of the cooking liquid to get a smooth mixture, no added salt or pepper. The amount of flour you need for the bread will depend on how moist your potatoes are.

If your oven has a warming setting, feel free to turn that on for a little bit before baking so your bread will rise more quickly. See the original recipe on how to do that. My little, old oven doesn’t have a warming setting so I let my dough rise in the microwave where it wouldn’t get a draft and could be slightly protected from the cold. It took well past two hours for my dough to double in size but I’m glad I didn’t rush the process – this bread is worth the wait.

This recipe makes two loaves of bread.

Potato Bread

Ingredients:

  • 1/2 C warm milk, at 110 degrees F
  • 1 pkg active dry yeast
  • 1 C mashed potatoes
  • 2 eggs, beaten
  • 1/2 C butter, at room temperature
  • 1/2 C sugar
  • 1 tsp salt
  • 3 – 3 1/2 C bread flour

Steps:

  1. Sprinkle yeast into warm milk. Let sit 10 minutes, until it gets foamy.
  2. In the bowl of a stand mixer, beat the mashed potatoes, butter, and eggs. Mix in the sugar and salt. Add in the yeast mixture.
  3. Fit your stand mixer with the dough hook and add the flour, 1 C at a time. After three cups have been added, add remaining flour 1 tbsp at a time, if needed. (The first batch I used 3 C + 2 tbsp, the second batch I only needed 3 C.) Kneed the dough until it comes together around the dough hook and is no longer sticky.
  4. Turn dough out onto a lightly floured surface and form into a ball. Place in a lightly greased bowl, turning to coat. Cover and set in a warm location for 1-3 hours, or until the dough has doubled in size.
  5. Punch the dough and turn it onto a lighly floured surface. Divide dough evently in half. Roll each half to the width of your loaf pan. Roll dough along the short end and place in a lightly greased loaf pan. Repeat with the second half of the dough. Cover and set in a warm location for 1-3 hours, or until the dough has risen 1″ above the edge of the pan.
  6. Preheat oven to 375 degrees F.
  7. Bake break for 25-35 minutes, or until it reaches in internal temperature of 190 degrees F.

*This recipe is adapted from Emily at http://www.goldilockskitchen.com/2014/02/the-best-potato-bread.html*

potato bread | sew you think you can cook

I’m entering a new stage in the world of mommy food blogger. Here’s a little behind the scenes fact: We don’t have a dining table set up in this house. IMG_4217We did, but it was taken down to make way for our Christmas tree and it was never resurrected. I like having the open space for my son to play. And honestly, we eat on the couch anyway. Unfortunately, not having a table makes taking photos of food difficult, especially when there’s only one space in my home that gets natural light. Almost every photo this year has been taken on the floor. Now that my little guy is a skilled and fast crawler I have to work quickly to take advantage of the daylight – I can’t always wait for naptime.

Buttermilk Whole Wheat Waffles

I still remember the first time I baked with whole wheat flour. I don’t remember what I baked, maybe banana bread, but I remember that we absolutely hated it. The baked good in question was so dry and the grainy texture of the flour was not something we were expecting. But here I was with a 5lb bag of whole wheat flour and looking for ways to use it. I’d discovered a banana bread recipe that uses a mixture of all-purpose flour and whole wheat flour. It took a couple of years, but that whole wheat flour finally disappeared. And by the time the bag was depleated we didn’t hate it anymore!

I found myself going back for whole wheat flour when I made those whole wheat pitas for Secret Recipe Club in the beginning of the year. This time I grabbed a bag of white whole wheat. It wasn’t an intentional purchase, but from now on it’s my flour of choice. The texture of white whole wheat flour is finer and the taste more mild.

White wheat is an “albino” type of wheat, if you will. The traditional whole wheat flour is made from red wheat. The bran in white wheat is lighter in both color and flavor. (Source: Whole Grains Council)

When it comes to breakfast foods, my husband now requests pancakes or waffles made with whole wheat flour. Using whole wheat flour makes the baked good more substantial. And hey, it’s supposed to be healthier, too!

Buttermilk Whole Wheat Waffles

Ingredients:

  • 2 C white whole wheat flour
  • 1 tbsp sugar
  • 1 1/2 tsp baking powder
  • 1/4 tsp baking soda
  • 1/2 tsp salt
  • 2 eggs, separated
  • 2 C buttermilk
  • 2 tsp vanilla extract
  • 6 tbsp butter, melted and cooled slighly

Steps:

  1. In a large bowl whisk togther flour, sugar, baking powder, baking soda, and salt.
  2. In another bowl whisk the egg yolks with buttermilk, vanilla, and melted butter.
  3. Combine wet ingredients into the dry ingredients.
  4. In a dry bowl beat egg whites with a hand mixer until they form stiff peaks. Genly fold egg whites into the waffle batter.
  5. Into a hot greased waffle iron drop 1/3 C of batter and cook until golden.

*This recipe is adapted from https://slipnotdesigns.wordpress.com/2013/11/19/buttermilk-whole-wheat-buttermilk-belgian-waffles/*

 Buttermilk Whole Wheat Waffles  Sew You Think You Can Cook

Sweet Potato Enchiladas

Mexican Monday has taken a serious hit this year. The league that I bowl on happens on Monday nights and while I don’t bowl every week it’s often enough that our traditional dinner gets switched around or even skipped.

The enchiladas I’m sharing with you today are a meatless variety – perfect for a Friday during this Lenten period. Which is when I made them. If you want to add some meat to these be my guest; cooked shredded pork or chicken would be great. The meat isn’t missed though.

There are some changes I would make though. The sweet potato is cubed instead of mashed, which provides body and meatiness to the filling, but I struggled with the texture. Next time, I’ll mash the sweet potato and add some Mexican rice to the filling to add some more substance.

Sweet Potato Enchiladas

Ingredients:

  • 1 large sweet potato
  • 1/2 C corn & black bean salsa (I used Kroger brand)
  • 2 C shreded Mexican blend cheese, divided use
  • 2 C red enchilada sauce
  • 8 flour tortillas

Steps:

  1. Microwave potato for 10 minutes. Allow to cool and remove the skin. Cube or mash as desired.
  2. Preheat oven to 350 degrees F.
  3. Mix sweet potato with salsa and 1 1/2 C of cheese.
  4. Pour half of the enchilada sauce in the bottom of a casserole dish.
  5. Assemble enchiladas: Place about 1/3 C of the sweet potato filling into each tortilla, roll, and place seam side down in the prepared casserole dish.
  6. Top enchiladas with remaining enchilada sauce and cheese. Bake 20 minutes, or until bubbly and golden.

*This recipe is adapted from Averie at http://www.averiecooks.com/2014/06/sweet-potato-corn-and-black-bean-enchiladas.html*

Sweet Potato Enchiladas | Sew You Think You Can Cook

#SundaySupper: Retro

I have a confession to make. And it’ll probably show my age, or lack there of. The theme for today’s #SundaySupper is Retro. That means food from the 50’s-70’s. I was stumped. The only thing I knew about retro food was from a challenge on Next Food Network Star one season. The contestents were given a dish considered retro and had to modernize it. And from that the only dish I could recall was Tuna Noodle Casserole. (Oh, I think pork chops and applesauce is one?)

So, that’s what I made. I wasn’t really sure what to expect. I’d never had tuna noodle casserole, at least not that I can remember. The only time I eat canned tuna is as a tuna salad sandwich from a sub shop during Lent. This casserole was a perfect opportunity to try something new Friday night. I was very pleased to not only enjoy it hot out of the oven, but reheated in the microwave! I never, repeat, never eat leftover fish. Leftover shrimp is iffy, too. But when my husband reheated a bowl for lunch and it smelled amazing I had to get myself a serving, too.

And now for a little history behind Tuna Noodle Casserole: This casserole dish became popular in the 50’s due to it’s simplicity, quickness, and low cost of packaged ingredients. This comfort food staple became a potluck standard. (Source: Wikipedia)

A big thank you to Heather of Hezzi-D’s Books and Cooks for hosting this fun event! Be sure to scroll past my recipe to see a list of blast-from-the-past recipes. I am looking forward to seeing the gang’s retro recipes and expand my little culinary world.

This casserole makes six servings.

Tuna Noodle Casserole

Ingredients:

  • 1/2 lb wide egg noodles
  • 2 tbsp vegetable oil
  • 1 yellow onion, diced
  • 3 carrots, diced
  • 2 tbsp flour
  • 2 3/4 C milk
  • 4 oz cream cheese
  • 1 tbsp spicy mustard (I used El Diablo Steakhouse)
  • 1 C frozen peas, thawed
  • 1/2 C shredded Parmesan cheese, divided use
  • 2 cans (5oz) tuna in water, drained and flaked

Steps:

  1. Cook egg noodles according to package directions. Drain and set aside.
  2. Preheat broiler.
  3. Heat oil in a large skillet over medium-high heat. Saute onion and carrot until carrots are almost tender. Sprinkle the flour over the veggies and stir until flour is absorbed and mixture is thick.
  4. Slowly whisk in the milk and cook until thick, stirring constantly. Melt in the cream cheese and 1/4 C of the Paremsan. Add mustard and season to taste with S+P.
  5. Remove from the heat and stir in the noodles and tuna. Place casserole in a lightly greased broiler-safe casserole dish. Top with remaining Parmesan. Place under the broiler for 5 minutes, or until golden and bubbly.

*This recipe is adapted from Cooking Light at http://www.myrecipes.com/recipe/tuna-noodle-casserole-0*

Tuna Noodle Casserole  Sew You Think You Can Cook

Bodacious Breakfasts and Appetizers:

Made in the Shade Main Dishes:

Swell Side Dishes:

Dreamy Desserts:

The Bee’s Knees Beverages:

8387592742_f6164fd5a8_o

Join the #SundaySupper conversation on twitter on Sunday! We tweet throughout the day and share recipes from all over the world. Our weekly chat starts at 7:00 pm ET. Follow the#SundaySupper hashtag and remember to include it in your tweets to join in the chat. To get more great Sunday Supper Recipes, visit our website or check out our Pinterest board.

Would you like to join the Sunday Supper Movement? It’s easy. You can sign up by clicking here: Sunday Supper Movement.

Pineapple Shrimp Stir Fry

My 2015 New Year’s Resolution of developing a new recipe every month is batting 100 right now. Sure, month 3 has only just begun, but you can’t get a perfect score if you don’t get the first two. (Or as my Grandpa Ray would say whenever we played cards, “You can’t win ’em all if you don’t win the first two.”)

In February my hand was forced. It was Ash Wednesday and there was a lot of snow on the ground preventing trips to the grocery store earlier in the week. I took stock of what I had in my freezer and pantry and decided to work on my original recipe! I did manage to get to both Ash Wednesday Mass and the grocery store so I could pick up some chow mein noodles to give my original stir fry a little somethin’-somethin’.

11008433_10102770035154211_4726077019926716777_nMy mother-in-law was visiting over the long weekend and thanks to the snow storm (I think it was Octavia?) Tilly got an extra 5 days with her grandson. Because of a bitterly windchill of -25 degrees F I took advantage of the situation and left the little man at home where it was warm. I have to say, as crazy as it sounds, I missed him terribly during Mass.

For Valentine’s Day we had Chocolate Kahlua Fondue for dessert and one of the dippers was pineapple (perfect combination). I used the leftover pineapple in my stir fry. I had cooked frozen shrimp in the freezer – I’ll have shrimp cocktail for lunch – which were also used. I would suggest using raw shrimp in stir fries so the shrimp doesn’t get too rubbery but in a pinch, it’s perfect! I wanted to go for the sweet and spicy combination that makes stir fries so popular so I added some Sriracha. To date I’ve always thought that there’s never enough Sriracha in recipes, so I used a full tablespoon. Being heavy-handed with the popular chili paste provided a great warmth to the dish, the perfect amount to slowly build with each bite. The acidity and sweetness from the pineapple combatted the spiciness quite beautifully.

An Original Recipe

Pineapple Shrimp Stir Fry

Ingredients:

  • 1-2 tbsp vegetable oil
  • 1 small red onion, sliced
  • 2 carrots, peeled and cut into sticks
  • 1 clove garlic, minced
  • 1/2″ piece of ginger root, grated
  • 3/4 lb peeled and deveined shrimp
  • 1 tbsp soy sauce
  • 1/2 tsp fish sauce
  • 6 oz chow mein noodles, cooked and rinsed according to package directions
  • 1 tbsp Sriracha
  • 1 scallion, sliced

Steps:

  1. Heat oil in a wok or large skillet over medium high heat. When hot saute the onions and carrots. When the onions soften add in the garlic and ginger and stir fry for 60 seconds.
  2. Add the shrimp and saute until they turn pink and are completely cooked. Add in the pineapple and cook until warmed through.
  3. Add the soy sauce, fish sauce, and Sriracha. Bring to a bubble and toss in the cooked chow mein noodles. Coat noodles in the sauce. Garnish with scallion.

Pineapple Shrimp Stir Fry | Sew You Think You Can Cook

Poppy Seed Muffins with Dried Cherries

Last month I used dried cherries in my #FoodieExtravaganza post. I had some dried cherries leftover and conveniently found a recipe to use them in  Tyler Florence’s Real Kitchen.

If you recall, my parents were in town the weekend I made the ice cream. (My dad was my inspiration for using dark chocolate!) I whipped up these muffins the night before my dad had to leave. He was catching a very early morning flight and had to leave at 4:30! I made these muffins so he could have something to eat in the car if he so desired.

I didn’t have a full cup of cherries leftover so I simply polished off the bag using what I had. The result was delicious poppy seed muffins with a few dried cherries here and there. You could substitute with your favorite tart dried fruit in this recipe if you wish – cranberries, blueberries, chopped apricots could work well too!

Oh, and I forgot to sprinkle the tops of the muffins with extra sugar so they didn’t quite have that expensive coffee shop look, but we didn’t seem to mind.

Poppy Seed Muffins with Dried Cherries

Ingredients:

  • 2 C flour
  • 1 C sugar
  • 1 tbsp baking powder
  • 1 tsp salt
  • 2 eggs
  • 1 C milk
  • 1 stick butter, melted
  • 1 tbsp poppy seeds
  • zest 1 orange
  • 1 C dried cherries

Steps:

  1. Preheat oven to 400 degrees F. Grease a standard muffin tin or line it with paper liners.
  2. In a large bowl whisk together flour, sugar, baking powder, and salt.
  3. In another bowl whisk together eggs and milk. Stir in the poppy seeds and orange zest.
  4. Combine the wet ingredients into the dry ingredients.
  5. Toss the dried cherries in a little bit of flour to coat. Gently fold into the muffin batter.
  6. Fill prepared muffin try 2/3 of the way full.
  7. Sprinkle with extra sugar (optional).
  8. Bake 20 – 25 minutes, until a toothpick inserted comes out cleanly.

*This recipe is adapted from Tyler Florence’s Real Kitchen*

Poppy Seed Muffins | Sew You Think You Can Cook

Dislcaimer: This post contains affiliate links.

Tuesday Tattles: Teething Edition

Tuesday Tattles

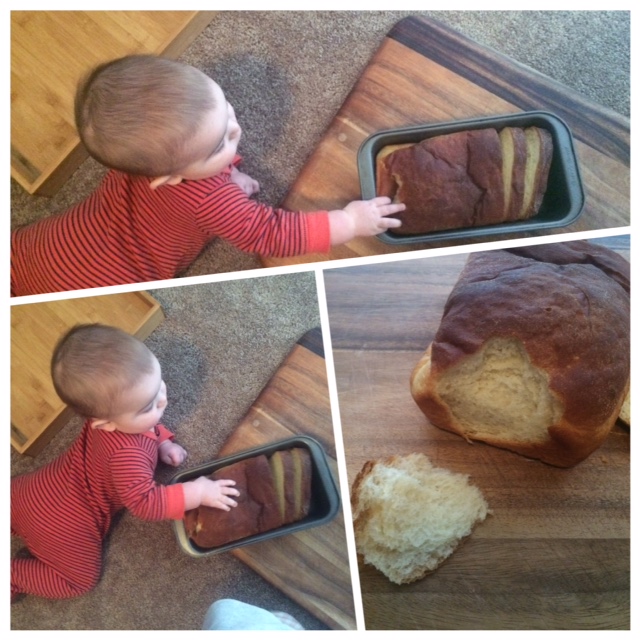
At 8 months old my little man has two teeth. Unlike most babies, my son didn’t get these teeth together, the second one arrived about two weeks after the first. I know these teeth mark the beginning of a long process of teething but I have to jinx it and say that as far as a teething baby goes, he’s pretty easy. I had visions, or shall we say nightmares, of what I thought a teething baby would be like. Drooling, runny nose, feverish, with diarrhea, cranky, and inconsolable. So far I’ve only experienced two out of the six. And I would be completely okay with missing out on the other four. We had the crankiness and we had the drooling. Here is a list of things that have gotten us through so far.

Tuesday Tattles: Teething

Infant’s Tylenol

There is something about this magical elixir that makes everything better. There is an almost instantaneous shift in his mood once he’s tasted the grapey goodness of medicine. I use Tylenol as my last resort, when the crankiness level has reached the state of inconsolable and it’s obvious that he’s in pain. There’s a difference in the tone of his cry and the amount of chewing on whatever he can get his hands on is greater than normal. The teething objects will usually expand to his sleeves in desperation. As with all medicine, consult your doctor before use and only use the prescribed amount.

Bright Starts Chill Out Teethers

These teethers are probably the cheapest variety out there. They even sell a Pretty in Pink version where a portion of the proceeds go to breast cancer research! Pop ’em in the fridge for some soothing cold relief for your little one’s gums.

Nuby Icybite Hard/Soft Teething Keys

Wesley’s newest play date had a set of these teething keys and he went right after them, so I ran out and got him his own set. These are also refrigerator friendly.

Nuby Teething Blankie. Squeak & Crinkle Teether & Blanket

This little blanket has it all! A quadrant of it crinkles, the four corners have teething rings, one side has ribbons (although I think they’re too short for my tag-addicted son to take notice), and the center squeaks! A big thank you to my mom for sending this teether.

Vulli Sophie the Giraffe Teether

Sophie teethersSophie is getting another shout on the blog today. The original Sophie is still a favorite, as is teething ring version. The newest member of the Sophie family is the Sophie the Giraffe Squirting Bath Toy. My mother-in-law brought Wesley this toy on her last visit and the little man became very attached to it! It has yet to be played with in the bath, however.

Bright Starts Snuggle & Teethe

This teething toy is known as “Mr. Crinkles” in our house. We have the giraffe (no elephants allowed!) – the two feet each have a different textured teething surface and the animal crinkles. In addition to the elephant they  aalso have a monkey, which is totally cute. I saw it last weekend and almost bought it – but I refrained, as you can see the little guy has a lot of options already!

Lifeproof iPhone case

And now for the favorite chew toy of all – my cell phone. In preparation of having a baby, I converted over to the iPhone just so I could get a Lifeproof case. While I know it’s probably the least hygenic thing my son could ever put in his mouth, he does, and I let him. The corners are just the right fit and as a result my case has teeth scratches all over it.

His other favorite items? Books, magazines, paper (my W-2, for example), the taggie his Tilly made him, Fisher-Price Brilliant Basics Baby’s First Blocks, my hair, his thumb, the tags on anything (pillows, blankets, stuffed animals, etc) and bath toys.

Disclaimer: This post contains affiliate links.